---
title: Couchbase Lite on Java — Installing
description: Couchbase Lite on Java -- a framework for developing offline-first
Java applications for mobile and edge
pubDate: 2026-08-17T09:53:44.266Z
antora:
editUrl: https://github.com/couchbase/docs-couchbase-lite/edit/release/3.3/modules/java/pages/gs-install.adoc
xref: xref:3.3@couchbase-lite:java:gs-install.adoc[]
---
[Consult the llms.txt file for a full list of contents](/llms.txt)
[View original HTML](/couchbase-lite/3.3/java/gs-install.html)
# Couchbase Lite on Java — Installing
> Description — _Couchbase Lite on Java — a framework for developing offline-first Java applications for mobile and edge_
> _Abstract — This content provides instructions that enable you to deploy Couchbase Lite on java_
> Related Content — [Install](gs-install.md) | [Prerequisites](gs-prereqs.md) | [Build and Run](gs-build.md)
## [](#introduction)Introduction
_Couchbase Lite_ on Java 3.2.4 enables development and deployment of Couchbase Lite applications to a JVM environment. You can deploy Standalone (Java Desktop/Console) apps or Web Apps (using, for example, Tomcat; including embedded Tomcat deployments).
Quick Steps
For experienced developers, this is all you need to add _Couchbase Lite for Java 3.2.4_ to your application projects.
* Enterprise Edition
* Community Edition
Include the following in your Gradle `build.gradle` or Maven `pom.xml` file, as appropriate:
* The Couchbase Enterprise Edition repository
``
* The Couchbase Lite Enterprise Edition dependency:
`couchbase-lite-java-ee:3.2.4`
1. If you want to use Vector Search, add the Couchbase Lite Vector Search dependency: `couchbase-lite-java-vector-search`
2. You must then use `CouchbaseLite.enableVectorSearch();` to enable the vector search extension.
1. Include the Couchbase Lite for Java dependency in your Gradle `build.gradle` or Maven `pom.xml` file, as appropriate:
`couchbase-lite-java:3.2.4`
2. For Gradle:
Check you have `mavenCentral()` in `repositories` (or in `settings.gradle`).
Maven automatically checks its own repo for dependencies.
> [!NOTE]
> for Linux, make sure you have followed the [additional steps required](gs-prereqs.md#additional-steps-for-linux).
That's it! You're all set to begin developing powerful Couchbase Lite applications.
Now, try the [Getting Started](gs-build.md) application, which demonstrates use of key CRUD functionality.
## [](#preparing-your-build-environment)Preparing Your Build Environment
This section shows how to set up and use Couchbase Lite to build desktop and web applications using gradle, Maven, Tomcat and Intellij IDEA Community Edition. It assumes a familiarity with these products, however you are free to use your own choice of development tools.
### [](#binaries)Binaries
Couchbase Lite binaries are available for both Community (CE) and Enterprise (EE) editions from the _Maven_ repositories.
### [](#prerequisites)Prerequisites
* Planning to sync with a _Couchbase Server_?
You will need to have runnable instances of _Couchbase Server_ and \_Sync Gateway installed. If you have not already done so see [Prepare Sync Gateway](#sync-gateway::get-started-prepare.adoc)
* Running on Microsoft Windows?
Windows requires C++ runtime installed. Please install the Visual C++ Redistribution package from this link:
* Deploying to Linux?
You need to deploy the Couchbase Lite `support` library, which is available _only_ on the zip download distributable. See the _Additional Steps for Linux_ section in [java:gs-prereqs.adoc#additional-steps-for-linux](gs-prereqs.md#additional-steps-for-linux).
## [](#standalone-apps)Standalone Apps
> [!IMPORTANT]
> To use Vector Search, you must have Couchbase Lite installed and add the Vector Search extension to your Couchbase Lite application. Vector Search is available only for 64-bit architectures and Intel processors that support the Advanced Vector Extensions 2 (AVX2) instruction set. To verify whether your device supports the AVX2 instructions set, [follow these instructions.](https://www.intel.com/content/www/us/en/support/articles/000090473/processors/intel-core-processors.html)
### [](#using-gradle)Using Gradle
1. Create a project folder
2. Initialize it for a Gradle Java application
3. Include the content shown in [Example 1](#ex-bgf1) in your app-level `build.gradle` file
4. Open the project folder in Intellij IDEA and import the gradle settings.
> [!TIP]
> If you don't have auto-import set for Gradle projects, then accept the **Import Gradle Project** prompt that is displayed bottom-right of the screen
> Note the Gradle menu at the extreme right of the screen:
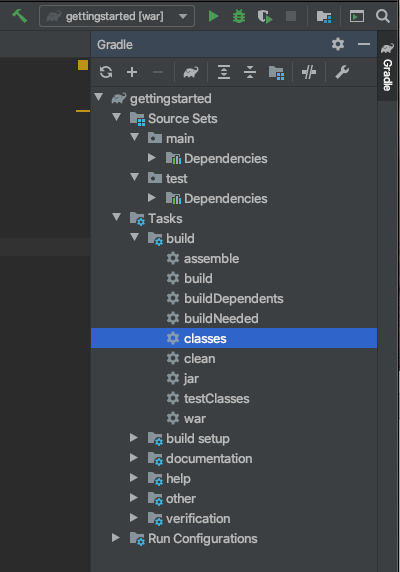
That's it. You're all set to start building your own Couchbase Lite applications — see [Build and Run](gs-build.md) for an example of how to do that.
Example 1\. build.gradle file content
* Enterprise Edition
* Vector Search Extension
* Community edition
Compile options
```groovy
// Required only if your project has some Kotlin source code
kotlinOptions { jvmTarget = '11' }
// Set minimum JVM level to ensure availability of, for example, lambda expressions
compileOptions {
targetCompatibility JavaVersion.VERSION_11
sourceCompatibility JavaVersion.VERSION_11
// ... other section content as required by user
}
```
Dependencies
```groovy
dependencies {
implementation "com.couchbase.lite:couchbase-lite-java:3.2.4"
// ... other section content as required by user
}
```
Repositories
```groovy
repositories {
maven {url 'https://mobile.maven.couchbase.com/maven2/dev/'}
// ... other section content as required by user
}
```
> [!NOTE]
> Vector Search is an **Enterprise-only** feature.
Compile options
```groovy
// Required only if your project has some Kotlin source code
kotlinOptions { jvmTarget = '11' }
// Set minimum JVM level to ensure availability of, for example, lambda expressions
compileOptions {
targetCompatibility JavaVersion.VERSION_11
sourceCompatibility JavaVersion.VERSION_11
// ... other section content as required by user
}
```
Dependencies
```groovy
dependencies {
implementation "com.couchbase.lite:couchbase-lite-java:3.2.4"
// All standard 64-bit ARM architectures
implementation 'com.couchbase.lite:couchbase-lite-java-vector-search-arm64-1.0.0'
// ... other section content as required by user
}
```
Repositories
```groovy
repositories {
maven {url 'https://mobile.maven.couchbase.com/maven2/dev/'}
google()
mavenCentral()
// ... other section content as required by user
}
```
Activating the Extension
```java
try { CouchbaseLite.enableVectorSearch(); }
catch (CouchbaseLiteException e) {
throw new IllegalStateException("Could not enable vector search", e);
}
```
Compile options
```groovy
// Required only if your project has some Kotlin source code
kotlinOptions { jvmTarget = '11' }
// Set minimum JVM level to ensure availability of, for example, lambda expressions
compileOptions {
targetCompatibility JavaVersion.VERSION_11
sourceCompatibility JavaVersion.VERSION_11
// ... other section content as required by user
}
```
Dependencies
```groovy
dependencies {
implementation "com.couchbase.lite:couchbase-lite-java:3.2.4"
// ... other section content as required by user
}
```
### [](#using-maven)Using Maven
1. Include the content shown in [Example 2](#ex-bmf1) in your `pom.xml` file in the root of your project folder
2. That's it — just add your own code
You're all set to start building your own Couchbase Lite applications — see [Build and Run](gs-build.md) for an example of how to do that.
Example 2\. pom.xml file content
* Enterprise Edition
* Community edition
Compile properties
```XML
UTF-8
11
11
```
Dependencies
```XML
com.couchbase.lite
couchbase-lite-java-ee
3.2.4
```
Repositories
```xml
couchbase
https://mobile.maven.couchbase.com/maven2/dev/
// ... any other section content as required by user
```
Compile properties
```XML
UTF-8
11
11
```
Dependencies
```xml
com.couchbase.lite
couchbase-lite-java
3.2.4
// ... any other section content as required by user
```
## [](#web-app-development)Web App Development
This section explains how to set-up a build project to create Couchbase Lite web apps using gradle and Intellij IDEA.
> [!TIP]
> Using Maven
>
> For examples of how to do this using Maven POM files, see —
>
> * [Couchbase Mobile Workshop](https://github.com/couchbaselabs/mobile-travel-sample/tree/master/java/TravelSample)
> * [Mobile Training To Do App](https://github.com/couchbaselabs/mobile-training-todo/tree/release/lithium/java-ws/server/Todo)
### [](#tomcat)Tomcat
In our examples here we build and deploy web apps using a gradle plugin based on the `com.bmuschko.tomcat` plugin. It provides a simple Tomcat harness that can be used from within Intellij IDEA or the command-line — see [Embedded Tomcat](#lbl-tomcat)
### [](#bmkMultCblJapps)Multiple Web Apps
Each web application has its own \*class loader (WebappX). This loads the classes, jars, and resources found in the application's `WEB-INF/classes` and `WEB-INF/lib` folders, together with any shared jar files from `$CATALINA_BASE/lib` — see [tomcat documentation](https://tomcat.apache.org/tomcat-9.0-doc/class-loader-howto.html) for more.
So, if you are running multiple Couchbase Lite web applications, deploy your Couchbase Lite library `/libs` to `$CATALINA_BASE/lib`. This means you do not need to deploy it in each web app and **minimizes the size of each app**.
> [!NOTE]
> Configuring Couchbase Lite logging functionality will affect the logging of all web applications as the _common class loader_ shares _Couchbase Lite Console, File_ and _Custom logging functionalities_ across all web apps.
For information about building a WAR file see [Deploying a WAR File](#lbl-war)
### [](#prerequisites-2)Prerequisites
* Ensure your build environment matches the runtime Tomcat environment. Specifically, that the Java and Tomcat versions are the same.
* If your Tomcat server runs Linux, declare the _shared libraries_ (`/support`) in the `$CATALINA_HOME/bin/setenv.sh` script file — see: _Additional Steps for Linux_ section in [Prerequisites](gs-prereqs.md).
* Ensure the Couchbase Lite jars (`/lib`) are on the executable path within Tomcat — see: [Multiple Web Apps](#bmkMultCblJapps)
> [!TIP]
> This also means you should declare the dependencies as `providedCompile` to avoid them being bundled into the `WEB-INF/libs` folder
### [](#steps)Steps
1. Create a project folder and initialize it for a Gradle Java application
```bashrc
gradle init
```
2. Create your `build.gradle` file, including the [Example 3](#ex-bgf2) in your app-level build.gradle:
3. Open the project folder in Intellij IDEA and import the gradle settings.
> [!TIP]
> If you don't have auto-import set for Gradle projects, then accept the **Import Gradle Project** prompt that is displayed bottom-right of the screen.
> Note the Gradle menu at the extreme right of the screen:
> image::GradleMenuWebApp.png\[,300\]
If you want to deploy your app to a local tomcat container then see [\[Deploying a WAR file to tomcat\]](#Deploying a WAR file to tomcat)
That's it. You're all set to start building your own Couchbase Lite applications — see [Building a Getting Started App](gs-build.md) for an example of how to do that.
Example 3\. build.gradle file content
* Community
* Enterprise
```groovy
dependencies {
implementation "com.couchbase.lite:couchbase-lite-java:3.2.4"
// ... other section content as required by user
}
```
```groovy
repositories {
maven {url 'https://mobile.maven.couchbase.com/maven2/dev/'}
// ... other section content as required by user
}
dependencies {
implementation "com.couchbase.lite:couchbase-lite-java-ee:3.2.4"
// ... other section content as required by user
}
```
## [](#lbl-tomcat)Embedded Tomcat
The simplest way to build and deploy your Couchbase Lite web app is to use a gradle plugin that provides a simple Tomcat harness.
Our examples are based on the `com.bmuschko.tomcat` plugin — see [com.bmuschko.tomcat on Github](https://github.com/bmuschko/gradle-tomcat-plugin).
Including the plugin in your `build.gradle` file make a number of tomcat tasks available to you. View them using:
```bash
./gradlew tasks
```
This shows that the following web application tasks are now available:
* `tomcatJasper` \- Runs the JSP compiler and turns JSP pages into Java source.
* `tomcatRun` \- Uses your files as and where they are and deploys them to Tomcat.
* `tomcatRunWar` \- Assembles the web app into a war and deploys it to Tomcat.
* `tomcatStop` \- Stops Tomcat.
So, to run the app use:
```bash
./gradlew tomcatRun
```
## [](#lbl-war)Deploying a WAR File
To deploy your web app to a local Tomcat instance you need to generate a WAR file. However, you should note that when creating a war file, if you use the `implementation` dependency type then your _Couchbase Lite_ jar files will be bundled into WEB-INF/lib of the web application. To exclude Couchbase Lite jar files from getting bundled and to use Couchbase Lite in multiple web applications, change the dependency type from **`implementation`** to **`providedCompile`**
1. You can do this using the Gradle command below from within your project folder:
```bashrc
./gradlew war
```
> [!NOTE]
> The generated war file will be at /build/libs.
2. Deploy the war file to Tomcat, by copying it to $CATALINA\_BASE/webapps
> [!TIP]
> You can also use Tomcat's Manager App to deploy the war file — see [Tomcat's Manager App](https://tomcat.apache.org/tomcat-9.0-doc/manager-howto.html) documentation for more detail.
3. To use common class loader approach to load Couchbase Lite libraries, copy all of the Couchbase Lite jar files in $CATALINA\_BASE/lib.
> [!NOTE]
> For linux platform see also — _Using Native Libraries for Linux_ in [Prerequisites](gs-prereqs.md)
## [](#related-content)Related Content
###### [](#)
How to . . .
* [Prerequisites](gs-prereqs.md)
* [Install](gs-install.md)
* [Build and Run](gs-build.md)
.
###### [](#-2)
Learn more . . .
* [Databases](database.md)
* [Documents](document.md)
* [Blobs](blob.md)
* [Remote Sync Gateway](replication.md)
* [Handling Data Conflicts](conflict.md)
.
###### [](#-3)
Dive Deeper . . .
[Mobile Forum](https://forums.couchbase.com/c/mobile/14) | [Blog](https://blog.couchbase.com/) | [Tutorials](https://docs.couchbase.com/tutorials/)
.