---
title: Manage Users, Groups, and Roles
description: Couchbase Server allows defined users to be assigned
roles, which permit access to resources.
pubDate: 2026-08-17T09:53:44.266Z
antora:
editUrl: https://github.com/couchbase/docs-server/edit/release/7.2/modules/manage/pages/manage-security/manage-users-and-roles.adoc
xref: xref:7.2@server:manage:manage-security/manage-users-and-roles.adoc[]
---
[Consult the llms.txt file for a full list of contents](/llms.txt)
[View original HTML](/server/7.2/manage/manage-security/manage-users-and-roles.html)
# Manage Users, Groups, and Roles
> Couchbase Server allows defined _users_ to be assigned roles, which permit access to resources. Additionally, _groups_ of users can be established, and roles assigned to each group; so that each user is granted the roles of each group of which they are a member.
## [](#creating-and-managing-users)Creating and Managing Users and Groups
The administrator who initially performs installation and configuration of Couchbase Server is granted the role of _Full Administrator_, with complete access to the entire system, including _read_ and _write_ privileges. Once basic system configuration has been completed, the Full Administrator is free to add other users to the system, and assign them roles; thereby specifying their privileges.
Note that a cluster running Couchbase Server _Enterprise Edition_ can have any number of users. A cluster running _Community Edition_ can have a maximum of twenty users.
As Full Administrator, to add _users_ (each of which might be either an _administrator_ or an _application_) and _groups_ to Couchbase Server, use [Couchbase Web Console](#manage-users-with-the-ui), the [CLI](#manage-users-with-the-cli), or the [REST API](#manage-users-with-the-rest-api), as described in the sections below.
For a general overview of Couchbase-Server authorization, see [Authorization](../../learn/security/authorization-overview.md). For a list of available roles and corresponding privileges, see [Roles](../../learn/security/roles.md).
## [](#manage-users-with-the-ui)Manage Users and Groups with the UI
Access the **Dashboard** of Couchbase Web Console, and left-click on the **Security** tab, on the vertical navigation-bar, at the left. This brings up the **Security** view, as follows:
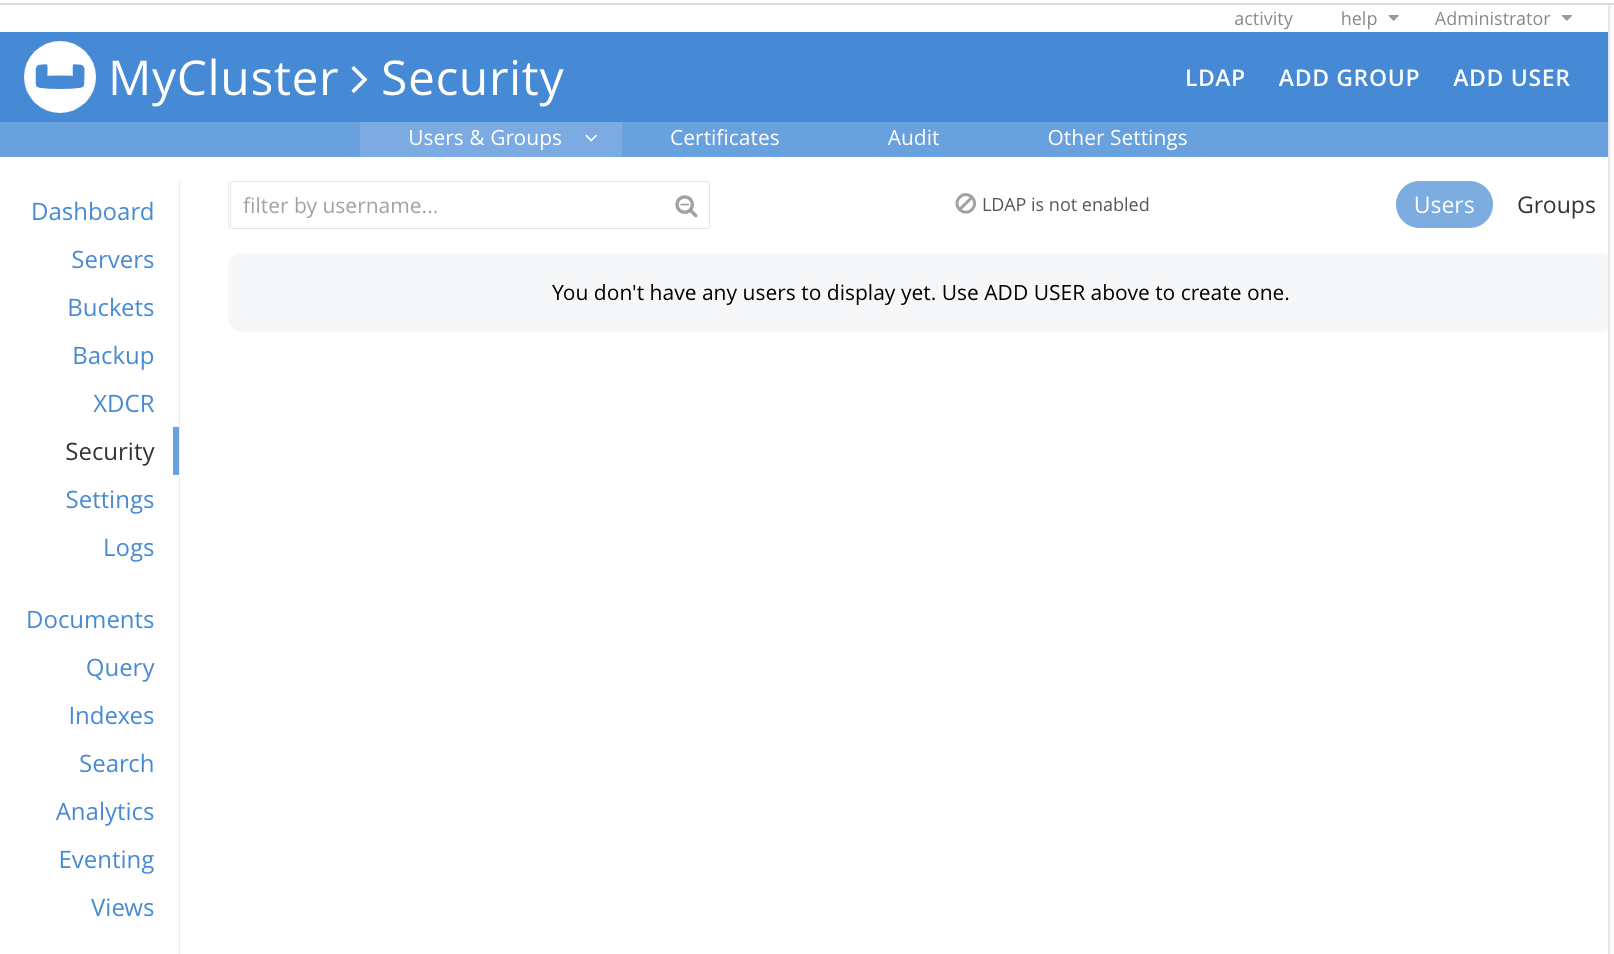
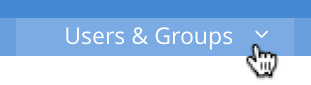
The **Users & Groups** panel, which is visible by default on the **Security** screen, allows _users_ and _groups_ to be defined. It also allows _roles_ to be assigned to users and groups. If at any time the **Users & Groups** panel is not currently visible, access it by left-clicking on the **Users & Groups** tab, which is located at the left-hand side of the upper, horizontal navigation-bar:
Initially, the panel shows that no users have yet been defined. (The Full Administrator who established the cluster is never included on the list; which contains only administrators subsequently defined.)
Note that the following notification may appear in the upper area of the screen:
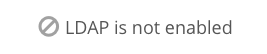
This indicates that no ability to support _external authentication_ — by means of either `saslauthd` or `LDAP` — has yet been enabled. To enable LDAP, see the first step of the command-sequence provided in [Getting Started with saslauthd and LDAP](configure-saslauthd.md#getting-started-with-saslauthd-and-ldap). For a general overview of external authentication, see [Authentication Domains](../../learn/security/authentication-domains.md).
### [](#add-a-group)Add a Group
A _group_ can be defined, and roles assigned to it, by means of Couchbase Web Console. Users can then be defined, and assigned to each group; each user thus being granted the group's roles. Groups may provide the most efficient way of managing role-assignments, when user-numbers are high.
To define a group, left-click on the **Add Group** tab, near the upper right of the **Security** screen:
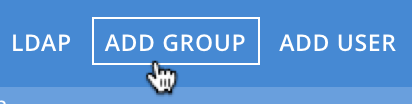
This brings up the **Add New Group** dialog:
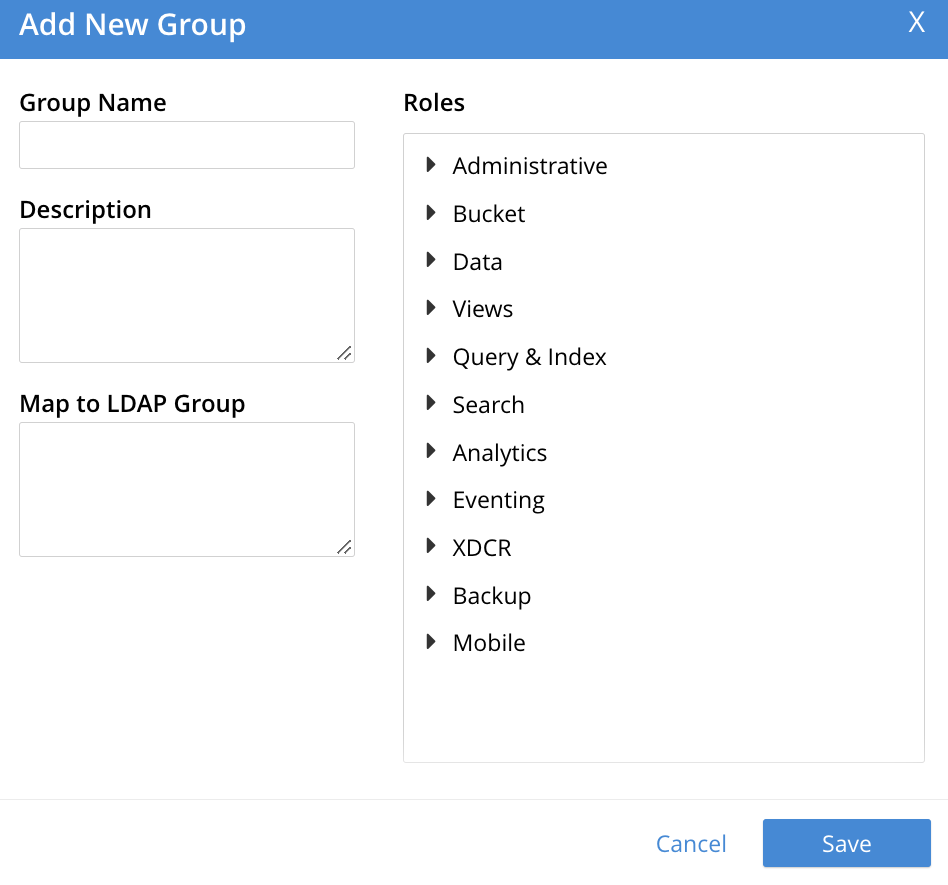
The fields are as follows:
* **Group Name**. The name of the new Couchbase-Server group to be created.
* **Description**. An optional description of the new Couchbase-Server group.
* **Map to LDAP Group**. The name of an existing LDAP group to which the new Couchbase-Server group is to be mapped. For details, see [Map LDAP Groups to Couchbase Server Roles](configure-ldap.md#map-ldap-groups-to-couchbase-server-roles).
* **Roles**. The roles to be associated with the new Couchbase-Server group. The display lists role-categories: to see roles, open each category by left-clicking on its right-pointing arrowhead, and scrolling down as appropriate.
The first category, which appears at the top of the panel, is for **Administrative** roles: these roles involve access to cluster-wide features.
Below the first category, the **Bucket**, **Data**, and other categories appear: in most of these categories, roles can be applied to some or all buckets defined on the cluster. Additionally, within any given bucket, the assigned role can apply to all or to a subset of _scopes and collections_ defined for that bucket (see [Scopes and Collections](../../learn/data/scopes-and-collections.md), for an overview of scopes and collections).
#### [](#create-a-group-with-an-administrative-role)Create a Group with an Administrative Role
To create a `ClusterAdmin` group, each of whose members is granted the **Cluster Admin** role, enter the following:
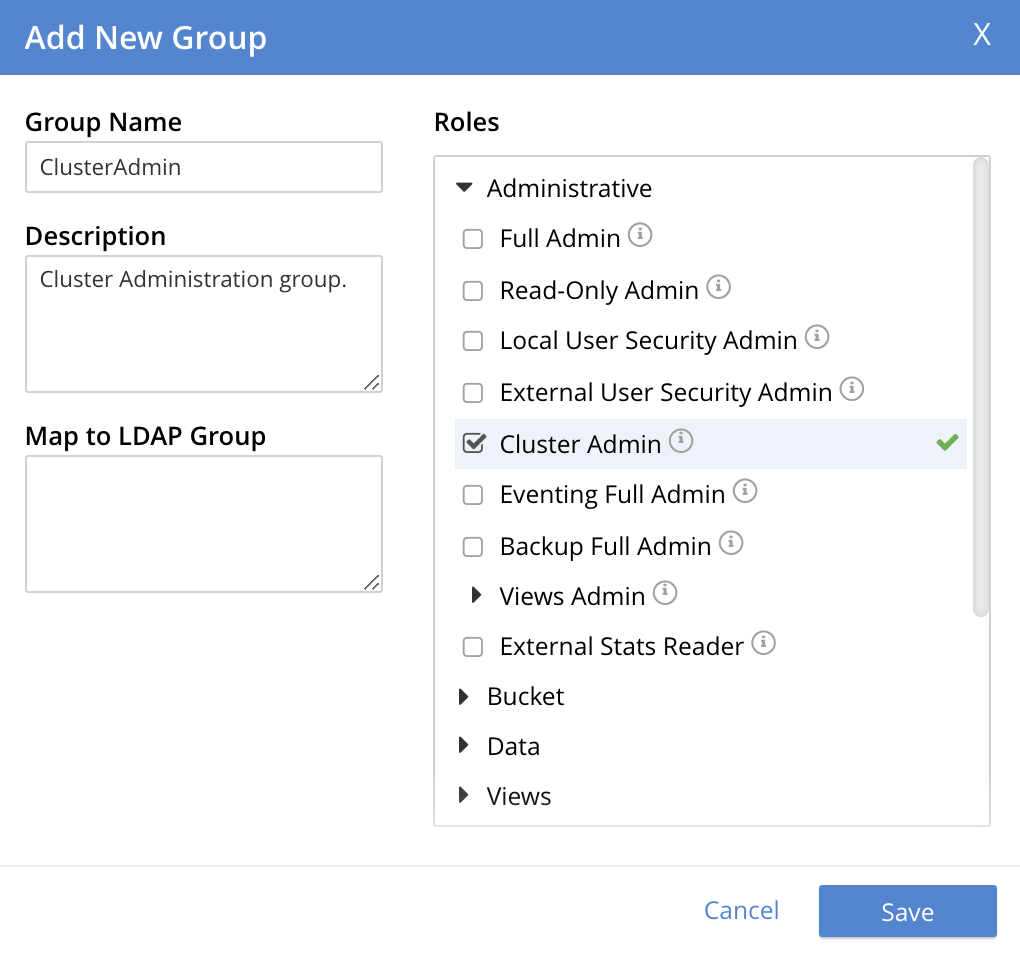
As this indicates, no LDAP group mapping is required to define a group intended for the support only of users who are defined on Couchbase Server as _local_ or _external_. For an explanation of LDAP group mappings, see [Map LDAP Groups to Couchbase Server Roles](configure-ldap.md#map-ldap-groups-to-couchbase-server-roles).
Save the group by left-clicking on the **Save** button.
#### [](#create-a-group-with-a-data-access-role)Create a Group with a Data-Access Role
Within each bucket, Couchbase Server organizes data into _scopes_ and _collections_. For an overview, see [Scopes and Collections](../../learn/data/scopes-and-collections.md). Access to each bucket, each scope, and each collection is protected by Role-Based Access Control. Therefore, roles must be assigned accordingly.
To create a group with a data-access role (for example, **Data Reader**), having entered a **Group Name** into the **Add New Group** dialog, access the **Data** category, in the **Roles** panel. This opens to reveal the available **Data** roles:
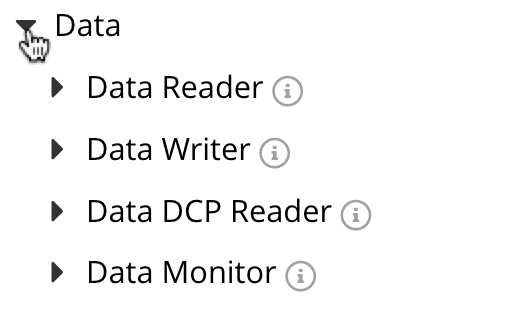
Left-click on **Data Reader**, to reveal the selector for role-assignment options:
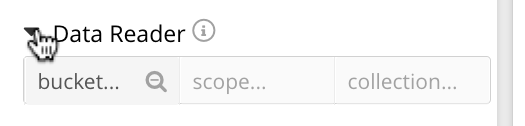
The selector features three fields: each provides a pull-down menu, from which selections can be made. The field at the left allows a _bucket_ to be specified; that in the center, a _scope_; that at the right, a _collection_. In each case, the default selection is a wild-card symbol (\*), indicating that _all_ are selected by default.
Left-click in the left-hand field:
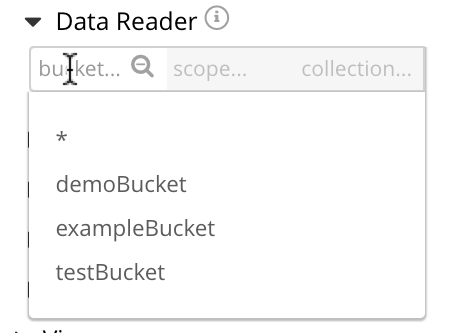
This indicates that three buckets are available for selection: **demoBucket**, **exampleBucket**, and **testBucket**. Select **testBucket**. The center field, which has until now been inactive, is activated. Left-click in the center field to reveal what scopes are available in **testBucket** for assigment:
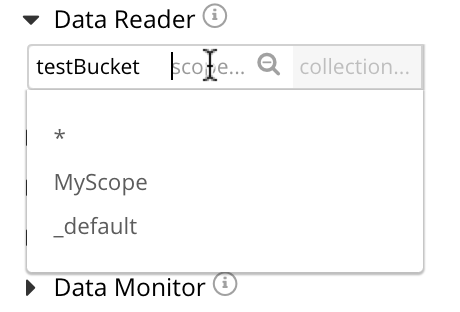
This shows that the **MyScope** and **\_default** scopes are available. Select **MyScope**. Now, left-click in the right-hand field:
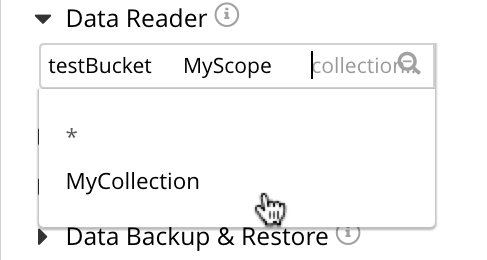
This shows that the **MyCollection** collection is available. Select **MyCollection**. Now, to add the assignment of **Data Reader** to all documents in the **MyCollection** collection, in the **MyScope** scope, in the **testBucket** bucket, left click on the **Save** button, at the bottom right of the dialog. The assigned role now appears immediately below the selector:
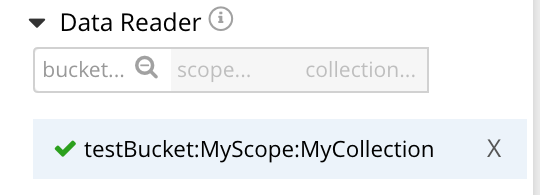
To make additional assignments, to other buckets, scopes, and collections, repeat the procedure using the selector. For each role to be defined, an entry must be specified for each of the three fields — bucket, scope, and collection. Then, the role is displayed as a role-definition, underneath the selector. Should it be necessary, a displayed role-definition can be deleted, by left-clicking on the **X**, to the right.
(Note that some roles apply to all data in the bucket; some to all collections in a specified scope, within a specified bucket; and some to all documents in a specified collection, within a specified scope and bucket. Consequently, the selector varies in appearance, role by role; based on how many fields are required for the a full specification of the role's assignment.)
When all required role-definitions have been made, left-click on **Save**, to save the group. The **Security** screen is now displayed. The edited group appears, and can always be made visible by means of the **Groups** button.
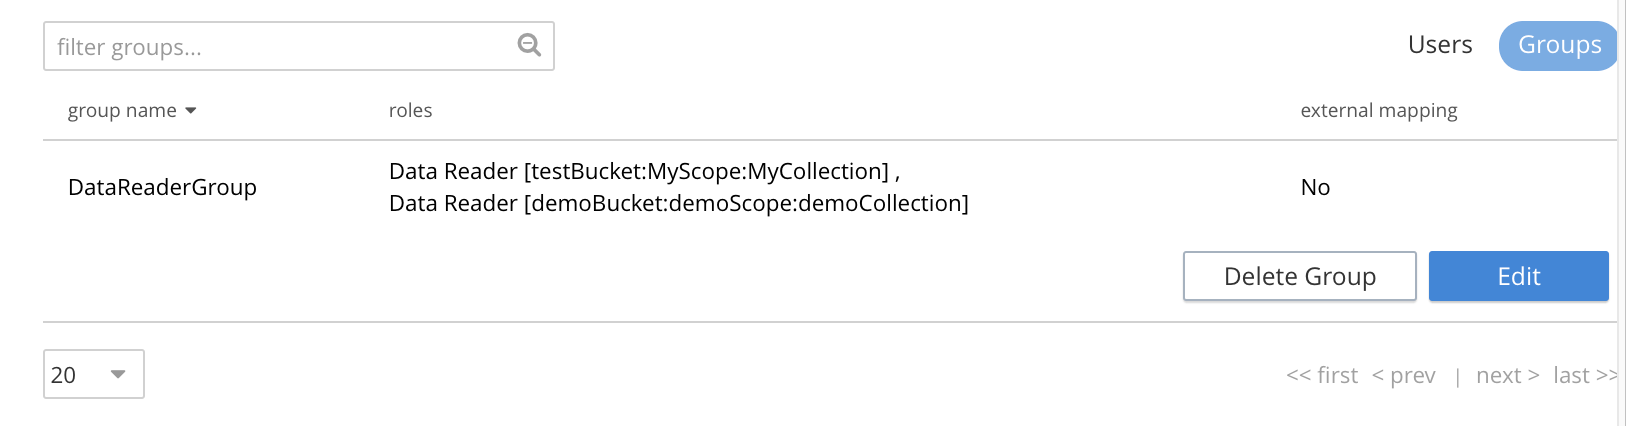
To make additional changes to the group's role-assignments, left click on the **Edit** button. The **Edit Group ** dialog appears: this is similar in appearance and behavior to the **Add Group** dialog, and thus allows new roles to be added, and existing to be deleted.
### [](#add-a-user)Add a User
To add a user, left-click on the **Add User** control, at the upper right.

The **Add New User** dialog now appears:
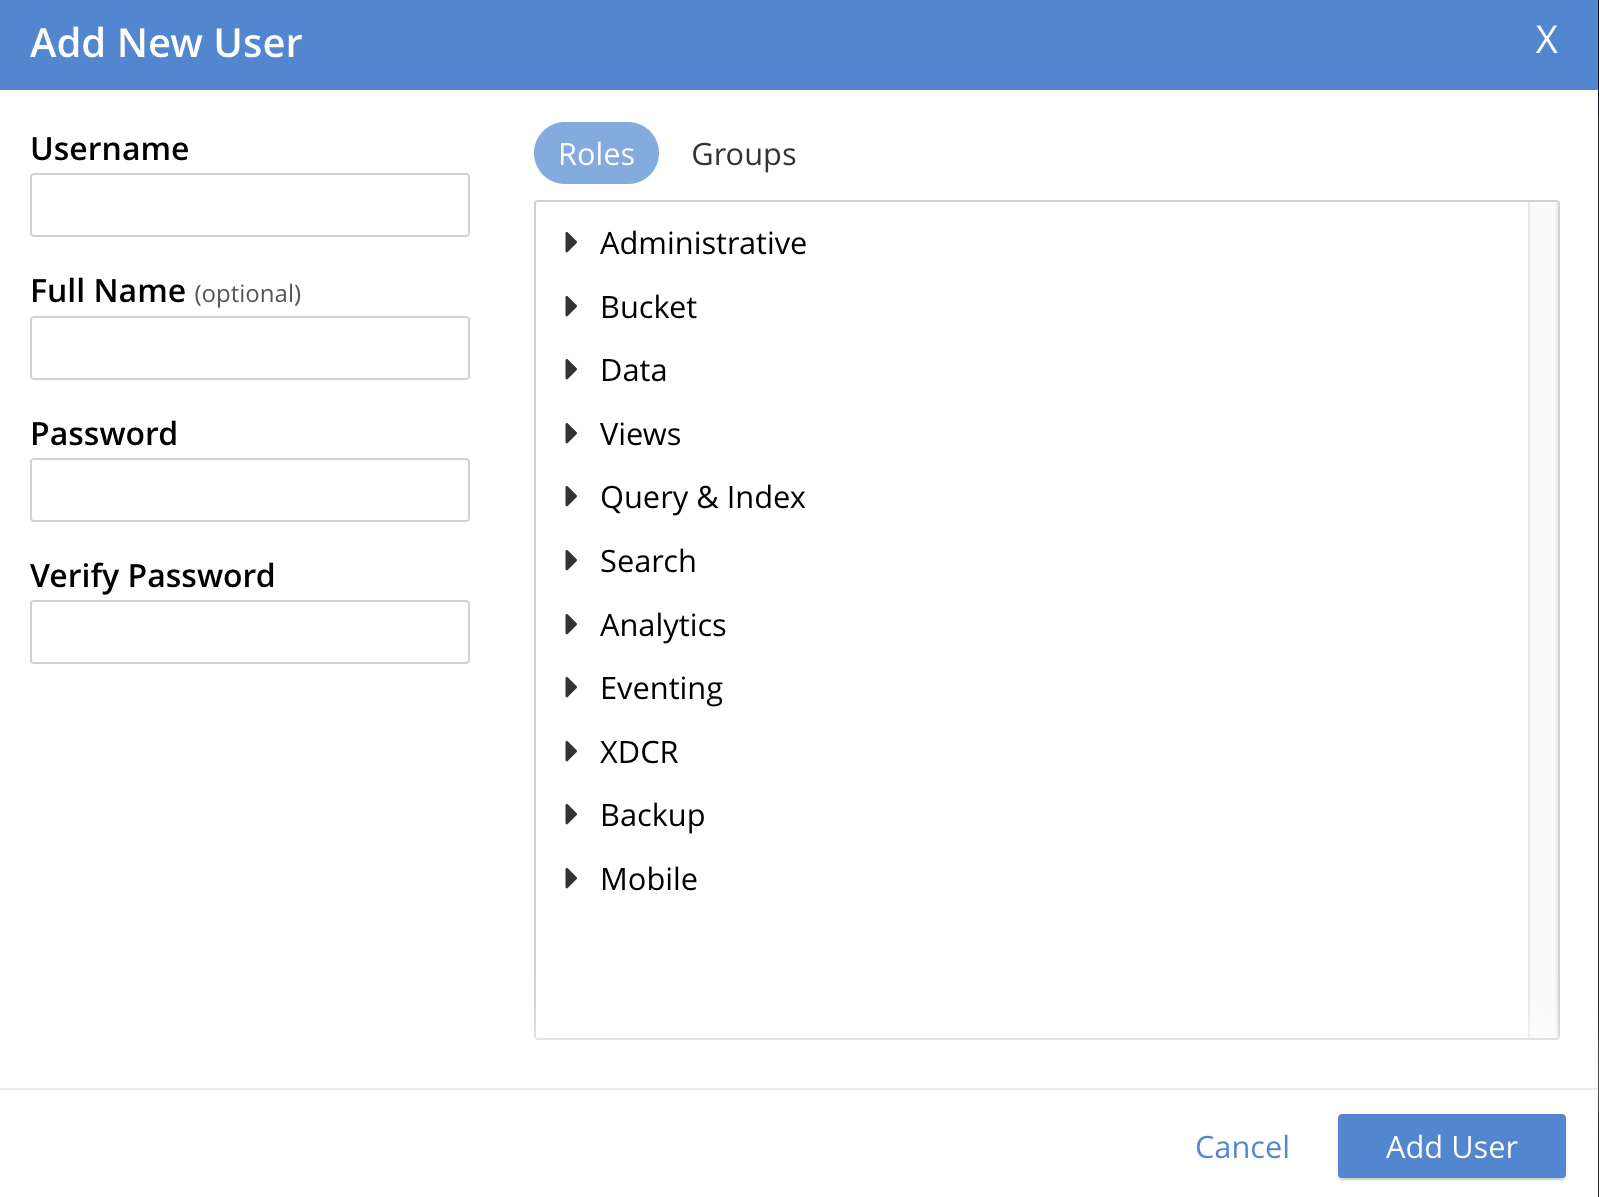
If either _Native LDAP_ or `saslauthd` has been enabled, towards the upper left of the dialog, the **Authentication Domain** panel is visible. This features two checkboxes: one specifying **Couchbase**, the other **External**. By default, **Couchbase** is checked: this means that the user will be defined locally, and that a password for the user must therefore be created, using the **Password** fields displayed on the dialog.
#### [](#add-a-locally-authenticated-user)Add a Locally Authenticated User
Add a locally authenticated user, by adding appropriate entries into the **Username** and **Password** fields. See [Usernames and Passwords](../../learn/security/usernames-and-passwords.md) for character-related requirements. The **Full Name** field may be left blank.
The user may now either be assigned one or more specific roles, or be assigned to one or more groups (so as to inherit each group's assigned roles), or both.
#### [](#adding-roles)Assign Roles to a User
Roles can be assigned as described above in [Add a Group](#add-a-group) — by checking checkboxes and using selectors, in the **Roles** panel, which is displayed by default.
For example, assign the **Query Curl Access** role:
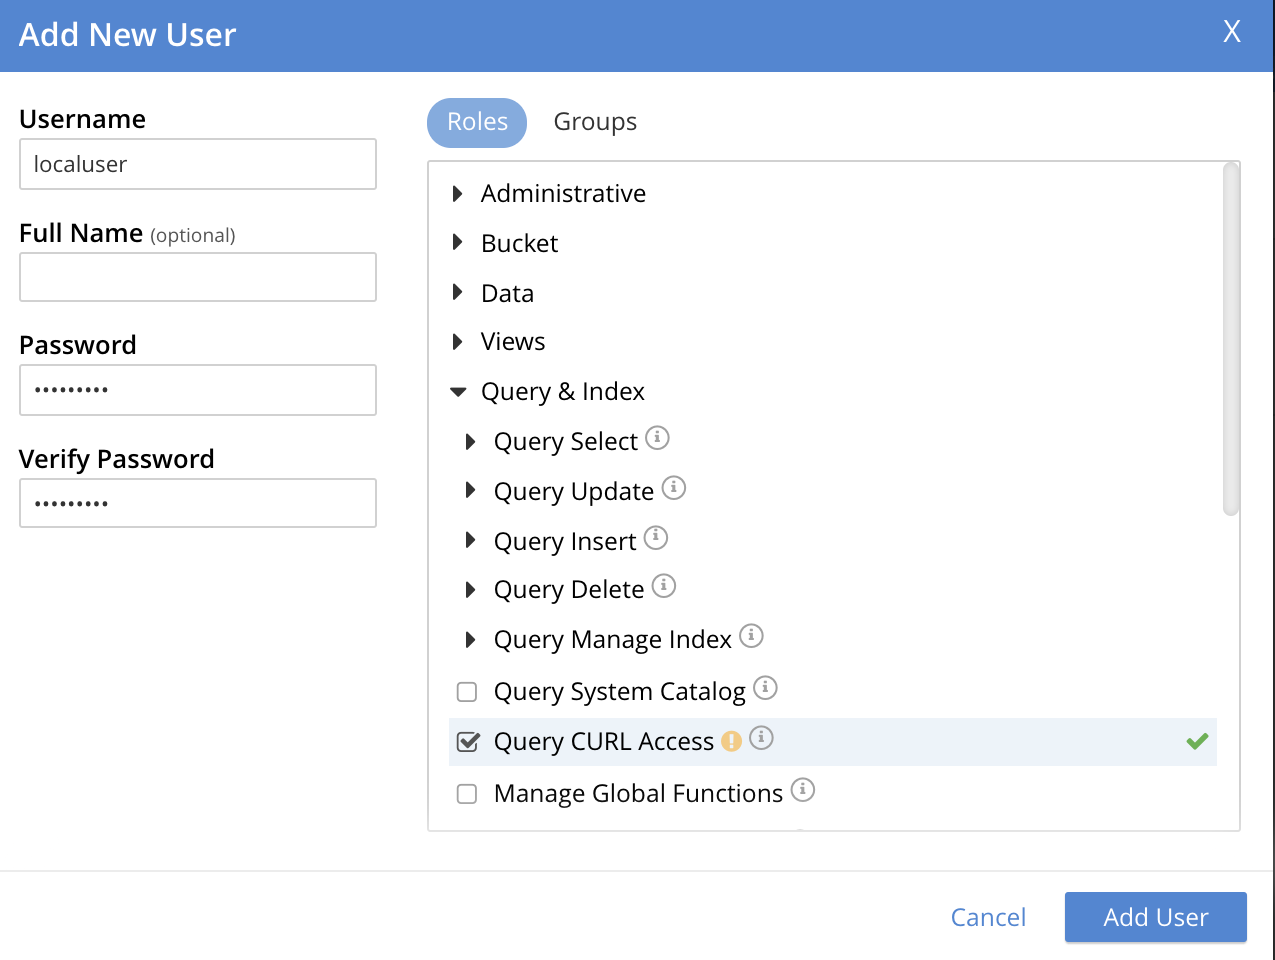
Now, to add this user, left-click on the **Add User** button, at the lower right of the dialog. Alternatively, continue the user-definition process, by assigning the user to a group.
#### [](#assigning-groups)Assign a User to a Group
To assign a user to a group, left-click on the **Groups** tab at the upper right of the dialog:
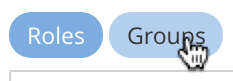
The content of the dialog's right-hand pane now changes, to display available groups:
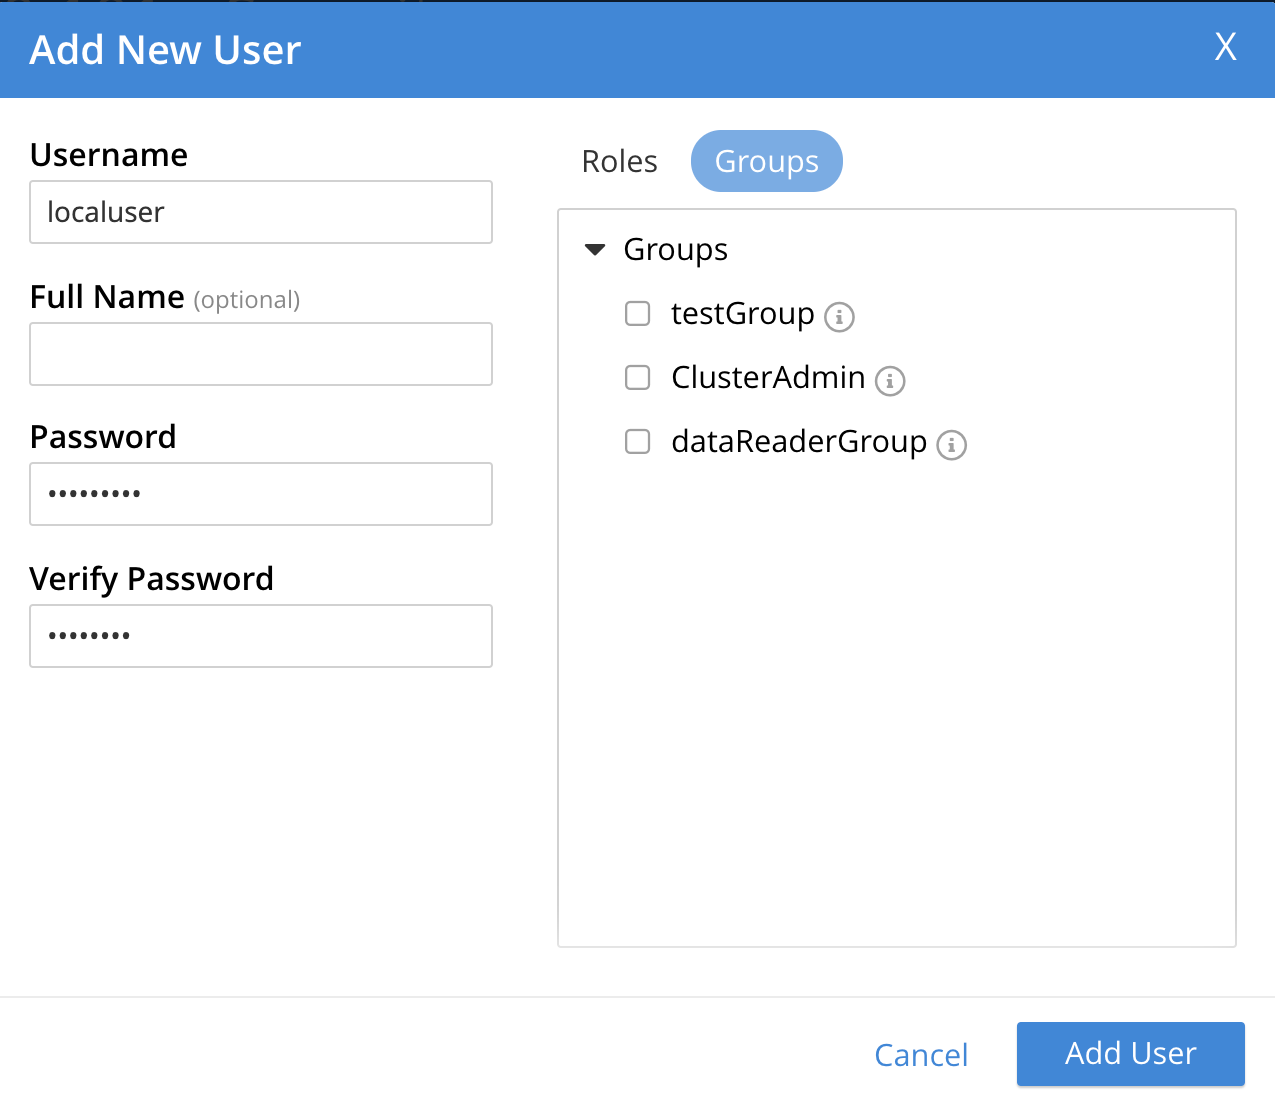
A user-group named `ClusterAdmin`, is thus shown to exist. To add the user to the group, check the corresponding checkbox:
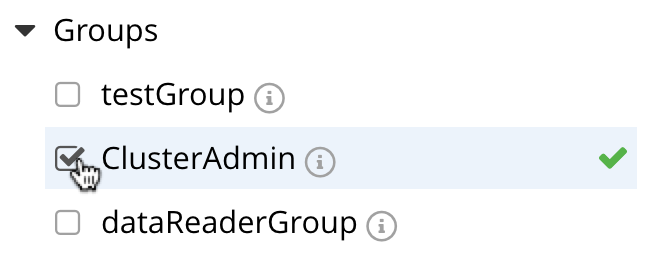
Now left-click on the **Add User** button, at the lower right:
The new user now appears on **Security** panel, as follows:

The single, displayed row indicates that user `localUser` has been defined, and has been granted the **Query CURL Access** role (which was assigned directly) and the **Cluster Admin** role (which has been derived from the user's assigned membership of the **ClusterAdmin** group). Note also that the **auth domain** for the user is **Couchbase**, indicating that this user is locally defined.
#### [](#editing-users-and-groups)Editing Users and Groups
Once created, users and groups can be edited. Left-click on the currently defined user's row:

The row expands vertically, displaying control-buttons at the lower right. By left-clicking on **Delete**, you delete the user. By left-clicking on **Edit**, you bring up the **Edit ** dialog, which provides options for redefining full name, roles, and groups. (The content of this dialog is similar to that of the **Add New User** dialog, examined above.) The **Reset Password** button only appears when the selected user is _locally_ defined: left-clicking on this brings up a dialog that allows redefinition of the user's password:
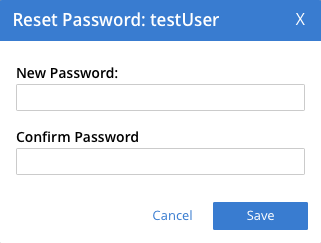
Note that the **Users & Groups** panel, subsequent to the definition of a user, displays two buttons towards the upper right, whereby **Users** and **Groups** views can be accessed in turn. To inspect and make changes to the currently defined group, left-click on the **Groups** button:
The **Groups** view is now displayed. As with the **Users** view, left-clicking on a group's row displays controls that include **Delete** and **Edit** options:

Left-click on the **Edit** button to display the **Edit Group ** dialog, which is similar to the **Add New Group**dialog examined above, and allows all the group's attributes, except the name, to be modified.
### [](#adding-an-externally-authenticated-user)Adding an Externally Authenticated User
An _externally authenticated_ user is not authenticated on Couchbase Server. Instead, they are authenticated on a server external to the cluster. This means that the user's password is defined and maintained externally.
The addition of a user as externally authenticated must be supported by [Native LDAP](../../learn/security/authentication-overview.md#native-ldap-support), [saslauthd](../../learn/security/authentication-overview.md#using-saslauthd), or [PAM](../../learn/security/authentication-overview.md#introduction-to-pam-based-authentication). Appropriate set-up procedures must have been completed prior to the addition of externally authenticated users.
For the detailed steps required to establish external authentication by means of Native LDAP (which is the recommended mechanism), see [Configure LDAP](configure-ldap.md).
To add an externally authenticated user, on the **Add New User** dialog, select the **External** option:
This removes the password-related fields from the dialog, since they are not required for the creation of an externally authenticated user. The fields for the user's names remain, and can be used.
From this point, the externally authenticated user can be defined exactly as was the locally authenticated user, above. For example, the **Query System Catalog** role can be assigned to the user; and the user then assigned to the `ClusterAdmin` group, whereby the **Cluster Admin** role is granted. When the definition-process is complete, the **Users** view of the **Users & Groups** panel appears as follows:
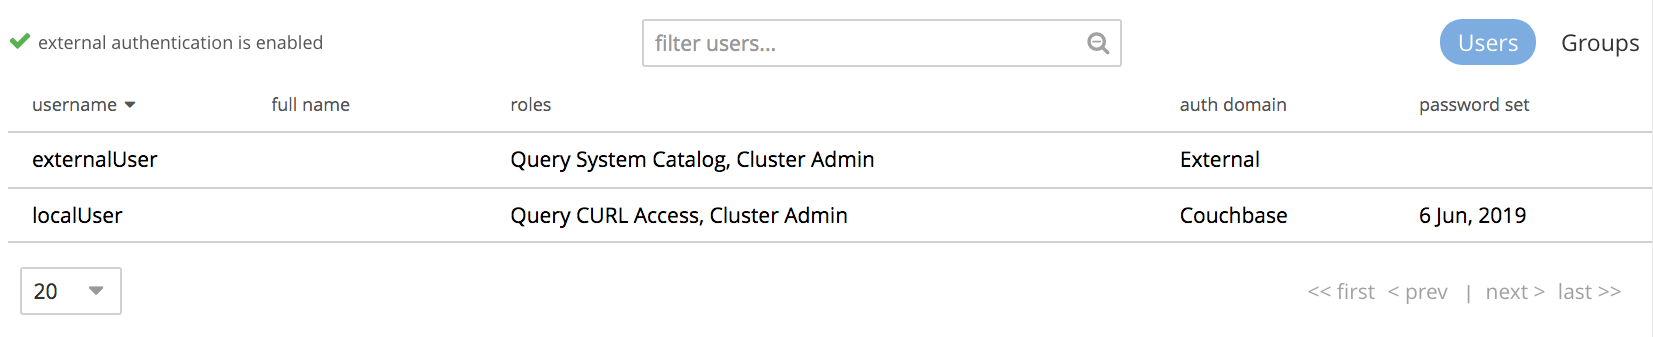
The externally authenticated user is now shown to have the username `externalUser`, and the **Query System Catalog** and **Cluster Admin** roles. Their **auth domain** is specified as `External`, indicating that they are authenticated on an external server.
> [!NOTE]
> External users can only be authenticated using the `PLAIN` method. By default, the Couchbase SDK will only default to PLAIN when connecting over TLS ports, therefore, external users should use the TLS ports.
>
> More details on authentication methods can be found in [Understanding Authentication](../../learn/security/authentication-overview.md#authentication-for-applications)
### [](#role-based-console-appearance)Role-Based Console Appearance
Role-assignment determines which features of Couchbase Web Console are available to the administrator. Non-available features are not displayed: therefore, the console's appearance changes, based on which roles have been assigned the current user.
## [](#manage-users-with-the-cli)Manage Users with the CLI
Users can be managed with the [user-manage](../../cli/cbcli/couchbase-cli-user-manage.md) command. This allows the creation and deletion of users and groups, the assignment of roles, and the listing of current status.
### [](#get-user-information-with-the-cli)Get User Information with the CLI
To list the cluster's current users, enter the following. Note that the command is piped to the [jq](https://stedolan.github.io/jq/) program, to optimize output-readability.
/opt/couchbase/bin/couchbase-cli user-manage --cluster http://10.144.210.101 \
--username Administrator \
--password password \
--list | jq
A document is returned, containing an entry for each of the current users:
[
{
"id": "externalUser",
"domain": "local",
"roles": [
{
"role": "scope_admin",
"bucket_name": "demoBucket",
"scope_name": "demoScope",
"origins": [
{
"type": "user"
}
]
},
{
"role": "ro_admin",
"origins": [
{
"type": "user"
}
]
}
],
"groups": [],
"external_groups": [],
"name": "",
"password_change_date": "2021-02-01T09:46:04.000Z"
},
{
"id": "testUser",
"domain": "local",
"roles": [
{
"role": "data_reader",
"bucket_name": "testBucket",
"scope_name": "MyScope",
"collection_name": "MyCollection",
"origins": [
{
"type": "user"
}
]
}
],
"groups": [],
"external_groups": [],
"name": "",
"password_change_date": "2021-02-01T09:40:23.000Z"
}
]
The entries include information on the `id` and `roles` of the user, their authentication `domain`, their `name` if one was specified, and on the local and external `groups` to which the user belongs. For each non-global role, the bucket, scope, and collection to which the permissions are restricted are displayed, as appropriate.
### [](#get-group-information-with-the-cli)Get Group Information with the CLI
Information on currently defined _groups_ can similarly be returned:
/opt/couchbase/bin/couchbase-cli user-manage --cluster http://10.143.192.101 \
--username Administrator \
--password password \
--list-groups
An example of the output is as follows:
[
{
"id": "DataReaderGroup",
"roles": [
{
"role": "data_reader",
"bucket_name": "testBucket",
"scope_name": "MyScope",
"collection_name": "MyCollection"
},
{
"role": "data_reader",
"bucket_name": "demoBucket",
"scope_name": "demoScope",
"collection_name": "demoCollection"
}
],
"ldap_group_ref": "",
"description": "Administrators with limited Data Reader permission."
}
]
This shows that a single group, named `DataReaderGroup`, has been defined on the cluster; and that the `data_reader` role has been assigned to it for the specified collections.
### [](#create-local-users-with-the-cli)Manage Local Users with the CLI
The username and password of a _local_ user is stored and maintained on Couchbase Server. Roles can be allocated to the user either _directly_ or by means of _group membership_.
#### [](#create-a-local-user-using-direct-role-assignment-with-the-cli)Create a Local User, Using Direct Role-Assignment, with the CLI
To create a user who is to be _locally authenticated_, directly assigning a role, enter the following:
/opt/couchbase/bin/couchbase-cli user-manage \
--cluster http://10.144.210.101 \
--username Administrator \
--password password \
--set \
--rbac-username dgreen \
--rbac-password dGr3En239 \
--roles query_external_access,analytics_reader \
--auth-domain local
This uses the `--set` flag, to indicate that the RBAC profile for the cluster is being updated. The username and password for the user are defined. The value of the `--auth-domain` flag indicates that this is indeed to be a `local` user. The `query_external_access` and analytics\_reader\` roles are assigned by means of the `--roles` flag: to change direct role assignments, the user must be recreated, with all the new roles specified as the arguments to the `--roles` flag.
If the call is successful, the following is displayed:
WARNING: Granting the query_external_access role permits execution of the N1QL function CURL() and may allow access to other network endpoints in the local network and the Internet.
SUCCESS: User dgreen set
The output thus includes the standard command-line warning on the significance of the `query_external_access` role.
#### [](#create-a-local-user-with-the-cli-directly-assigning-a-per-collection-role)Create a Local User with the CLI, Directly Assigning a Per-Collection Role
Roles that permit data-access can be assigned with reference to a bucket, to a scope within a bucket, or to a collection within a scope. Syntactically, the assignment should be specified in square brackets, immediately after the role-name; with the bucket-name preceding (if one is specified) the scope-name; and the scope-name preceding (if one is specified) the collection-name. The names of bucket, scope, and collection must be separated by colons.
The following example creates a user whose role permits access to data within a specified collection:
/opt/couchbase/bin/couchbase-cli user-manage \
--cluster http://10.144.210.101 \
--username Administrator \
--password password \
--set \
--rbac-username dhiggins \
--rbac-password d8&3hdli2 \
--roles data_reader[testBucket:my_new_scope:my_new_collection] \
--auth-domain local
This grants the user `dhiggins` the `data_reader` role on data within the collection `my_new_collection`; which resides within the scope `my_new_scope`, in the `testBucket` bucket.
If this call is successful, the following is displayed:
SUCCESS: User dhiggins set
#### [](#create-a-local-user-using-group-based-role-assignment-with-the-cli)Create a Local User, Using Group-Based Role-Assignment, with the CLI
To create a user who is to be _locally authenticated_, assigning a role by means of group membership, enter the following:
/opt/couchbase/bin/couchbase-cli user-manage --cluster http://10.143.192.101 \
--username Administrator \
--password password \
--rbac-username cbrown \
--rbac-password cBr403n438 \
--auth-domain local \
--set \
--user-groups Admins
This specifies the `--set` flag, to indicate that group-editing is to occur. The `--user-groups` flag is given the value `Admins`, to indicate that the `Admins` group is that which will be edited. Flags are provided to indicate the username and password of a new user, who will be added to the system, and given membership of the specified group, so as to inherit its assigned roles.
If successful, the call returns the following:
SUCCESS: User 'cbrown' group memberships were updated
#### [](#delete-a-local-user-with-the-cli)Delete a Local User with the CLI
To delete a local user, specify the `--delete` flag, with the username and authentication domain:
/opt/couchbase/bin/couchbase-cli user-manage --cluster http://10.143.192.101 \
--username Administrator \
--password password \
--rbac-username dgreen \
--auth-domain local \
--delete
The output is as follows:
SUCCESS: User 'dgreen' was removed
#### [](#create-a-group-with-the-cli)Create a Group with the CLI
Using the CLI, create a group as follows:
/opt/couchbase/bin/couchbase-cli user-manage \
--cluster http://10.143.192.101 \
--username Administrator \
--password password \
--set-group \
--group-name xdcrAdmin \
--roles replication_admin
This uses the `--set-group` flag to indicate that a group is to be created or edited. The `--group-name` flag specifies the name of a new group named `xdcrAdmin`, and the `--roles` flag is used to assign the `replication_admin` role to the new group. Note that to change the group's role-assignments, the group must be recreated, with all the new role-assignments specified as the arguments to the `--roles` flag: user-memberships go unchanged.
If the call is successful, the following is displayed.
SUCCESS: Group 'xdcrAdmin' was created
For information on how to use the CLI to create a mapping between a Couchbase-Server user-group and an LDAP group, see [Map Groups with the CLI](configure-ldap.md#map-groups-with-the-cli).
#### [](#delete-a-group-with-the-cli)Delete a Group with the CLI
To delete a group with the CLI, use the `user-manage` command as follows:
/opt/couchbase/bin/couchbase-cli user-manage \
--cluster http://10.143.192.101 \
--username Administrator \
--password password \
--delete-group \
--group-name xdcrAdmin
This deletes the group `xdcrGroup`. If the command is successful, the following output is provided:
SUCCESS: Group 'xdcrAdmin' was deleted
### [](#manage-external-users-with-the-cli)Manage External Users with the CLI
Users can be defined as _externally authenticated_, by means of the CLI. This requires external authentication to have been configured prior to user-creation. For recommended procedures, see [Configure LDAP](configure-ldap.md).
#### [](#create-an-external-user-using-direct-role-assignment-with-the-cli)Create an External User, Using Direct Role-Assignment, with the CLI
To create an _externally authenticated_ user with direct role-assignment, use the `user-manage` command as follows:
/opt/couchbase/bin/couchbase-cli user-manage --cluster http://10.143.192.101 \
--username Administrator \
--password password \
--set \
--rbac-username wgrey \
--roles cluster_admin \
--auth-domain external
The `--auth-domain` is specified as `external`. The `--set` flag establishes that the cluster's RBAC profile is to be updated. No password is specified, since none is to be saved on Couchbase Server — authentication occurring on the LDAP server. The role to be assigned to the user is specified by means of the `--roles` flag as `cluster_admin`
If the command is successful, the following is returned:
SUCCESS: User wgrey was created
#### [](#create-an-external-user-directly-assigning-a-per-collection-role)Create an External User, Directly Assigning a Per-Collection Role
Roles that permit data-access can be assigned with reference to a bucket, to a scope within a bucket, or to a collection within a scope. Syntactically, the assignment should be specified in square brackets, immediately after the role-name; with the bucket-name preceding (if one is specified) the scope-name; and the scope-name preceding (if one is specified) the collection-name. The names of bucket, scope, and collection must be separated by colons.
The following example creates an external user whose role permits access to data within a specified collection:
/opt/couchbase/bin/couchbase-cli user-manage --cluster http://10.144.210.101 \
--username Administrator \
--password password \
--set \
--rbac-username tcrawford \
--roles data_writer[testBucket:my_new_scope:my_new_collection] \
--auth-domain external
If successful, the call returns the following:
SUCCESS: User tcrawford set
External user `tcrawford` is thus granted `data_writer` access to the collection `my_new_collection`; which resides in the scope `my_new_scope`, in the bucket `testBucket`.
#### [](#create-an-external-user-using-group-based-role-assignment-with-the-cli)Create an External User, Using Group-Based Role-Assignment, with the CLI
To create an external user with a group-based role-assignment, use the `user-manage` command as follows:
/opt/couchbase/bin/couchbase-cli user-manage --cluster http://10.143.192.101 \
--username Administrator \
--password password \
--set \
--rbac-username rjones \
--rbac-name 'Richard Jones' \
--auth-domain external \
--user-groups Admins
The `--set` flag specifies that a group is to be updated. The existing Couchbase-Server user-group `Admins` is passed as the value of `--user-groups`: this specifies that `Admins` is indeed the group of which the external user, `rjones` is to be a member. All roles assigned to `Admins` are now to be inherited by `rjones`.
If successful, the command returns the following:
SUCCESS: User 'rjones' group memberships were updated
For information on how to use the CLI to create a mapping between a Couchbase-Server user-group and an LDAP group, see [Map Groups with the CLI](configure-ldap.md#map-groups-with-the-cli).
#### [](#delete-an-external-user-with-the-cli)Delete an External User with the CLI
To delete an external user, use the `--delete-user` flag, specifying `external` as the value of the `--auth-domain` flag:
/opt/couchbase/bin/couchbase-cli user-manage --cluster http://10.143.192.101 \
--username Administrator \
--password password \
--rbac-username wgrey \
--auth-domain external \
--delete
If successful, the command returns the following:
SUCCESS: User 'wgrey' was removed
## [](#manage-users-with-the-rest-api)Manage Users with the REST API
Users can be managed with the `GET /settings/rbac/users` method and URI. This allows the creation and deletion of users and groups, the assignment of roles, and the listing of current status.
For corresponding reference information, see [Role Based Admin Control (RBAC)](../../rest-api/rbac.md).
Each user can be defined as either _locally_ or _externally_. The creation of external users requires external authentication to have been configured prior to user-creation. For recommended procedures, see [Configure LDAP](configure-ldap.md).
### [](#get-user-information-with-the-rest-api)Get User Information with the REST API
To list the cluster's current users, use the `GET /settings/rbac/users` method and URI as follows:
curl -v -X GET -u Administrator:password \
http://10.143.192.101:8091/settings/rbac/users
If successful, the command provides as its output a document containing an entry for each of the current users. This output is identical in form to that shown above, in [Get User Information with the CLI](#get-user-information-with-the-cli).
### [](#get-group-information-with-the-rest-api)Get Group Information with the REST API
To list the cluster's current groups, use the `GET /settings/rbac/groups` method and URI as follows:
curl -v -X GET -u Administrator:password \
http://10.143.192.101:8091/settings/rbac/groups
If successful, the command provides as its output a document containing an entry for each of the current groups. This output is identical in form to that shown above, in [Get Group Information with the CLI](#get-group-information-with-the-cli).
### [](#manage-local-users-with-the-rest-api)Manage Local Users with the REST API
The username and password of a local user is stored and maintained on Couchbase Server. Roles can be allocated to the user either directly or by means of group membership.
#### [](#create-a-local-user-with-the-rest-api)Create a Local User, Using Direct Role-Assignment, with the REST API
To create a local user, use the `PUT /settings/rbac/users/local/` method and URI. For example:
curl -v -X PUT -u Administrator:password \
http://10.143.192.101:8091/settings/rbac/users/local/dgreen \
-d password=dGr3En238 \
-d roles=ro_admin
This specifies that the user `dgreen` should be locally established, with the given password and the `ro_admin` role.
#### [](#retrieve-a-local-user-with-the-rest-api)Retrieve a Local User, with the REST API
The `GET /settings/rbac/users` method and URI can be used to list current users:
curl -v -X GET -u Administrator:password http://10.143.192.101:8091/settings/rbac/users | jq '.'
If successful, the call returns the following:
[
{
"id": "dgreen",
"domain": "local",
"roles": [
{
"role": "ro_admin",
"origins": [
{
"type": "user"
}
]
}
],
"groups": [],
"external_groups": [],
"uuid": "aad6c6df-bf03-428b-8850-2e4171ec88f2",
"password_change_date": "2023-07-24T07:39:09.000Z"
}
]
#### [](#create-a-local-user-directly-assigning-a-per-collection-role)Create a Local User, Directly Assigning a Per-Collection Role
Roles that permit data-access can be assigned with reference to a bucket, to a scope within a bucket, or to a collection within a scope. Syntactically, the assignment should be specified in square brackets, immediately after the role-name; with the bucket-name preceding (if one is specified) the scope-name; and the scope-name preceding (if one is specified) the collection-name. The names of bucket, scope, and collection must be separated by colons. The following example creates a user whose role permits access to data within a specified collection:
curl -v -X PUT -u Administrator:password \
http://10.144.210.101:8091/settings/rbac/users/local/dwilliams \
-d password=dGr3En238 \
-d roles=data_reader[testBucket:my_new_scope:my_new_collection]
The user `dwilliams` is thus granted `data_reader` privileges on the collection `my_new_collection`; which resides within the scope `my_new_scope`, in the `testBucket` bucket.
#### [](#create-a-local-user-using-group-based-role-assignment-with-the-rest-api)Create a Local User, Using Group-Based Role-Assignment, with the REST API
Use the `PUT /settings/rbac/users/local/sdavis` method and URI, as follows:
curl -v -X PUT -u Administrator:password \
http://10.143.192.101:8091/settings/rbac/users/local/sdavis \
-d groups=Admins,xdcrAdmin \
-d password=Sd4v1s938
The value of the `--groups` flag specifies that the user, specified in the endpoint as `sdavis`, should be added to the `Admins` and `xdcrAdmin` groups. To modify group membership subsequently, run the command again, specifying all of the groups whose membership is required as the arguments to the `groups` parameter.
#### [](#delete-a-local-user-with-the-rest-api)Delete a Local User with the REST API
Local users can be deleted by means of the `DELETE /settings/rbac/users/local/` method and URI:
curl -v -X DELETE -u Administrator:password \
http://10.143.192.101:8091/settings/rbac/users/local/dgreen
#### [](#create-a-group-with-the-rest-api)Create a Group with the REST API
To create a group with the REST API, use the `PUT /settings/rbac/groups/` method and URI. For example:
curl -v -X PUT -u Administrator:password \
http://10.143.192.101:8091/settings/rbac/groups/roAdminGroup \
-d roles=ro_admin
This establishes a new group named `roAdminGroup`. By means of the `roles` parameter, the `ro_admin` role is assigned to the group. This role will be inherited by all of the group's future members.
#### [](#delete-a-group-with-the-rest-api)Delete a Group with the REST API
To delete a group with the REST API, use the `DELETE /settings/rbac/groups/` method and URI. For example:
curl -v -X DELETE -u Administrator:password \
http://10.143.192.101:8091/settings/rbac/groups/roAdminGroup
This deletes the group `roAdminGroup`.
### [](#manage-external-users-with-the-rest-api)Manage External Users with the REST API
Users can be defined as _externally authenticated_, by means of the REST API. This requires external authentication to have been configured prior to user-creation. For recommended procedures, see [Configure LDAP](configure-ldap.md).
#### [](#create-an-external-user-with-direct-role-assignment-using-the-rest-api)Create an External User, Using Direct Role-Assignment, with the REST API
To create an external user and assign roles to them directly, use the `PUT /settings/rbac/users/external/` method and URI. For example:
curl -v -X PUT -u Administrator:password \
http://10.143.192.101:8091/settings/rbac/users/external/wgrey \
-d roles=cluster_admin
This creates the externally authenticated user `wgrey`, and assigns them the `cluster_admin` role.
#### [](#create-an-external-user-directly-assigning-a-per-collection-role-2)Create an External User, Directly Assigning a Per-Collection Role
Roles that permit data-access can be assigned with reference to a bucket, to a scope within a bucket, or to a collection within a scope. Syntactically, the assignment should be specified in square brackets, immediately after the role-name; with the bucket-name preceding (if one is specified) the scope-name; and the scope-name preceding (if one is specified) the collection-name. The names of bucket, scope, and collection must be separated by colons. The following example creates an external user whose role permits access to data within a specified collection:
/opt/couchbase/bin/couchbase-cli user-manage \
--cluster http://10.144.210.101 \
--username Administrator \
--password password \
--set \
--rbac-username tcrawford \
--roles data_writer[testBucket:my_new_scope:my_new_collection] \
--auth-domain external
If successful, the call returns the following:
SUCCESS: User tcrawford set
External user `tcrawford` is thus granted `data_writer` access to the collection `my_new_collection`; which resides in the scope `my_new_scope`, in the bucket `testBucket`.
#### [](#create-an-external-user-with-a-group-mapping-with-the-rest-api)Create an External User, Using Group-Based Role-Assignment, with the REST API
Use the `PUT /settings/rbac/users/` method and URI, as follows:
curl -v -X PUT -u Administrator:password \
http://10.143.192.101:8091/settings/rbac/users/rjones \
-d groups=Admins,xdcrAdmin
This adds the externally authenticated user `rjones` to the cluster's `Admins` and `xdcrAdmins` groups. The user now inherits the roles that have been assigned to each of the groups.
#### [](#delete-an-external-user-with-the-rest-api)Delete an External User with the REST API
External users can be deleted by means of the `DELETE /settings/rbac/users/external/` method and URI:
curl -v -X DELETE -u Administrator:password \
http://10.143.192.101:8091/settings/rbac/users/external/wgrey
This deletes the external user `wgrey` from the cluster.
For more information on managing users, groups, and roles with the REST API, see [Role Based Admin Control (RBAC)](../../rest-api/rbac.md).