Deploy Couchbase Server Using AWS Marketplace
Couchbase partners with Amazon to provide a packaged solution on AWS Marketplace. This solution is based on Amazon CloudFormation templates that incorporate the latest features and best practices for deploying Couchbase Server on Amazon Web Services.
Couchbase Server on AWS Marketplace provides one of the fastest and easiest ways to get up and running on Amazon Web Services (AWS). At the core of this experience are Amazon CloudFormation templates that are developed in close collaboration with Amazon in order to adopt the latest features and best practices. Amazon Machine Images (AMIs) also provide the information required to launch an instance of a virtual server in AWS, thus making it easier and faster to deploy Couchbase Server without having to create and manage schemas, or normalize, shard, and tune the database.
Couchbase is available through AWS Marketplace with hourly pricing, or through a Bring Your Own License (BYOL) model.
Before You Begin
-
You need an AWS account. If you don’t have one, sign up for one before proceeding.
-
You should review the best practices for deploying Couchbase Server on AWS.
Deploying Couchbase Server
| The CloudFormation templates are provided as a starting point and may be customized as needed. |
-
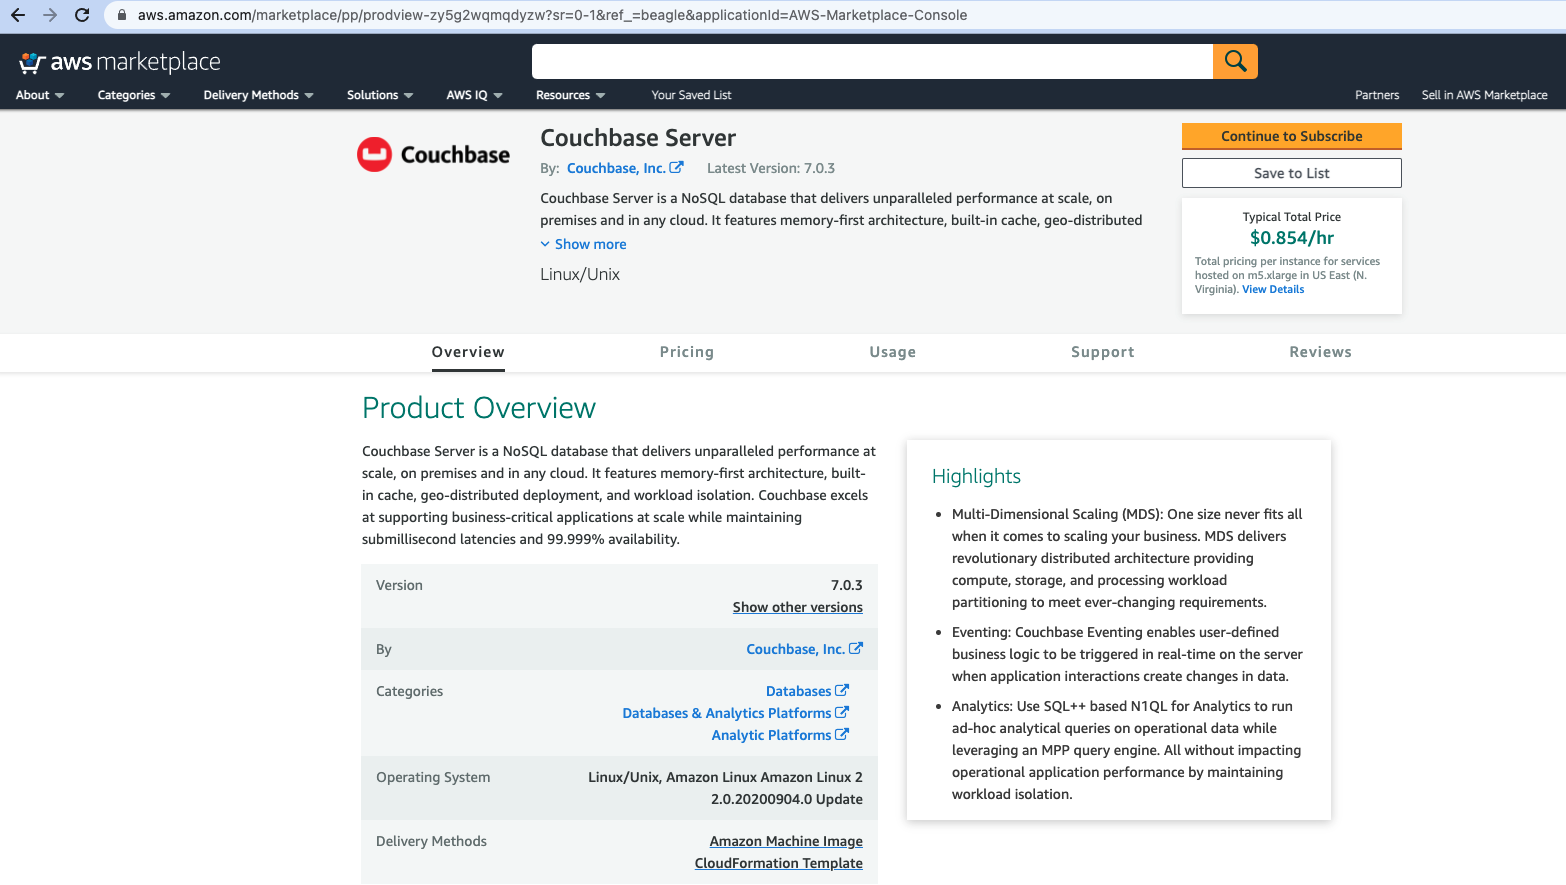
Log in to your account on the Amazon Web Services Marketplace, search for
Couchbaseand select Couchbase Enterprise Edition. Alternately, you can click here to go to the Couchbase Server product page directly. -
The Couchbase Server product page provides a quick overview of the product offering and useful links. Click Continue to Subscribe.
-
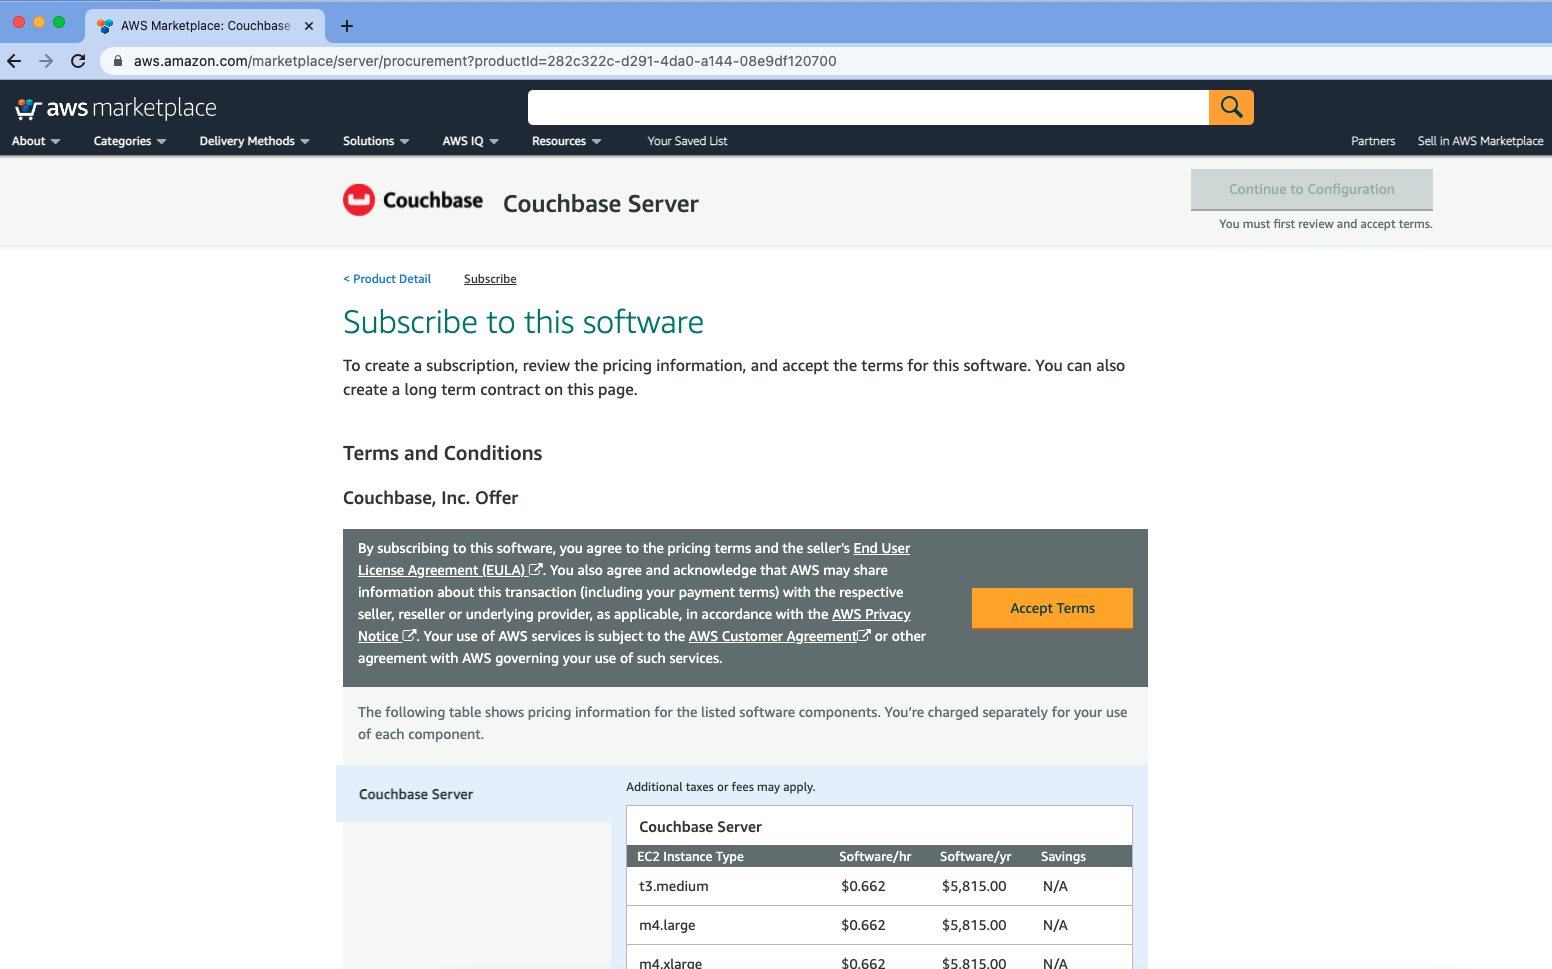
On the Subscribe to this software screen, accept the terms and conditions for this software.
-
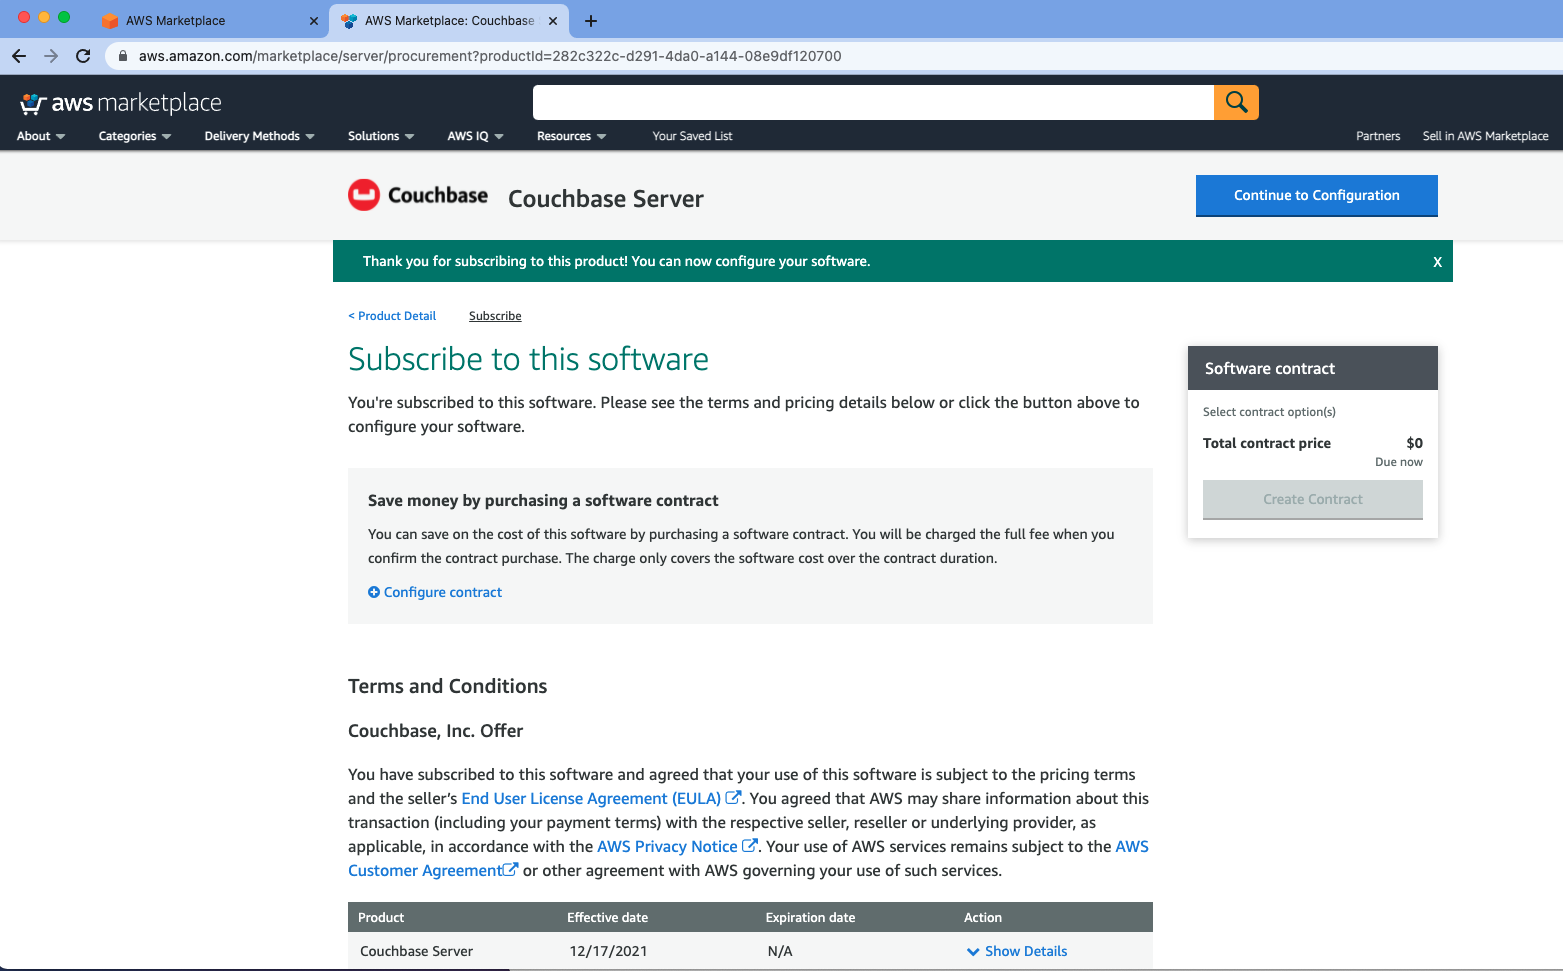
Once your request is processed, you’ll be able to proceed by clicking Continue to Configuration.
-
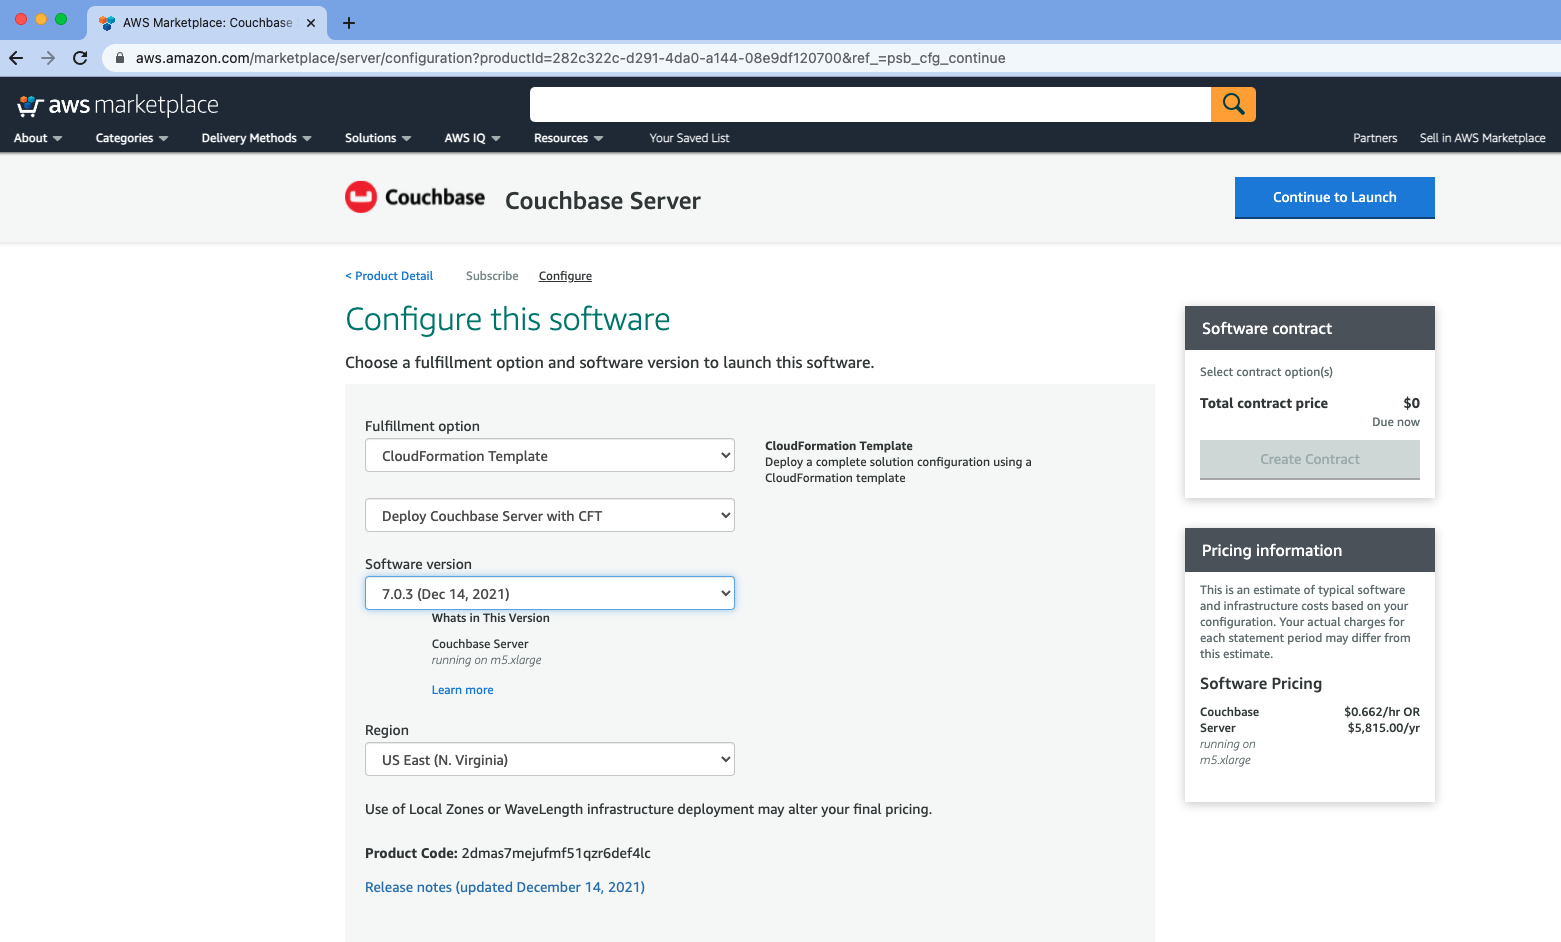
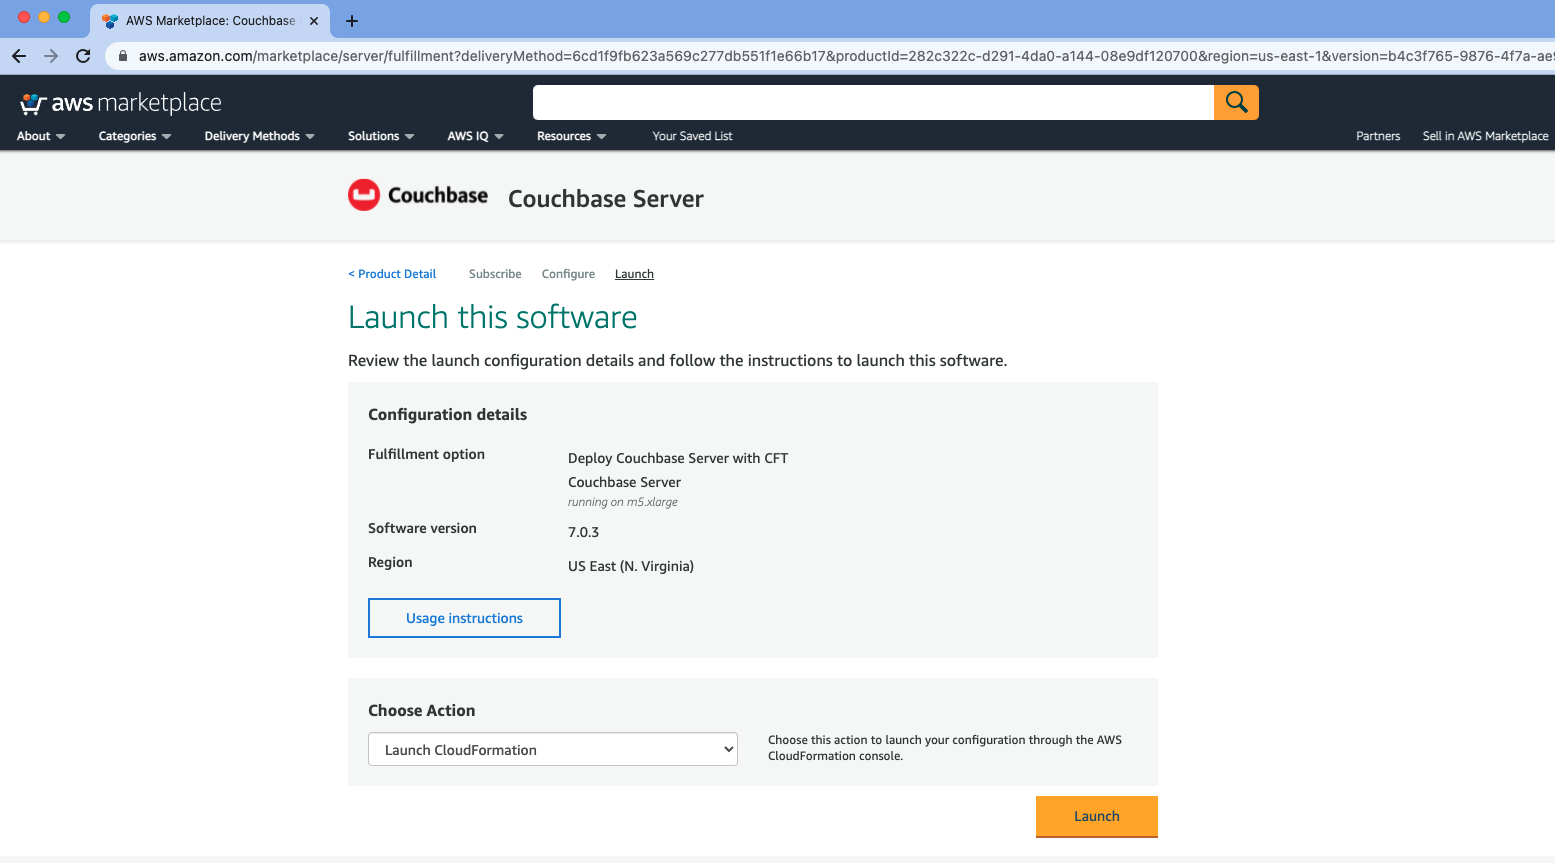
Configure the software by selecting CloudFormation Template from the Fulfillment option drop down. You can also customize the Couchbase Server version and the region where the software will be deployed. Then click Continue to Launch.
-
Review your configuration and then choose Launch CloudFormation from the Choose Action drop down to launch your configuration through the AWS CloudFormation console.
-
You will be redirected to the AWS CloudFormation Console where you must create a stack. A stack is a group of related resources that you manage as a single unit.
-
In the Specify template section, choose the template source as the
Amazon S3 URLand then click Next.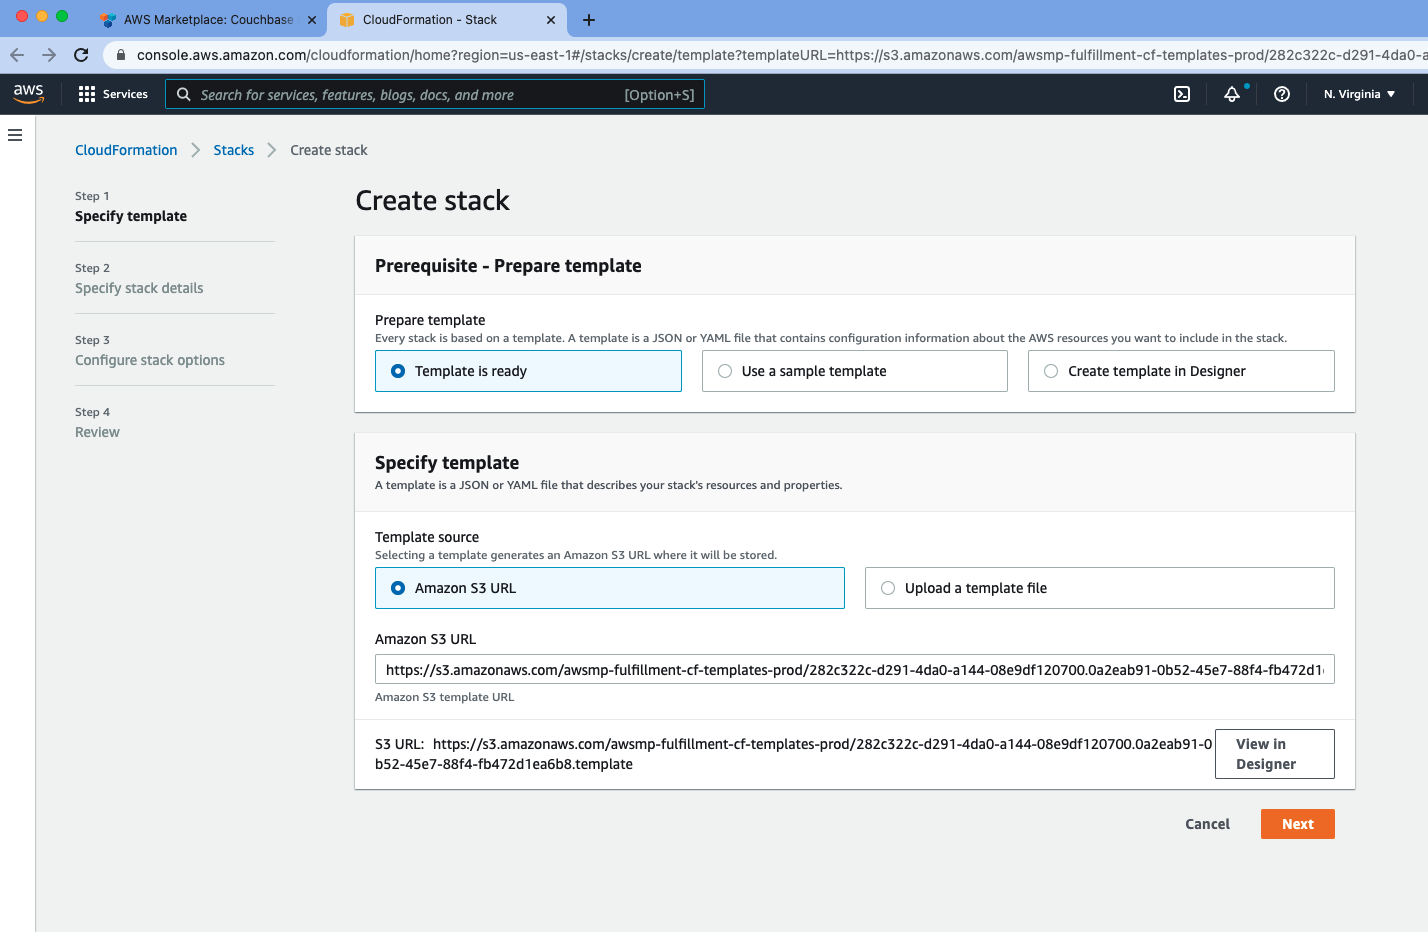
-
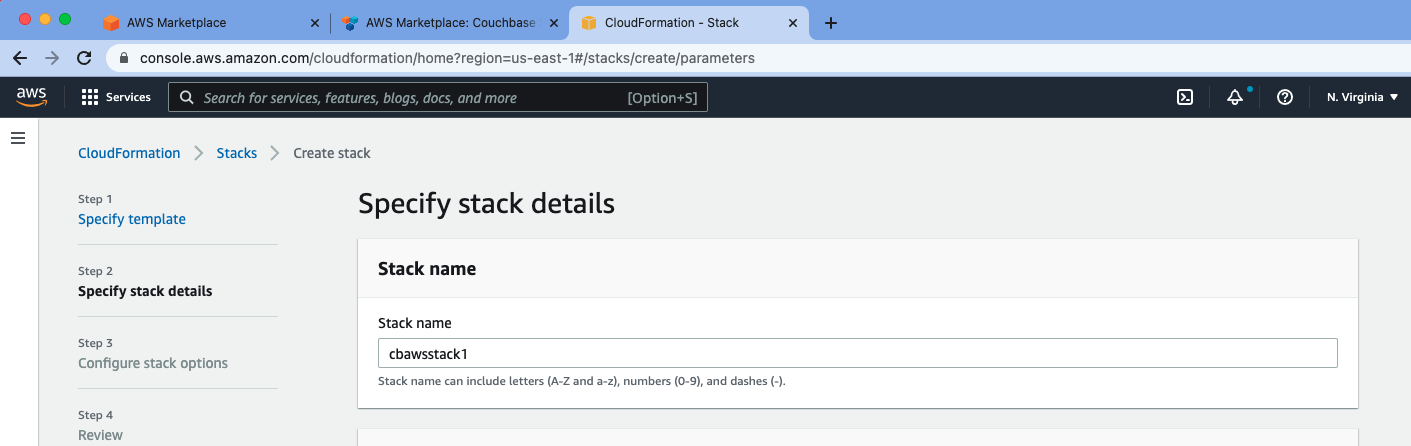
In the Specify stack details page Enter the stack name
-
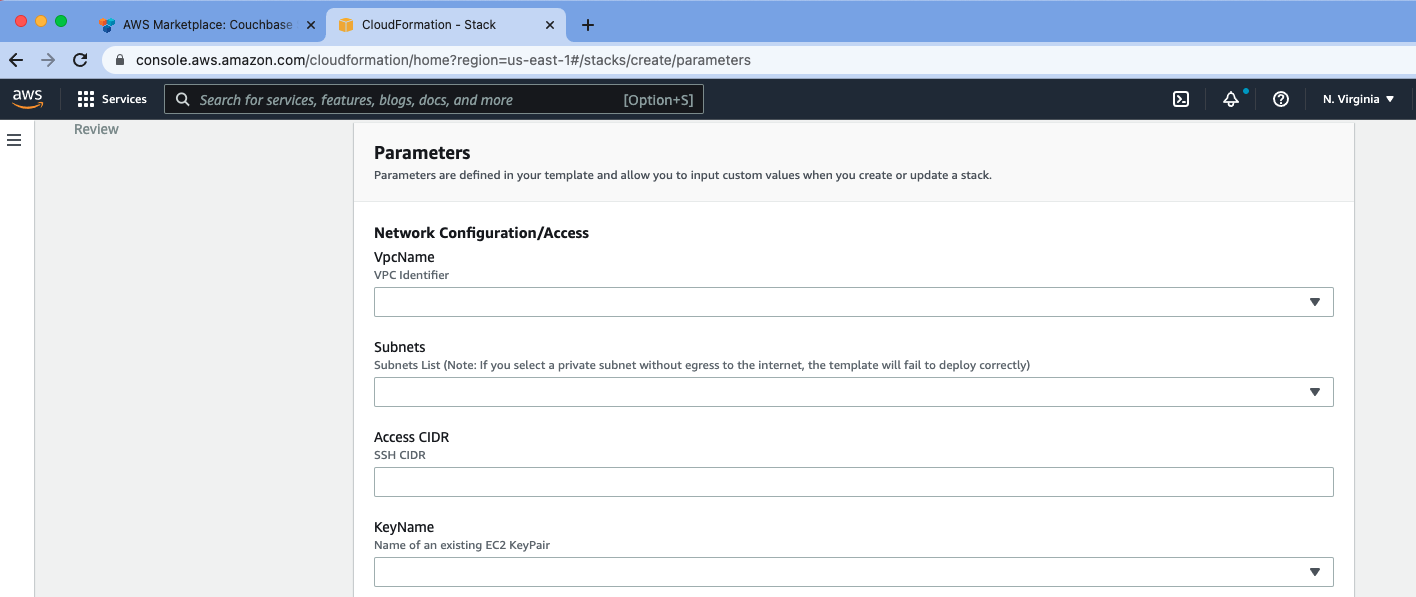
Enter the Network Configuration/Access parameters, specifically the VPC where you would like to deploy the software, list of subnets, CIDR range to permit ssh access to the EC2 instances where the software is installed and the key-value pair to access the EC2 instances.
-
Enter the Core Server Configuration parameters. Other than specifying the database user name and password, you can choose to use the default values defined in the AWS CloudFormation template or edit them.
The user name and password will be required to log in to the Couchbase Server Web Console later. 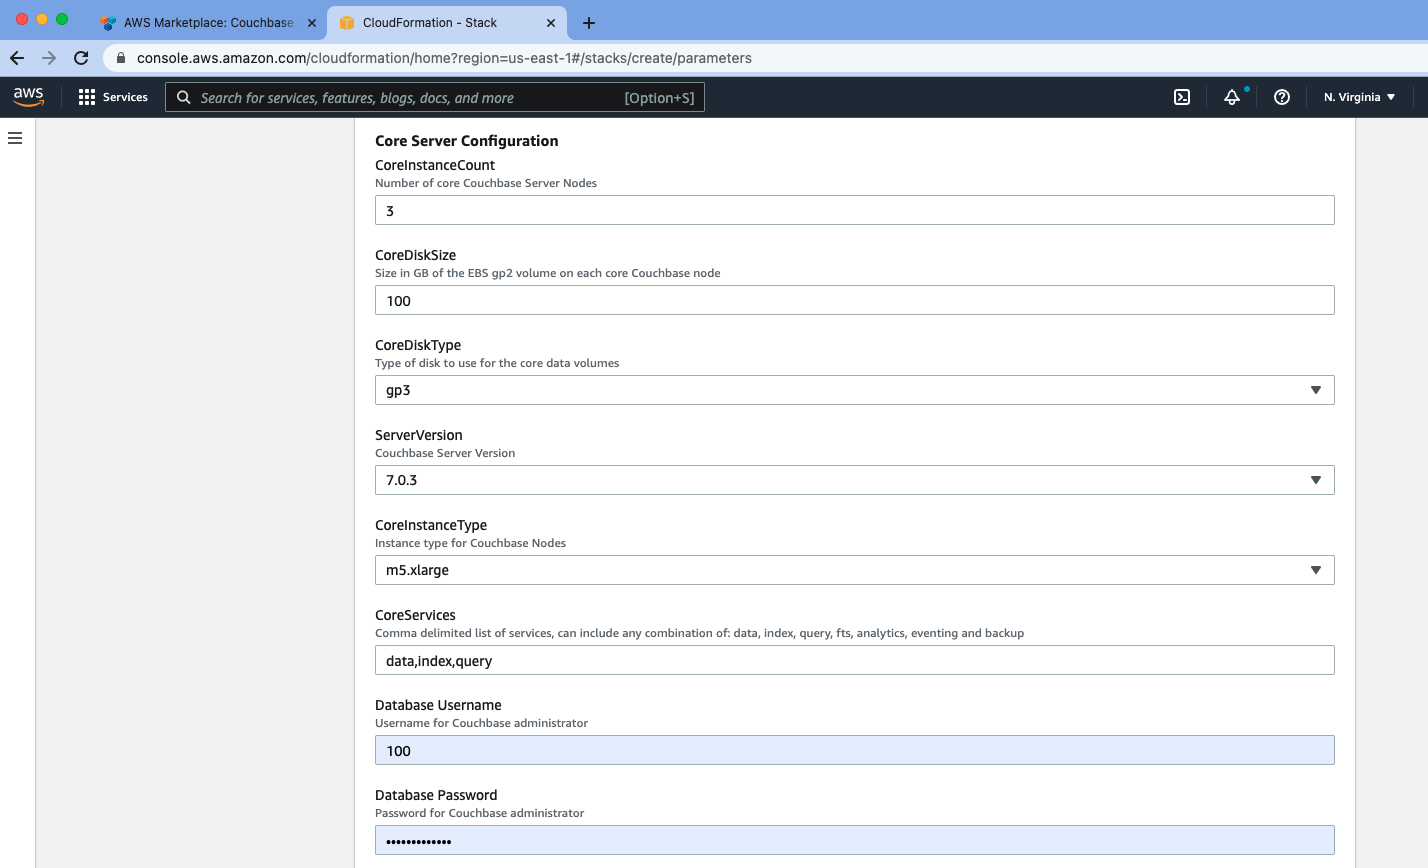
-
-
Optionally, if you plan to set up Couchbase Multi-Dimensional Scaling, you can customize the parameters in the Multi-Dimension Scaling Configuration section.
-
Then click Next.
-
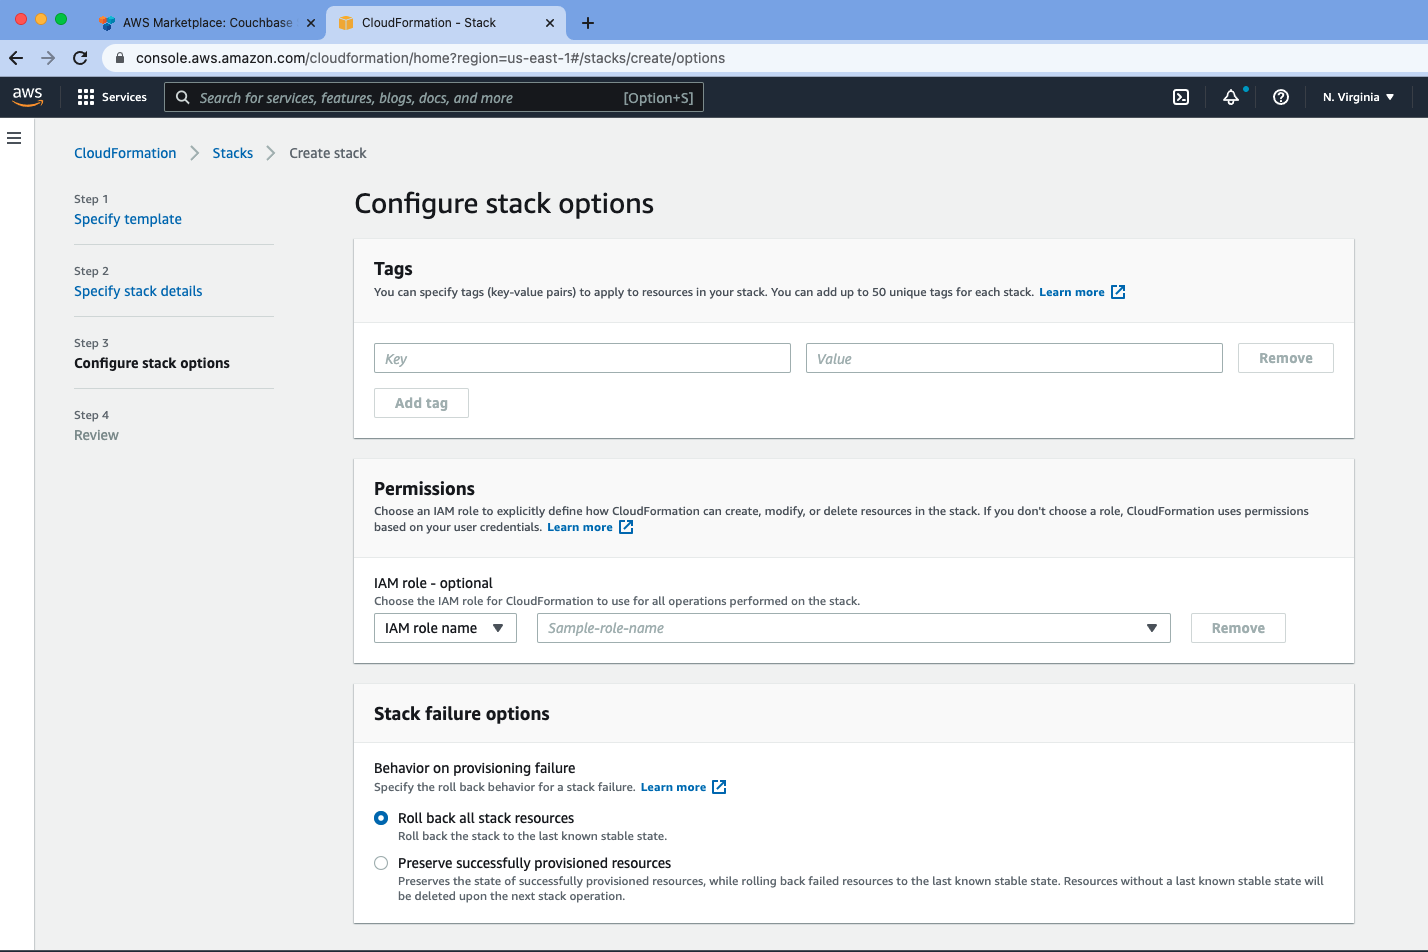
Optionally, in the Configure stack options page, you can specify tags for resources and other options in your stack and the required permissions. Click Next.
-
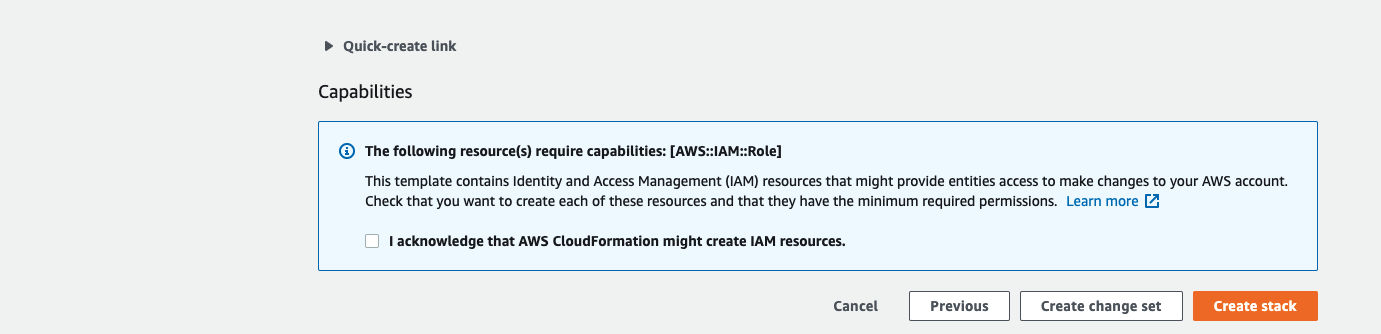
Acknowledge that AWS CloudFormation may create IAM resources that provide entities access to make changes to your AWS account and click Create.
-
The stack creation takes about 10 minutes to complete and the status is displayed on the screen. After the process is completed, you should see a
CREATE_COMPLETEstatus.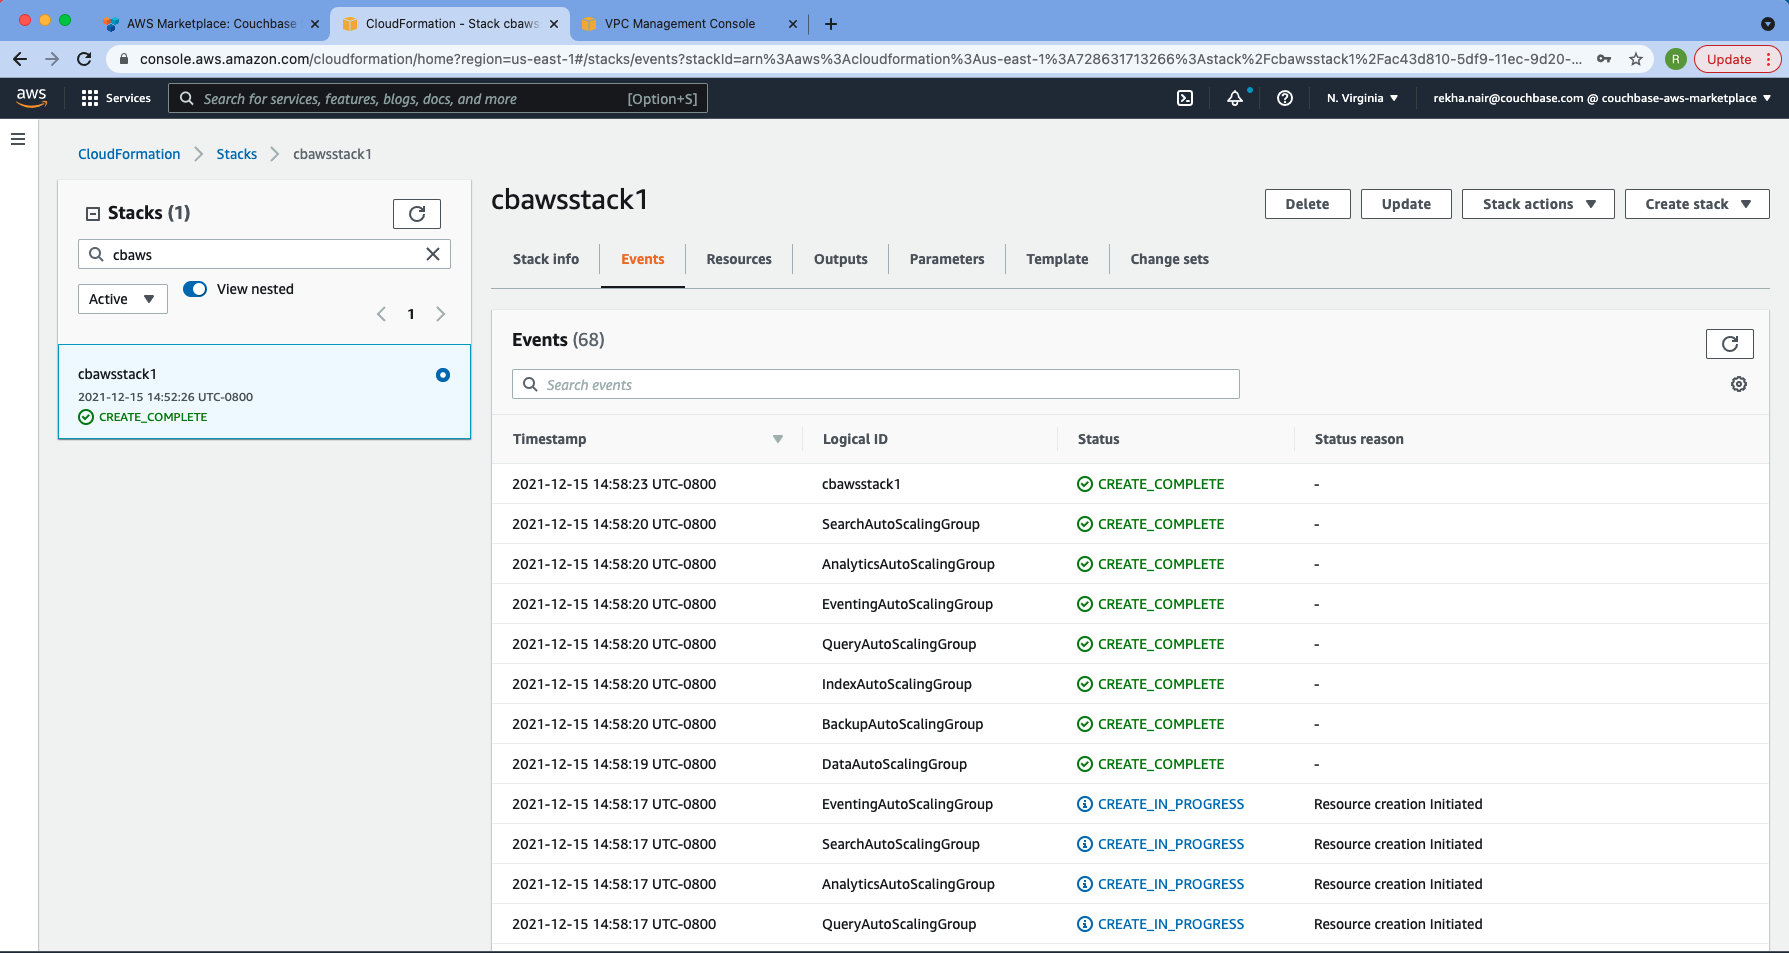
Logging in to Your Couchbase Cluster
After the deployment is completed, you can explore the resources created from the AWS EC2 dashboard.
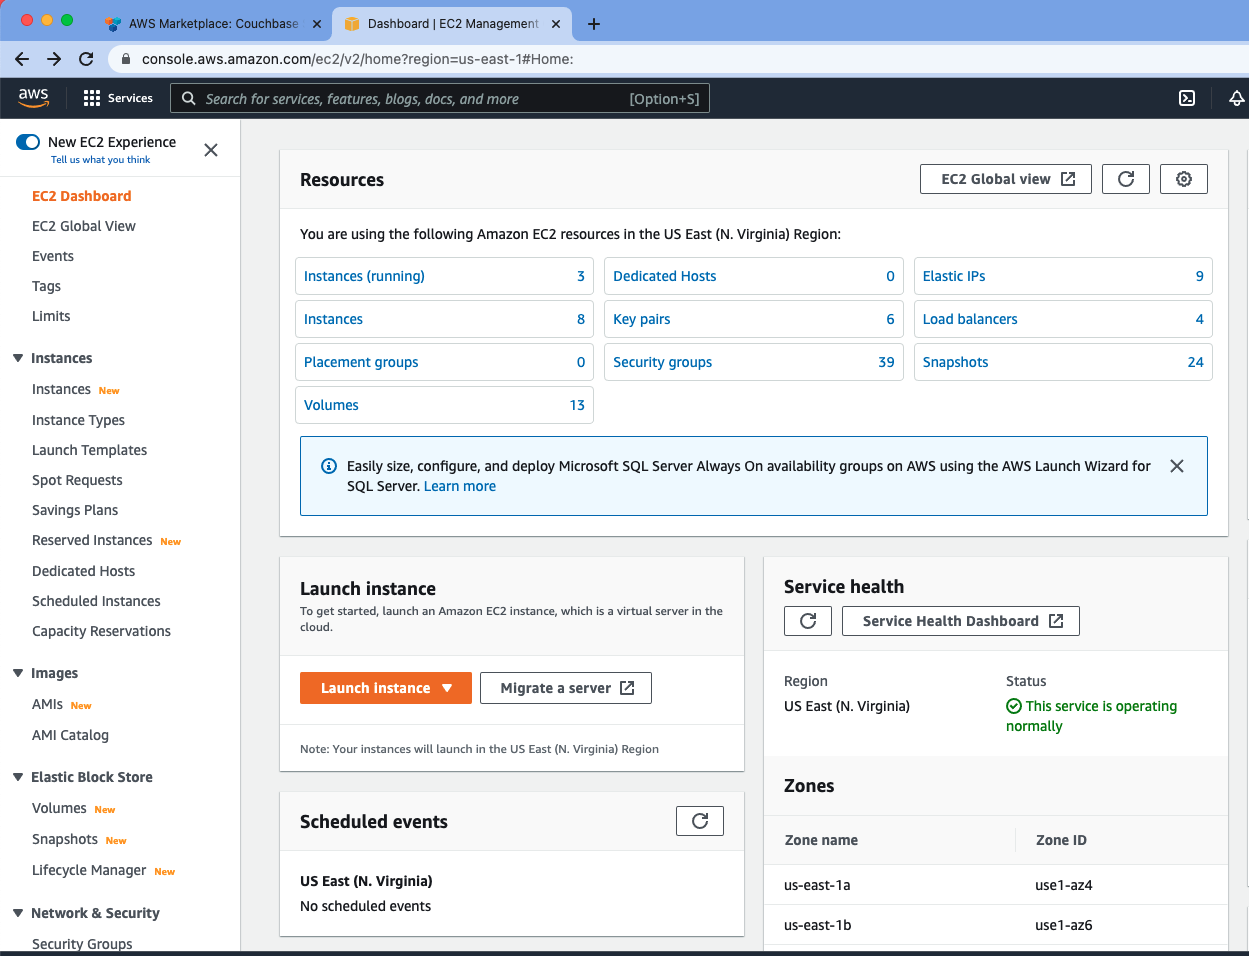
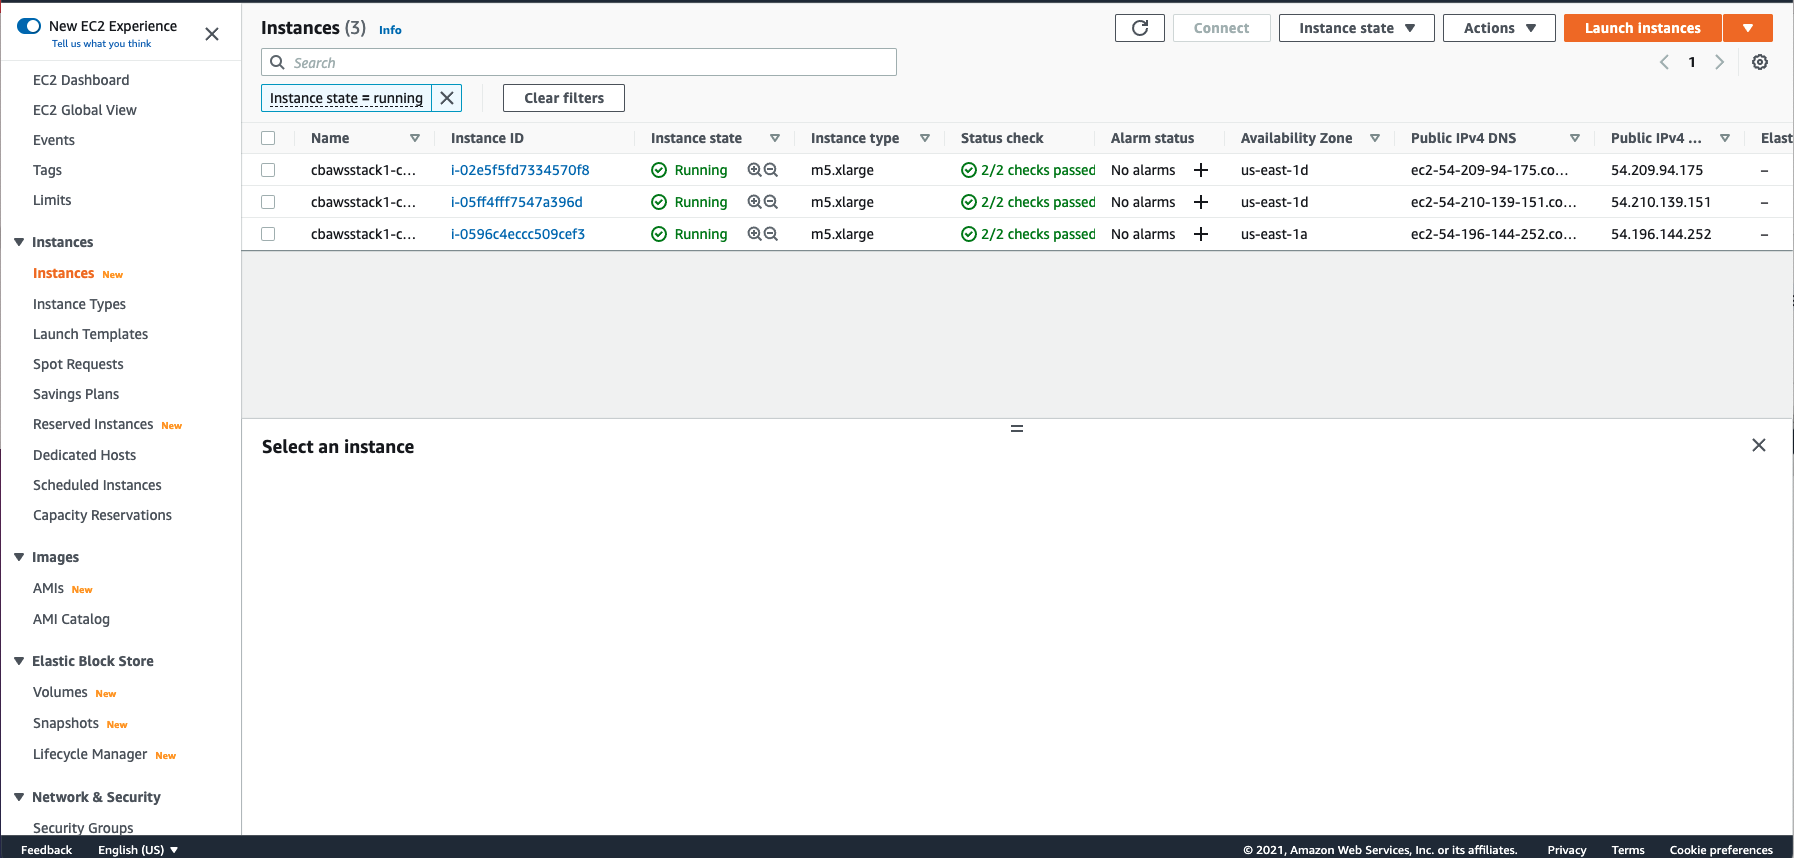
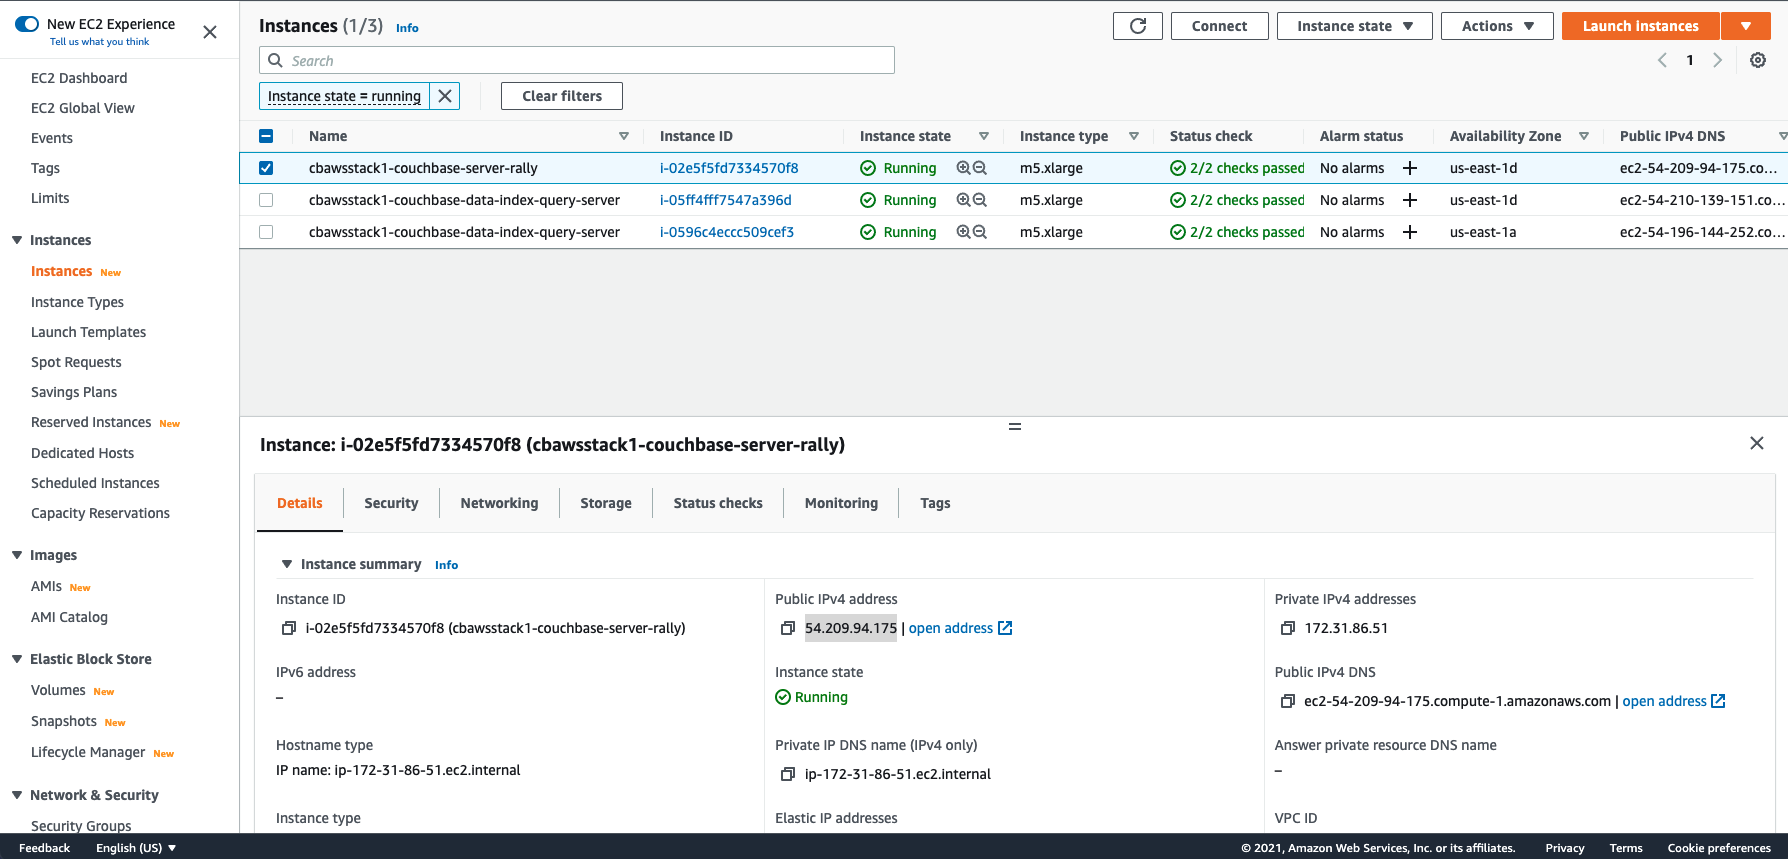
Click Instances(running) under Resources to view the running instances of Couchbase Server. You can select a particular instance to view details such as the instance ID, state, IPv4 Public IP, and so on.
-
This step describes how to log in to the Couchbase Server Web Console.
-
From the AWS EC2 console, select a running Couchbase Server Instance and copy the IPv4 Public IP.
-
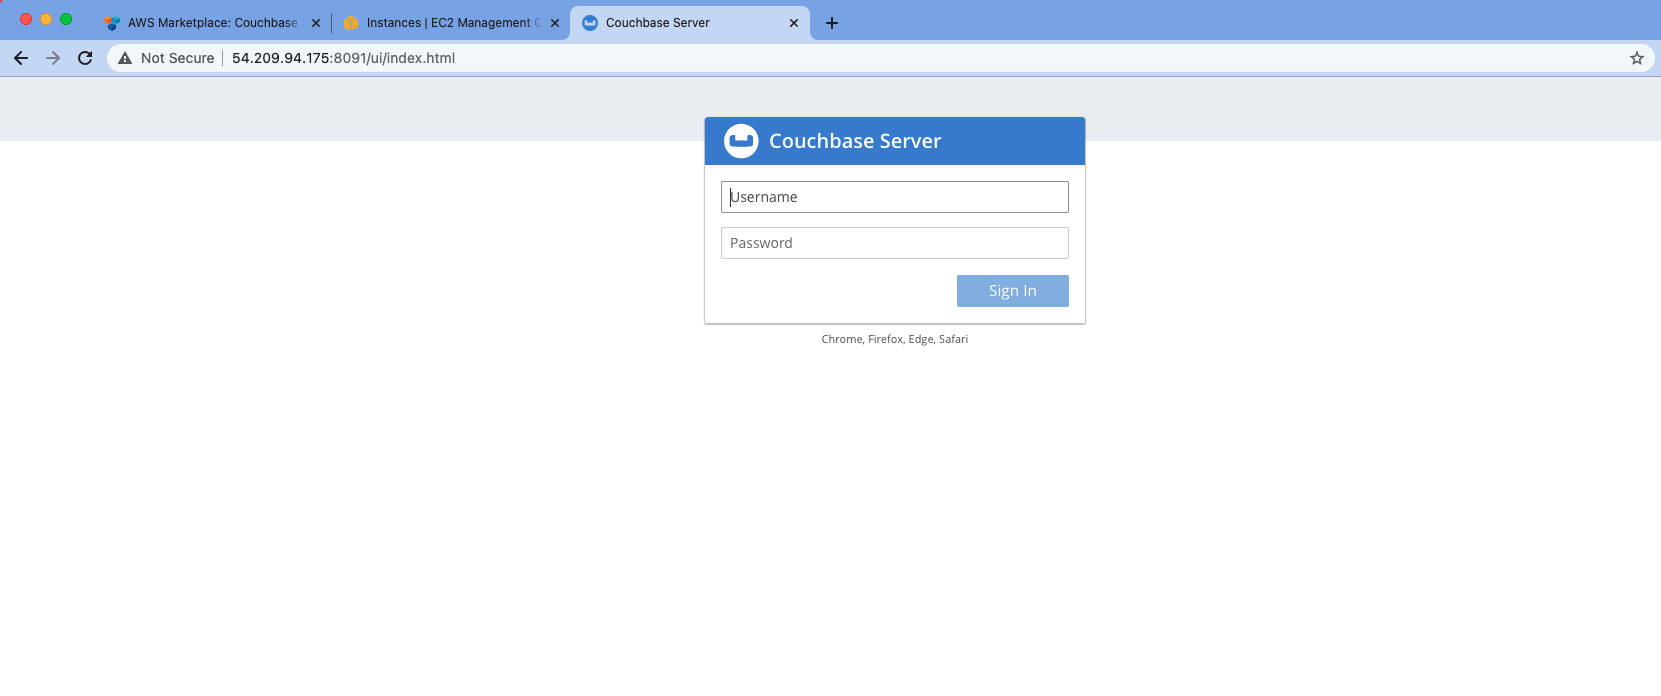
Open a browser tab and enter the copied IPv4 Public IP along with port 8091 as <ipv4-public-ip>:8091 to open the Couchbase Server Web Console.
-
Enter the database administrator user name and password you configured when creating the stack to sign in.
-
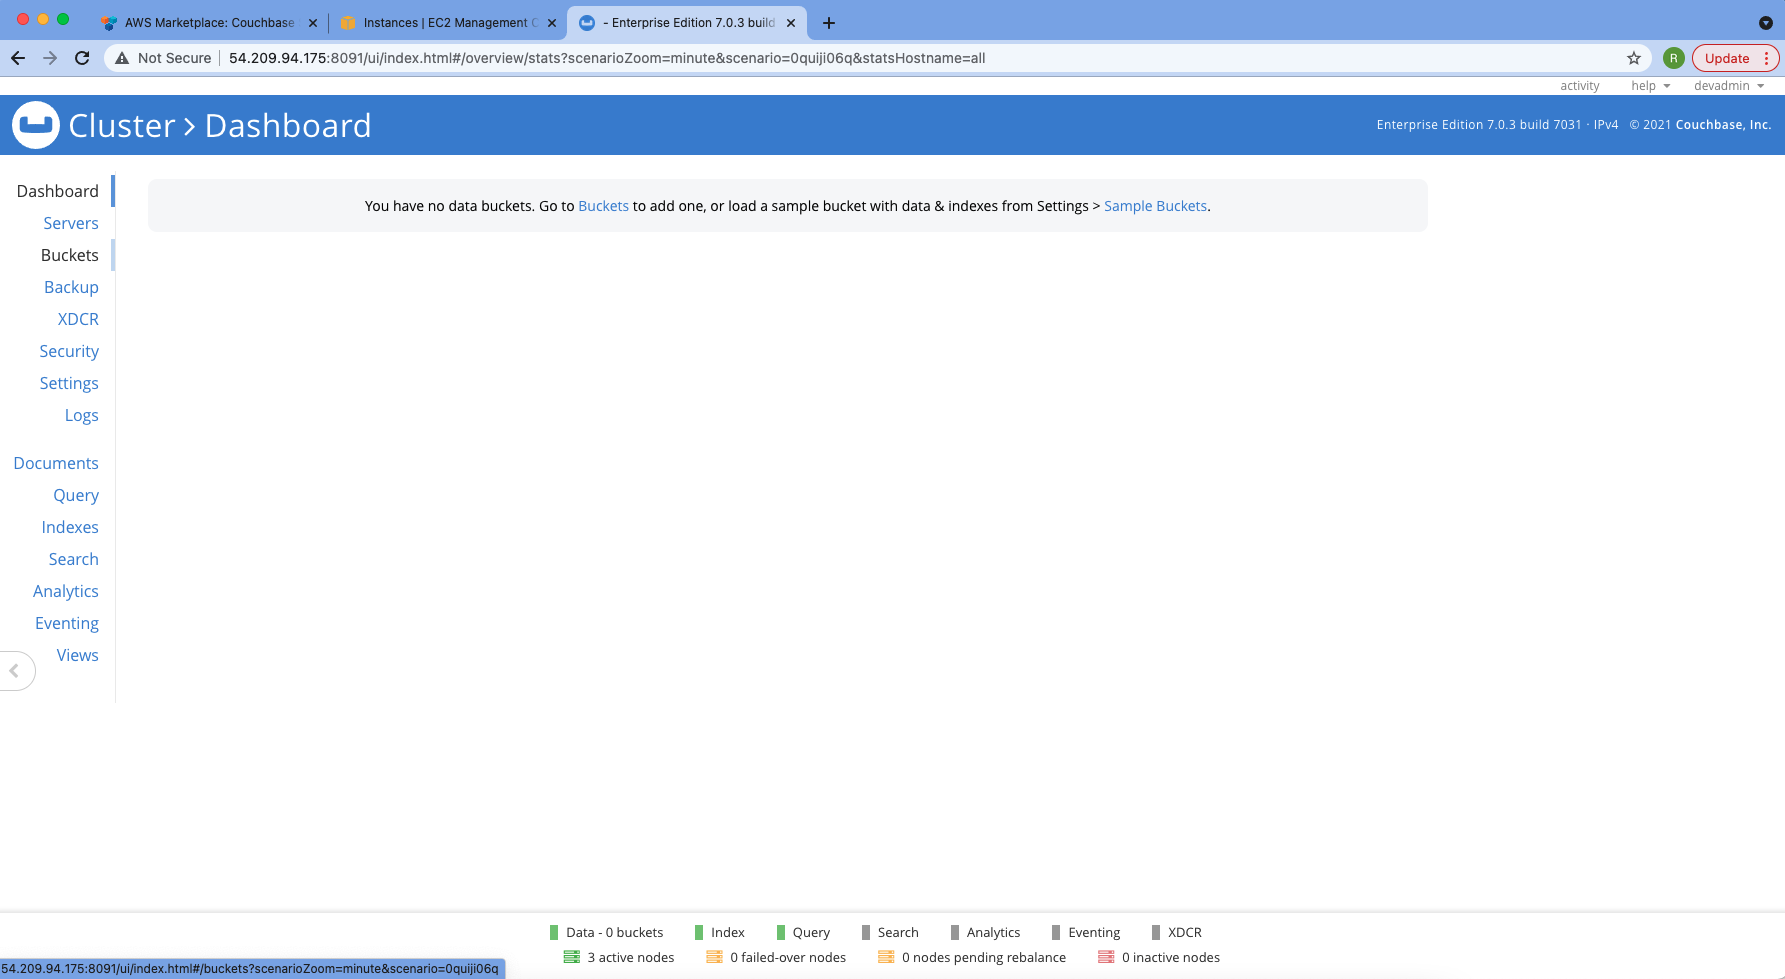
Once you log in successfully, you can see the status of your Couchbase Server cluster on the dashboard.
Click the Servers tab to explore the sever nodes that have been created.

-