Security

      +

      User Creation

      User is created via the Travel sample web app. When a user is created, a corresponding user profile document is created on Couchbase Server associated with the user. In addition, the web app automatically registers the user with the Sync Gateway via the Sync Gateway user admin REST endpoint

      The Sync Gateway user corresponds to users who are authenticated to replicate with the Sync Gateway and are different from the RBAC users created on Couchbase Server.
      Try it out (Web App)
      1. Access the Travel Web App URL in the browser. This URL would be http://localhost:8080 if you installed the web app manually or via docker container. If you used the Cloud install, please access the cloud instance of the web app.

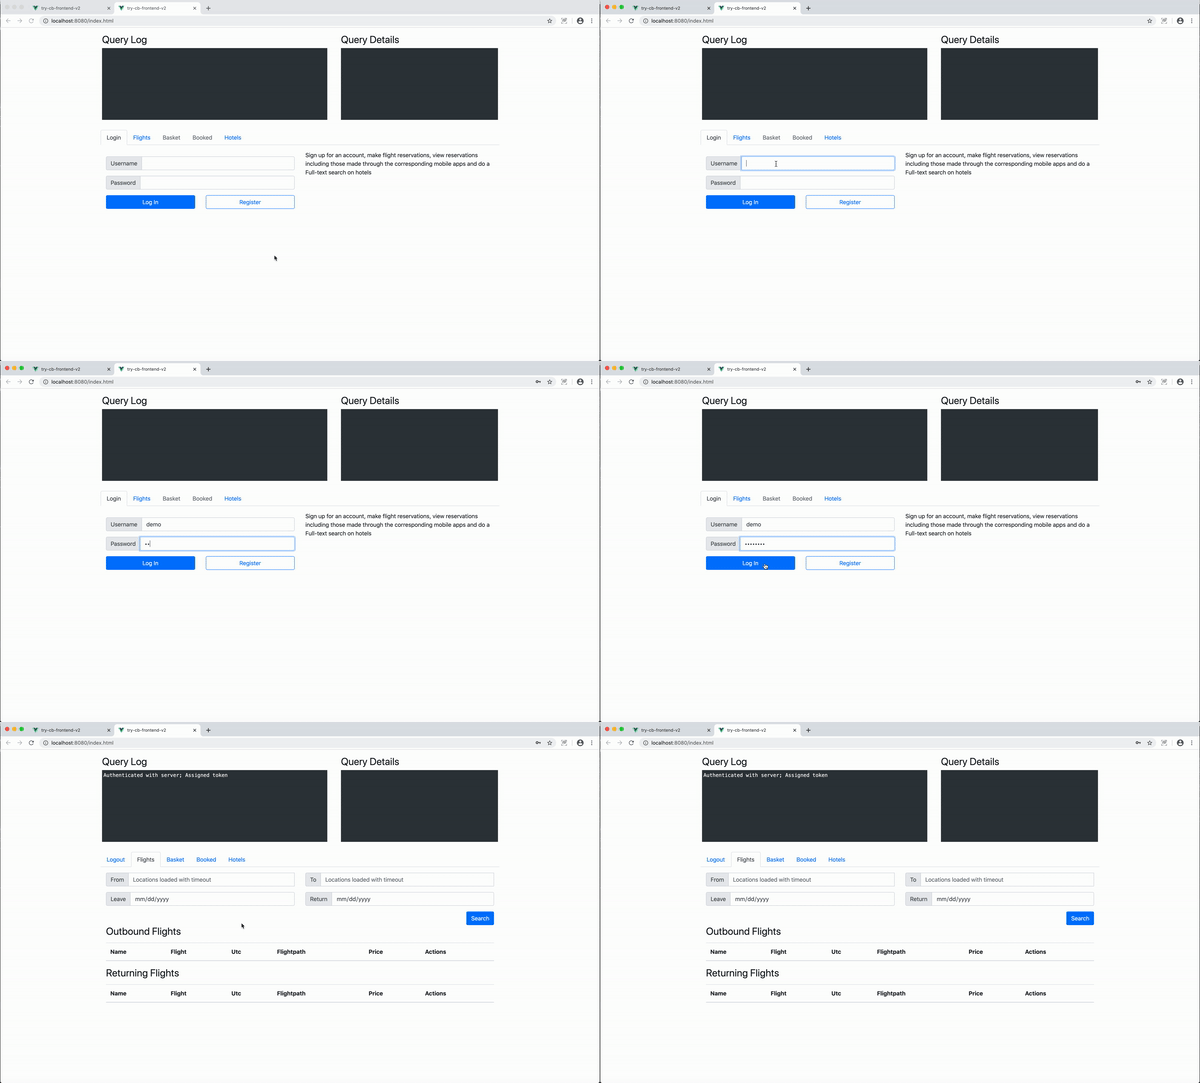
      2. Create a new user by entering "demo" as the username and "password" for the password. Click on the "Register" button

      3. You should be logged into the web app. There should be nothing created for the user.

      web user signup
      Try it out (Couchbase Server)
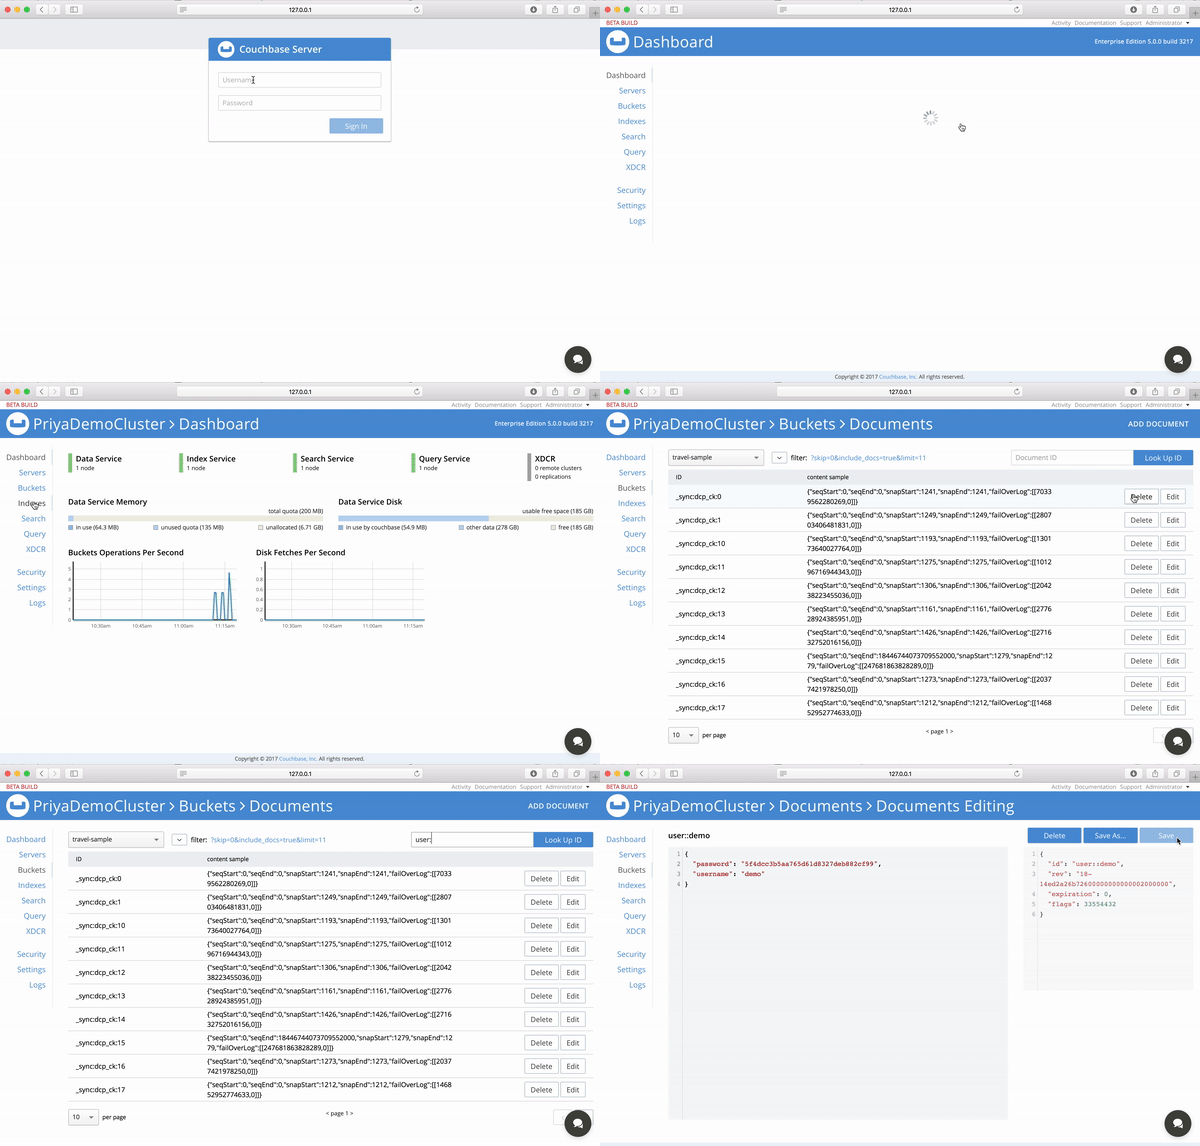
      1. Access the Couchbase Server URL in the browser. This URL would be http://localhost:8091 if you installed the server manually or via docker container. If you used the Cloud install, please access the cloud instance of the server.

      2. Log in with Administrator credentials that you set up during the installation of Couchbase Server.

      3. Choose "Buckets" in the Navigation pane on the left.

      4. In the box labelled "Document ID", enter "user::demo" (note: there are two colons) — see: Figure 1

      5. You should see the user document that was created when you signed up via the web app.

      6. Confirm that the "username" that you see is "demo"

      7. Now look for a document with Id "_sync:user:demo". This is the document that is created by the Sync Gateway when you register the user

      cb user auth
      Figure 1. Retrieve User Data

      Access Control

      In this lesson you’ll be introduced to Sync Gateway, our secure web gateway. Sync Gateway is an Internet-facing synchronization mechanism that exposes a web interface which provides - Data Synchronization and Routing - Authorization and Access Control

      In this chapter, we will focus on Authorization and Access Control. We will discuss Data Synchronization and Routing in the Sync chapter.

      In the "Installation" guide, we walked you through the steps to launch Sync Gateway with a specific config file. The Sync Gateway configuration file determines the runtime behavior of Sync Gateway.

      Open the sync-gateway-config-travelsample.json file located at https://github.com/couchbaselabs/mobile-travel-sample/blob/master/sync-gateway-config-travelsample.json. The users section defines the hardcoded list of sync gateway users who are granted access to replicate with the Sync Gateway. Hardcoding list of users is an alternative to creating Sync Gateway users dynamically as discussed in the User Creation section. In the config file, we have a hardcoded user named "admin" with password of "password" that is granted access to the "*" channel .

      "users": {
        "admin": {"password": "password", "admin_channels": ["*"]}
      }
      • The sync function in the config file is a JavaScript function which implements the access control logic. The access method is used to grant the current user access to specific channel. We will discuss channels in detail in the Sync section. For now, it is sufficient to note that documents are associated with channel(s). So access to a document is controlled by controlling the access rights to a channel.

        // Give user read access to channel
        if (!isDelete()) {
        // Deletion of user document is essentially deletion of user
        access(username,"channel." + username)
      }
      Try it out
      1. Run the following command in your terminal. If you did a cloud based install, please replace localhost in the command below with the IP Address of the cloud instance of the Sync Gateway.

        curl -X GET http://localhost:4984/travel-sample/
      2. Confirm that you see an "Unauthorized" error from the server

      3. Run the following command in your terminal. The authorization header is base64 encoded value of "demo:password". If you did a cloud based install, please replace localhost in the command below with the IP Address of the cloud instance of the Sync Gateway.

        curl -X GET http://localhost:4984/travel-sample/ -H 'authorization: Basic ZGVtbzpwYXNzd29yZA=='
      4. Confirm that you see the details of the "travel-sample" database and "state" is "online"