AWS PrivateLink Connection
- Capella Analytics
- how-to
Add an AWS PrivateLink connection that connects your Amazon Web Service (AWS) network with a Capella Analytics cluster.
This connection can reduce latency and egress costs for applications hosted in the same region.
Prerequisites
To use AWS PrivateLink with Capella Analytics, you need:
-
One of the following Capella roles:
-
Organization Owner
-
Project Owner
-
-
A Capella Analytics cluster in your project with multiple availability zones.
-
Access to the Amazon VPC console and information about your AWS network, including:
-
AWS VPC ID
-
AWS Subnet ID of each subnet
-
-
The AWS Command Line Interface (CLI) installed and configured.
Set Up the Private Endpoint
| Enabling private endpoints bills your account hourly for AWS PrivateLink until you disable this option. |
To add a connection using AWS PrivateLink, you use both the Capella UI and the AWS command line interface. Use an authorized account to access each one.
-
In the Capella UI, select the Capella Analytics tab and then select a cluster.
-
Select .
-
Click Enable Private Endpoints.
It can take several minutes for Capella to enable private endpoints. When private endpoints are available, the page shows all the controls you need to manage private endpoints in Capella.
-
Click Add Private Endpoint.
-
Complete the Private Endpoint Details fields.
You can use the Amazon VPC console to locate most of this information. - VPC ID
-
The AWS VPC ID.
- Subnet IDs
-
Enter every Subnet ID in a comma-separated list.
-
Click Next.
-
Download the connection shell script provided by Capella.
-
In the AWS CLI, run the downloaded shell script.
This script contains the command to create the private endpoint in your AWS VPC. When successful, the provisioning details output appears as follows:
{ "VpcEndpoint": { "VpcEndpointId": "vpce-06da68c605432752f", "VpcEndpointType": "Interface", "VpcId": "vpc-08bf9fdbf7174a563", "ServiceName": "com.amazonaws.vpce.us-west-2.vpce-svc-015986e75057cc4e6", "State": "pendingAcceptance", "RouteTableIds": [], "SubnetIds": [ "subnet-05f92391c3bb6b0fd", "subnet-0b70e5c9e897f7ef0" ], "Groups": [ { "GroupId": "sg-01505951c7752141d", "GroupName": "default" } ], "PrivateDnsEnabled": false, "RequesterManaged": false, "NetworkInterfaceIds": [ "eni-08cb66b65644ac32e", "eni-0c824869e81a21fac" ], "DnsEntries": [ { "DnsName": "vpce-06da68c605432752f-1zrggw92.vpce-svc-015986e75057cc4e6.us-west-2.vpce.amazonaws.com", "HostedZoneId": "Z1YSA3EXCYUU9Z" }, { "DnsName": "vpce-06da68c605432752f-1zrggw92-us-west-2b.vpce-svc-015986e75057cc4e6.us-west-2.vpce.amazonaws.com", "HostedZoneId": "Z1YSA3EXCYUU9Z" }, { "DnsName": "vpce-06da68c605432752f-1zrggw92-us-west-2a.vpce-svc-015986e75057cc4e6.us-west-2.vpce.amazonaws.com", "HostedZoneId": "Z1YSA3EXCYUU9Z" } ], "CreationTimestamp": "2022-11-15T18:50:45.062000+00:00", "OwnerId": "429712224361" } } -
In the Capella UI, the new endpoint appears with a Pending Acceptance status. Click Accept.
-
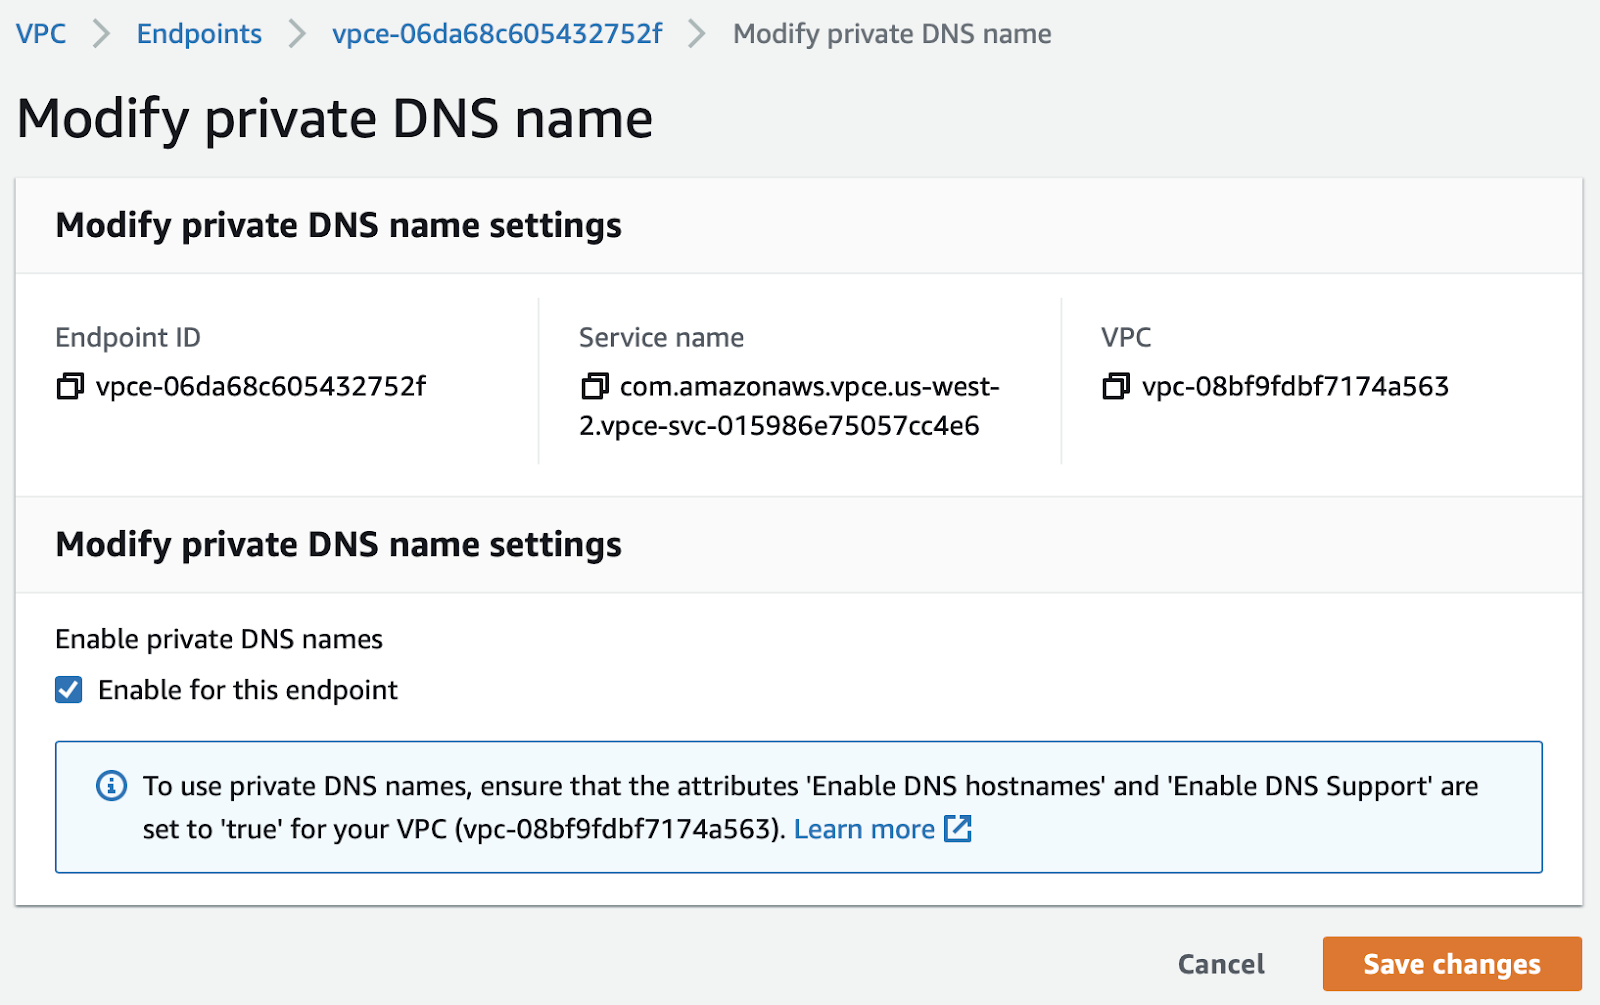
In the AWS VPC console, enable private DNS names for the new endpoint:
-
In the navigation pane, click Endpoints.
-
With your endpoint selected, click .
-
On the Modify private DNS name screen, select Enable for this endpoint:
-
Click Save changes.
-
-
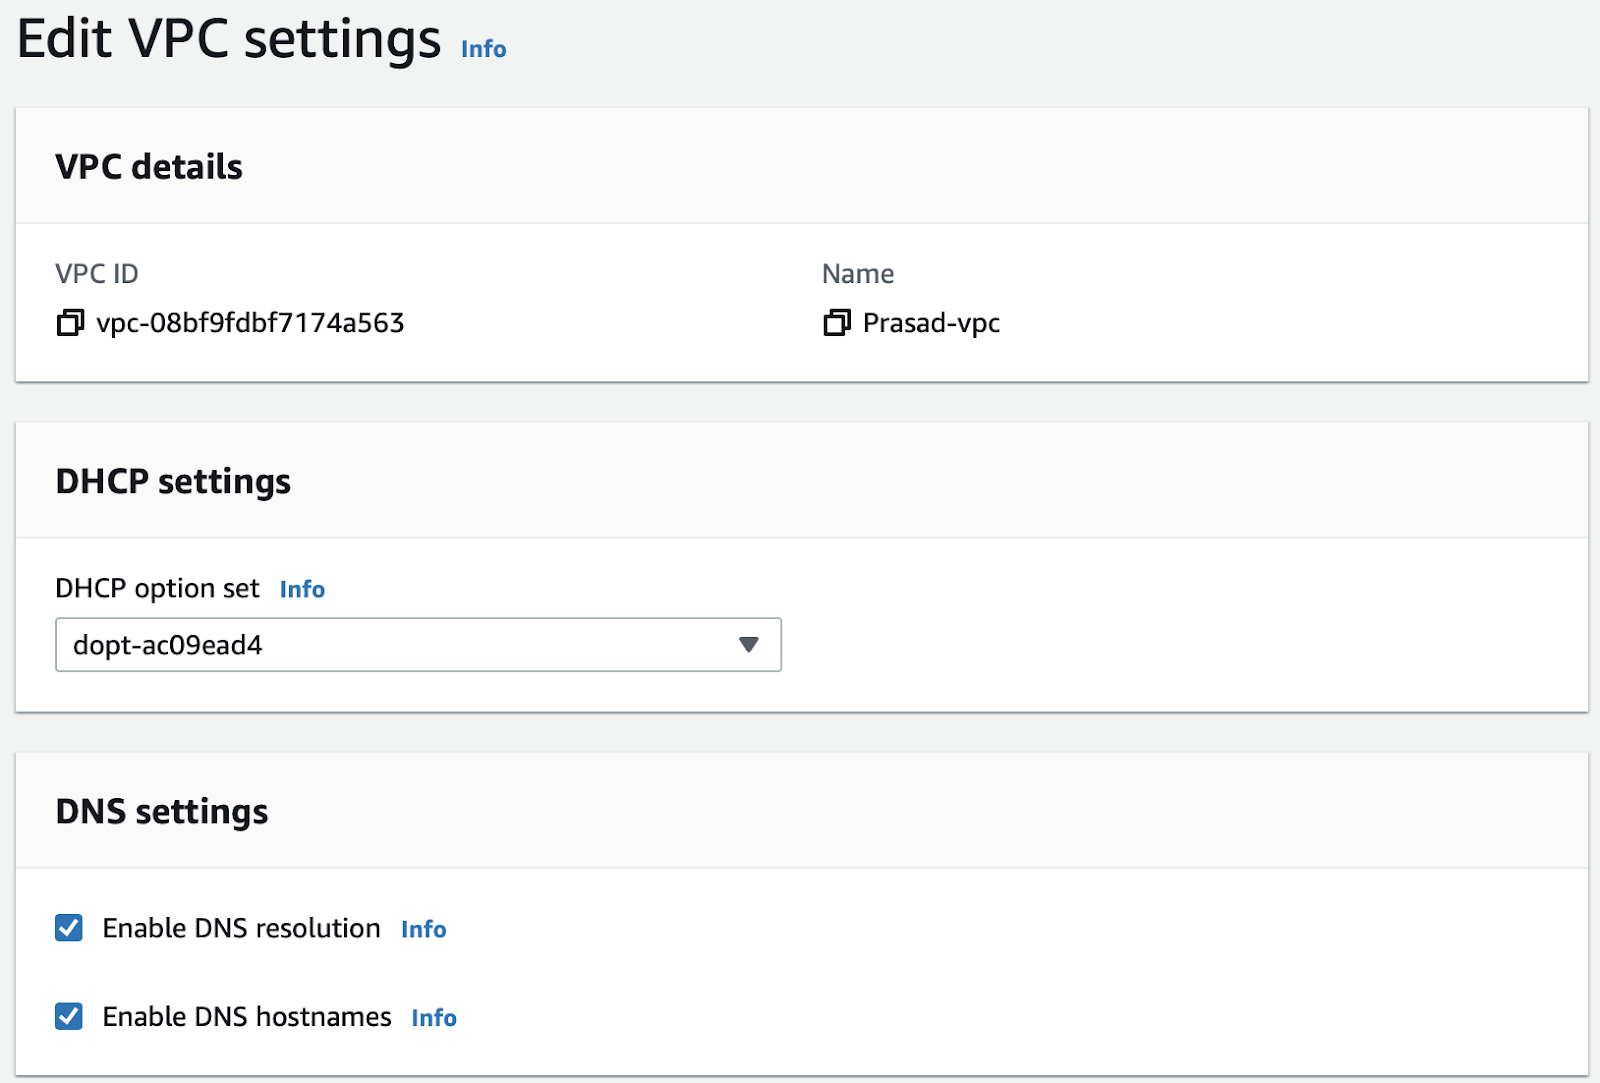
In the AWS VPC console, edit your VPC settings:
-
In the navigation pane, click Your VPCs.
-
With your VPC selected, click .
-
In the Edit VPC settings dialog, select Enable DNS resolution and Enable DNS hostnames:
-
Click Save.
-
-
In the AWS VPC console, add an inbound rule for the private endpoint:
-
With the Your VPCs page open, find and record the IPv4 CIDR value for your VPC. You need this for later steps. In this example, it’s
10.0.0.0/16: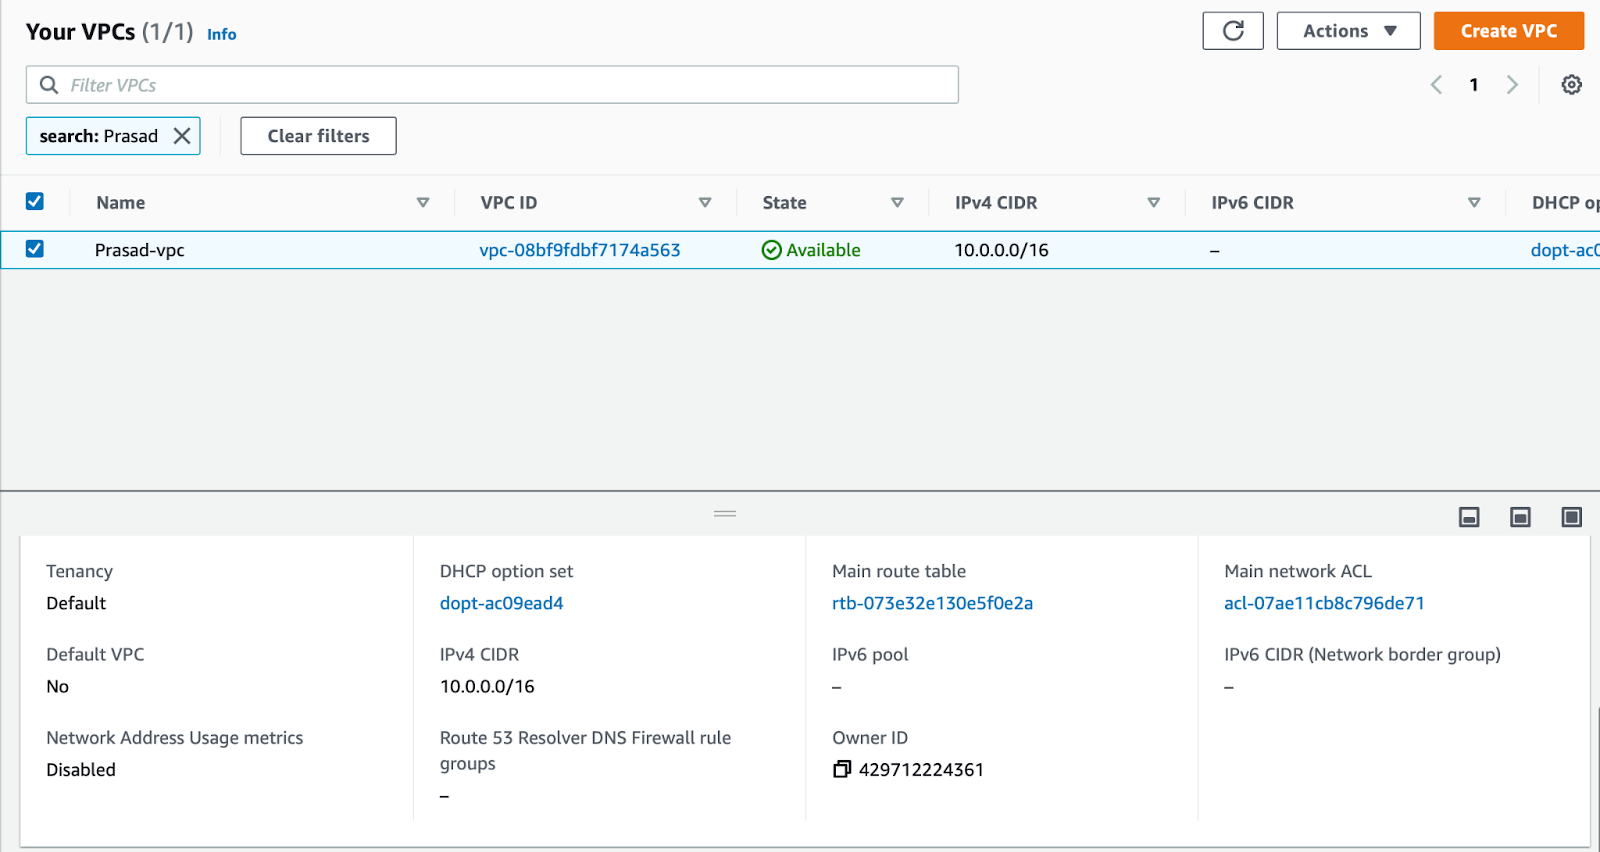
-
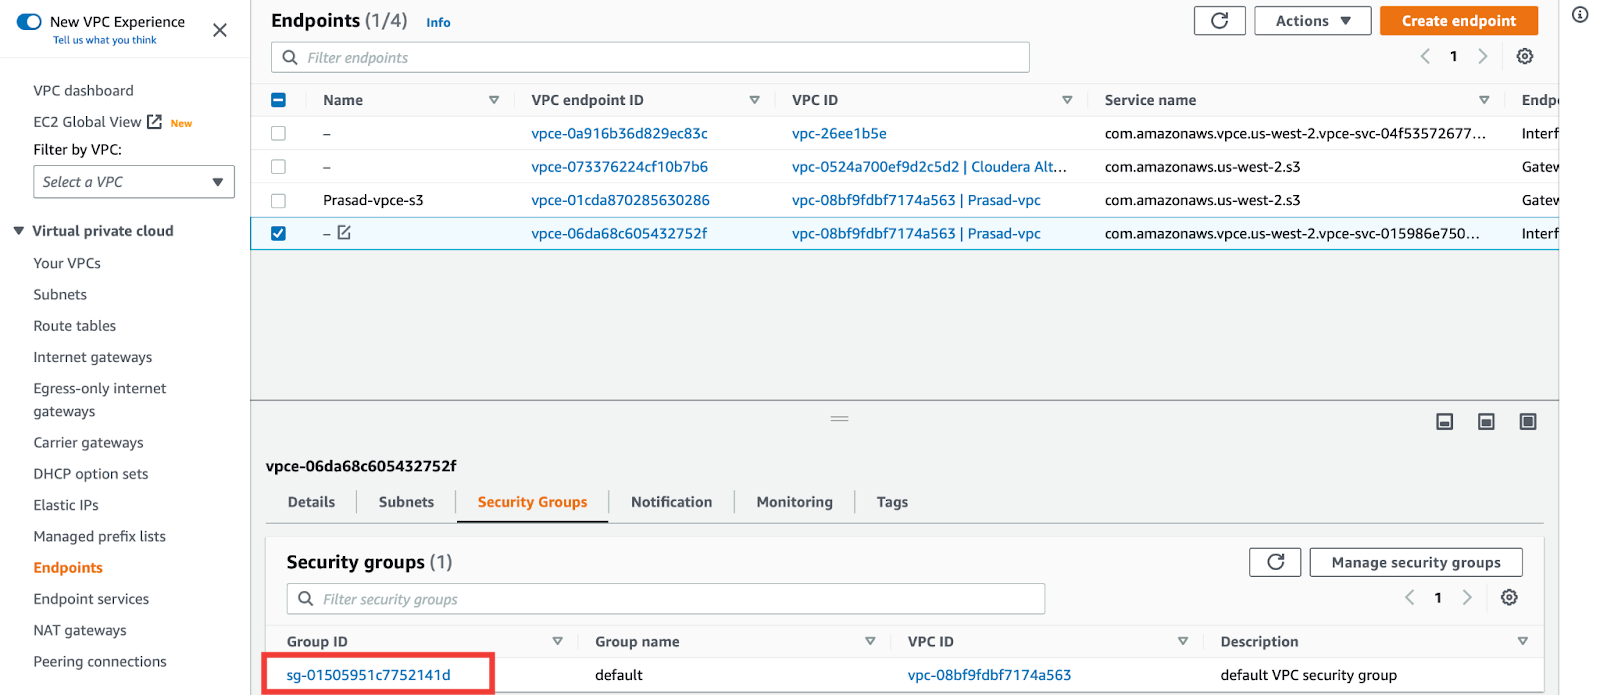
In the navigation pane, click Endpoints.
-
Select your endpoint.
-
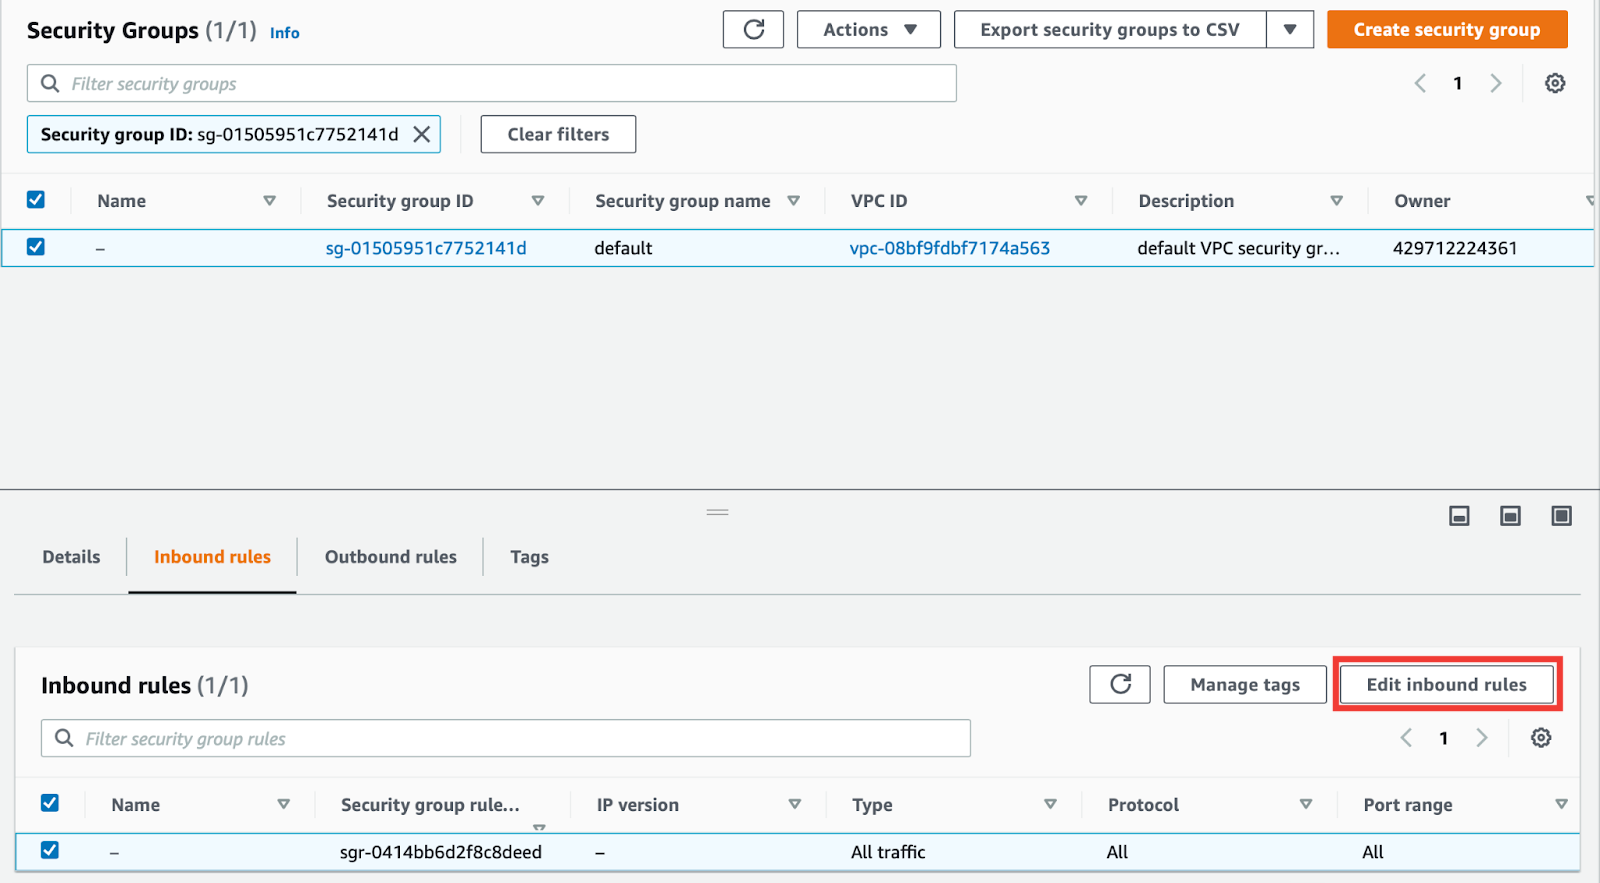
In the Security groups pane, click the Group ID link. This link is to your default VPC security group.
-
With the security group open to the Inbound rules pane, click Edit inbound rules.
-
In the Edit inbound rules dialog, add the VPC IPv4 CIDR you recorded earlier and use the following port ranges:
-
18091-18203
-
11207-11308
-
-
Click Save rules.
-
-
In the AWS VPC console, configure your network access control list (ACL) with an inbound rule:
-
In the navigation pane, click Network ACLs.
-
On the Network ACLs page, select the Network ACL associated with your VPC.
-
Click .
-
On the Edit inbound rules page, specify the following for a new inbound rule:
Field Value Source
Your VPC IPv4 CIDR.
For example:10.0.0.0/16 -
Click Save changes.
-
-
In the AWS VPC console, configure your network ACL with an outbound rule:
-
In the navigation pane, click Network ACLs.
-
Select the Network ACL associated with your VPC.
-
Click .
-
On the Edit outbound rules page, specify the following for the new outbound rule:
Field Value Type
Custom TCP
Port range
1024-65535Destination
Your VPC IPv4 CIDR.
For example:10.0.0.0/16 -
Click Save Changes.
-