Deploy Couchbase Server Using GCP Marketplace
Couchbase partners with Google to provide a packaged solution on GCP Marketplace. This solution is based on Google Deployment Manager templates that incorporate the latest features and best practices for deploying Couchbase Server on Google Cloud Platform.
Couchbase Server on GCP Marketplace provides one of the fastest and easiest ways to get up and running on Google Cloud Platform. Google Deployment Manager templates are developed in close collaboration with Google in order to adopt the latest features and best practices. These templates leverage Google’s globally flat network for extremely secure geographical replication.
Couchbase is available through GCP Marketplace with hourly pricing, or through a Bring Your Own License (BYOL) model.
Before You Begin
-
You need a Google account with access to Google Cloud Platform. If you don’t have one, sign up for one before proceeding.
-
You should review the best practices for deploying Couchbase Server on GCP.
The free trial version of GCP has limits on the number of resources that can be be deployed. You can proactively request quota adjustments from the Quotas page in the Cloud Platform Console.
Deploying Couchbase Enterprise
| The templates are provided as a starting point and may be customized as needed. Note that additional post deployment setup may be required. |
-
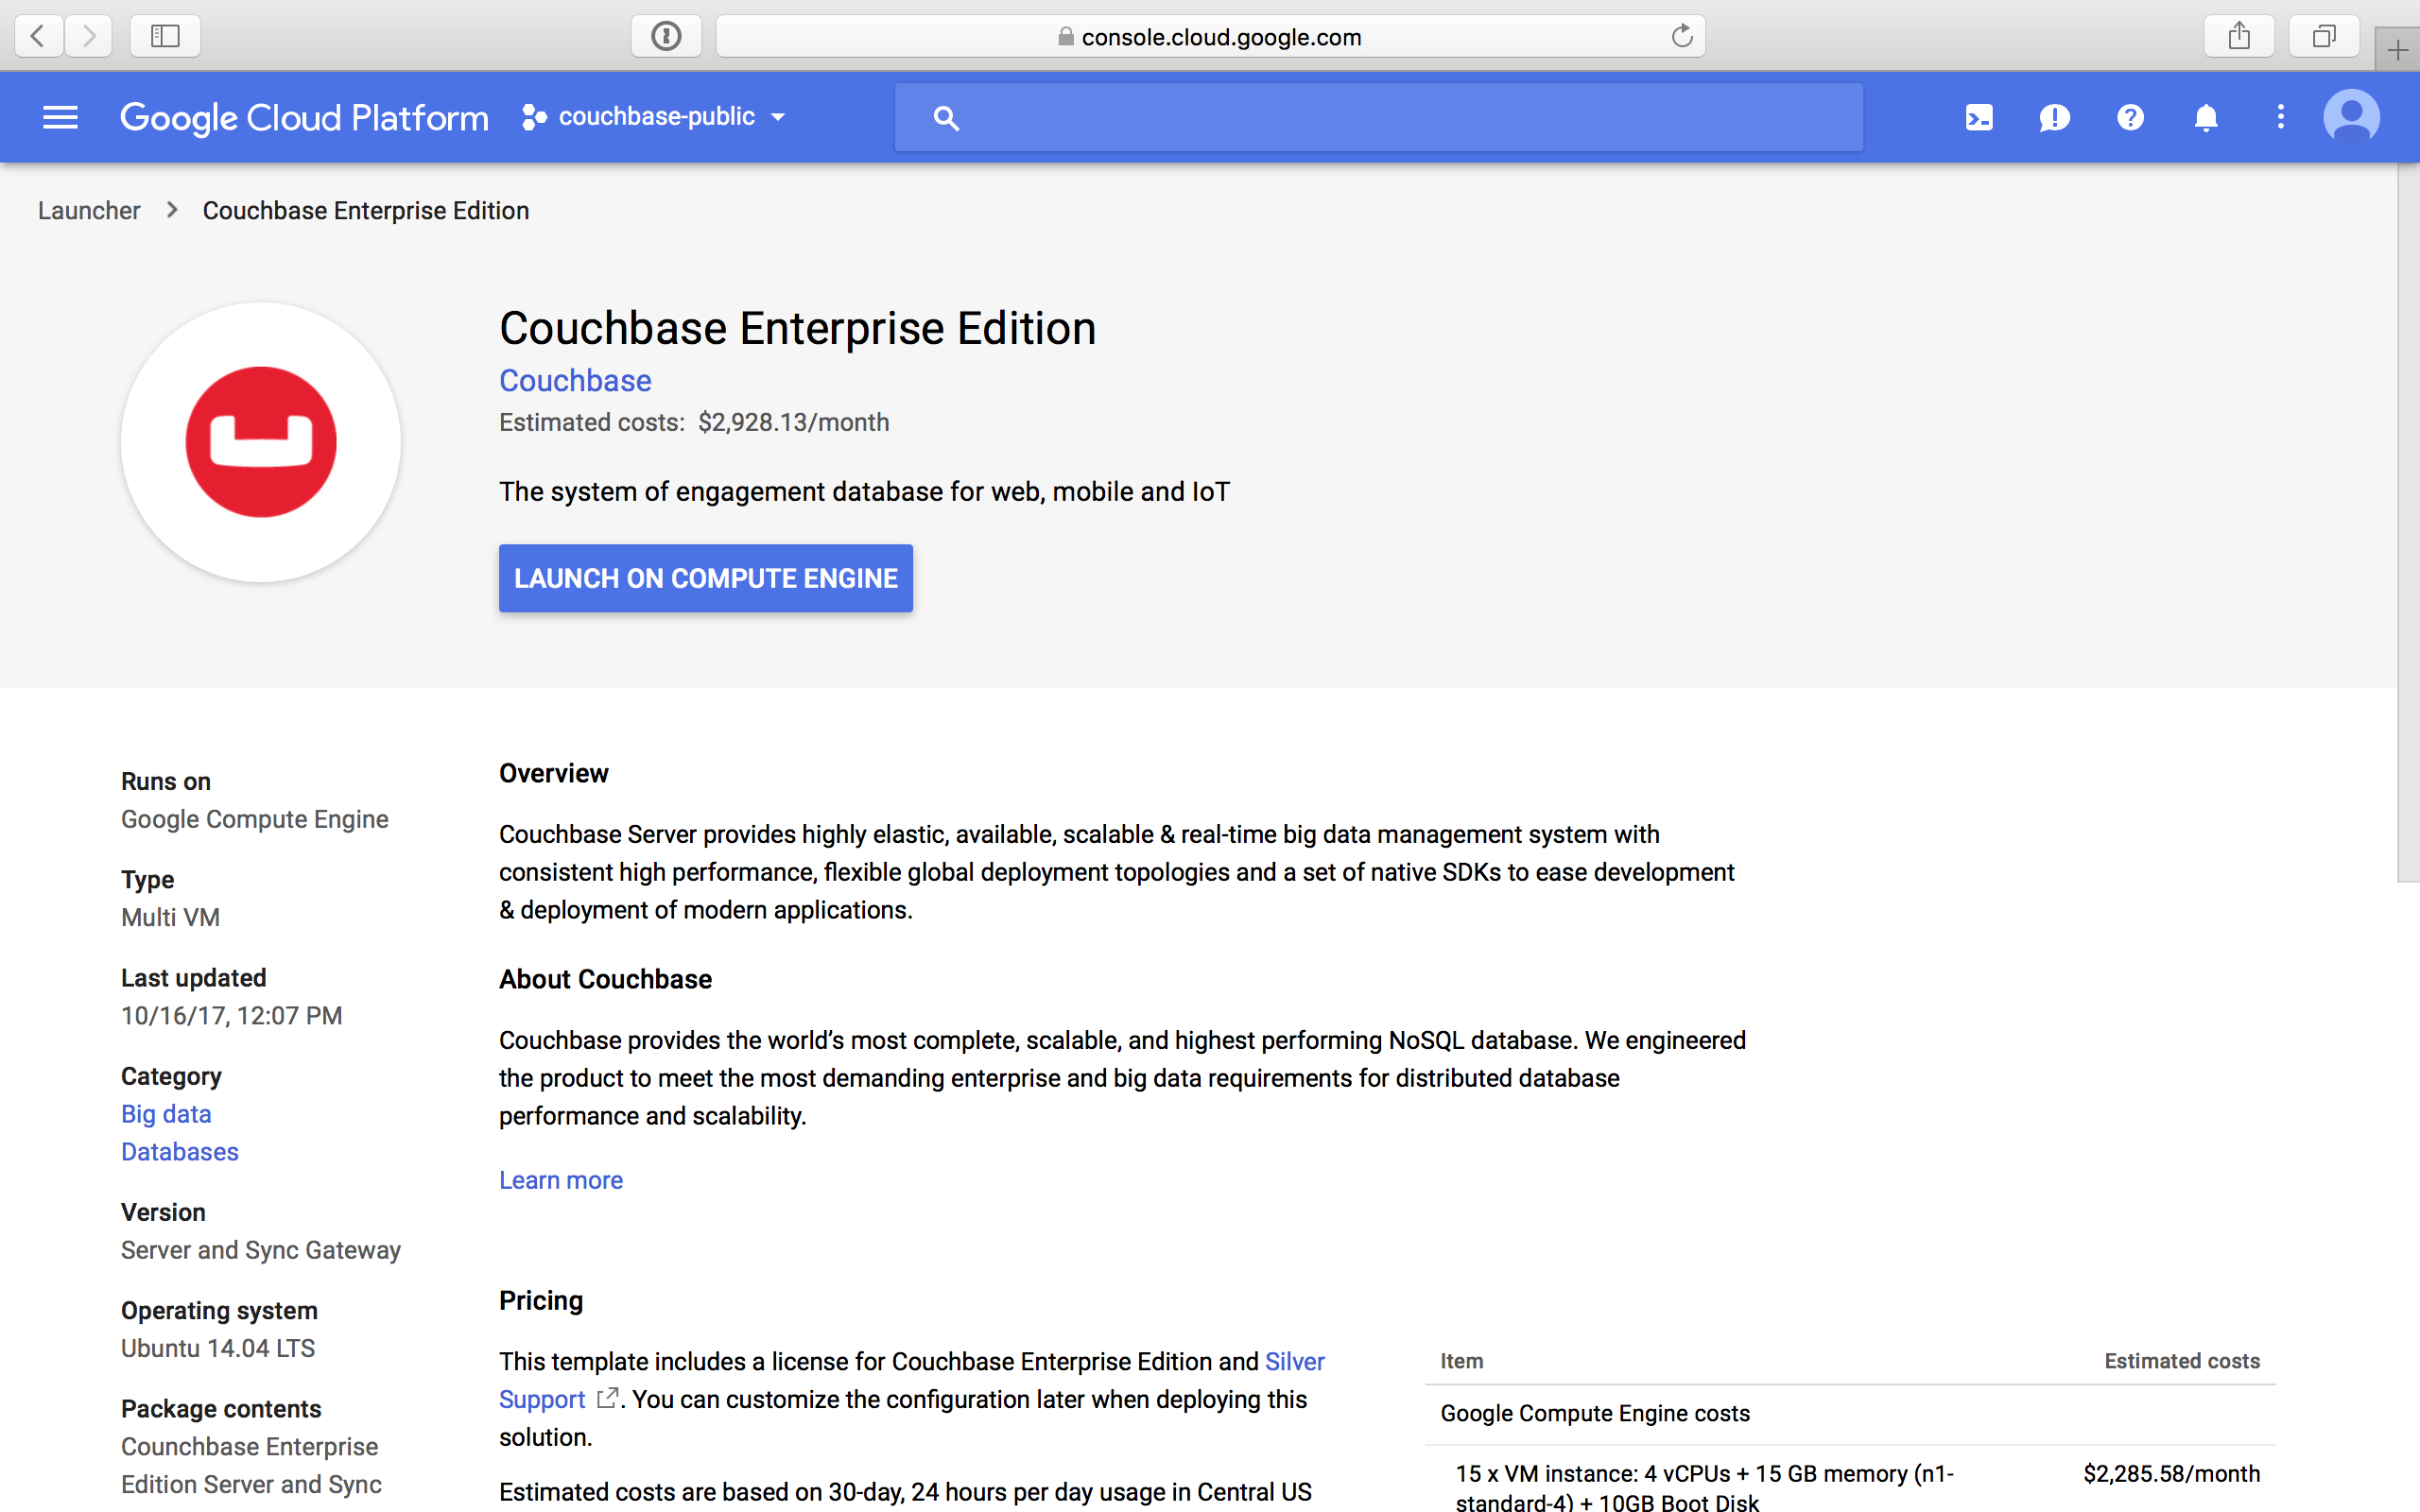
Log in to your Google Cloud Platform account and navigate to the Google Cloud Launcher page for Couchbase Enterprise Edition. If you wish to bring your own license, navigate to Couchbase Enterprise Editon - BYOL instead.
-
Click Launch on Compute Engine. On the New Couchbase Enterprise Edition deployment screen, configure the VM settings.
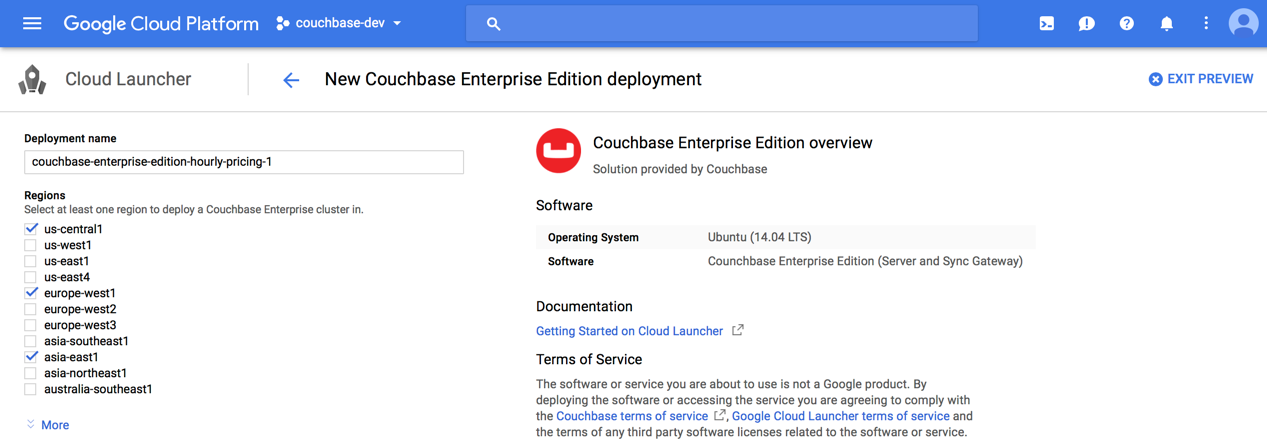
Field Name Description Deployment name
Provide a deployment name. We recommend using a shorter name as the deployment name has a character limit and the template will truncate longer names automatically.
Regions
Google Cloud Platform has a wide range of locations available. Pick a location where you want your cluster to be deployed.
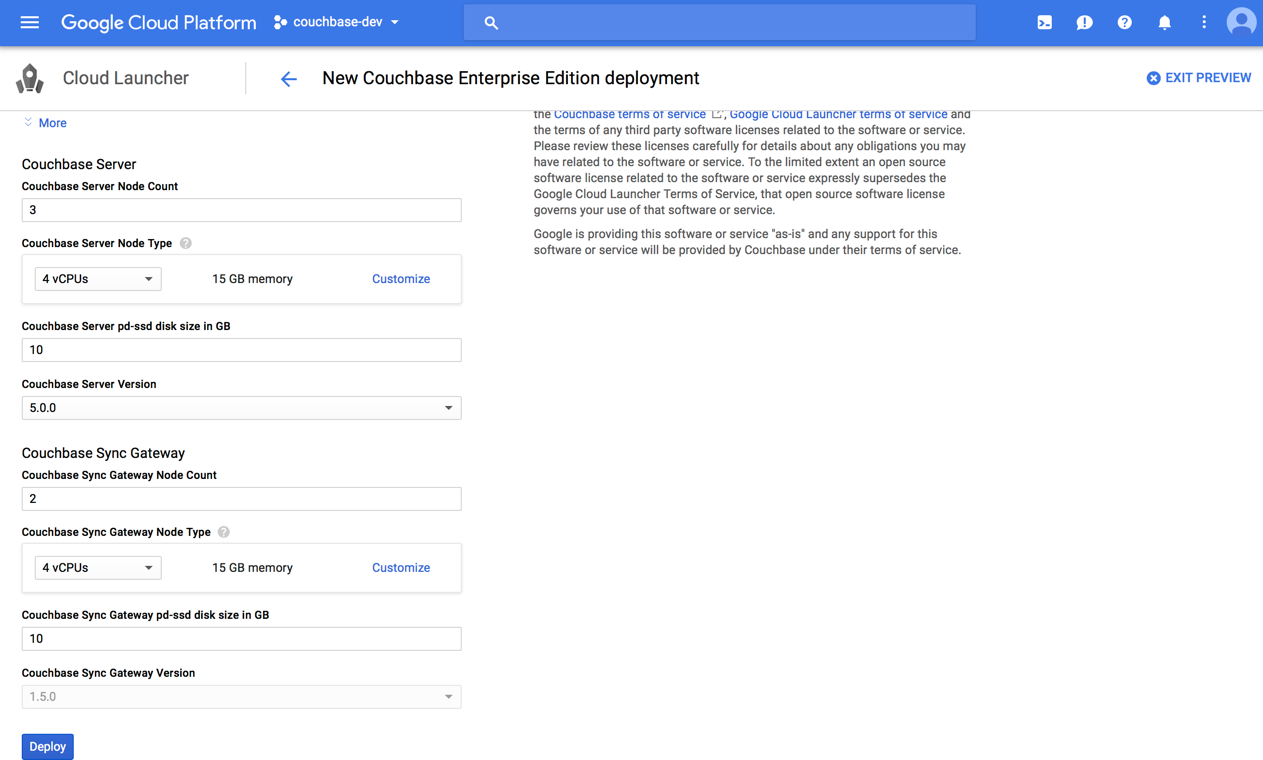
Couchbase Server
Couchbase Server Node Count
Enter the number of Server Nodes to deploy.
Couchbase Server Node Type
Select the machine type for your server nodes. You can choose to customize your machine type using the Customize link.
Couchbase Server pd-ssd disk size in GB
Enter the disk size for each of the server nodes.
Couchbase Server Version
Choose the Couchbase Server version to deploy.
The Compatibility Matrix summarizes the compatible versions of Sync Gateway and Couchbase Server. Couchbase Sync Gateway
Couchbase Sync Gateway Node Count
Enter the number of Sync Gateway Nodes to deploy.
Couchbase Sync Gateway Node Type
Select the machine type for your sync gateway nodes. You can choose to customize your machine type using the Customize link.
Couchbase Sync Gateway pd-ssd disk size in GB
Enter the disk size for each of the sync gateway nodes.
Couchbase Sync Gateway Version
Choose the Couchbase Sync Gateway version to deploy.
The Compatibility Matrix summarizes the compatible versions of Sync Gateway and Couchbase Server. -
Click Deploy. Deployment begins and you will be redirected to the Deployment Manager where the deployment status is displayed.
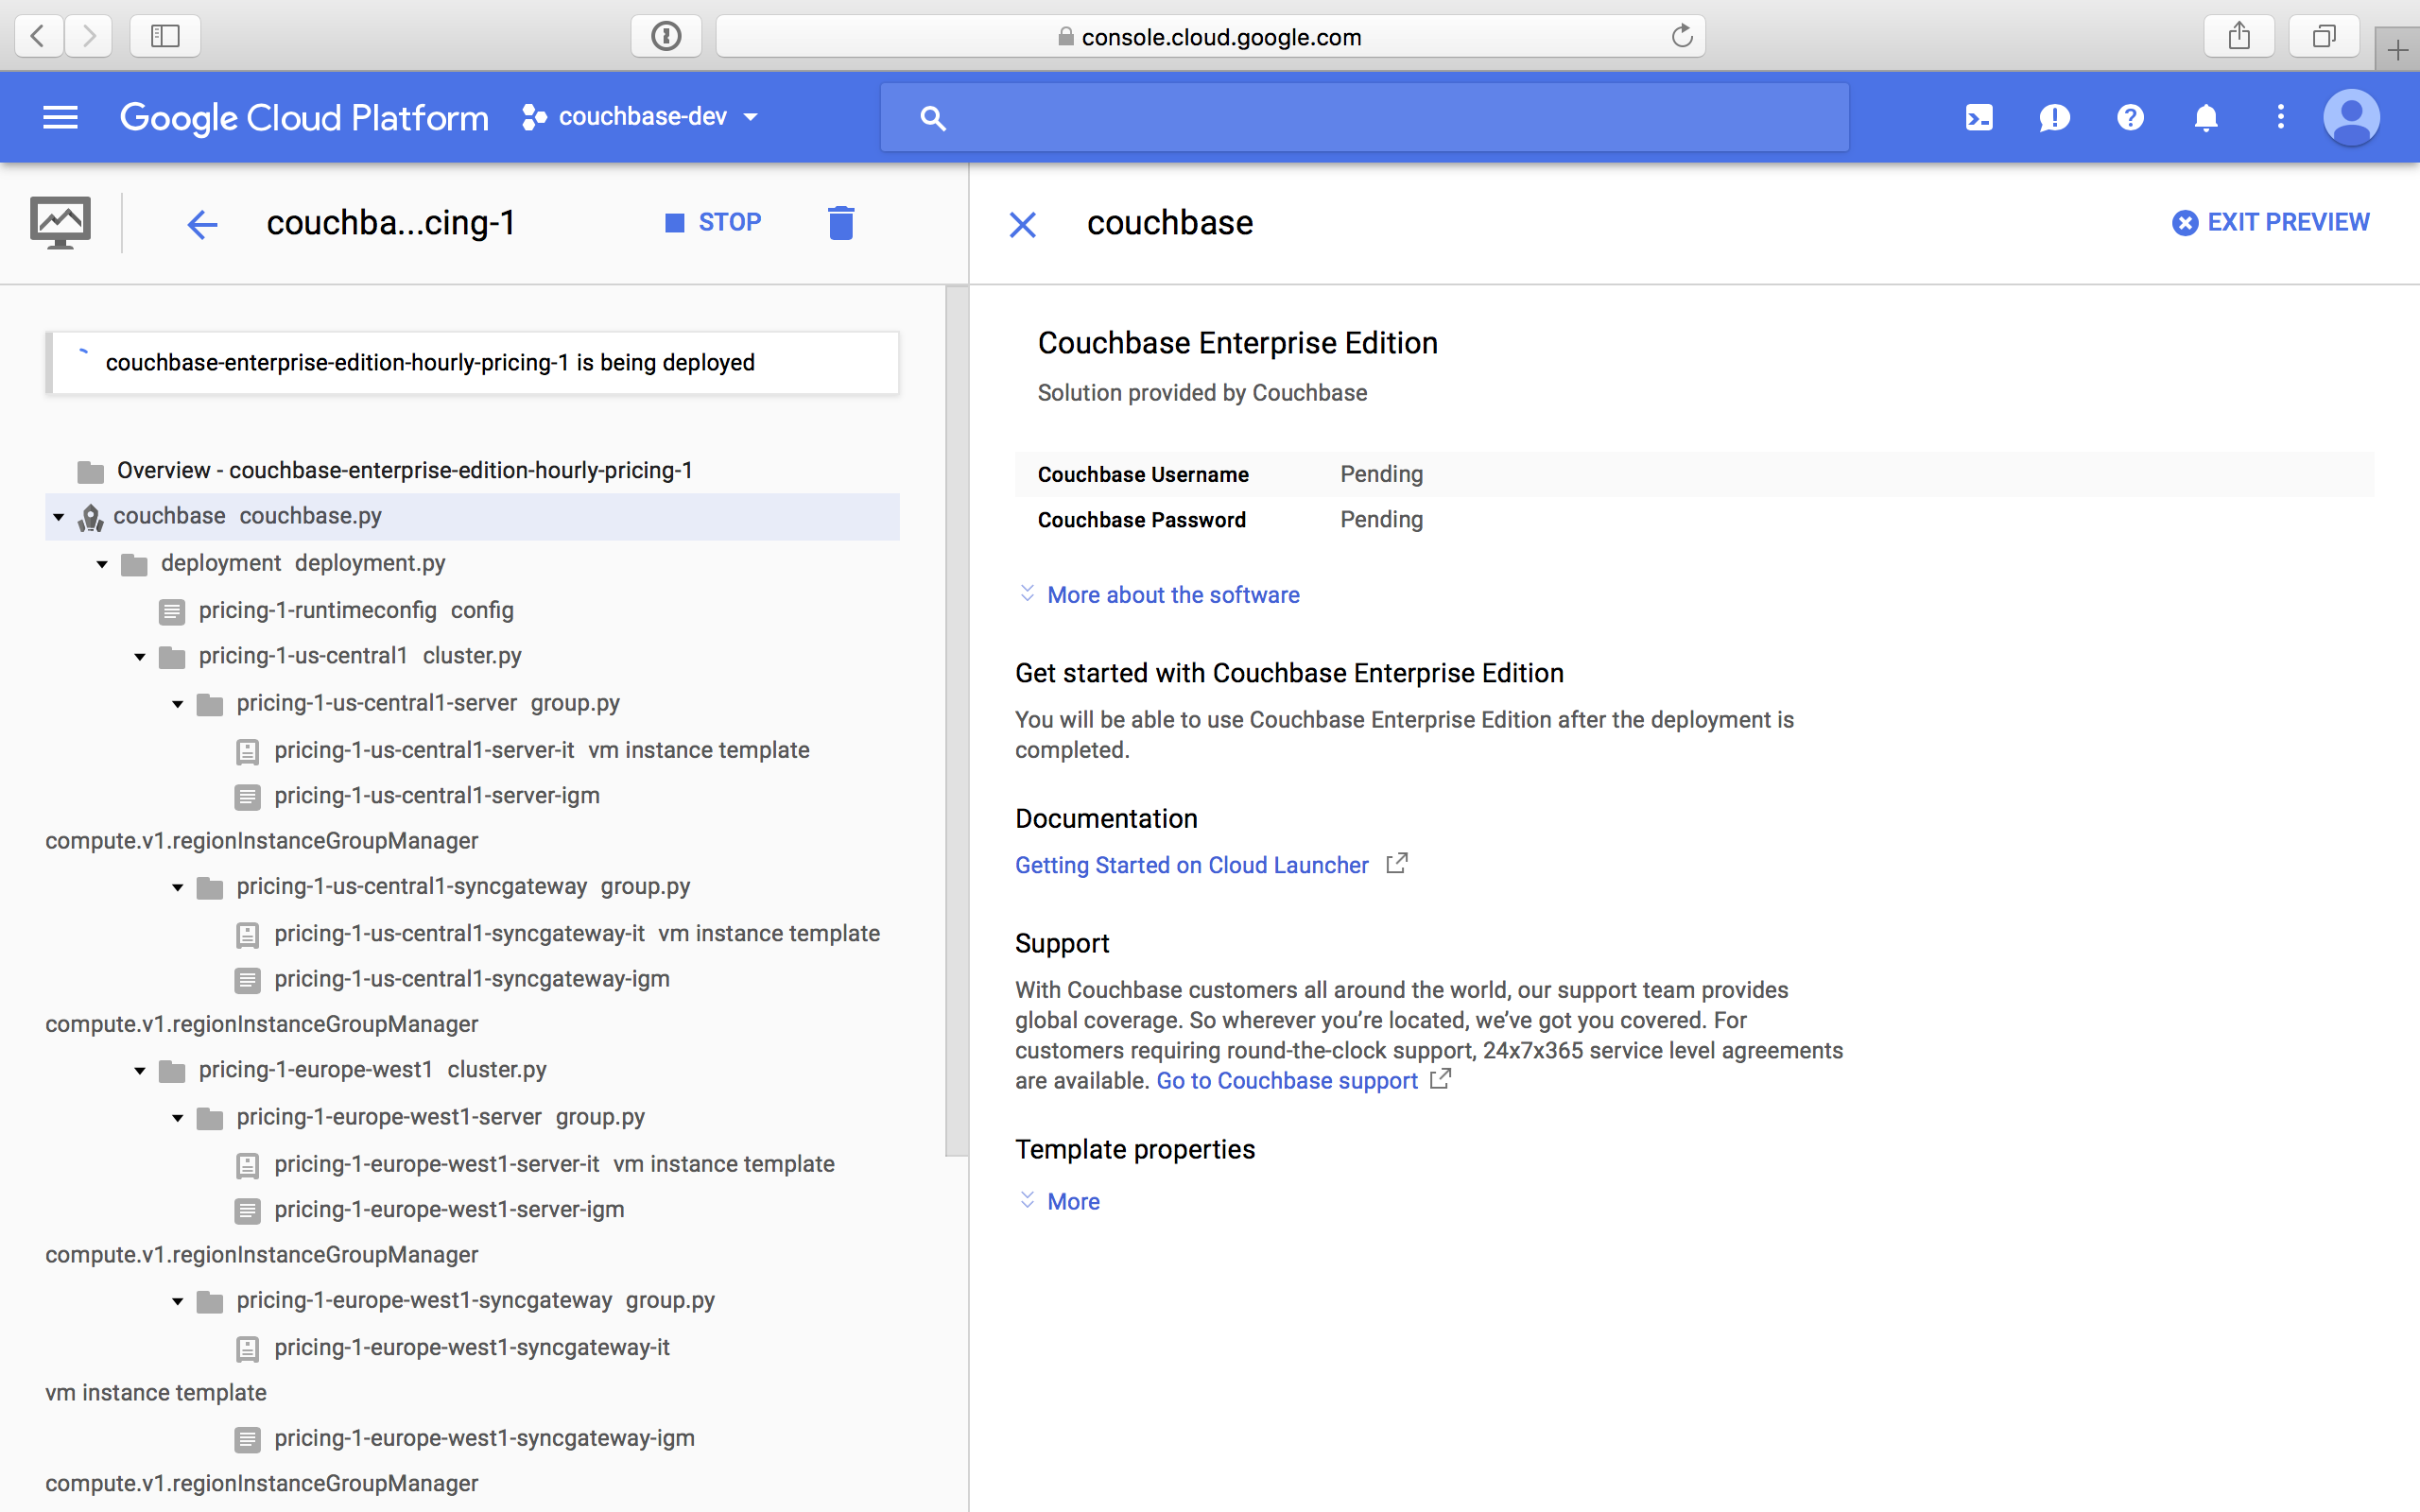
-
You should see a green check mark once deployment completes successfully.
Note the Couchbase Username and Password displayed on the screen. 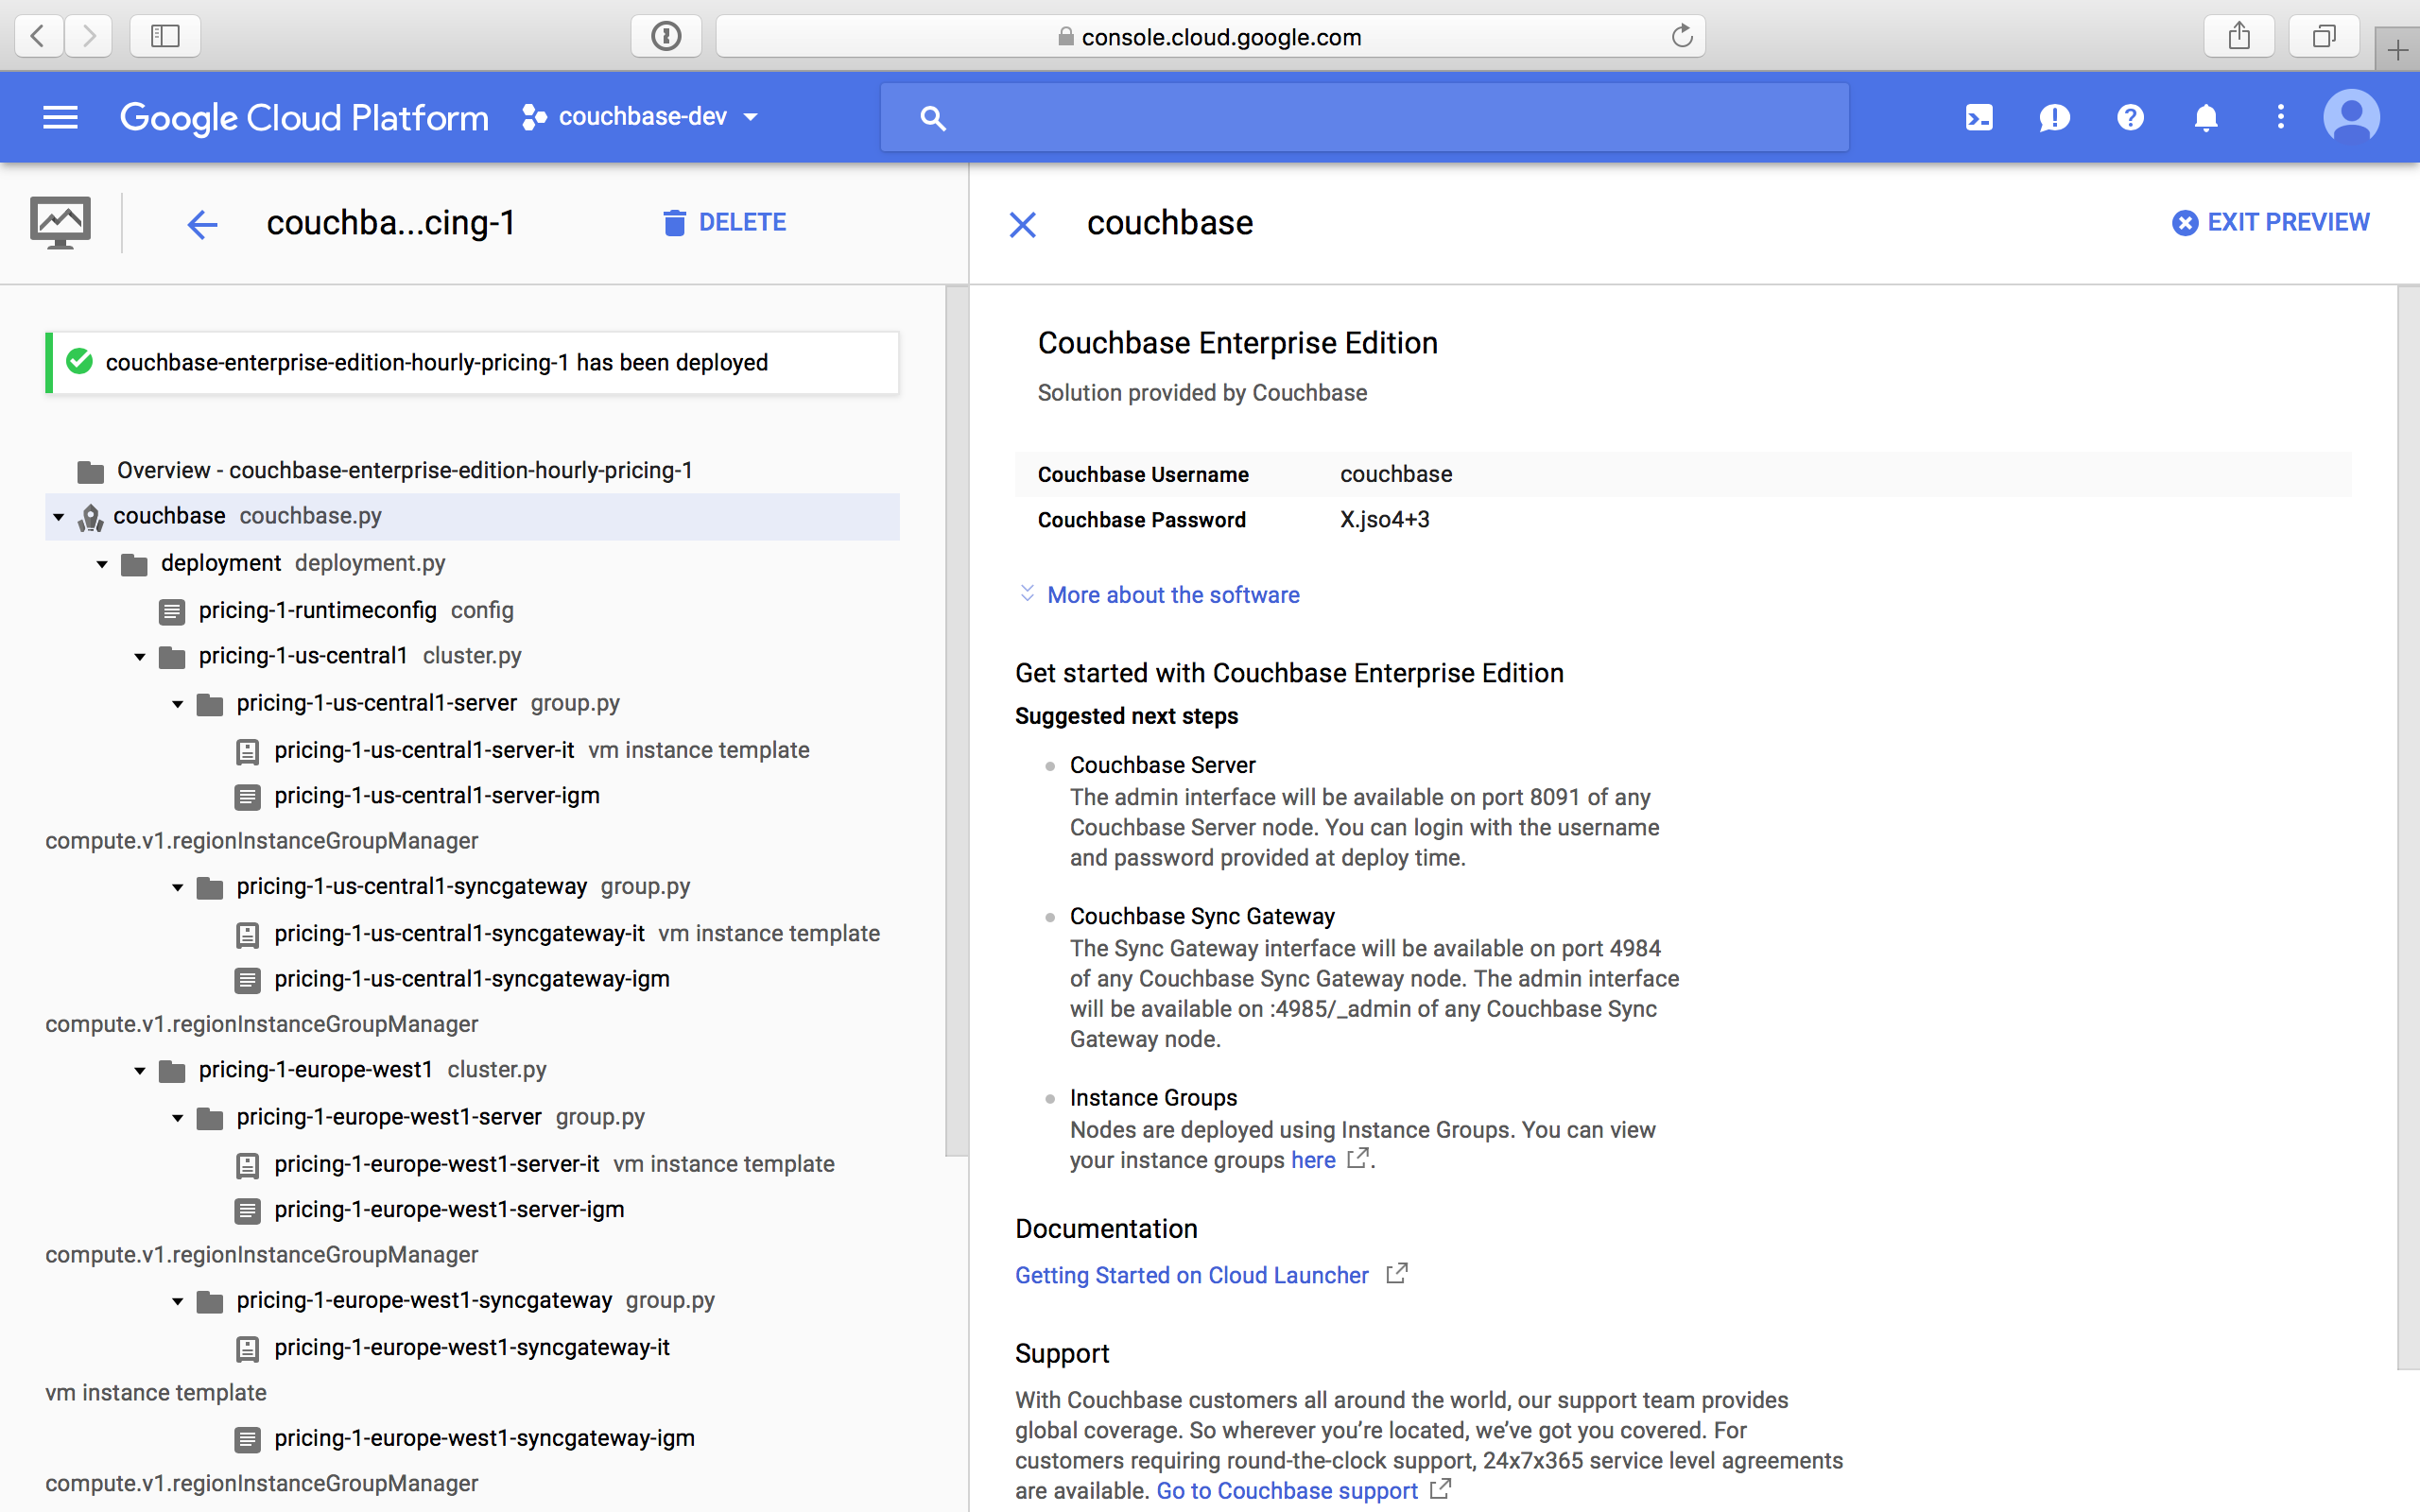
That’s it! It may take a short while for Couchbase to be up and running.
At this point a number of Instance Group Managers have been deployed. It may take several minutes for the VMs that the Instance Group Managers manage to start, and for their start-up scripts to complete installing and configuring Couchbase.
Logging in to Your Couchbase Cluster
You can log in to the Couchbase cluster and explore the items created.
-
To inspect the resources that have been deployed and log in to Couchbase Server:
-
Click the Products & services icon
 at the top left of the screen to pull down the sidebar and select Compute Engine > Instance Groups.
You can see a list of all the Instance groups being deployed.
Depending on how quickly you get to this step after starting deployment, the instance groups may still be deploying.
at the top left of the screen to pull down the sidebar and select Compute Engine > Instance Groups.
You can see a list of all the Instance groups being deployed.
Depending on how quickly you get to this step after starting deployment, the instance groups may still be deploying.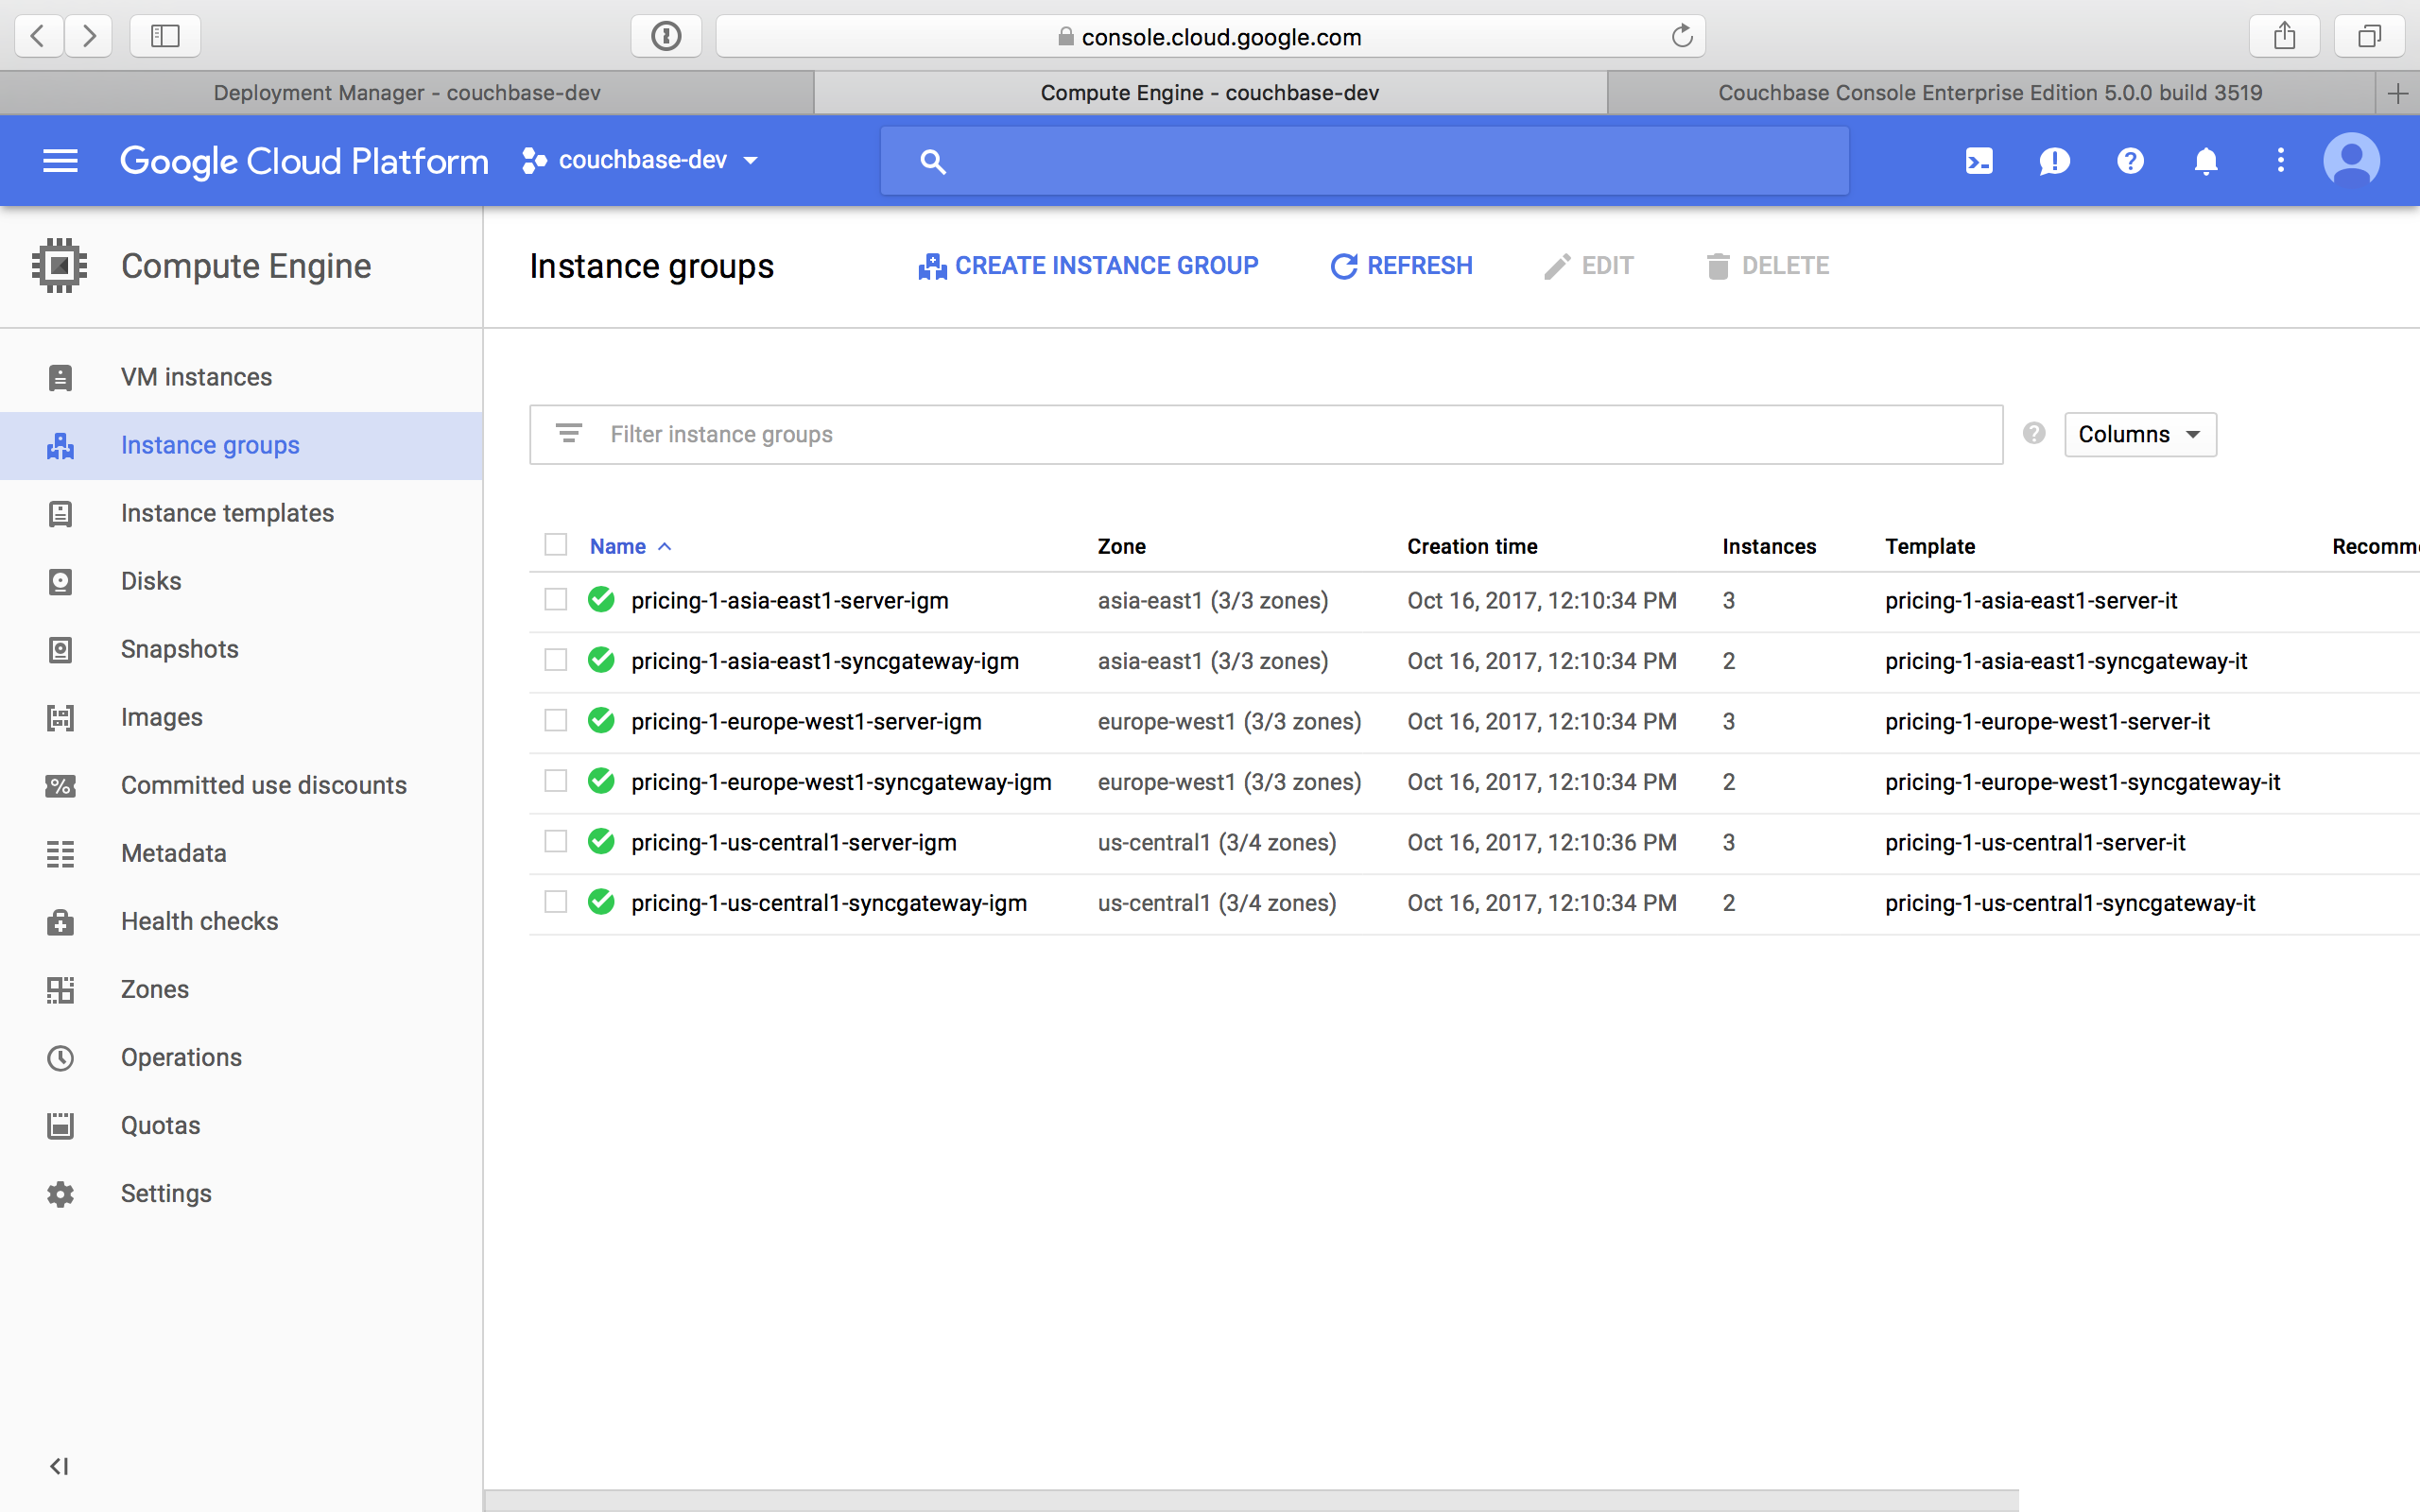
-
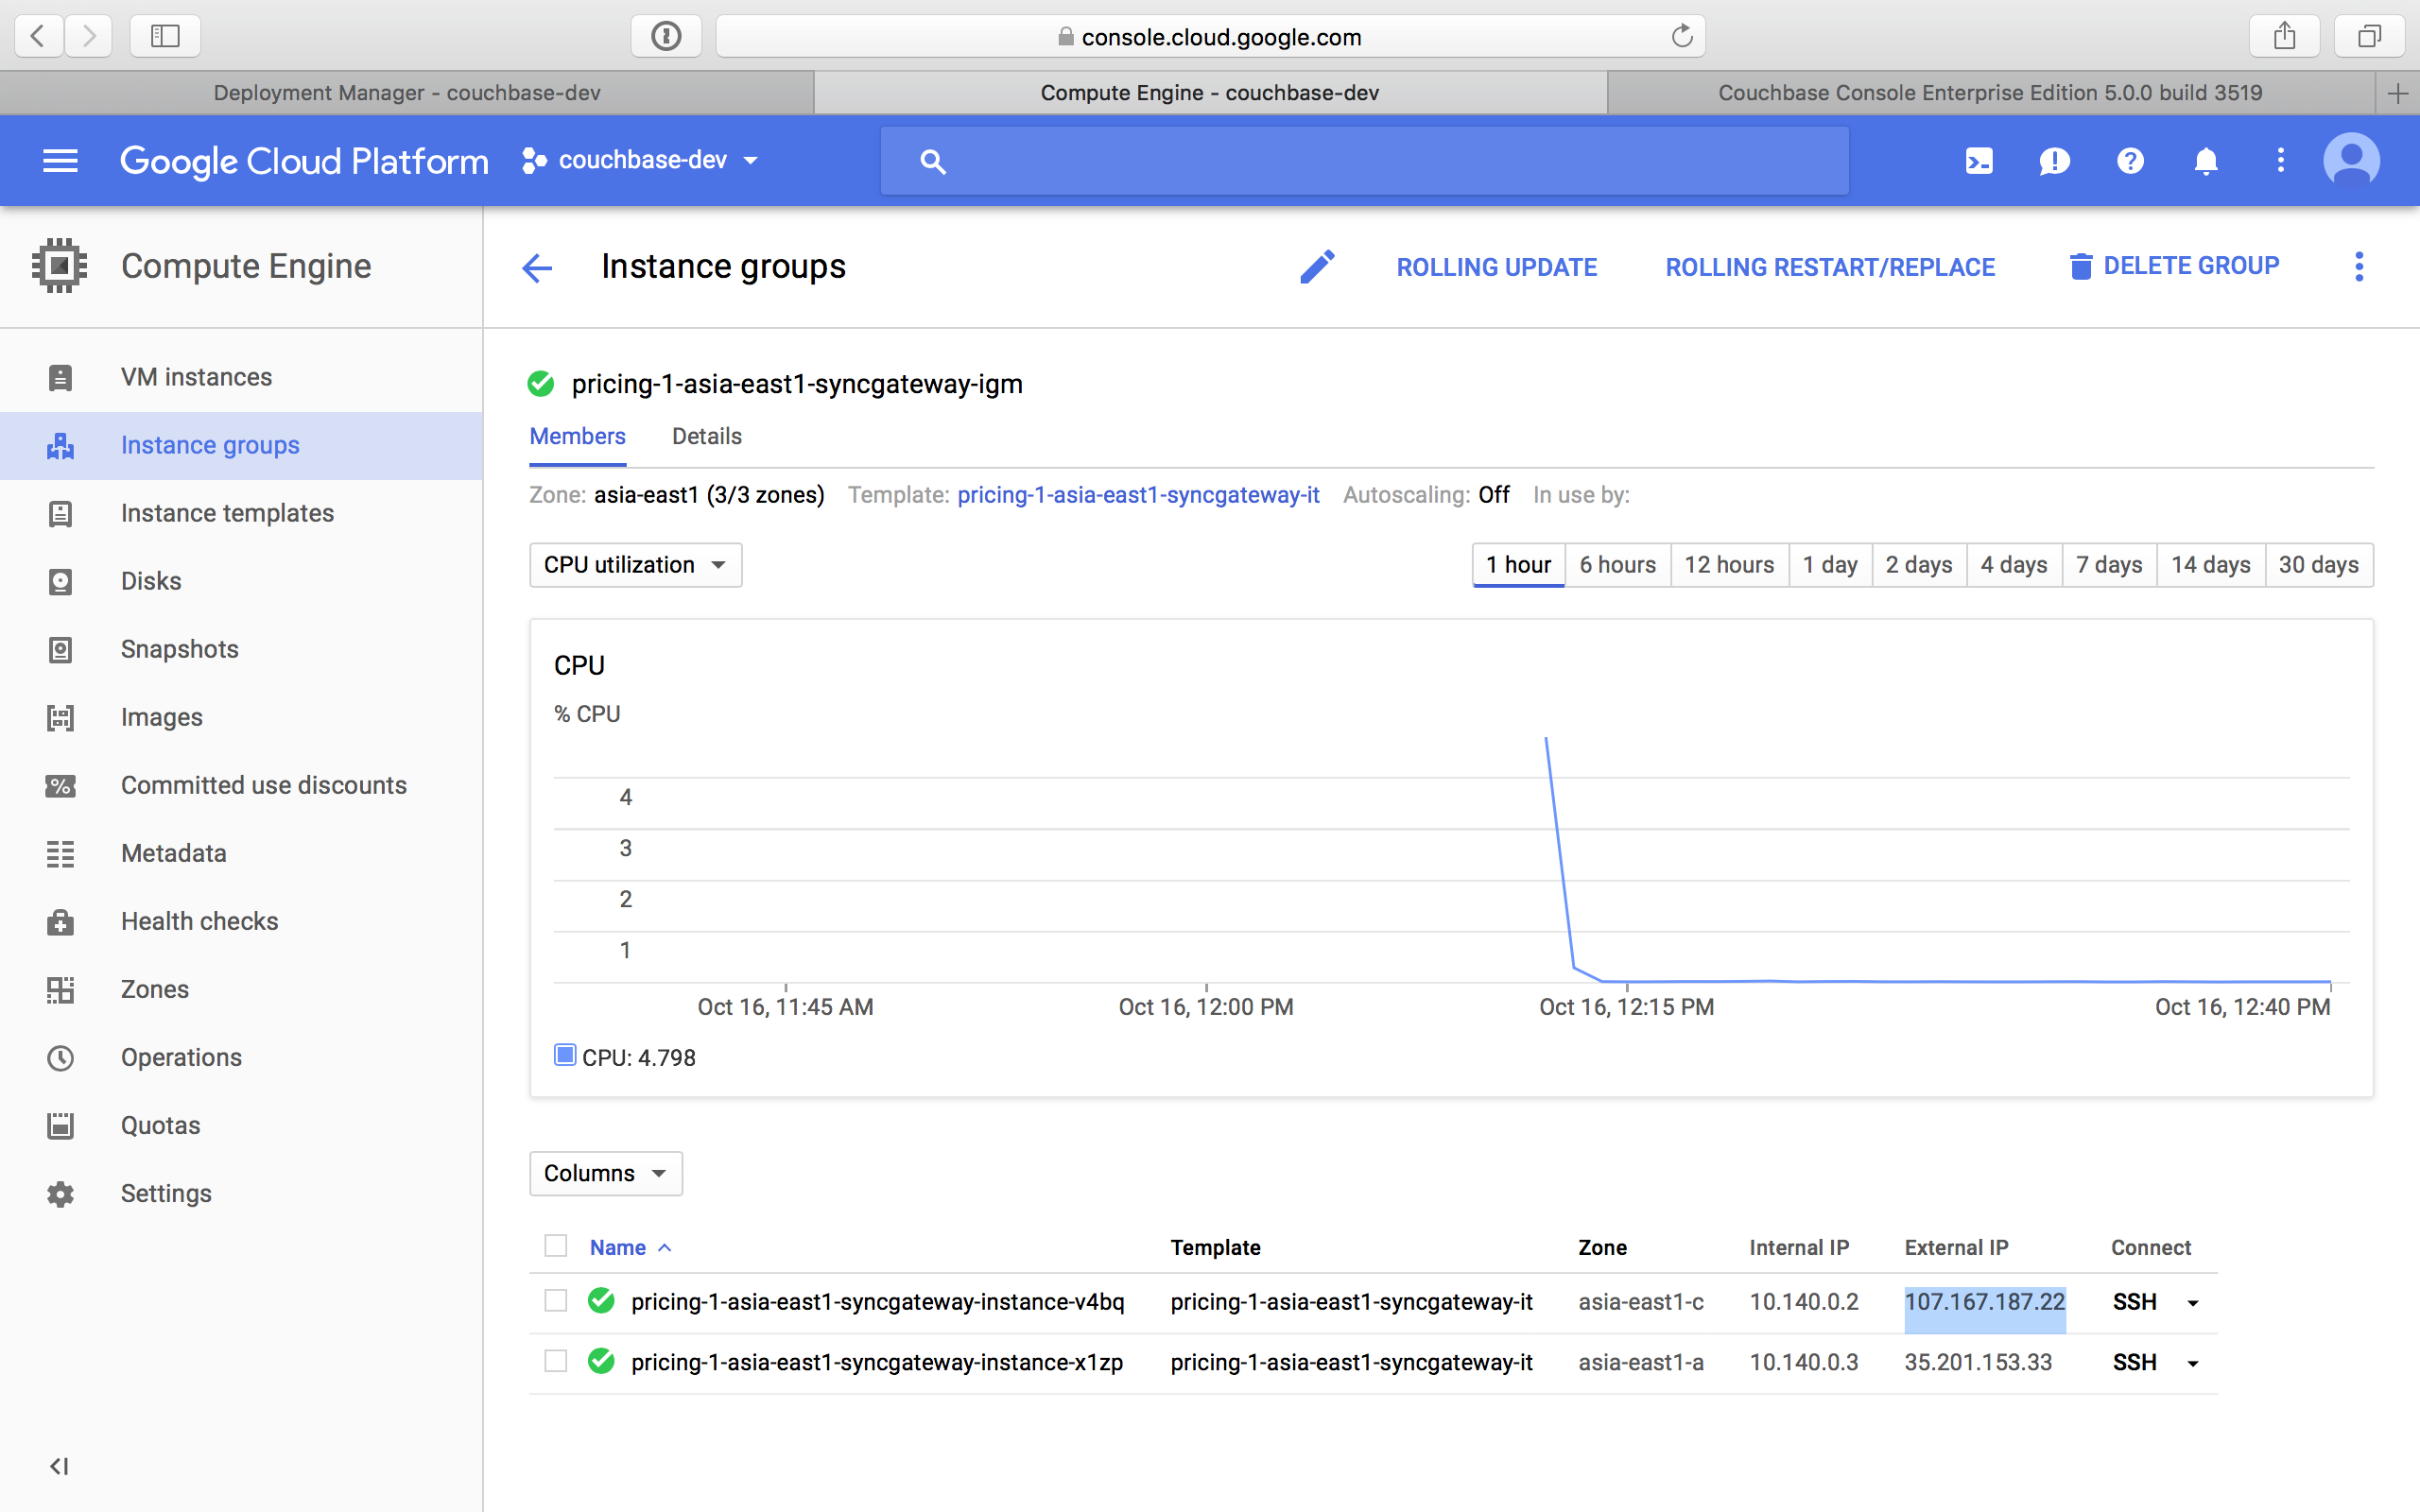
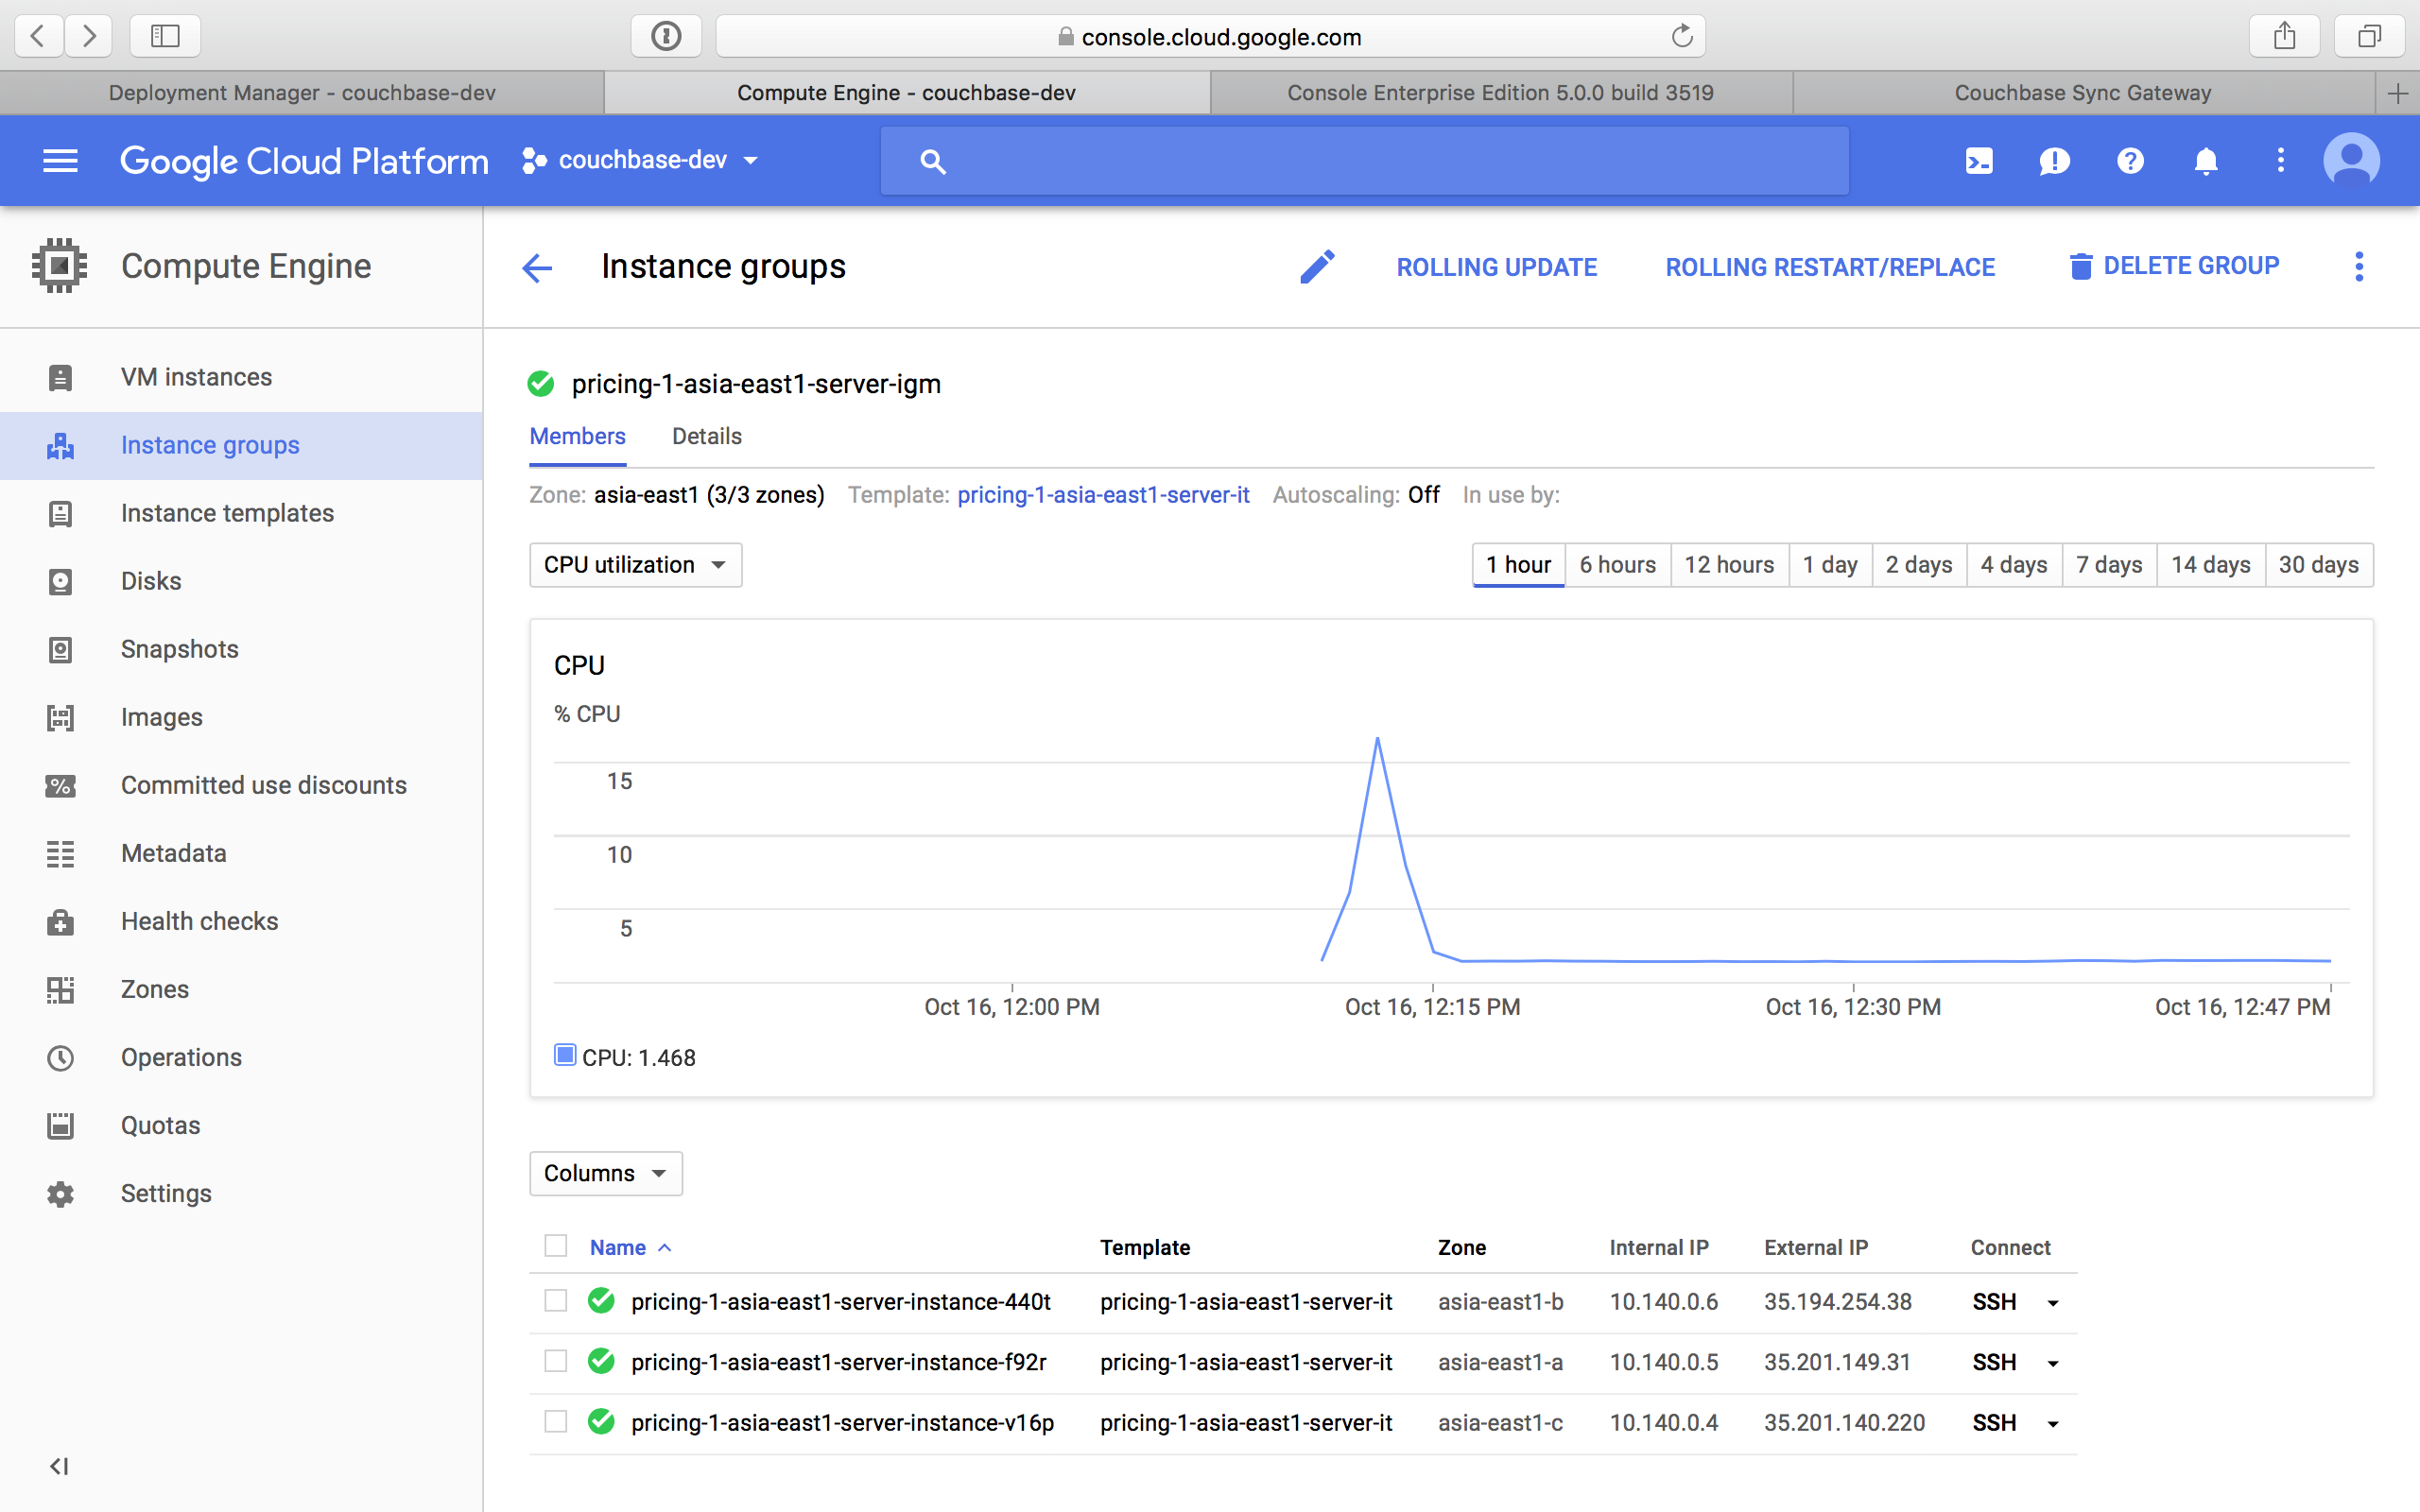
Click a server instance group to view details such as CPU utilization and the VM instances in that group. Note the External IP of one of the deployed VMs.
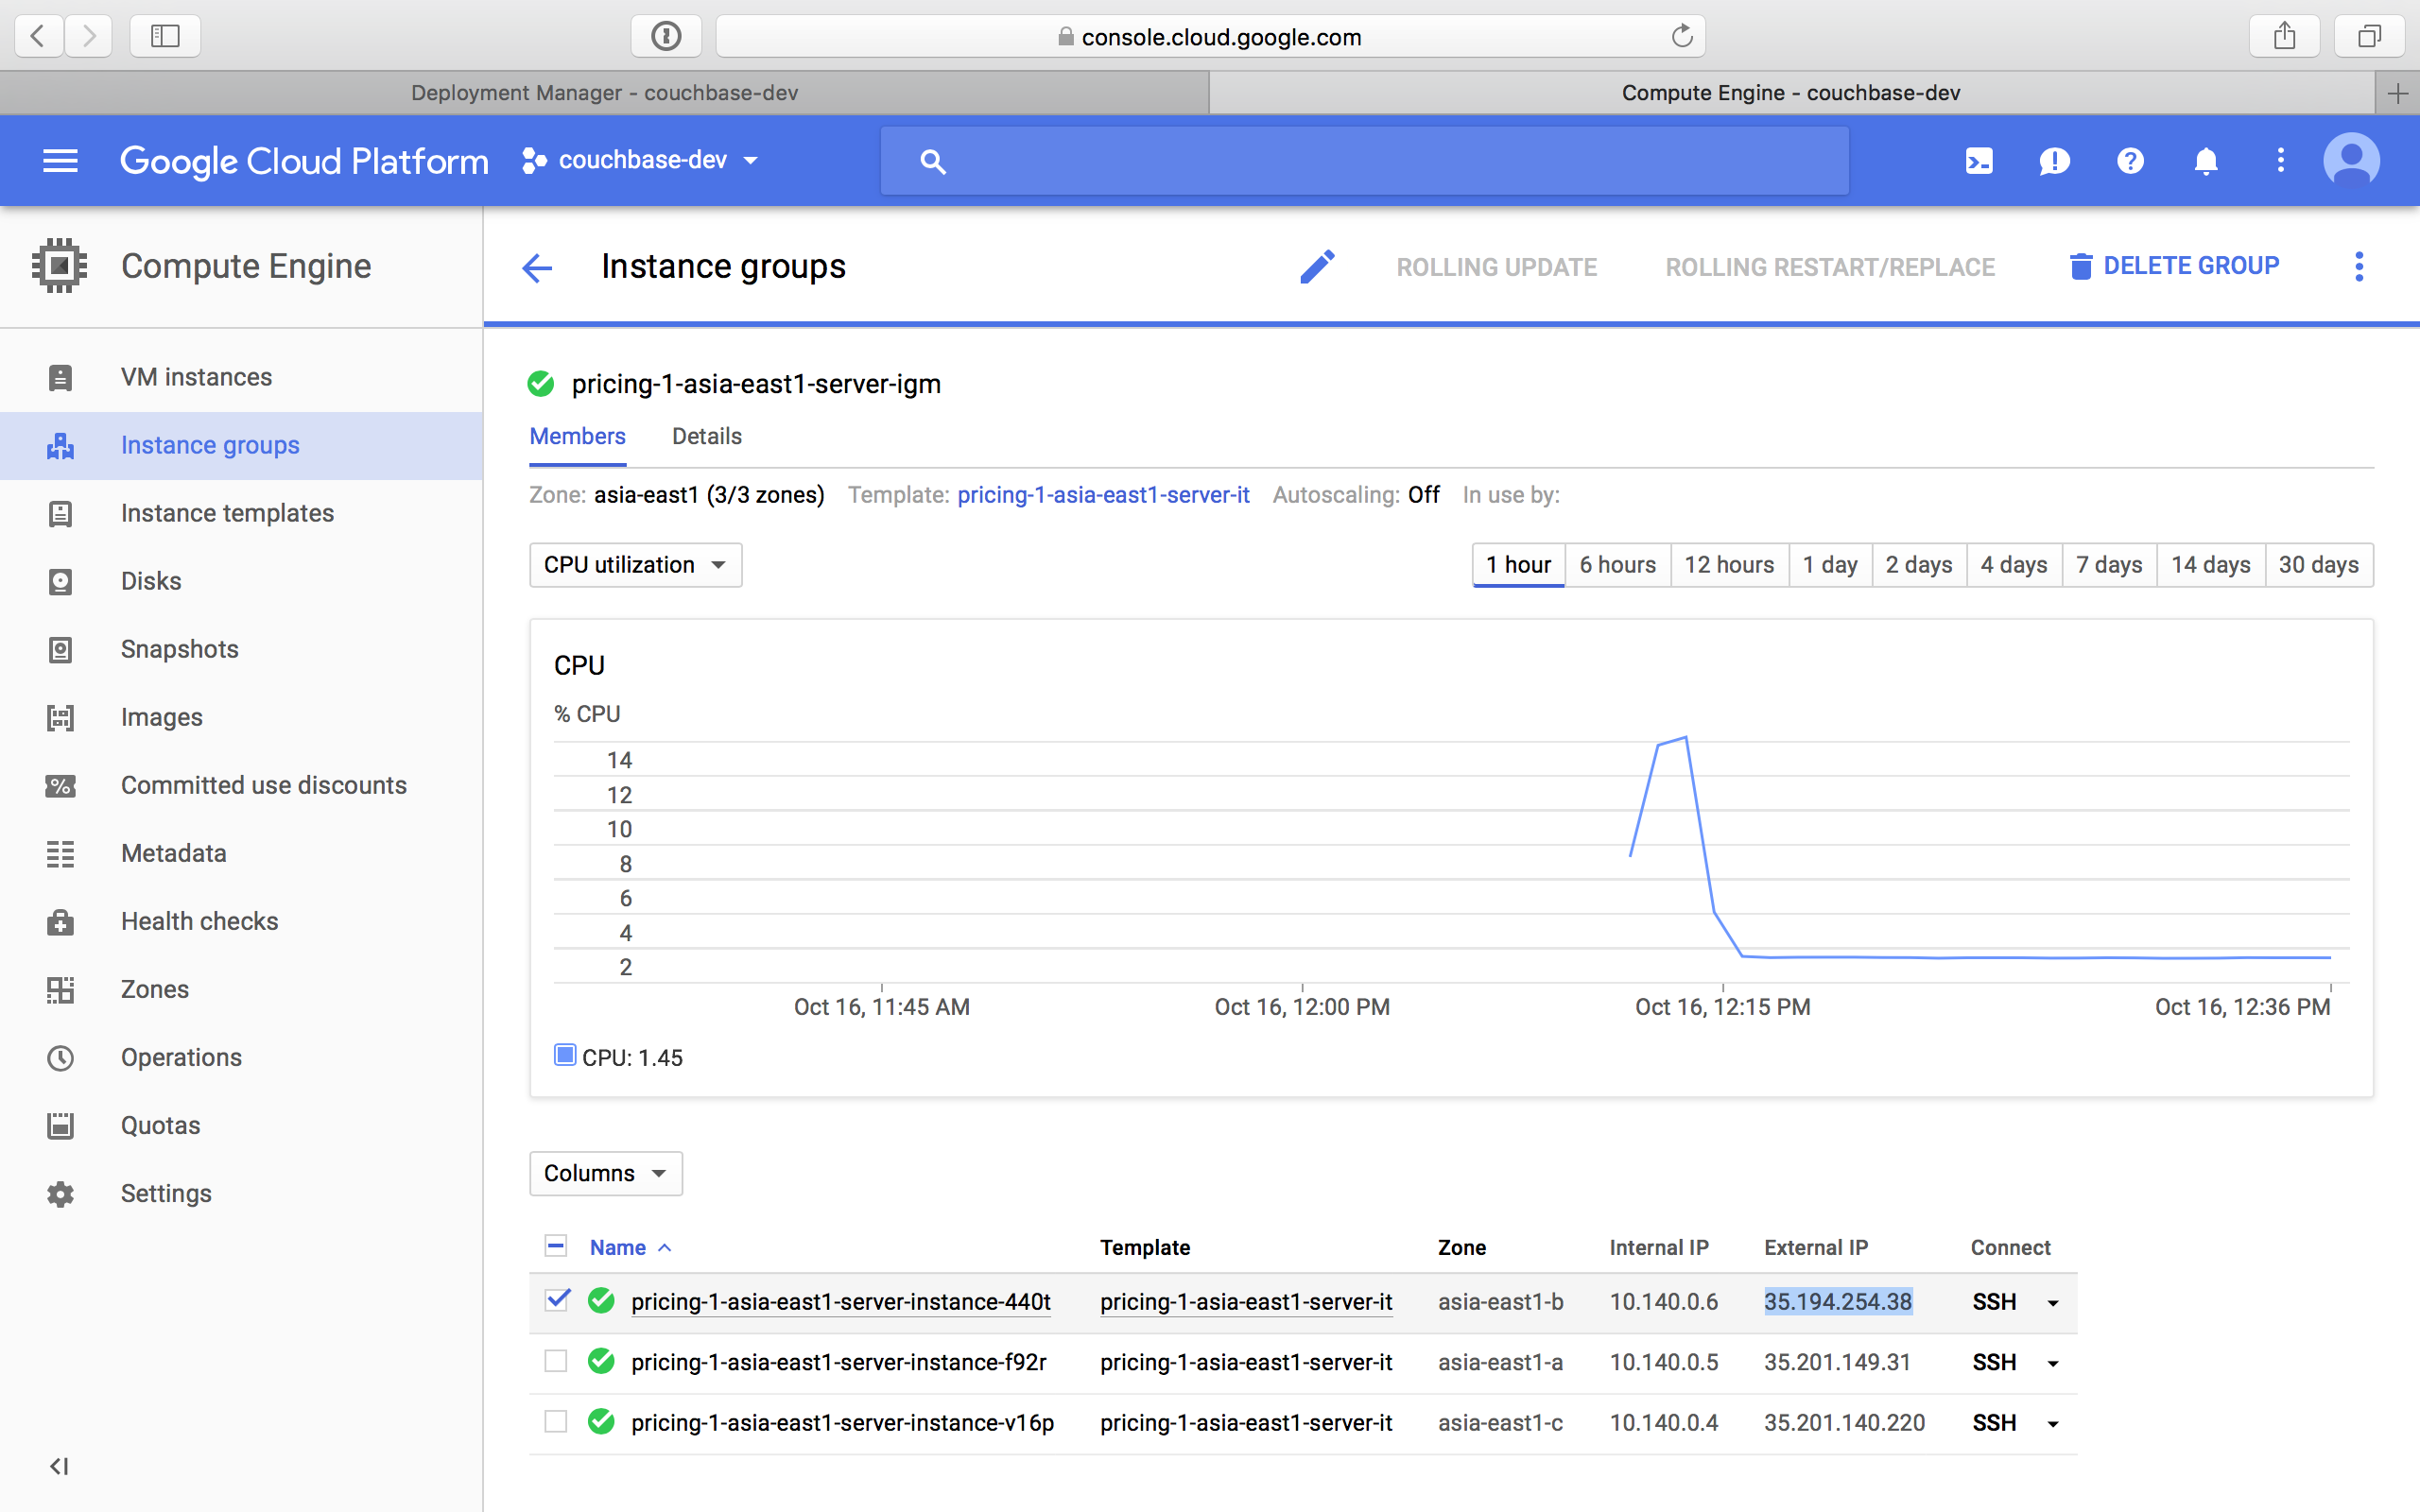
-
Open a browser tab and enter the copied External IP along with port 8091 as <external-ip>:8091 to open the Couchbase Server Web Console.
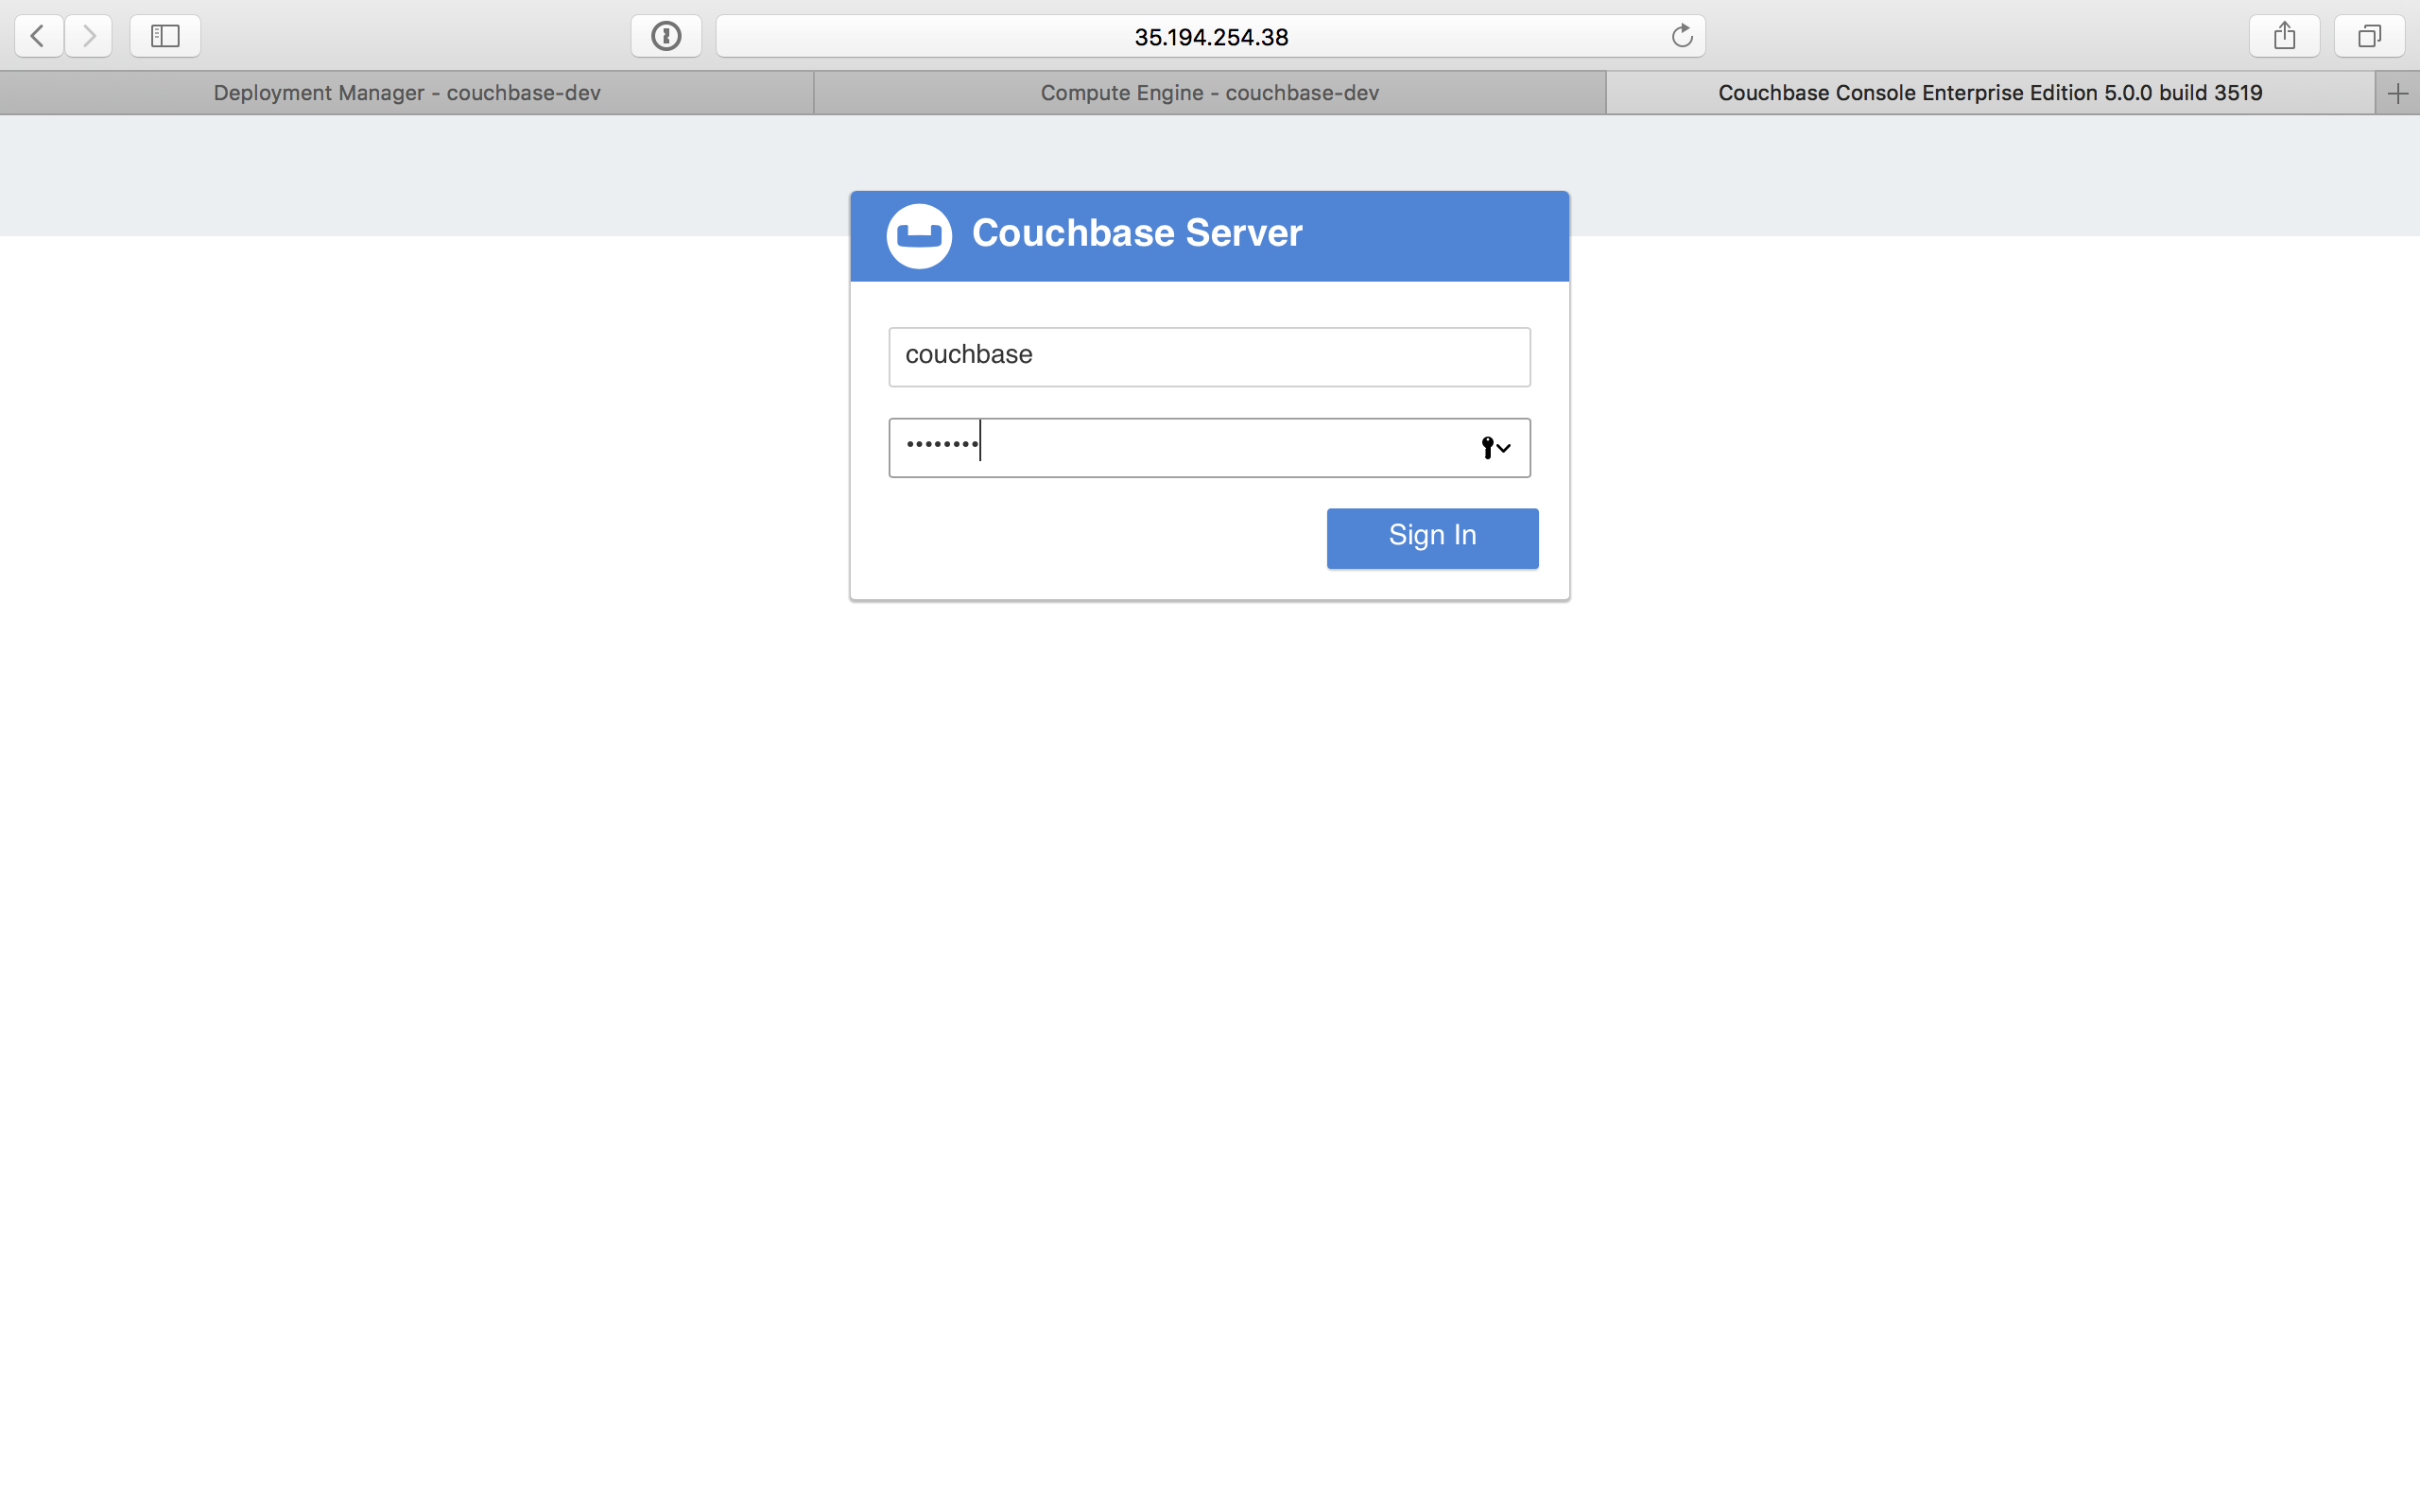
-
Enter the user name and password noted when deployment completed.
If you forgot to note the credentials, you can retrieve them by examining the Custom metadata > startup-script for the server instance template.

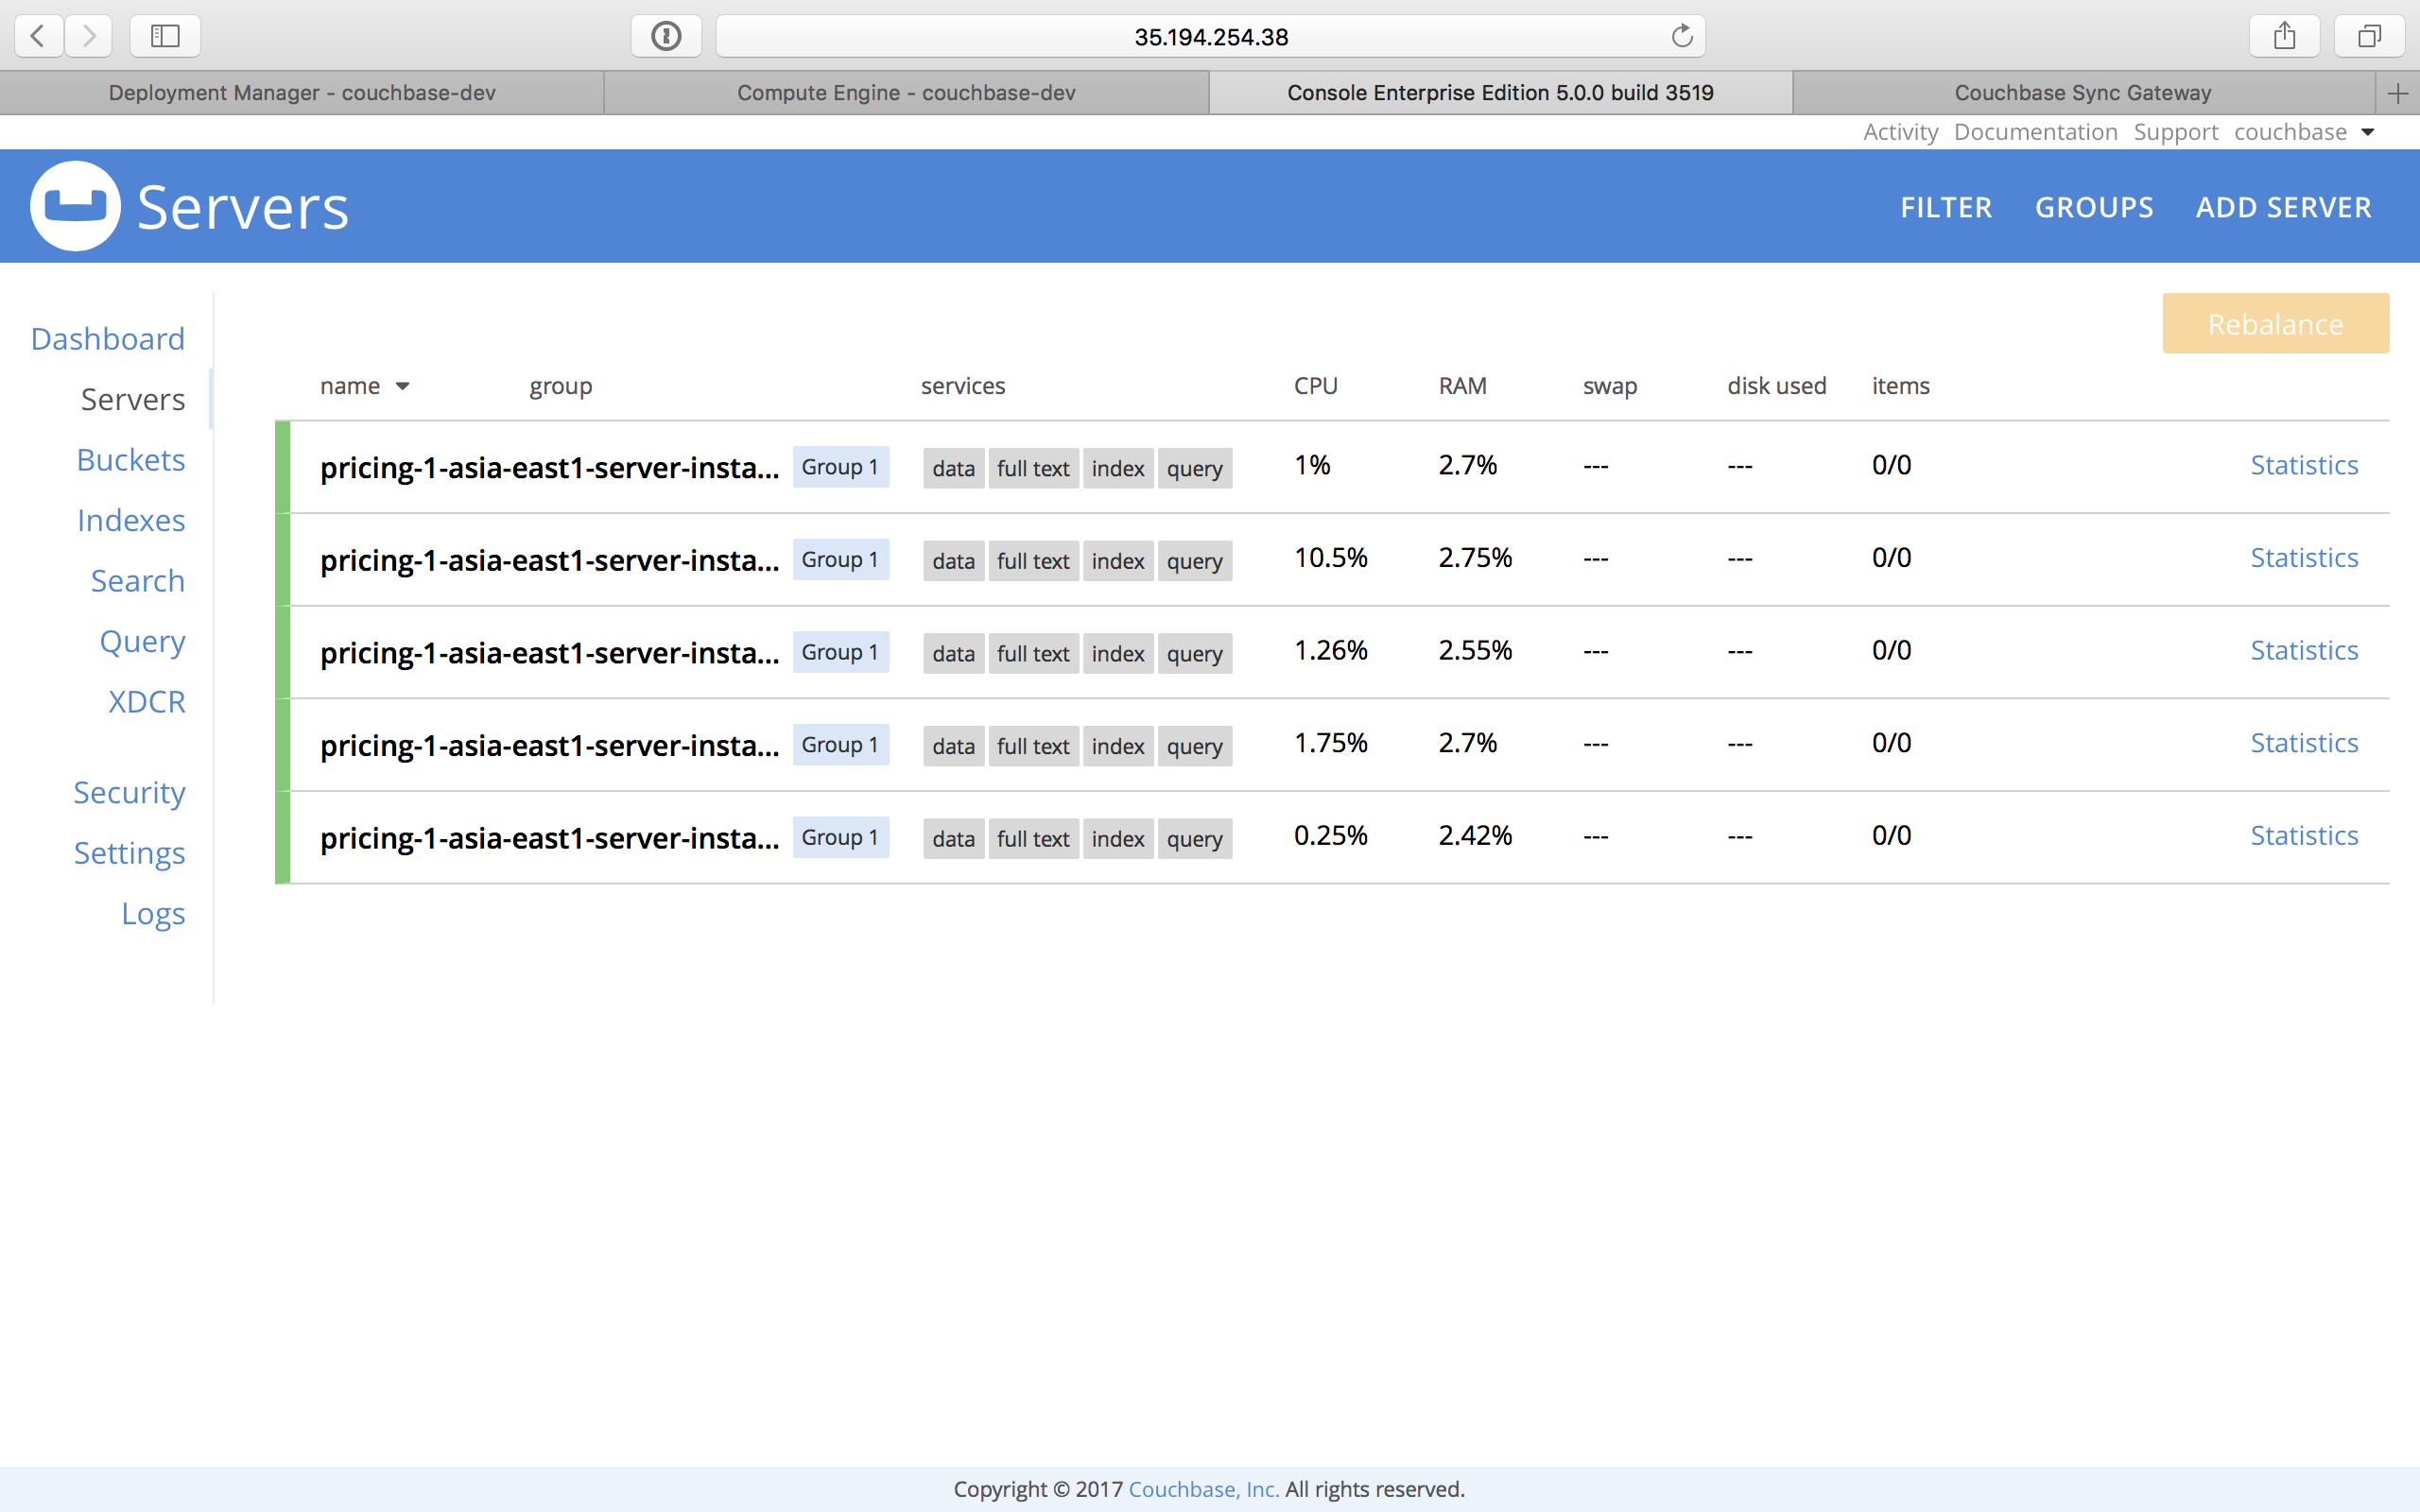
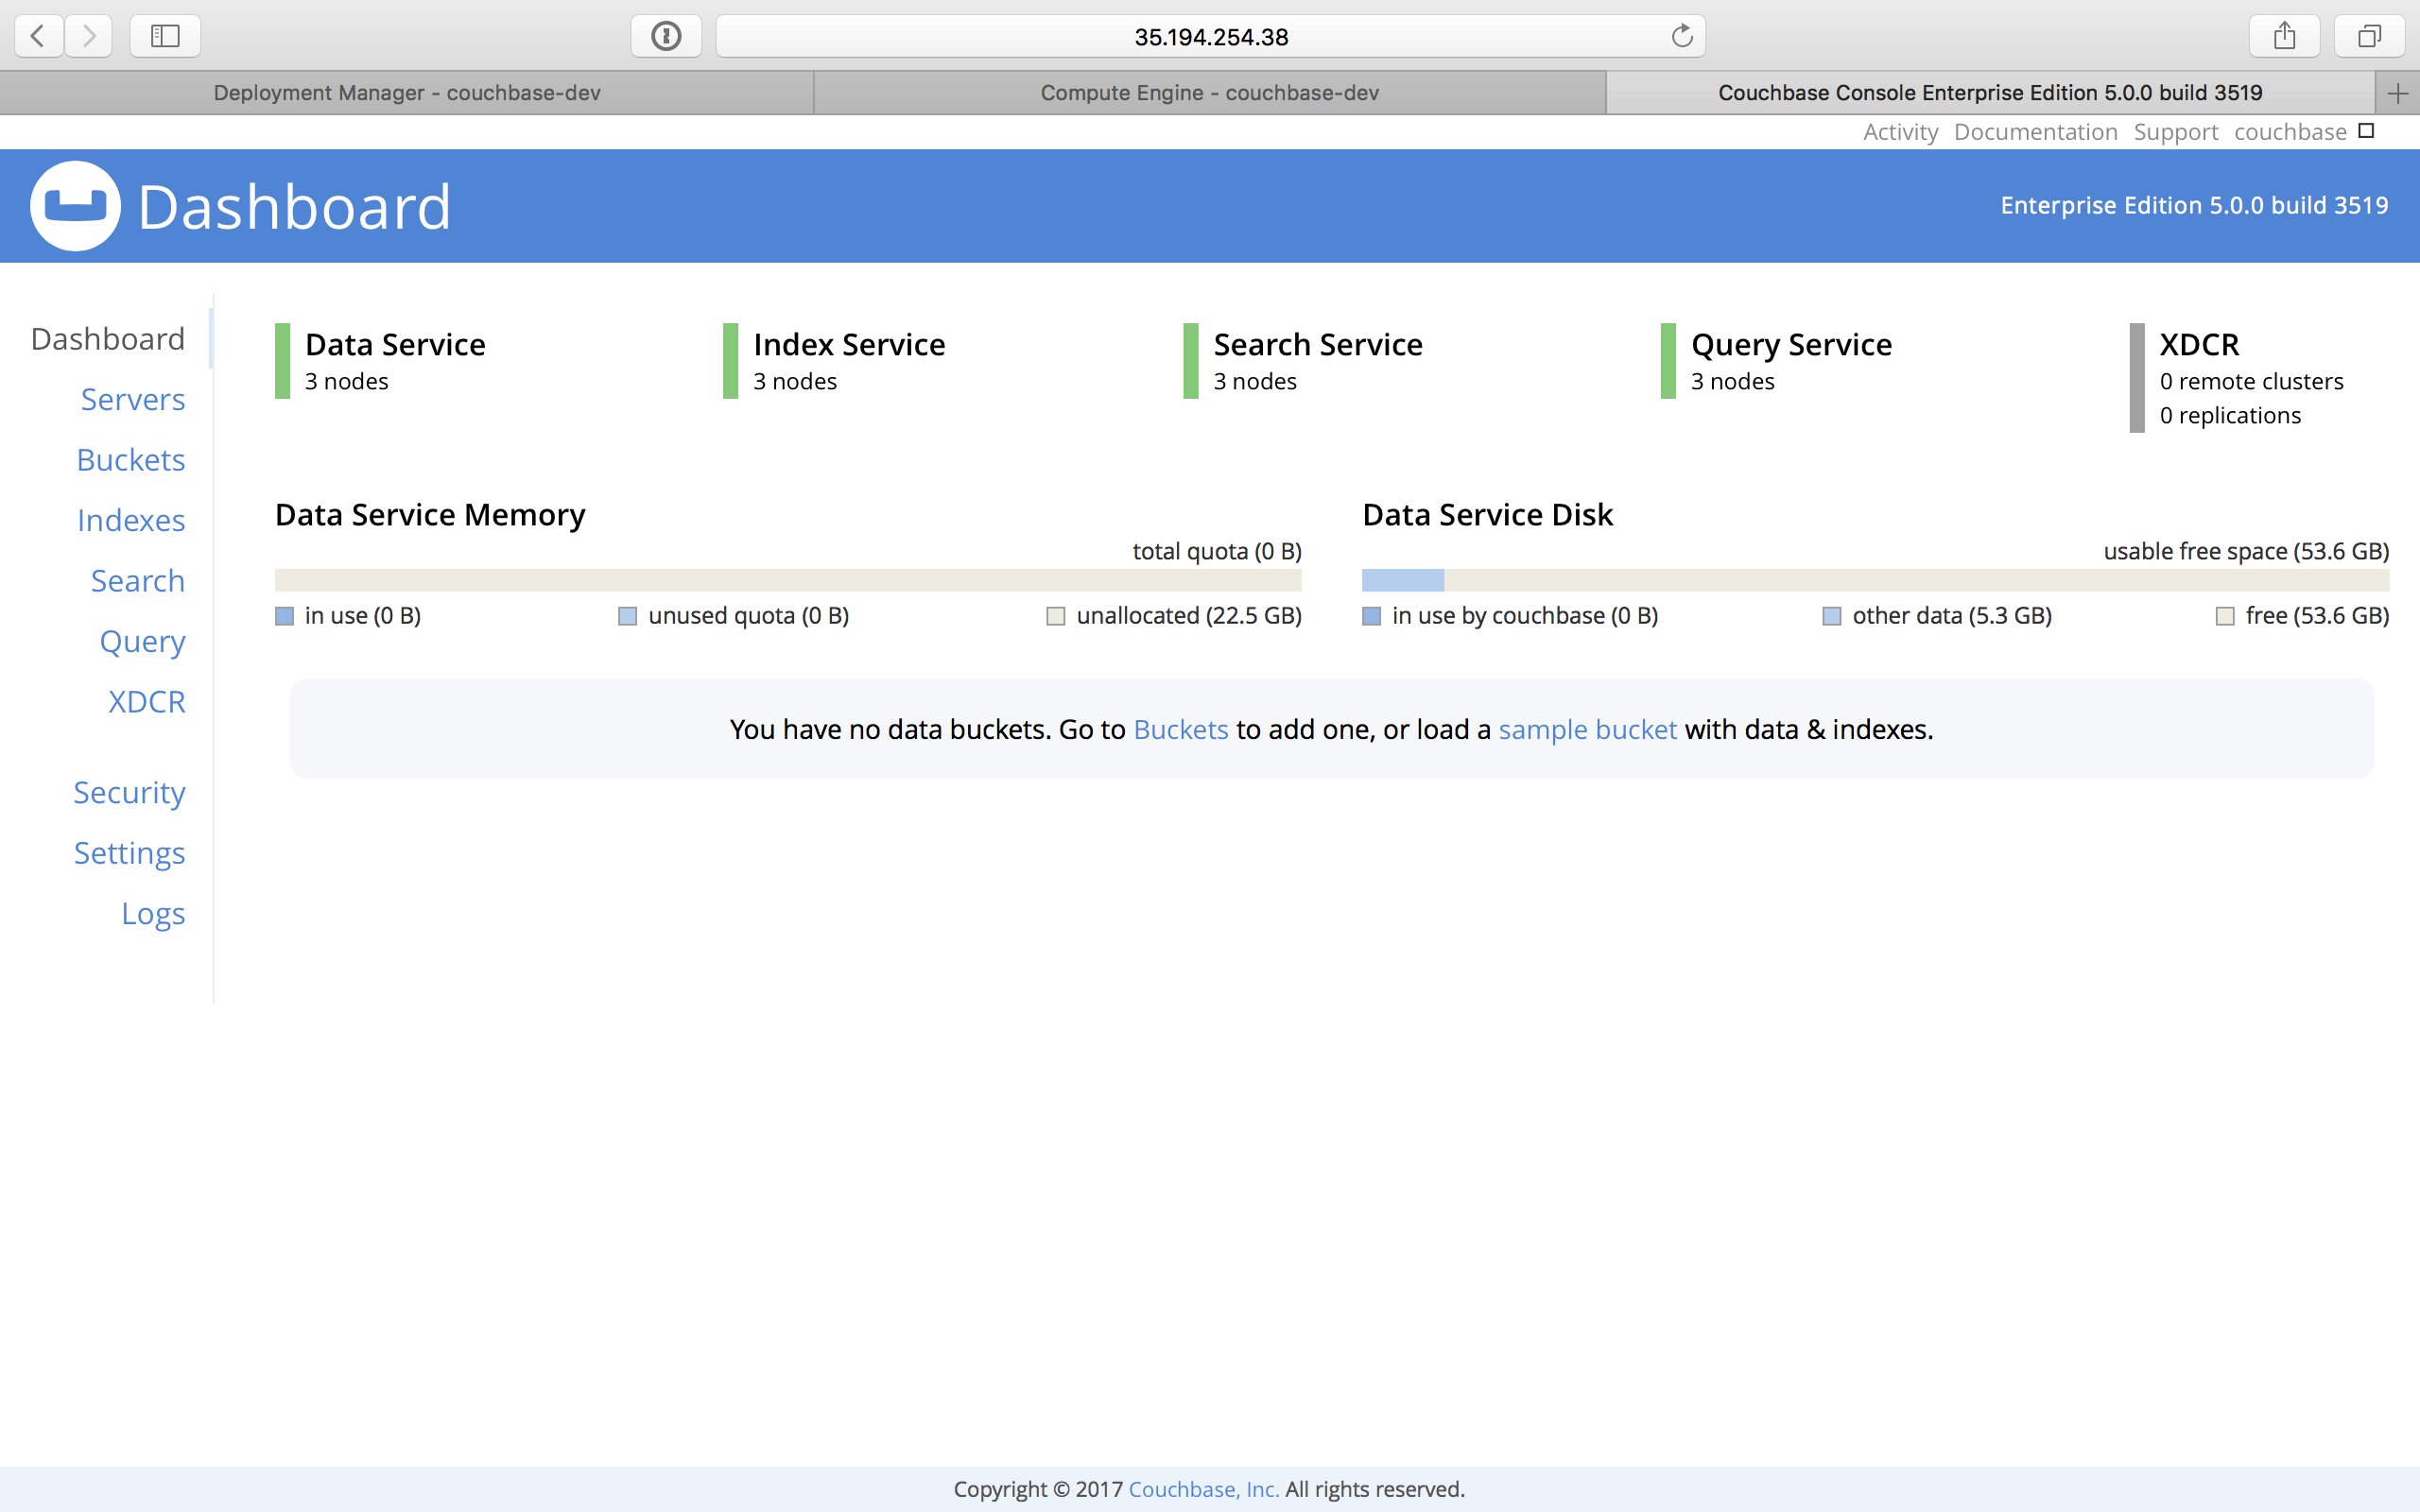
The dashboard shows the current view of the cluster. If you’ve gotten to this step quickly, the cluster may still be adding nodes and rebalance may be in progress. Once the process complete, the dashboard will look something like the following screen capture.
Click the Servers tab to explore the server nodes that have been created.
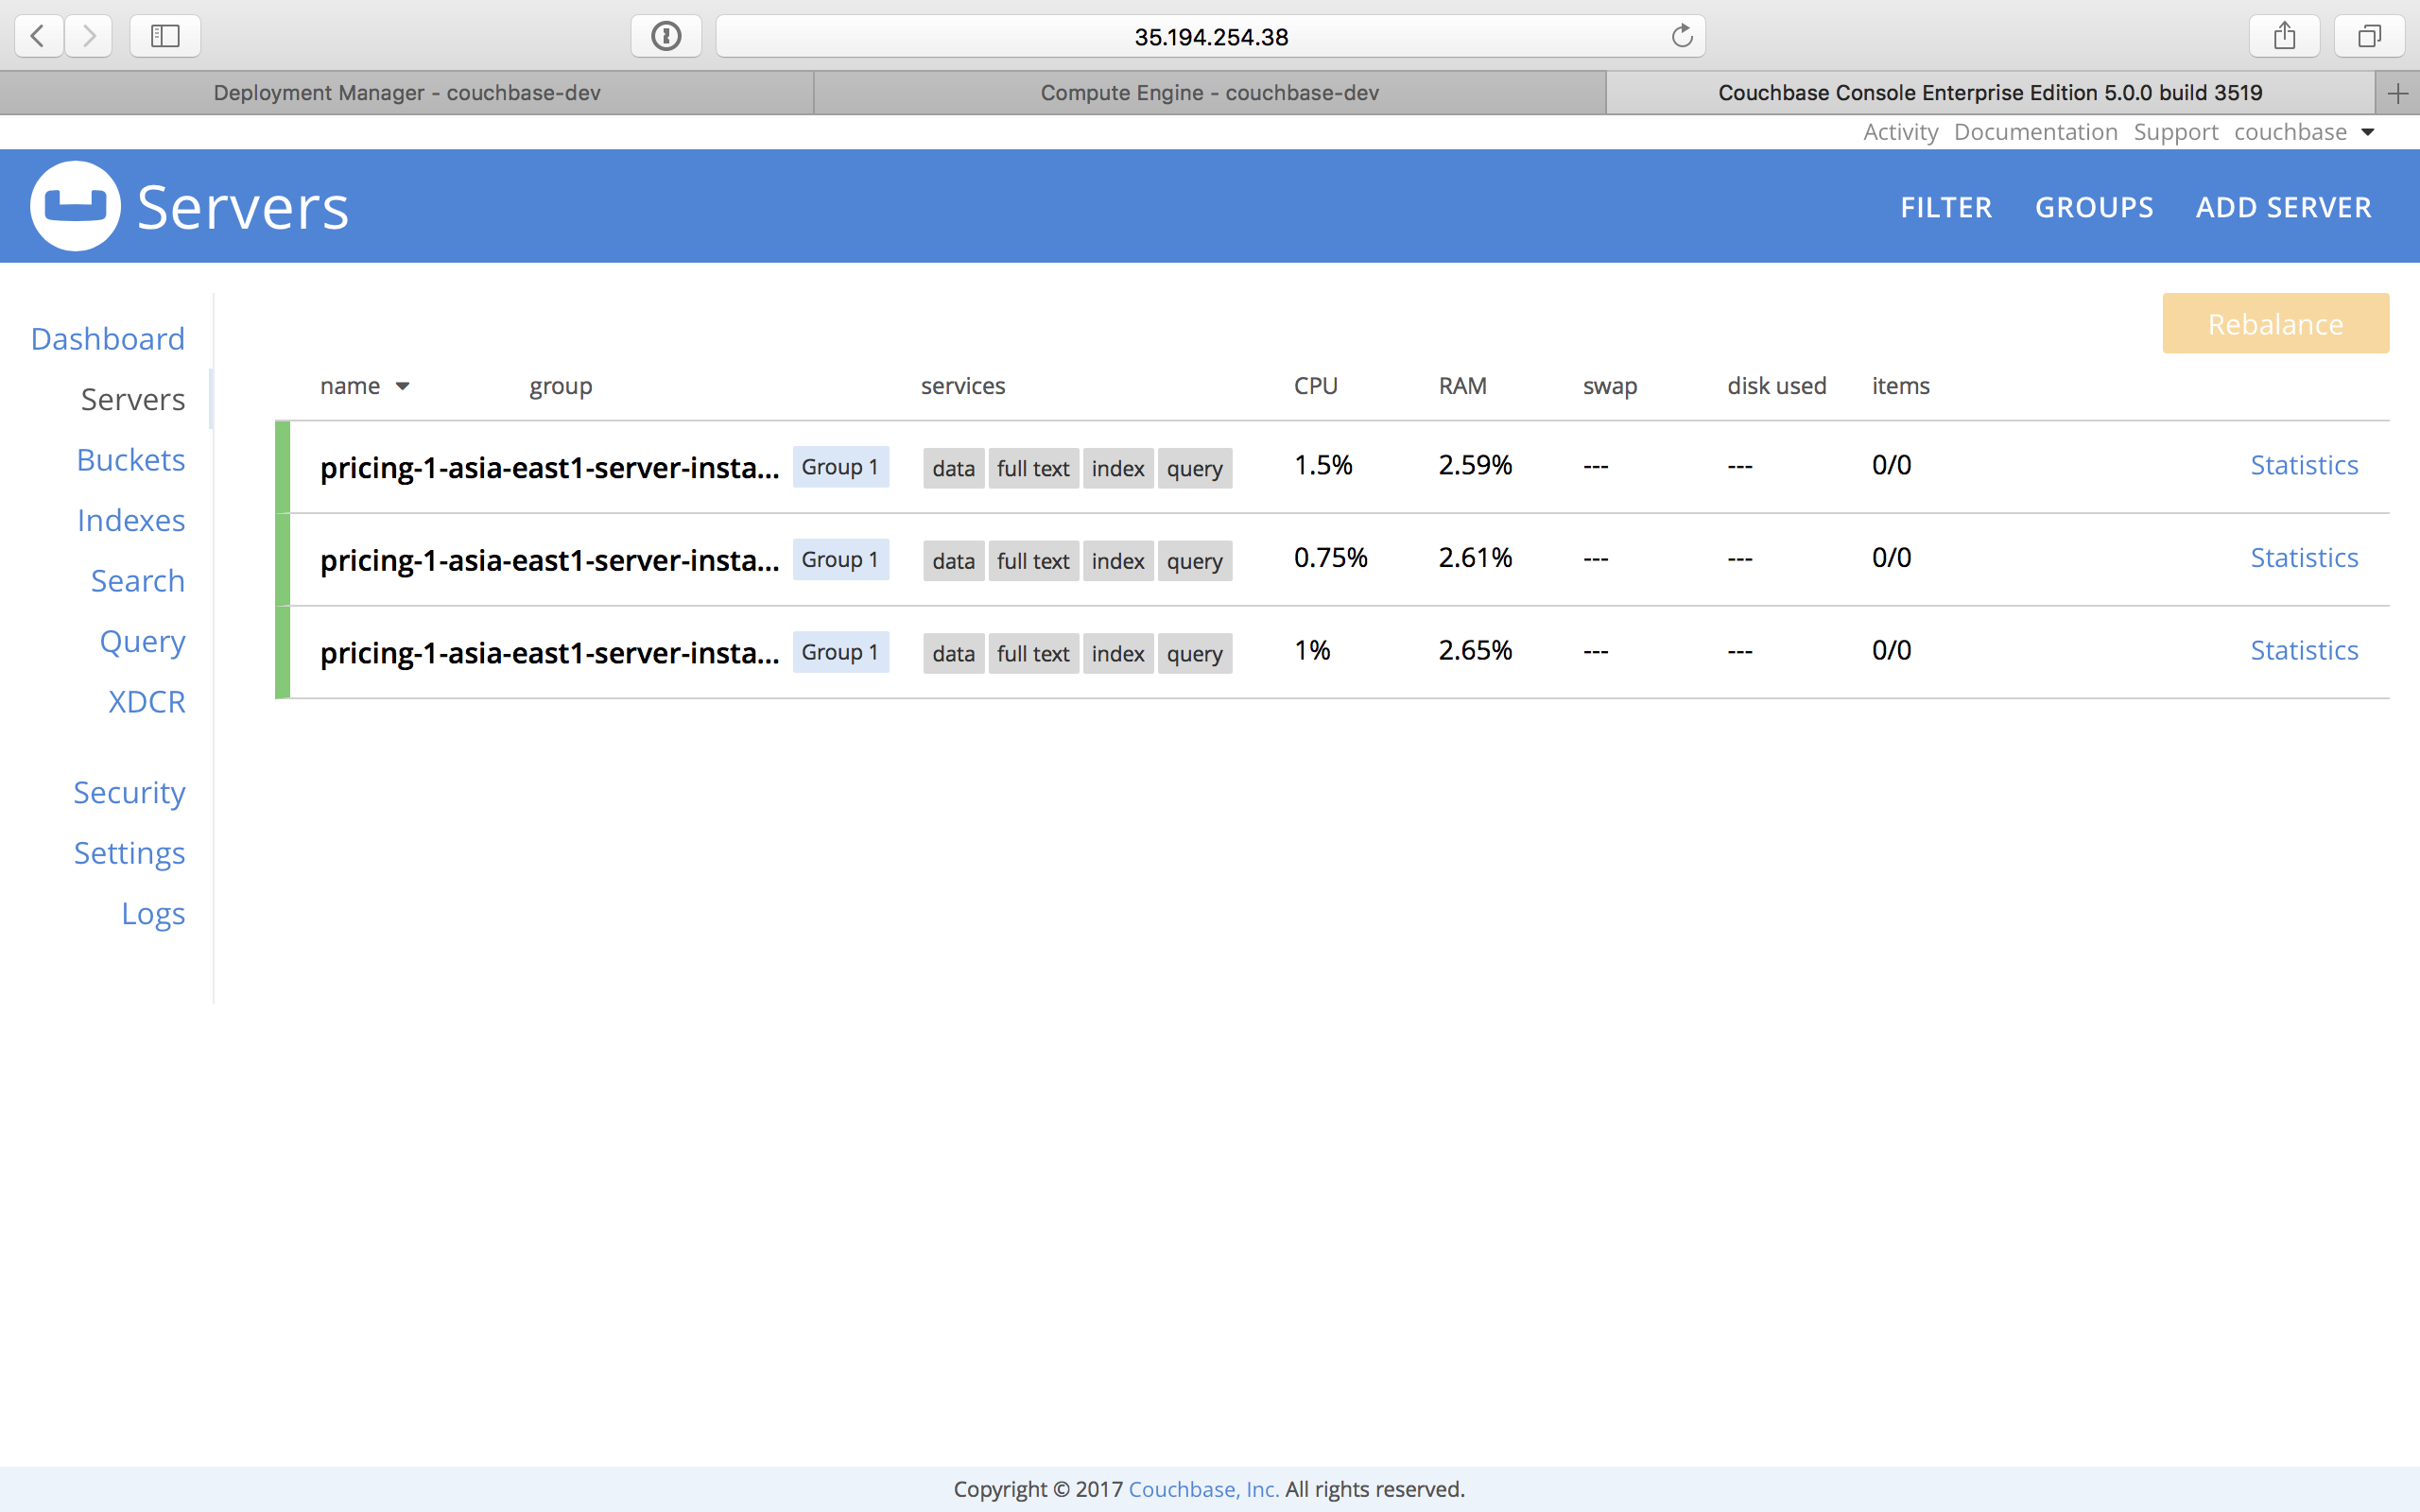
You can click around to explore, load sample buckets and run queries from the Query Workbench. You can also setup XDCR links between the different clusters created by the deployment.
-
-
To log in to the Sync Gateway Admin portal:
-
Click the Products & services icon
at the top left of the screen to pull down the sidebar and select Compute Engine > Instance Groups.
You can see a list of all the Instance groups being deployed.
Depending on how quickly you get to this step after starting deployment, the instance groups may still be deploying.
-
Click a sync gateway instance group to view details such as CPU utilization and the VM instances in that group. Note the External IP of one of the deployed VMs.
-
Open a browser tab and enter the copied External IP along with port 4984 as <external-ip>:4984. This opens the interface for Couchbase Sync Gateway which is already setup and configured to connect to an empty bucket on the cluster.
-
Open another browser tab and enter <external-ip>:4984/_admin/ to open the Couchbase Sync Gateway Admin Portal.
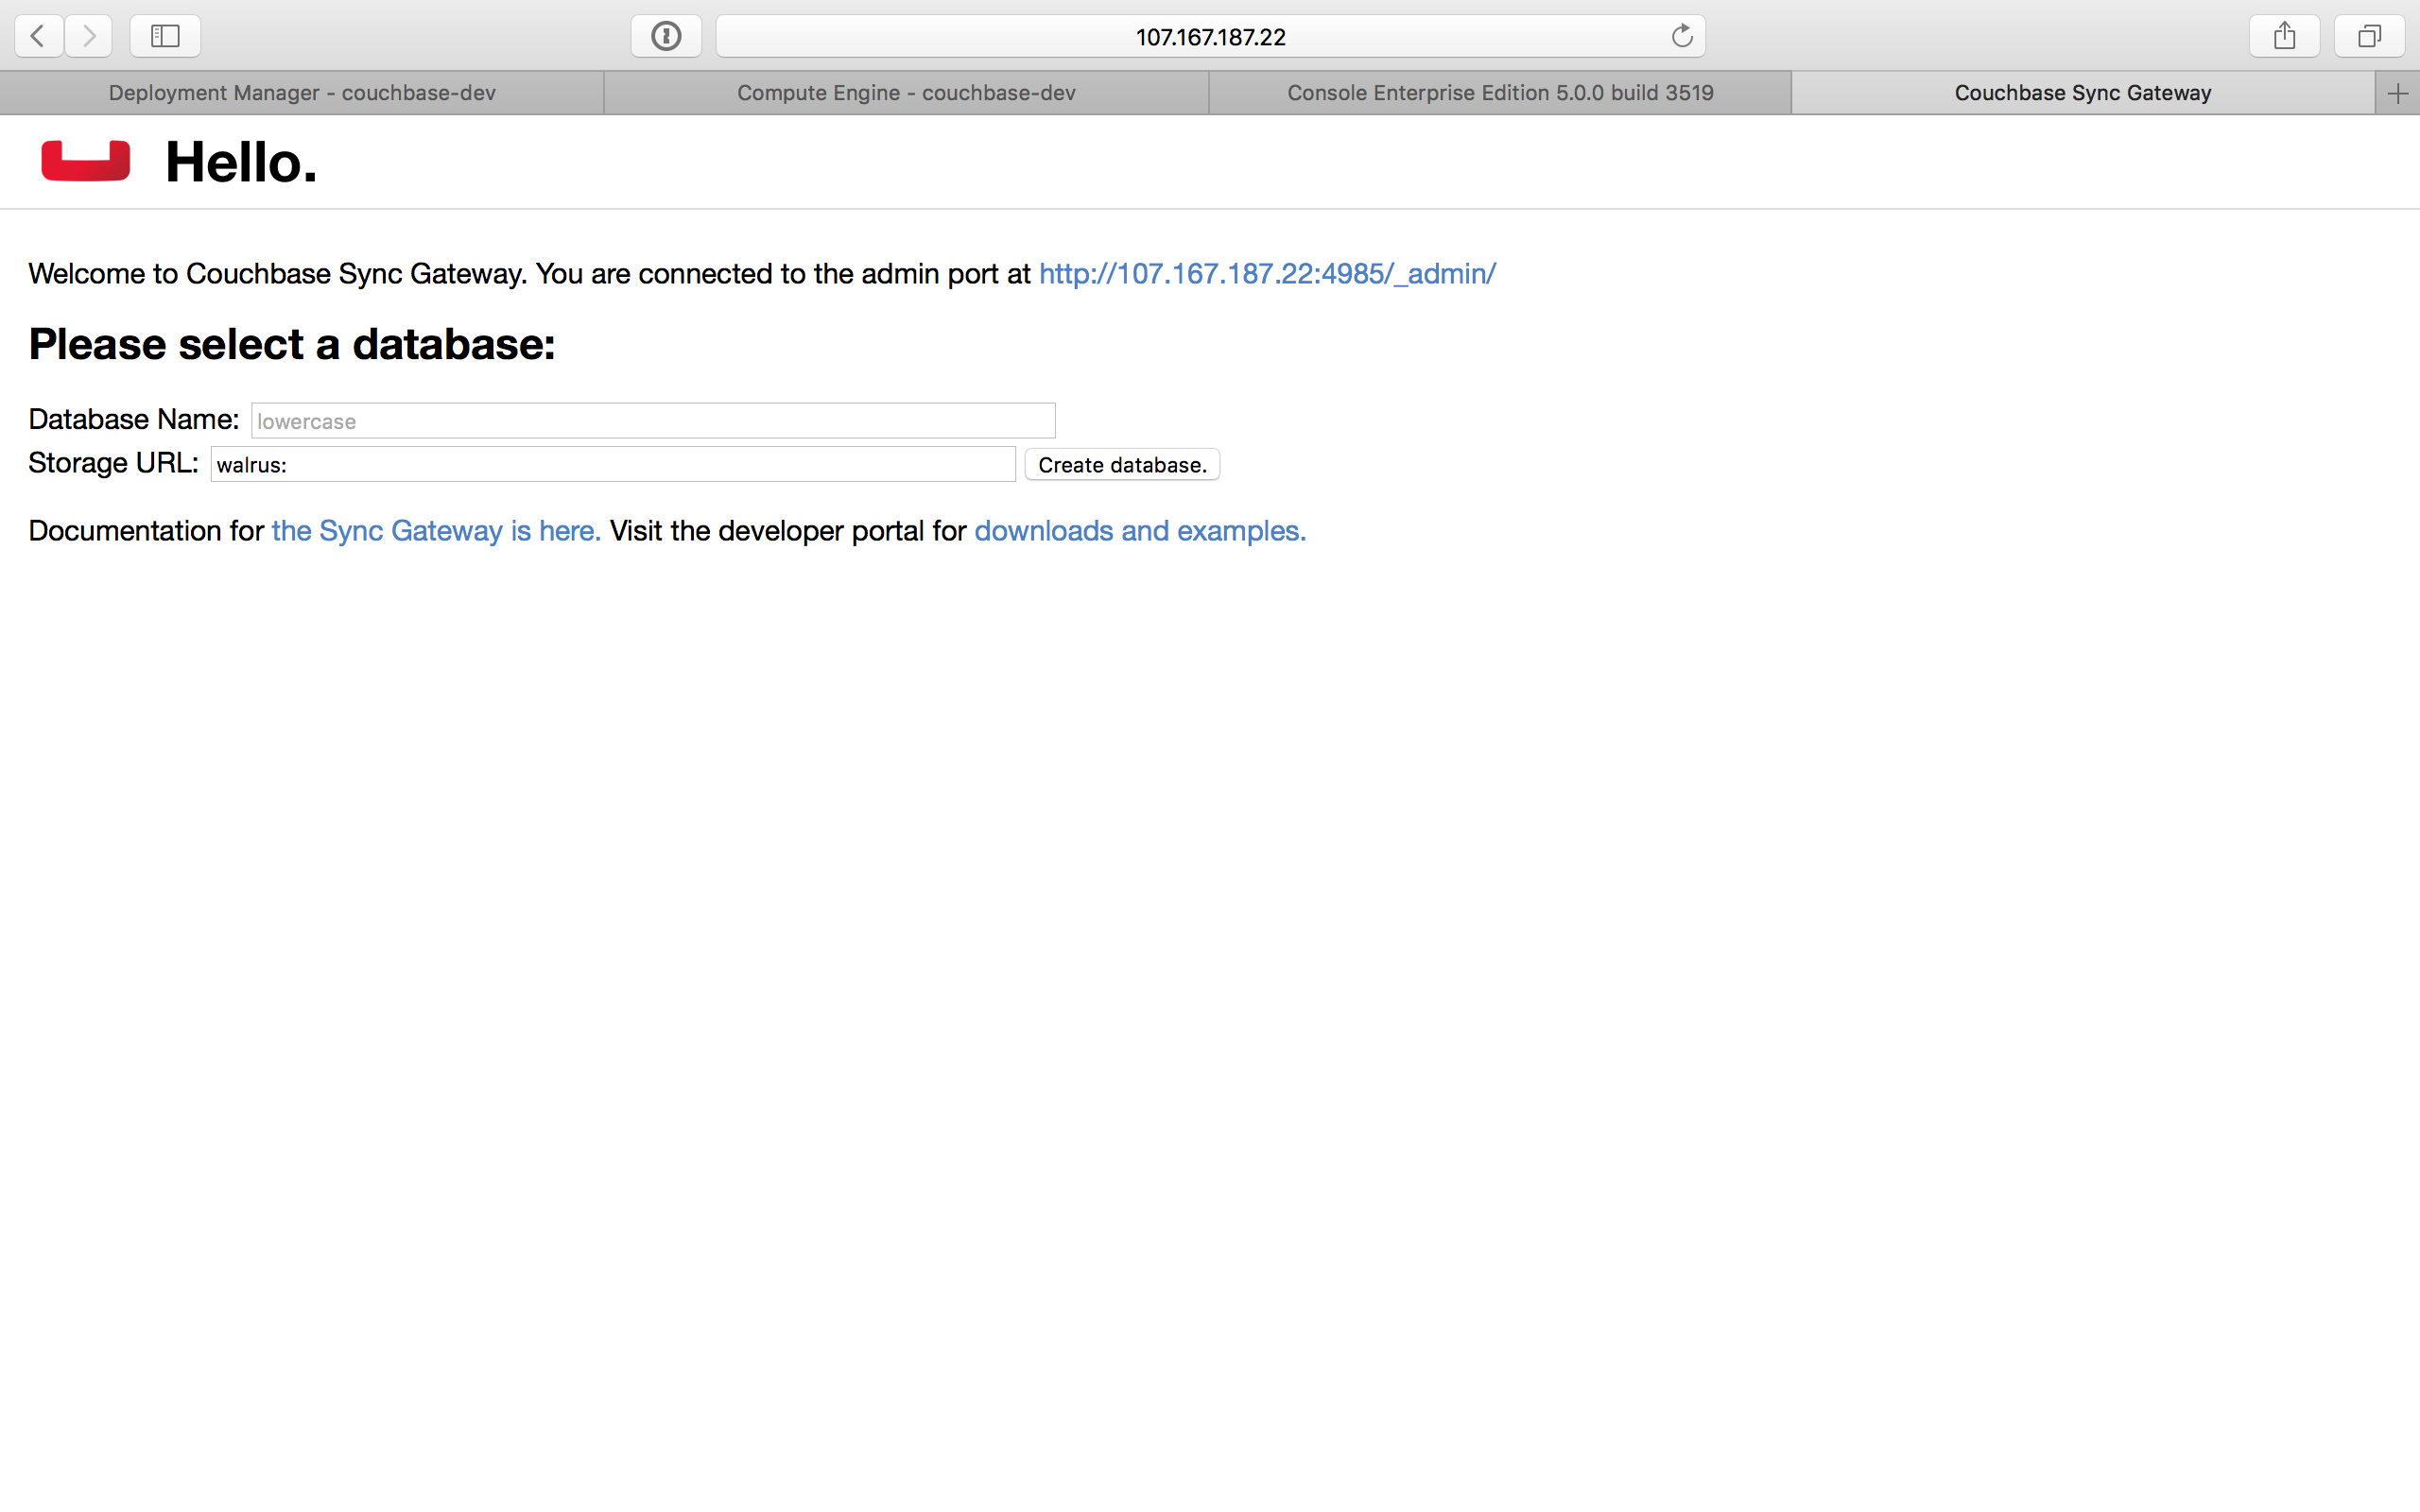
-
Scaling Your Couchbase Cluster
Scaling Couchbase is simplified greatly on Google Cloud Platform. This section describes how to scale up your cluster up in three simple steps.
-
Log in to Google Cloud Platform and navigate to Compute Engine > Instance Groups and select the server instance that you want to scale.
-
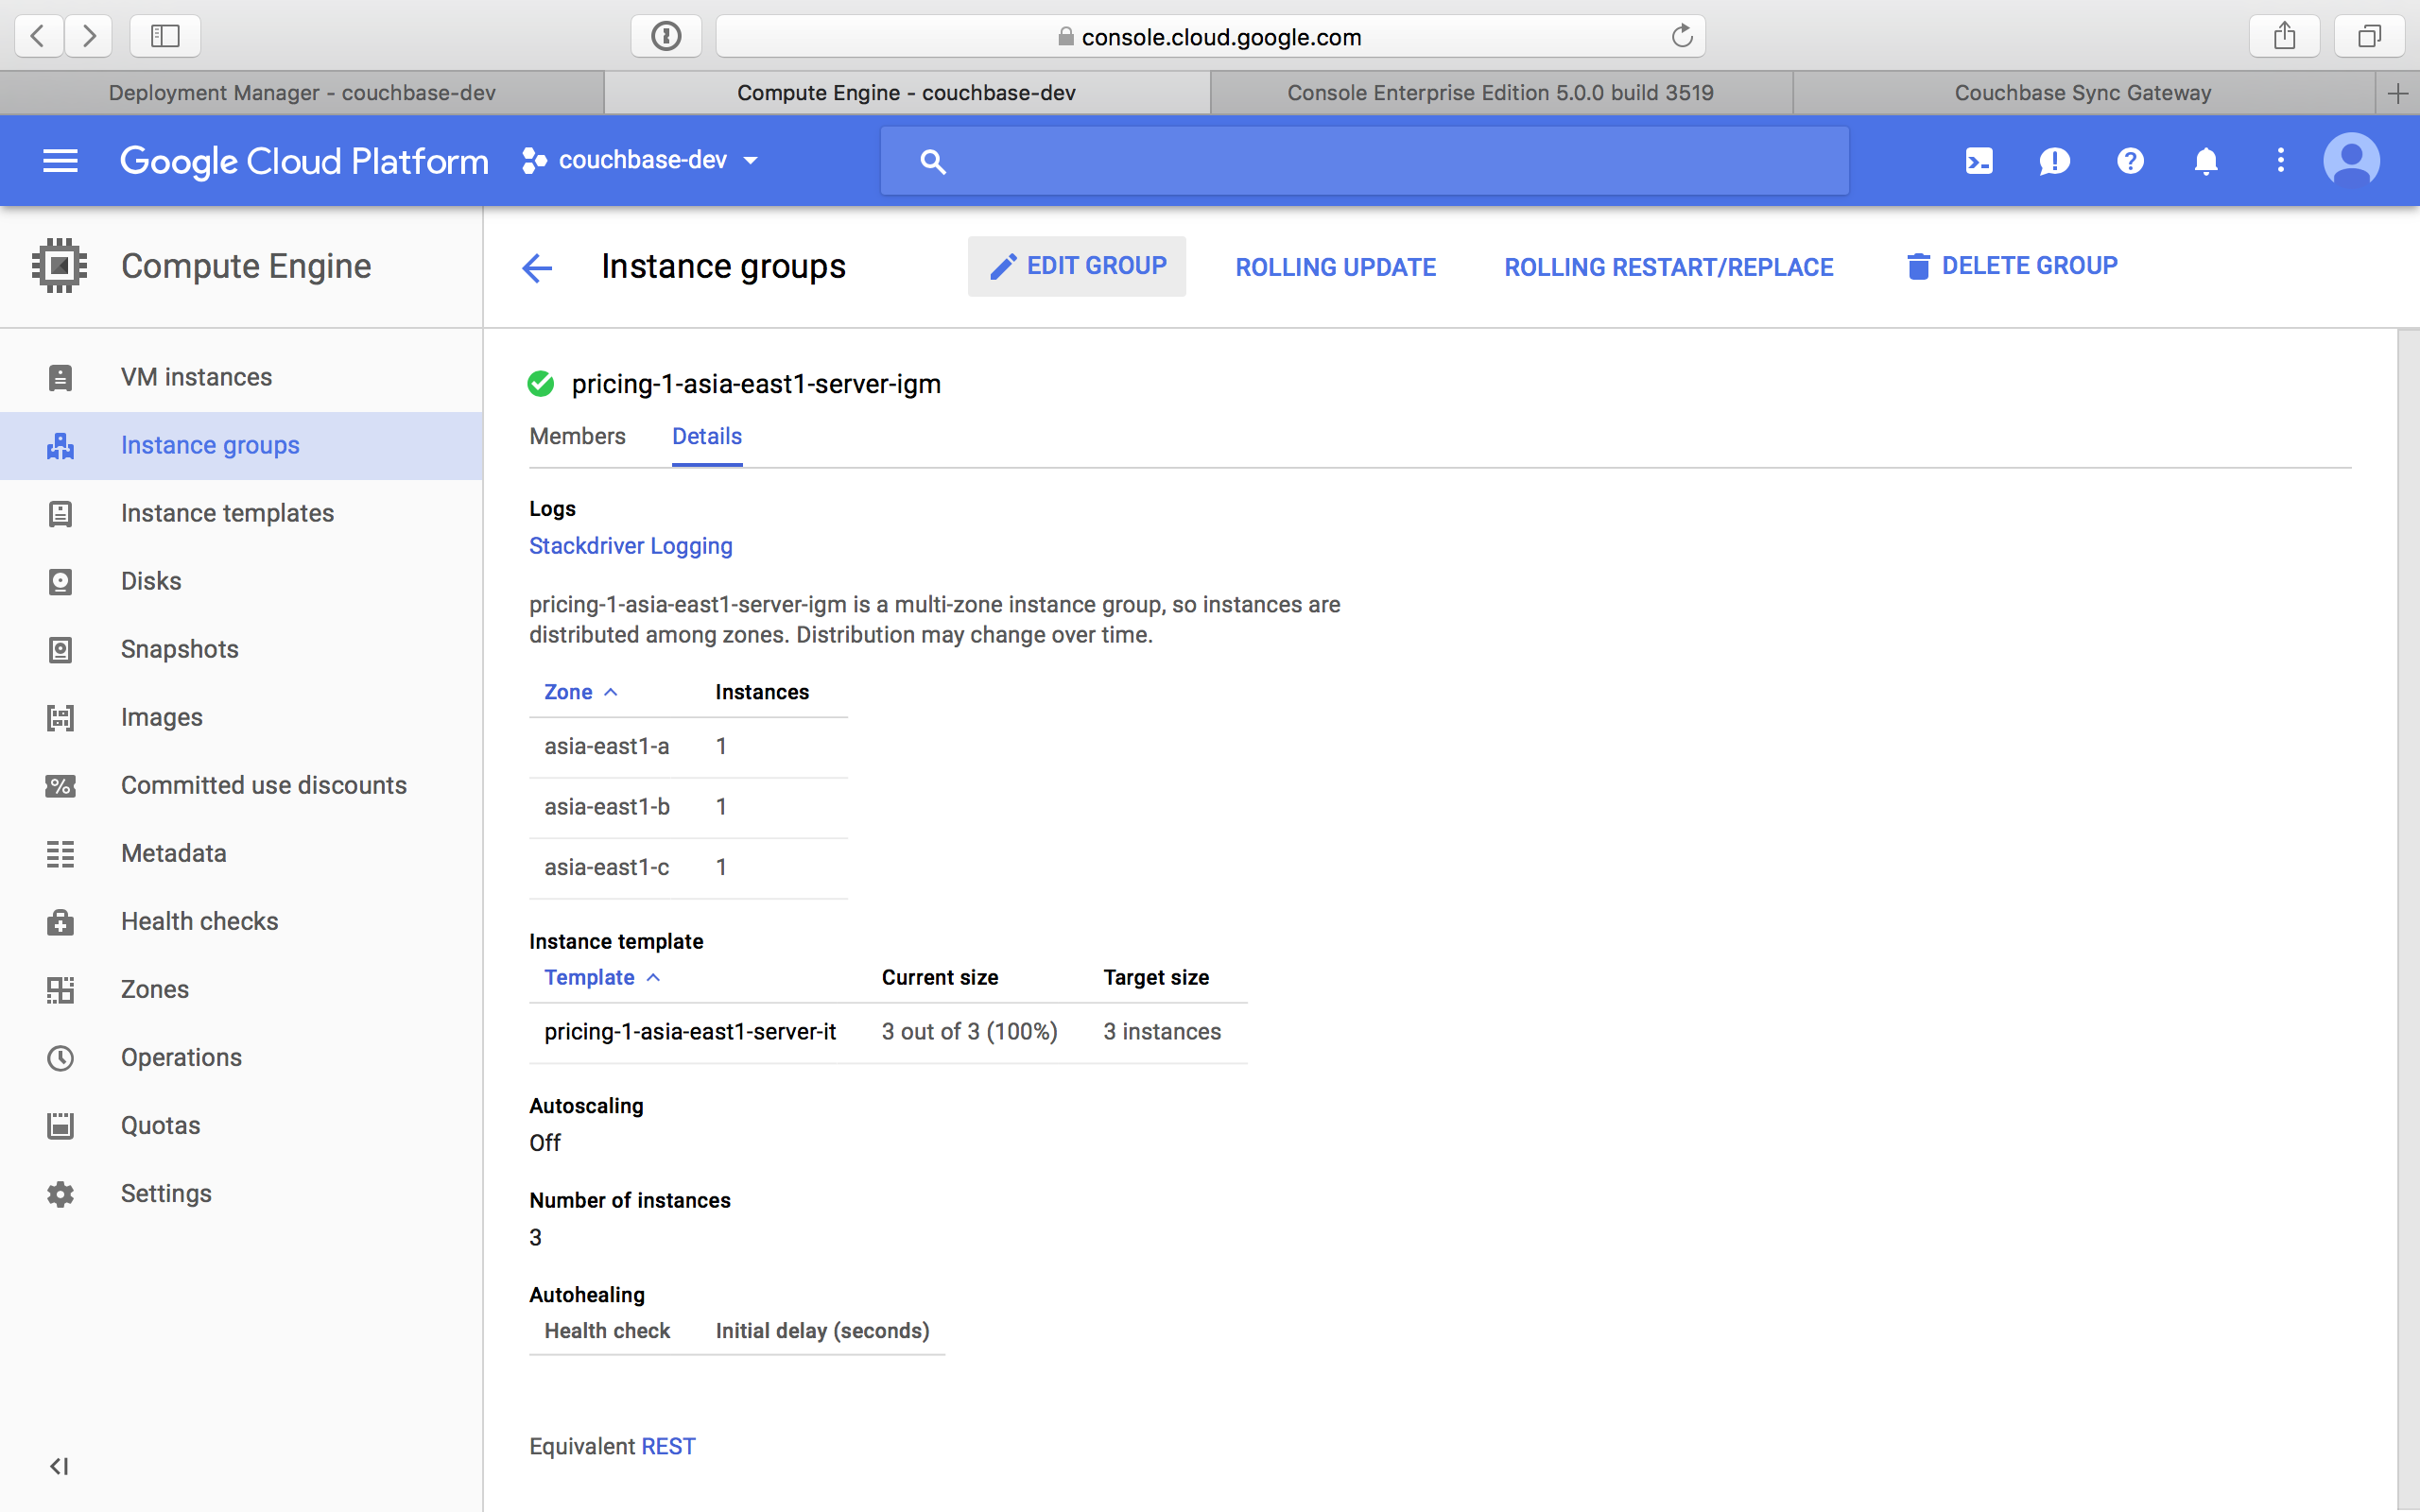
On the Details tab, click Edit Group and edit the number of instances.
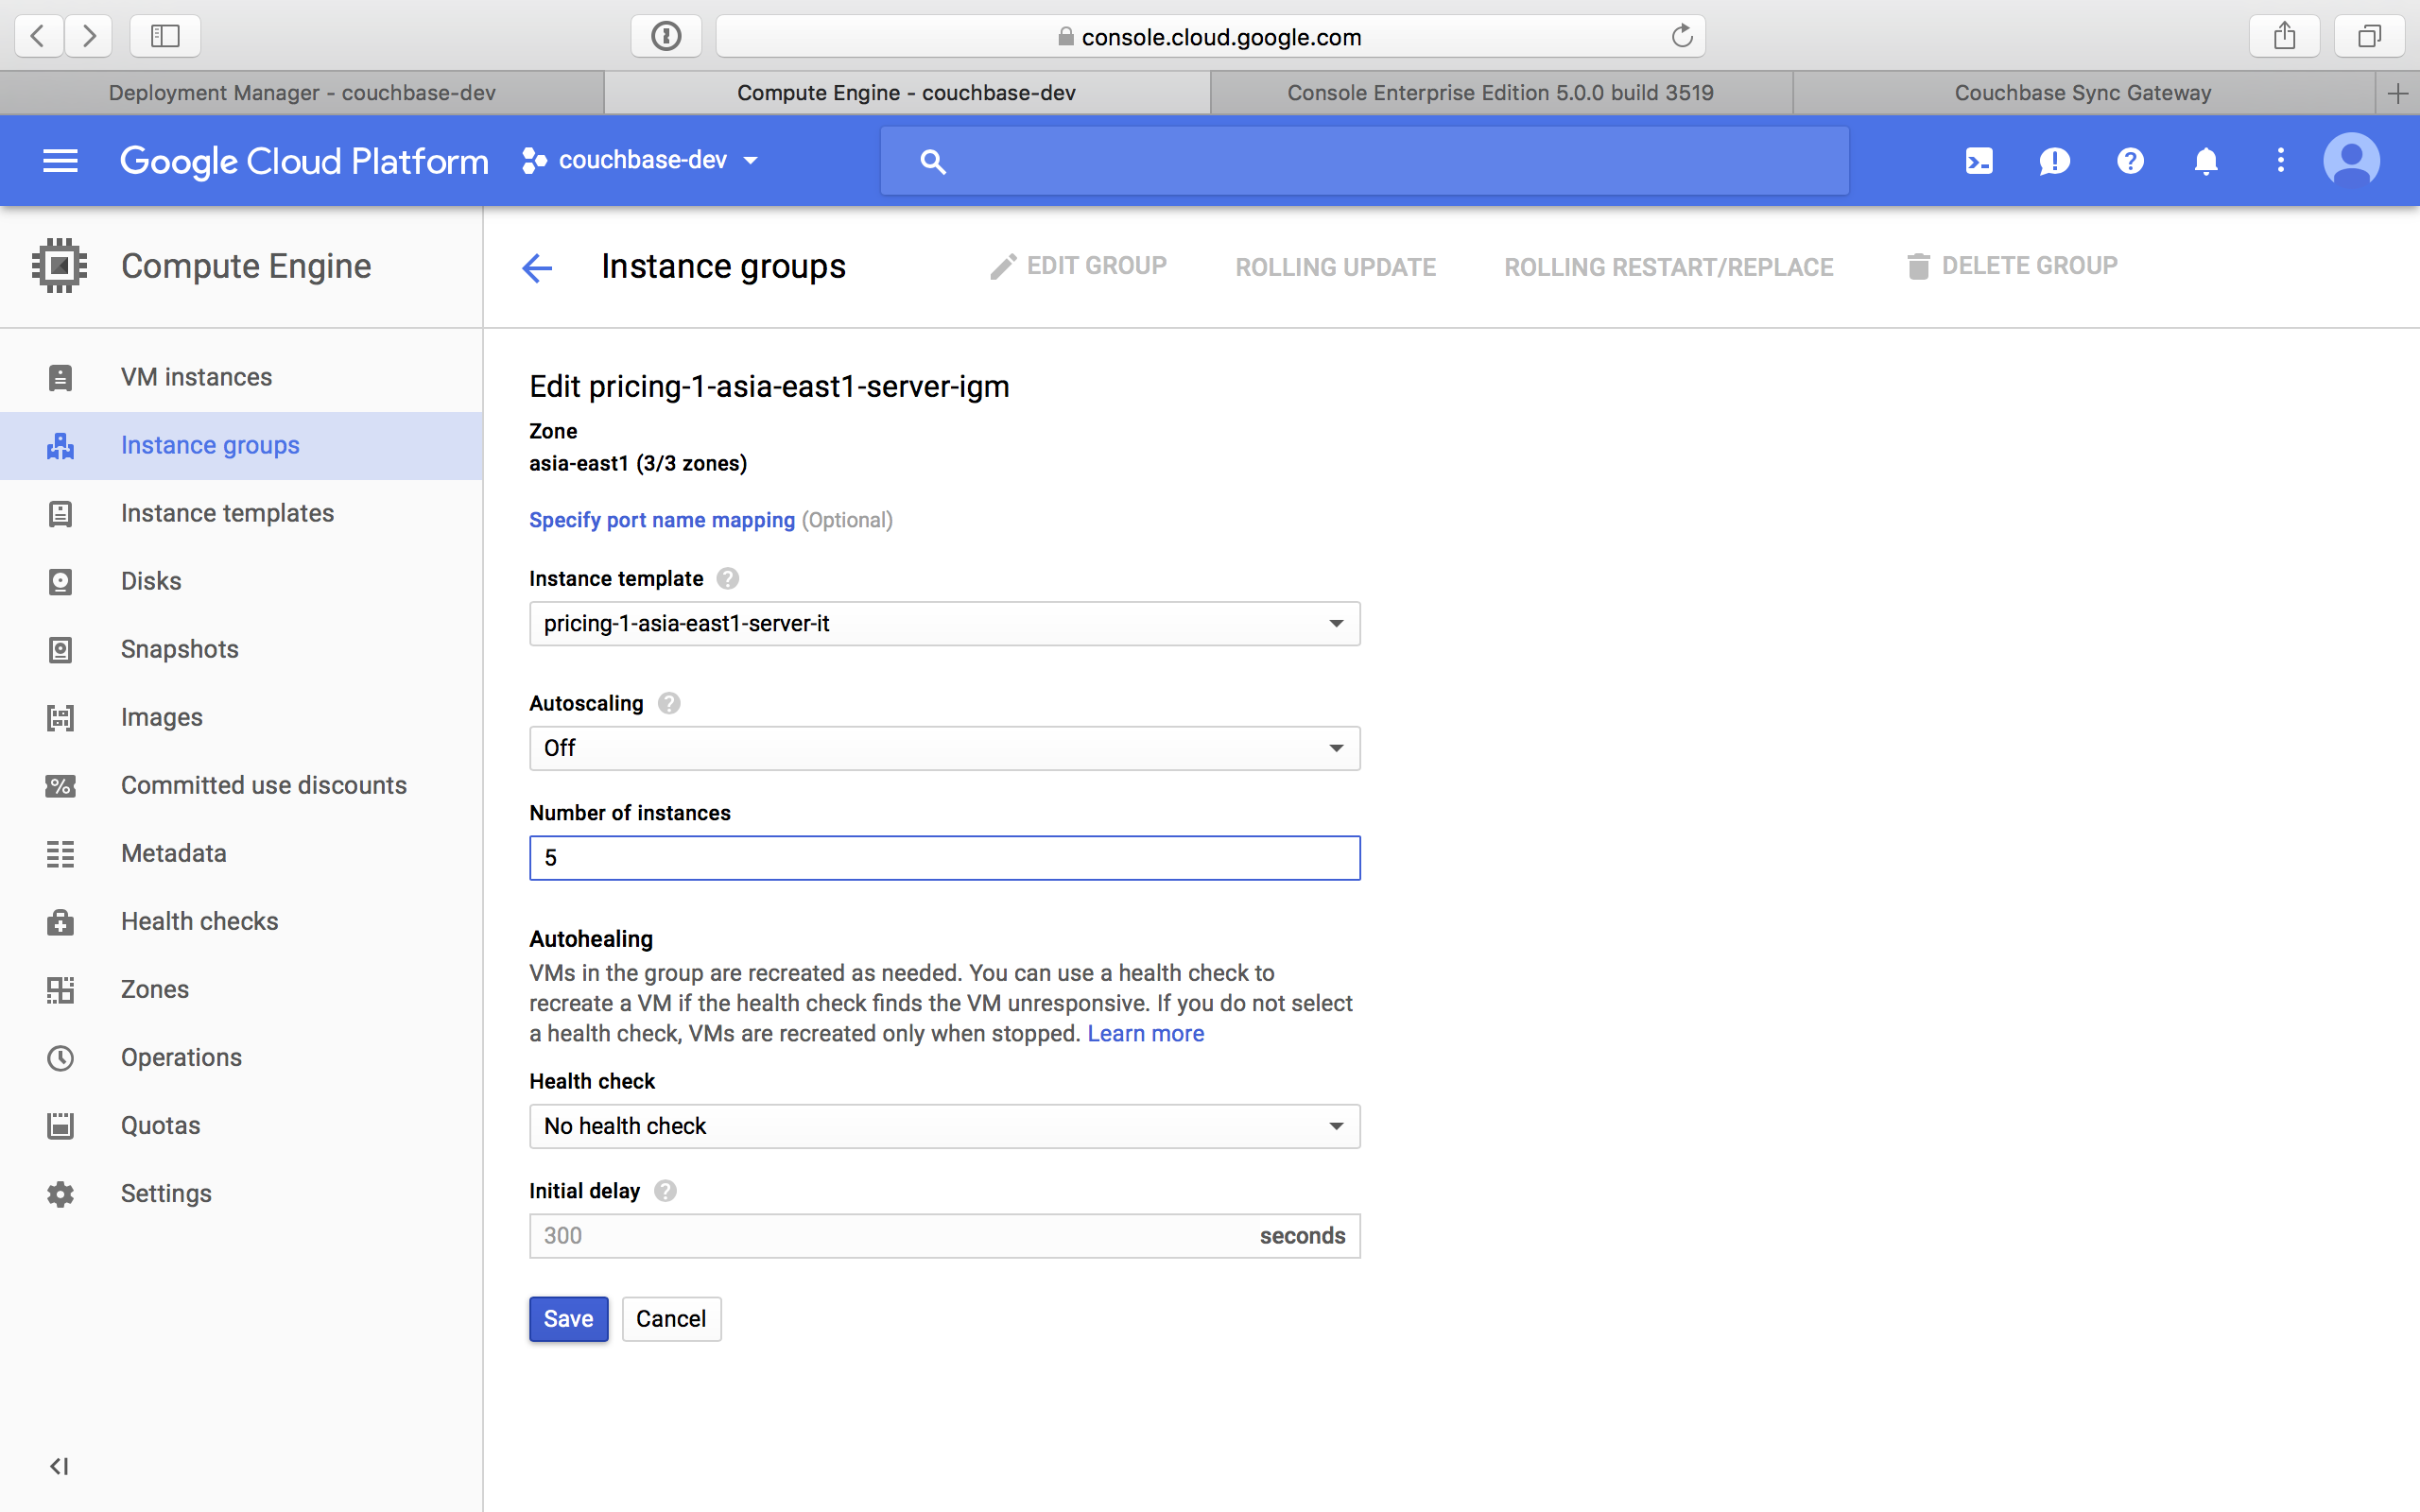
-
Click Save. You’ll see a notification that the group is being updated.
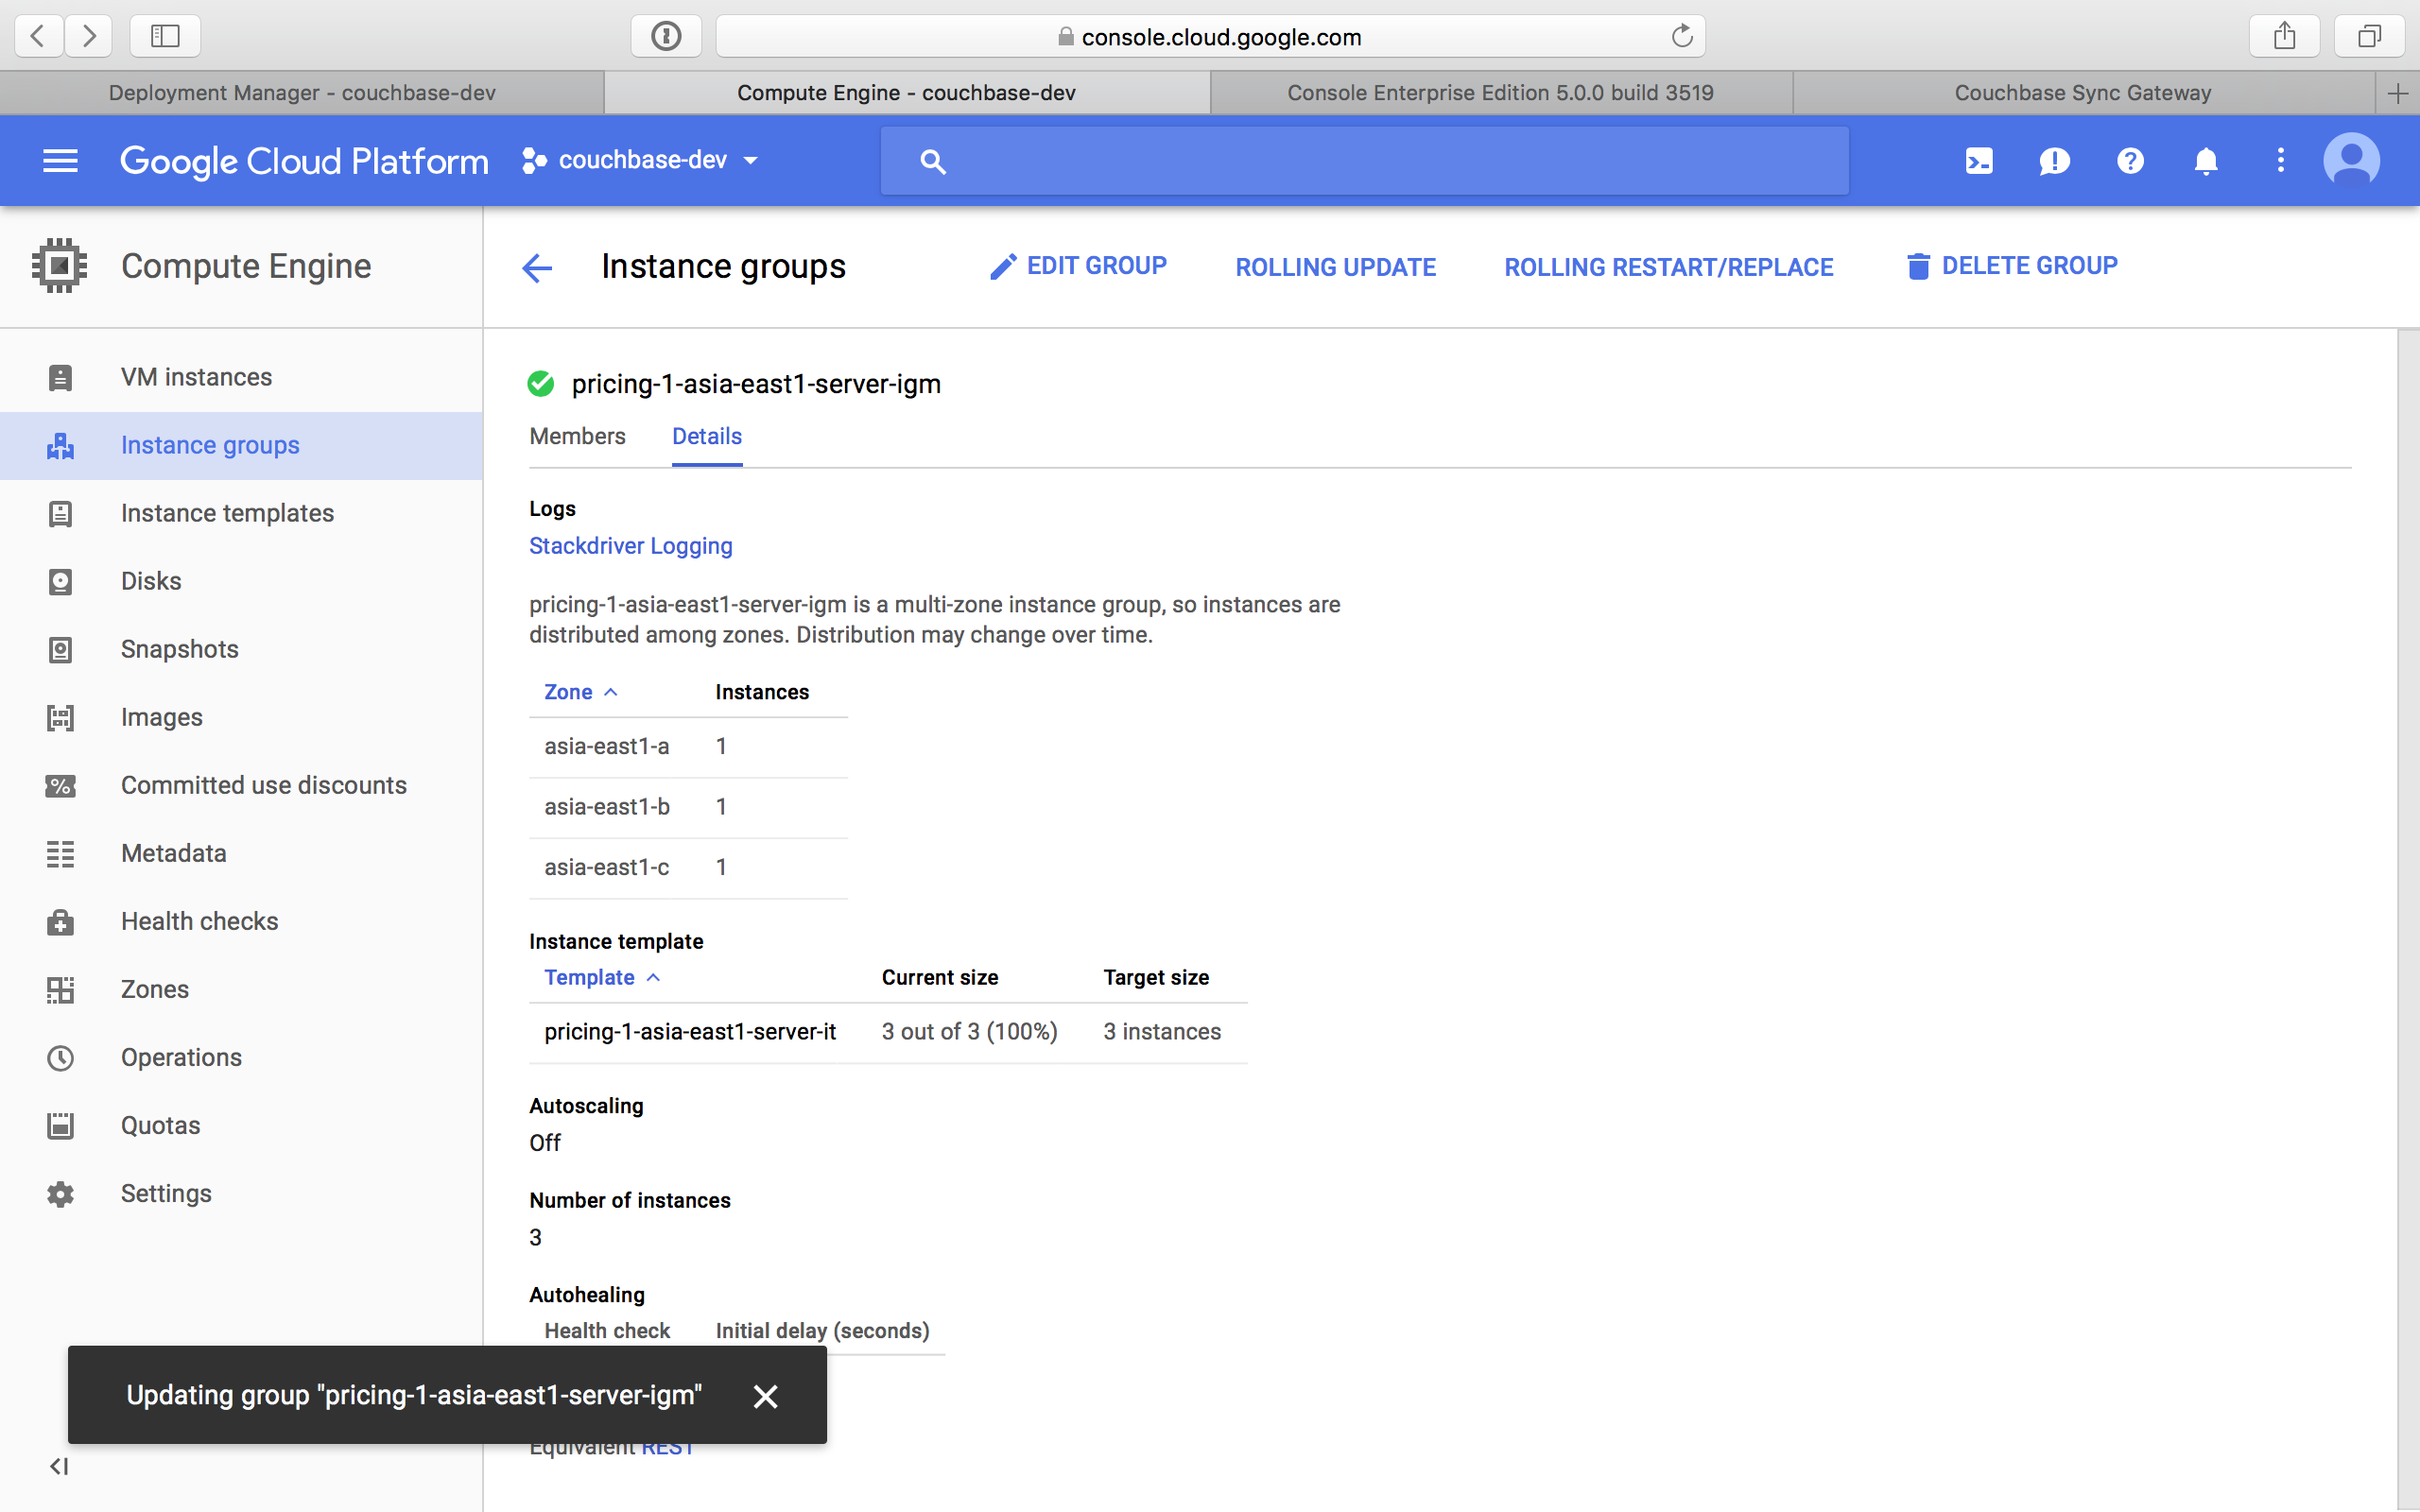
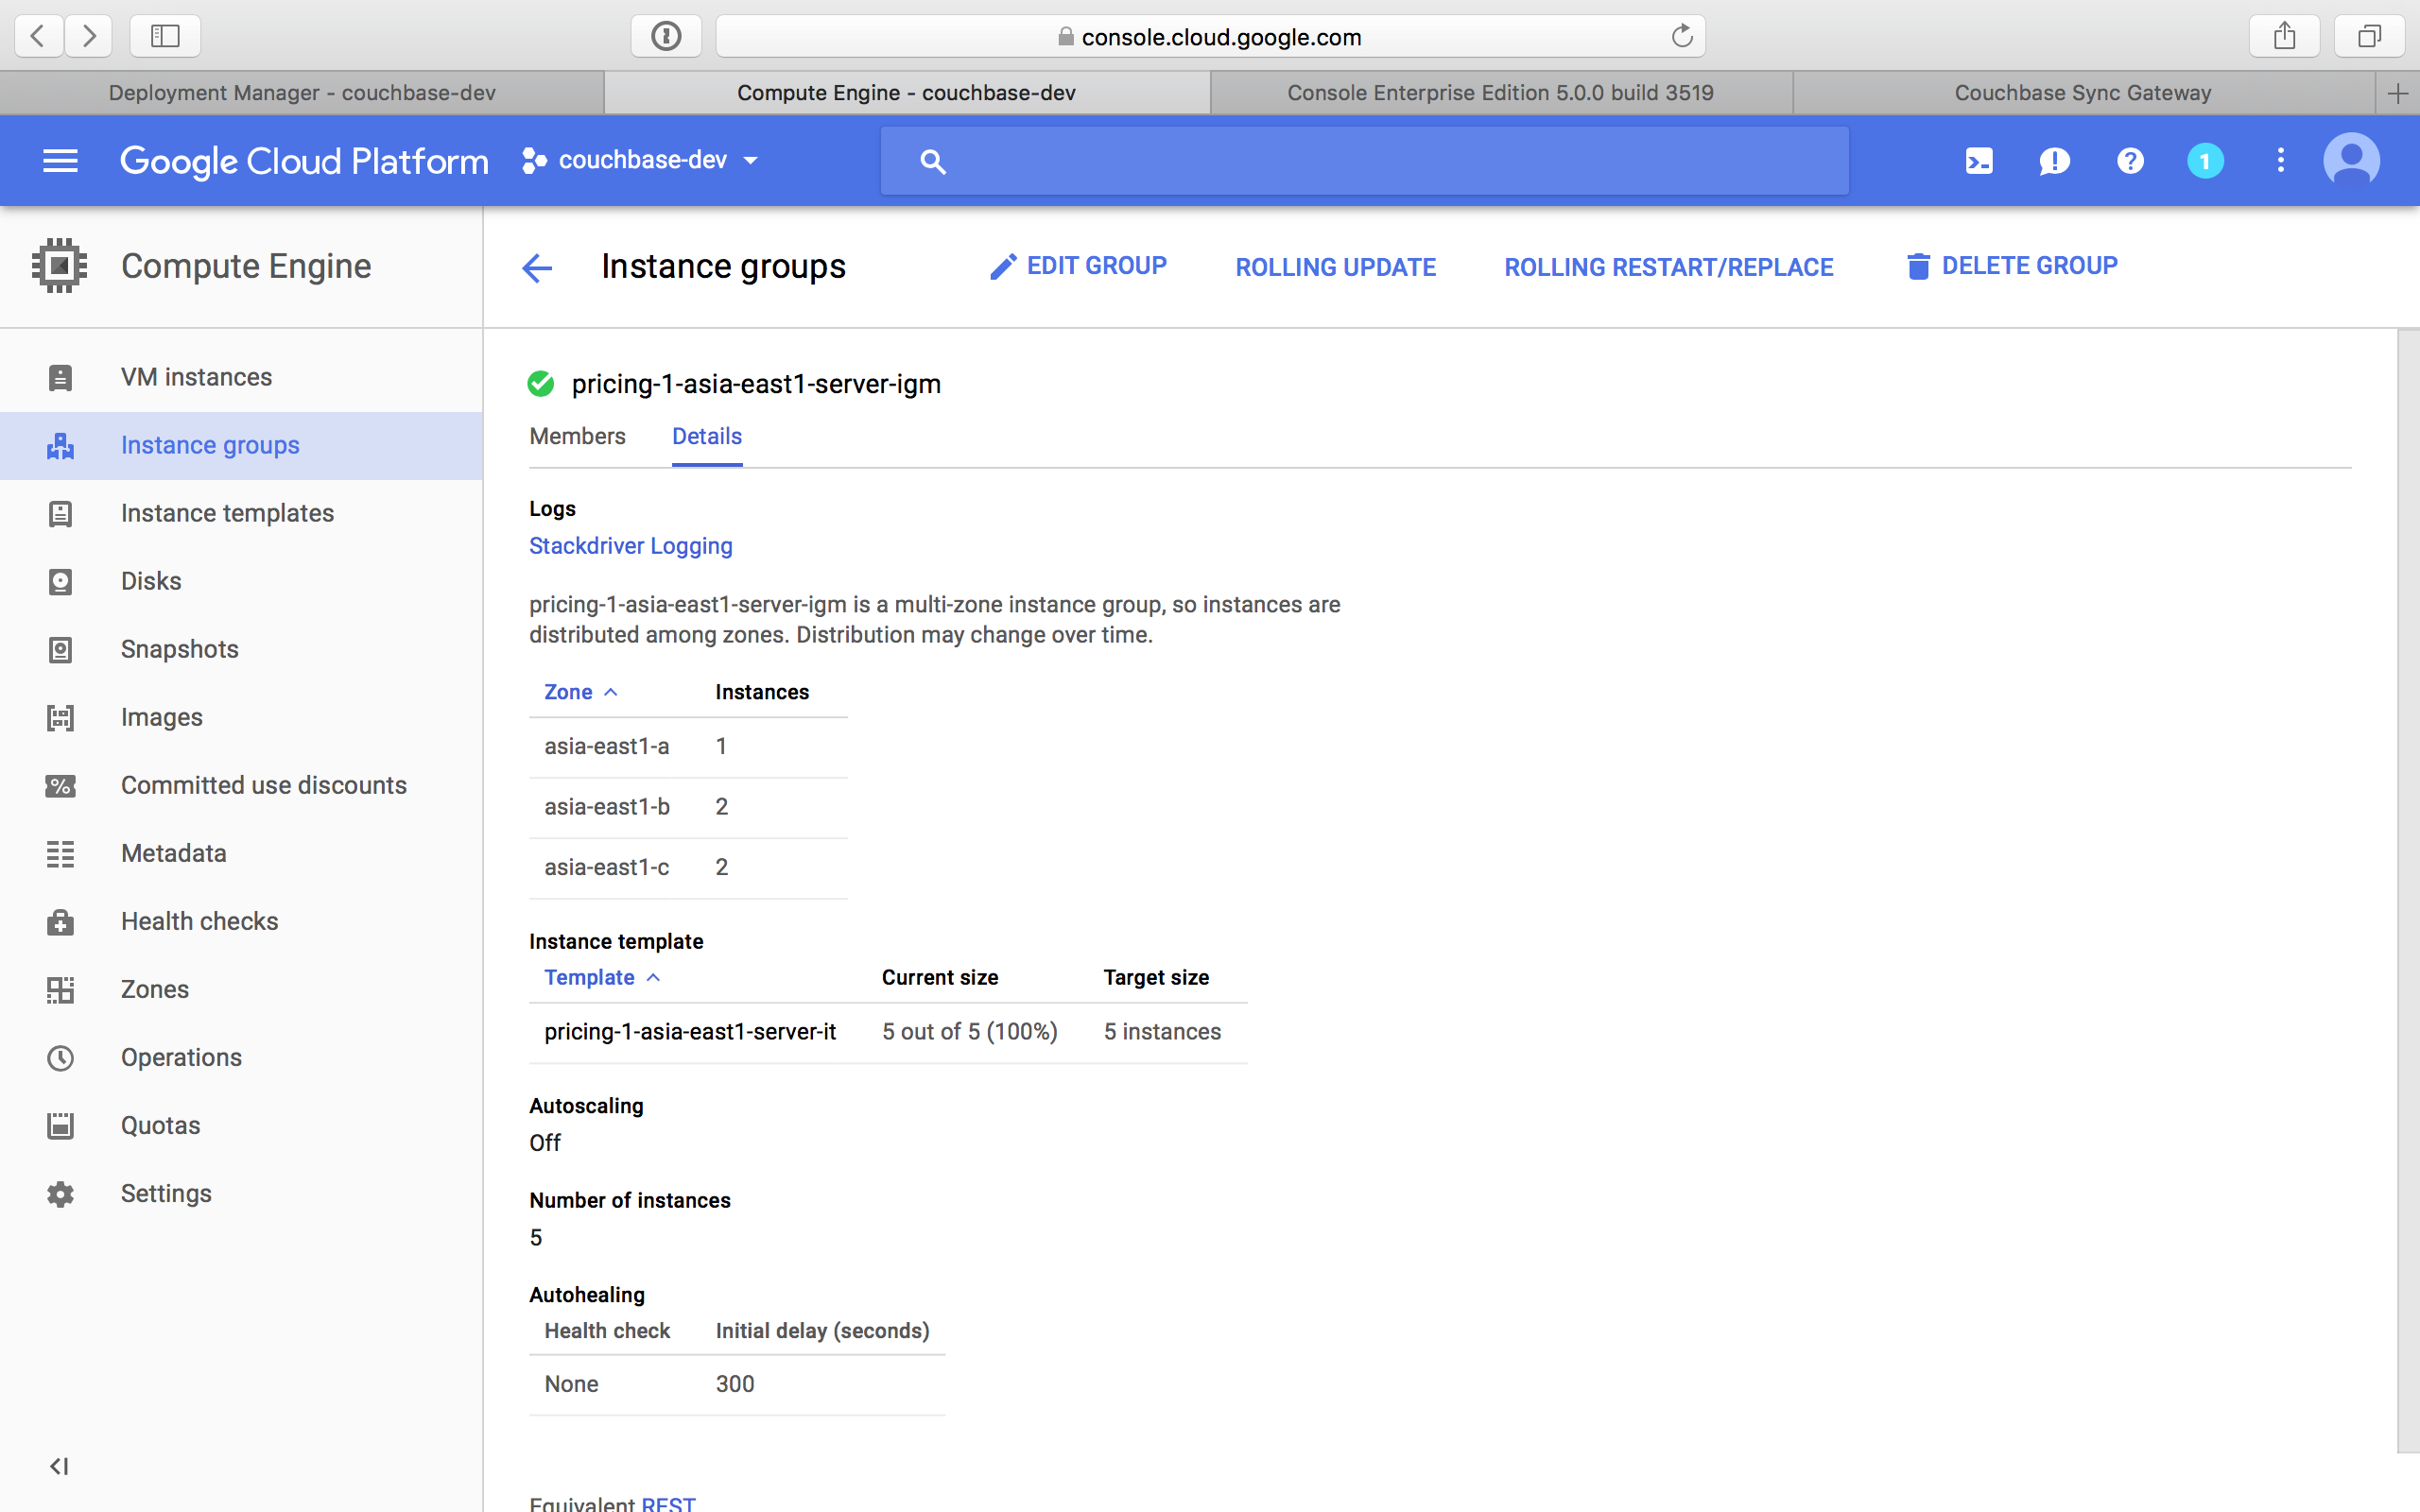
Once updated, you can see the updated number of instances reflected on the server Instance group Details tab.
On a different browser tab, you can log in to the Couchbase Server Web Console to see the additional server nodes that were added to your cluster.