Certificates
Couchbase Server supports using certificates for client and server security and authentication.
Certificates and Couchbase Server
To maintain security, Couchbase Server can verify the identity of any system it connects to or that tries to connect to it. This verification ensures that only authorized systems can interact with the database. By default, Couchbase Server nodes always verifies the identity of other nodes in the cluster. You can choose to have Couchbase Server also verify the identity of client systems and XDCR clusters. Couchbase Server verifies the identity of systems using certificates.
Similarly, you can configure Couchbase Server to identify itself to other systems using certificates. This use of certificates lets other systems such as clients and XDCR clusters verify the identity of your database.
Certificates indicate trust (and therefore identity) by cryptographically signing other certificates. You use a certificate’s private key to sign another certificate. In this case, the certificate you use to sign another is called a Certificate Authority (CA) or a root certificate. When you use a CA to sign a certificate, you’re indicating you trust the system using certificate. If Couchbase Server trusts the CA, it can trust a system that identifies itself with a certificate signed by the CA. You can also use the signed certificate as an intermediate certificate by using its own private key to sign new certificates. By signing the new certificate, the intermediate certificate extends the trust of the CA to the newly signed certificate. This series of signings establishes a chain of trust from the CA, through the intermediate certificate, to new certificate.
This page provides a general overview of using certificates with Couchbase Server and clients. It assumes you know the basics of Transport Layer Security (TLS) and certificates. To learn more about these topics, see the Wikipedia article on Public key certificate, and OpenSSL’s Command Line Utilities page.
Managing certificates requires the Full Admin or Security Admin roles.
For step-by-step instructions for creating and deploying certificate for Couchbase Server and clients, see Configure Server Certificates and Configure Client Certificates.
Couchbase Server’s Trust Store
You tell Couchbase Server which CAs and intermediate certificates to trust by adding them to its trust store. The trust store is a collection of certificates that’s shared cluster-wide—each node can access the certificates in it. The nodes in the cluster use these certificates to determine whether to trust other nodes during TLS connection negotiation.
When a system—another node, or a client or XDCR cluster when configured to connect securely—interacts with a node, it provides its certificate as identification. The node tries to identify the system by establishing a chain of trust from the system’s certificate to a certificate in the trust store. For example, suppose a client system has a certificate signed by an intermediate certificate which in turn was signed by a CA in the trust store. In this case, the node finds a chain of trust from the system’s certificate, through the intermediate certificate, and to a CA in the trust store. Therefore, it can trust the identity of the other system.
Default Certificates
By default, when you create a new cluster, Couchbase Server generates a self-signed CA that it uses as its root CA. It uses this CA to sign server certificates that it automatically generates for each node. The root CA appears under Trusted Root Certificates on the Certificates tab of the Security page in the Couchbase Server Web Console.
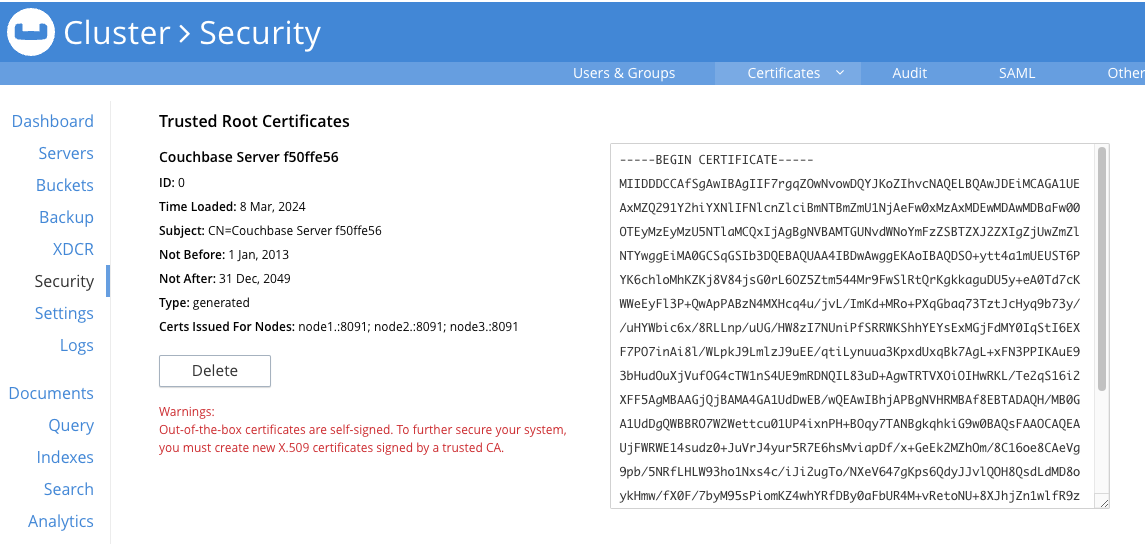
This page also lists each node’s certificate.
As you add nodes to the cluster, Couchbase Server automatically creates a new server certificate for them signed by this CA. These default certificates allow the nodes to verify each other’s identity, preventing outside systems from masquerading as a node. They a basic level of security.
You can add additional custom root certificates to Couchbase Server’s trust store. Common uses for the additional certificates includes signing certificates to identify client or XDCR clusters. You can also use additional root certificates to replace the node certificates that Couchbase Server automatically generates. The following sections explain these uses of custom certificates.
Custom Root Certificates
You can choose to create your own certificates, optionally signed by a well-known authority, and add them to Couchbase Server’s trust store. These additional certificates are listed under Trusted Root Certificates on the Certificates tab of the Security page, along with the self-signed CA. You can use these custom root certificates to sign certificates for client systems and XDCR peers.
| You cannot use the private key for the self-signed root CA that Couchbase Server created to sign node certificates. Therefore, the only way to create certificates for client systems and XDCR clusters is to create and add custom certificates to the trust store. |
Custom Node Certificates
You can also use a custom root certificate to sign node certificates. As long as the signing certificate has a chain of trust leading to a CA in the Couchbase Server’s trust store, the node’s certificate will be trusted by other nodes.
If you want to use custom node certificates, you can choose to replace the default self-signed root certificate with your own customized one. To replace the self-signed CA, you must first replace each node’s certificate with one you signed using the new CA. Once no node has a certificate that was signed by the self-signed CA you can delete it. You can learn which nodes have certificates signed by a root CA from its entry in the Couchbase Server Web Console’s Certificates tab on the Security page. The Certs Issued For Nodes field lists any nodes that have certificates signed by the certificate.
Couchbase Server only automatically generates node certificates for new nodes using its default self-signed root certificate. If you remove this certificate, Couchbase Server does not automatically generate certificates for new nodes. In this case, you must create a certificate for a new node before adding or joining it to the cluster.
Couchbase Server requires that certificates for nodes meet the following requirements:
-
The node’s certificate must have an attribute that limits its validity to the specific node. See Node Certificate Validation for an explanation.
-
The certificate must either:
-
An X.509 format certificate in PEM format and named
chain.pem. In addition, you must also supply the certificate’s private key in a file namedpkey.key. See Private Keys for a discussion of the private keys Couchbase Server supports. -
A PKCS #12 format file. See PKCS #12 Certificates for Nodes for more information about this format.
-
See Create and Deploy Cluster and Node Certificates for step-by-step instructions on creating the new CA and node certificates.
Supported Certificate Formats
Most of the certificates you use with Couchbase Server are in the X.509 format. Certificates you add to the trust store must meet the following criteria:
-
The certificate must be in a Privacy Enhanced Mail (PEM) file.
-
These files have the extension
.pem. -
The file can have any name, although
ca.pemis commonly used. -
They contain a single certificate.
For examples of creating cluster and other certificates based on private keys see in Configure Server Certificates
PKCS #12 Certificates for Nodes
When creating custom certificates for nodes, you can use PKCS #12 format certificates instead of X.509 certificates. This format lets you bundle the node’s certificate, private key, and certificate chain into a single file. Couchbase Server only supports this format for nodes.
When you upload a PKCS #12 certificate, Couchbase Server extracts the node’s private key and certificate and handles them the same way it handles individual X.509 certificates.
Several things to note when using PKCS #12 certificates:
-
The PKCS #12 file’s name must be
couchbase.p12and be located in the node’s inbox directory. -
Make sure the node’s inbox directory only contains the PKCS #12 certificate file. If the directory contains both a PKCS #12 certificate and a private key file named
pkey.key, the call to reload the node’s certificates fails. In this case, Couchbase Server cannot determine which file you want it to reload, and refuses to continue.
See Deploy a Certificate and Private Key to a Node in a PKCS #12 File for an example of using this certificate format.
Node Certificate Validation
In Couchbase Enterprise Server, each node certificate must have the node’s name specified as a Subject Alternative Name (SAN). This attribute restricts the certificate so it’s only valid for the node named in the SAN.
The SAN must meet the following requirements:
-
If the node name is a Fully Qualified Domain Name (FQDN), the SAN must be the FQDN with a
DNS:prefix. For example,DNS:node1.localhost.com. When the node name is an FQDN, the SAN cannot specify an IP address. -
If the node name is an IPv4 or an IPv6 IP address, the SAN must be the IP address, with an
IP:prefix. For example,IP:127.0.0.1orIP:0:0:0:0:0:0:0:1. When the node name is an IP address, the SAN cannot specify an FQDN.
| You can use the wildcard character in all expressions. |
For examples configuring node certificate including setting the node’s name as a SAN, see Configure Server Certificates.
Intermediate Certificates
An intermediate certificate—sometimes referred to as a subordinate certificate, an intermediate CA, or a signing CA—can be either:
-
A certificate signed by the root CA certificate.
-
One of a chain of intermediate certificates, each of which was signed by one preceding it in the chain. The first certificate in the chain must be in Couchbase Server’s trust store.
The main purpose of the intermediate certificate is to sign node certificates, client certificates, or other intermediate certificates. Signing node certificates convey the authority of the root certificate to the node or client certificates indirectly. Using the intermediate certificate instead of the root certificate’s own private key limits the key’s use, making it more secure.
The default certificates provided by Couchbase Server do not include intermediates: entity certificates are all signed directly by the root certificate. However, if you use customized certificates and certificate chains, you can define intermediate certificates.
You can upload intermediate certificates to the Couchbase Server trust store. For information, see Adding Intermediate Certificates to the Trust Store.
Client Certificates
A client can use a client certificate to identify itself to Couchbase Server. The certificate allows the server to authenticate the client and to authorize the client’s associated user. Information included in the certificate identifies the user by means of a username.
Administrators must sign the client certificates for XDCR or SDK-client connections using a root CA certificate in Couchbase Server’s trust store.
When authenticating a client that uses certificate-based authentication, Couchbase Server asks the client to present its certificate. If Couchbase Server finds that the certificate’s chain of trust leads to a root authority that it recognizes, it trusts the client. Couchbase Server then verifies that the certificate has not expired. After verifying the certificate is still valid, Couchbase Server extracts the username from the certificate. If the username matches an existing user and the user has the correct roles to access Couchbase Server via the client, Couchbase Server lets the client connect.
A similar process allows the server to authenticate with the client in a process called mutual TLS (mTLS) or mutual authentication.
| The client’s authentication with the server relies on the private key used to create the client certificate. The client digitally signs a message with its private key and sends the message to the server. The server uses the client’s public key to verify that the client sent the message. |
For an example of using private keys to secure XDCR, see Specify Root and Client Certificates, and Client Private Key.
For an example iof using certificates to secure a connection to an LDAP host, see Configure LDAP.
Specifying Usernames for Client Certificate Authentication
The client certificate can contain the username to use for a client connection. You can configure Couchbase Server to search for a username among multiple elements within the client certificate. If it finds an element that could contain a username, Couchbase Server attempts to authenticate and authorize username.
If you configure multiple elements within the client certificate to be potential usernames, Couchbase Server attempts to authenticate each until it either authenticates one or runs out of elements. You set the order in which Couchbase Server examines the elements in the client certificate for usernames. See Enable Client Certificate Handling for details.
Embedding Usernames in Certificates
You can use the following elements in a certificate to specify a username:
-
The
Subjectfor the certificate, featuring the Common Name. For example, when creating the client-certificate using the command line, you can set the subject of the certificate toclientnameby using the-subj "/CN=clientuser"argument.The Internet Engineering Task Force (IETF) has deprecated the Subject Common Name as described in section 6.4.4 of RFC 6125. Couchbase Server continues to support using the Subject Common Name. See also Deprecation of Subject Common Name. -
The
DNSname, provided as a Subject Alternative Name for the certificate. For example, if you addsubjectAltName = DNS:node2.cb.comto the certificate, you can configure Couchbase Server to usenode2.cb.comas the username without a prefix or delimiter specified in the handling-configuration.Prefix and delimiter are explained later in Identifying Certificate-Based Usernames on Couchbase Server.
-
The
emaildefined as a Subject Alternative Name for the certificate. For example, if you addsubjectAltName = email:john.smith@example.comto the certificate, you can configure Couchbase Server to usejohn.smith@example.comas the username. However, because Couchbase Server does not allow the character@in usernames,john.smith@example.comis not valid. You can configure Couchbase Server extract just the account portion of the email address (john.smith) by defining@as a delimiter. See Identifying Certificate-Based Usernames on Couchbase Server form an explanation. -
The
URIdefined as a Subject Alternative Name in the certificate. For example, if you addsubjectAltName = URI:www.example.comto the certificate, you can configure Couchbase Server to usewww.example.comas the username.
For examples of setting Subject Common Names and Subject Alternative Names in certificates, see Configure Server Certificates and Configure Client Certificates.
Identifying Certificate-Based Usernames on Couchbase Server
By default, Couchbase Server does not handle client certificates. You can enable client certificate handling so that it is optional or even mandatory.
When you enable client-certificate handling, you can configure Couchbase Server to search for paths within the client certificate that contain usernames for authentication.
Each specified path can be one of the following path-types:
-
subject.cn: extracts the Subject Common Name. -
san.dns. extracts theDNSSubject Alternative Name. -
san.email: extracts theemailSubject Alternative Name. -
san.uri: extracts theURISubject Alternative Name.
You can specify any number of paths for Couchbase Server to extract. You can also have it extract multiple instances of any path-type.
In some cases, the value in the certificate cannot match a Couchbase Server user name.
For example, email addresses are not valid usernames because they contain the @ character.
To handle these case, you can have Couchbase Server parse the value from the certificate to extract the username.
You can define a prefix, delimiter, or both that Couchbase Server uses to extract a portion of the element it extracts from the path.
-
If you define neither a prefix or delimiter for a path, Couchbase Server does not parse element’s content. It attempts to match the value as-is to an existing username.
-
You can define a prefix which is a string of text Couchbase Server attempts to match of the start of the value extracted from the certificate. If the prefix matches the start of the value, Couchbase Server removes the matching prefix from the value. It then tries to match the remaining string to a Couchbase Server username. If the prefix does not match the start of the value, Couchbase Server tries to match the entire value to a username. For example, suppose you specify
san.urias a path in the certificate to use, and set the prefix towww.. If Couchbase Server extracts the valuewww.example.comfrom thesan.urielement in the certificate, the prefix matches leadingwww., leaving Couchbase Server withexample.comas the username. If instead thesan.uriisexample.com, the prefix does not match. In this case, Couchbase Server attempts to matchexample.comto a username. -
You can define a delimiter, which is a single character that Couchbase Server should use to split the value extracted from the certificate. If it finds the delimiter in the value, Couchbase Server uses the portion of the value before the delimiter as the username. If Couchbase Server does not find the delimiter in the value, it uses the entire value as the username. For example, suppose you specify
san.emailas a path in the certificate, and set the delimeter to@. If Couchbase Server extracts the valuejohn.smit@example.comas the value ofsan.email, it splits the value at the@, leaving it withjohn.smithto match to a username.If the value contains multiple instances of the delimiter, Couchbase Server only uses the portion before the first delimiter. For example, if you set the delimiter to .and the value iswww.example.com, Couchbase Server attempts to matchwwwto a username. It does not attempt to match any other portion of the value if the first part does not match.
For step-by-step instructions, see Enable Client Certificate Handling.
Deprecation of Subject Common Name
The IETF has deprecated using Subject Common Name to identify either a server or a client in section 6.4.4 of RFC 6125. For Couchbase Enterprise Server Version 7.2 and later, this means that:
-
The node certificate for each server in the cluster must specify its node name as a Subject Alternative Name. See Node-Certificate Validation for details. You can still use Subject Common Name.
-
A client certificate may continue to specify just a Subject Common Name.
Examples of certificate creation provided in Manage Certificates continue to include definitions of Subject Common Name for both server and client.
Certificate Checking
Couchbase Server checks the validity of certificates in following situations:
-
You upload certificate to a node. If the name of the node is not specified as a SAN:
-
If the name of the node can be changed, Couchbase Server issues a warning, and the upload succeeds.
-
If the name of the node cannot be changed, Couchbase Server reports an error, and the upload fails.
To learn when you can rename a node, see Node Renaming.
-
-
You add a node or a node joins the cluster. Couchbase Server always checks the certificate on the new node to verify the node’s name is correctly specified as a SAN. Depending on the cluster’s configuration, Couchbase Server may perform the same check on the certificate of the cluster node handling the join. If Couchbase Server finds an issue, its response depends on what sort of check it performed:
-
New node: If the node name is not specified as a SAN, Couchbase Server returns an error and the add or join fails.
-
Cluster node: If the cluster has two or more nodes prior to the add or join, Couchbase Server does not perform a check. Otherwise, the Couchbase Server performs the check. If the node-name is not specified as a SAN, the add or join fails.
-
Certificate Expiration
When you create a certificate, you can choose to have it expire after a period of time. Setting an expiration on certificates is a best practice, as it can help limit the impact of a certificate being compromised. It also helps enforce certificate rotation. See Certificate Rotation.
When you set your certificates to expire, you must remember replace them before their expiration.
You can have the Couchbase Server alert feature notify you before a certificate expires.
By default, Couchbase Server sends this alert 30 days before the certificate expires.
You can change this alert period using the /settings/alerts/limits endpoint to change the certExpirationDays setting.
See Setting Alerts for more steps to change this setting.
Couchbase Server also alerts a second time if a certificate has expired.
See Alerts for more information about alerts.
Private Keys
Couchbase Server supports using both RSA and X.509 Elliptic Curve (EC) private keys.
Couchbase Server supports using the PKCS #1 file format only for unencrypted private keys. This format only supports RSA keys.
Couchbase Server supports using PKCS #8 file format for both unencrypted and encrypted private keys.
The user-specified EncryptedPrivateKeyInfo must use PKCS #5 v2 algorithms.
This format supports both RSA and Elliptic Curve keys.
Couchbase Server does not support Elliptic Curve Key files containing EC PARAMETERS.
When generating EC keys using the openssl command, be sure to use the -noout argument to prevent it from adding an EC PARAMETERS section.
|
JSON Passphrase Registration
If a node’s certificate has an encrypted private key, you can give Couchbase Server the key’s passphrase, so it can use the private key when necessary. You register the passphrase by passing Couchbase Server a JSON object using the REST API. For information, see Upload and Retrieve a Node Certificate.
Examples
Examples of file-types and their generation, of extension-definition, of intermediate-certificate use, and of Couchbase-Server specific deployment requirements are provided for the server-side in Configure Server Certificates, and for the client-side in Configure Client Certificates. The examples allow Cross Data Center Replication to be secured with certificates only. They also support secure access to Couchbase Server from Java clients.