Deploy Couchbase Server Using Azure Marketplace
Couchbase partners with Microsoft to provide a packaged solution on Azure Marketplace. This solution is based on Azure Resource Manager templates that incorporate the latest features and best practices for deploying Couchbase Server on Microsoft Azure.
Couchbase Server on Azure Marketplace provides one of the fastest and easiest ways to get up and running on Azure virtual machines. At the core of this experience are Azure Resource Manager templates that are developed in close collaboration with Microsoft in order to adopt the latest features and best practices.
Couchbase is available through Azure Marketplace with hourly pricing, or through a Bring Your Own License (BYOL) model.
Before You Begin
-
You need a Microsoft Azure account. If you don’t have one, sign up for one before proceeding.
-
You should review the best practices for deploying Couchbase Server on Azure.
The free trial version of Azure has limits on the number of resources that can be be deployed. Upgrading to a Pay-As-You-Go subscription will increase resource quotas, and it also allows you to open a support ticket in the Azure portal to request even higher quotas should you need them.
Deploying Couchbase Enterprise
| The templates are provided as a starting point and may be customized as needed. Note that additional post deployment setup may be required. |
-
Log in to your account on the Microsoft Azure Marketplace.
-
Search for
Couchbasein the Marketplace and select the Couchbase Enterprise app.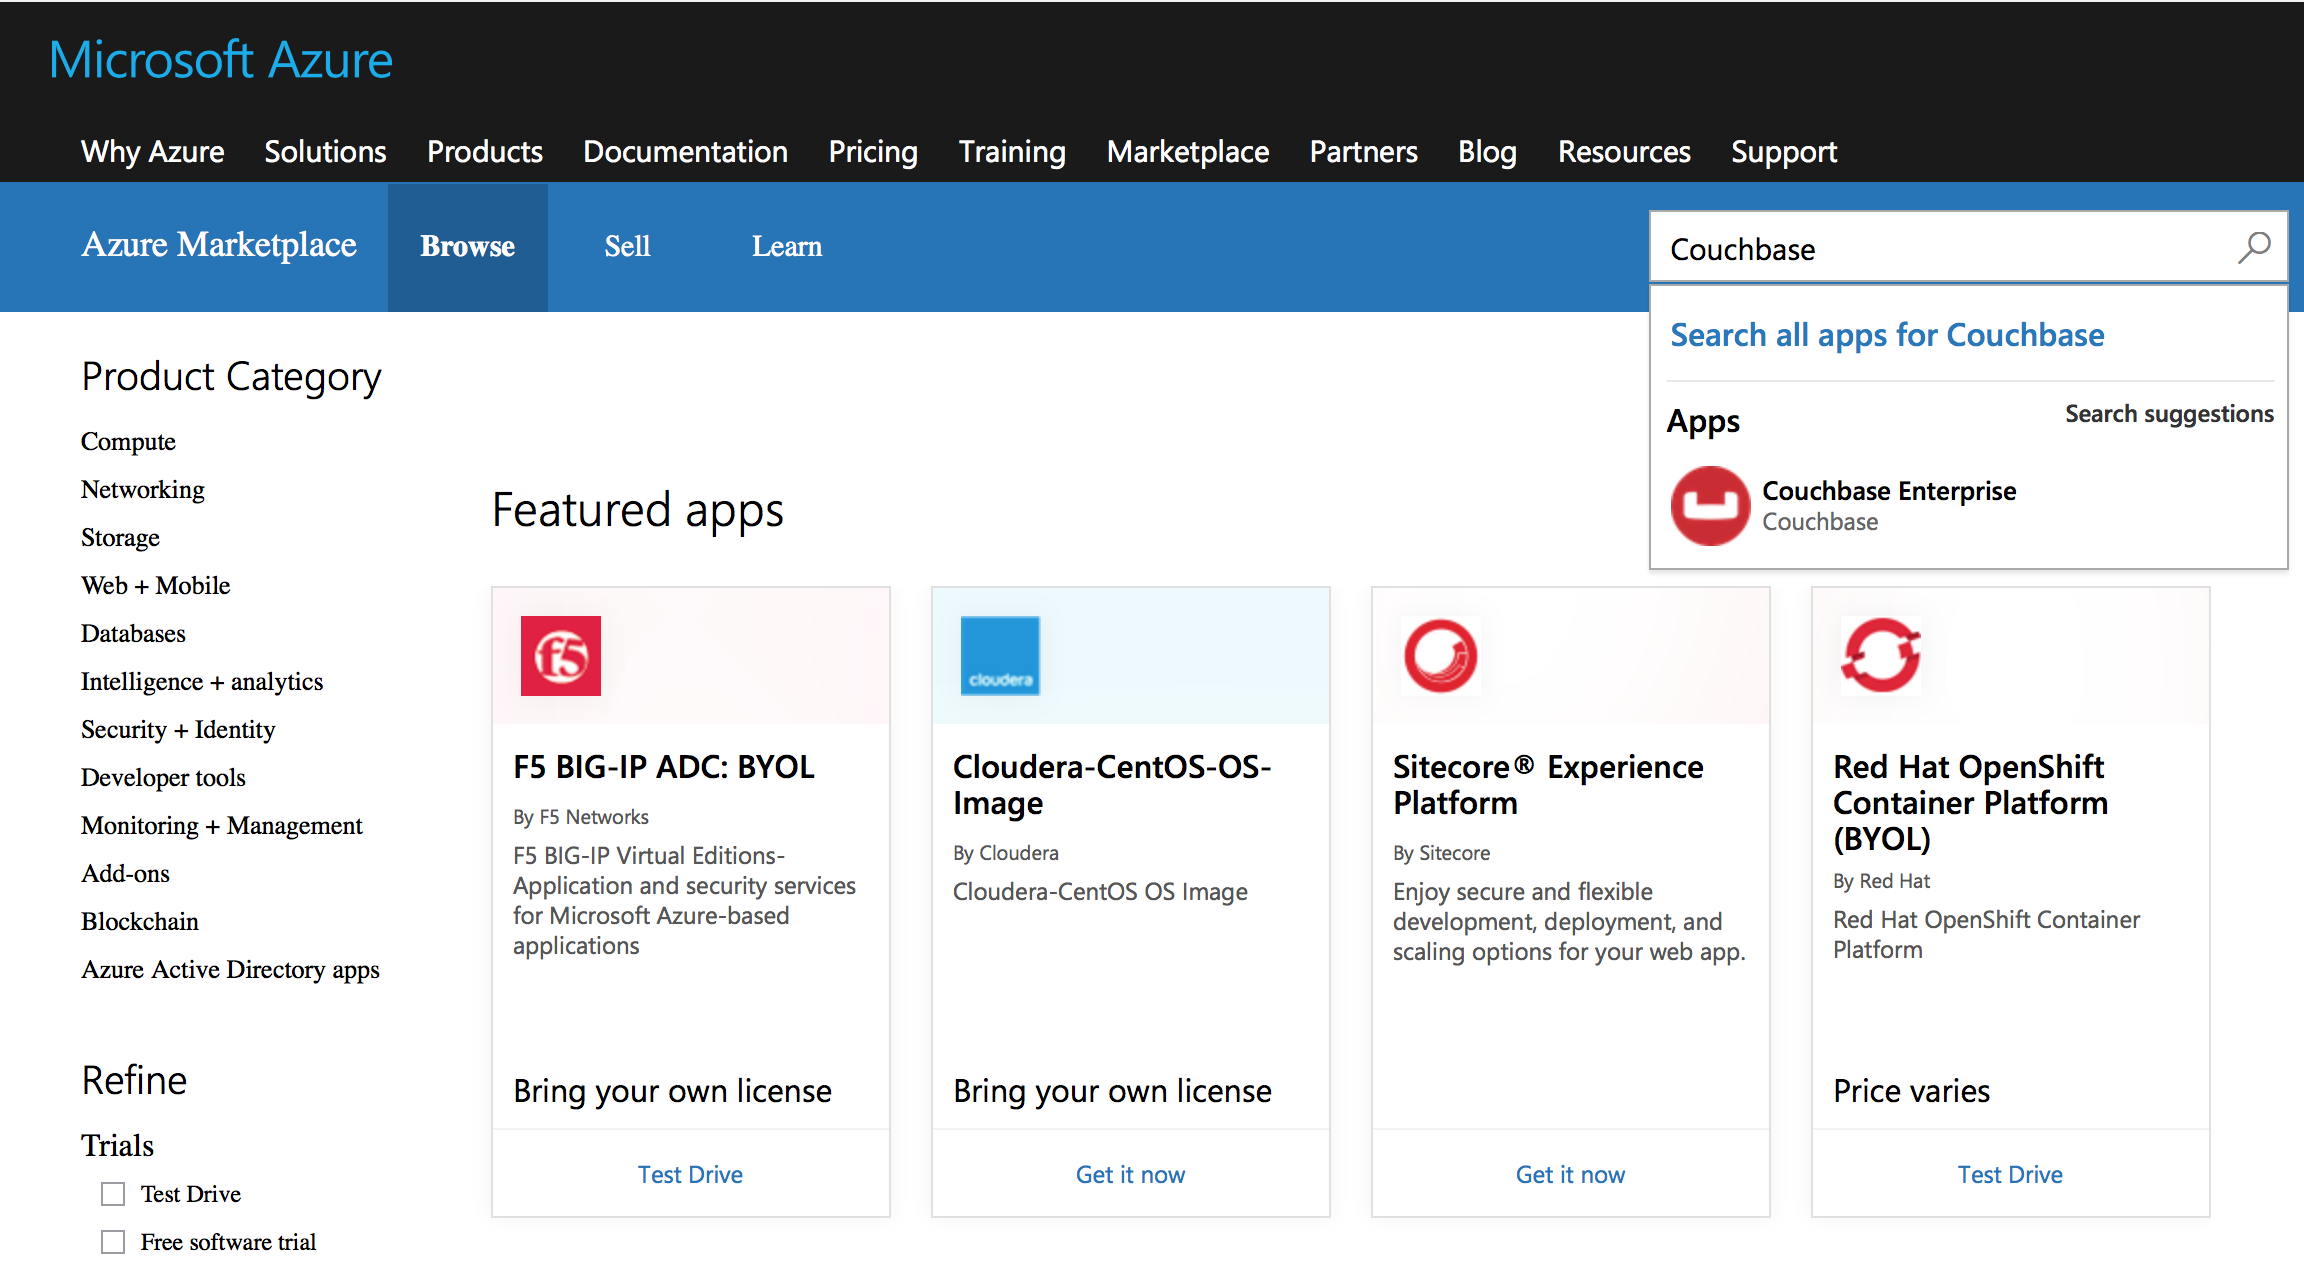
The Couchbase Enterprise product page provides a quick overview of the product offering and useful links.
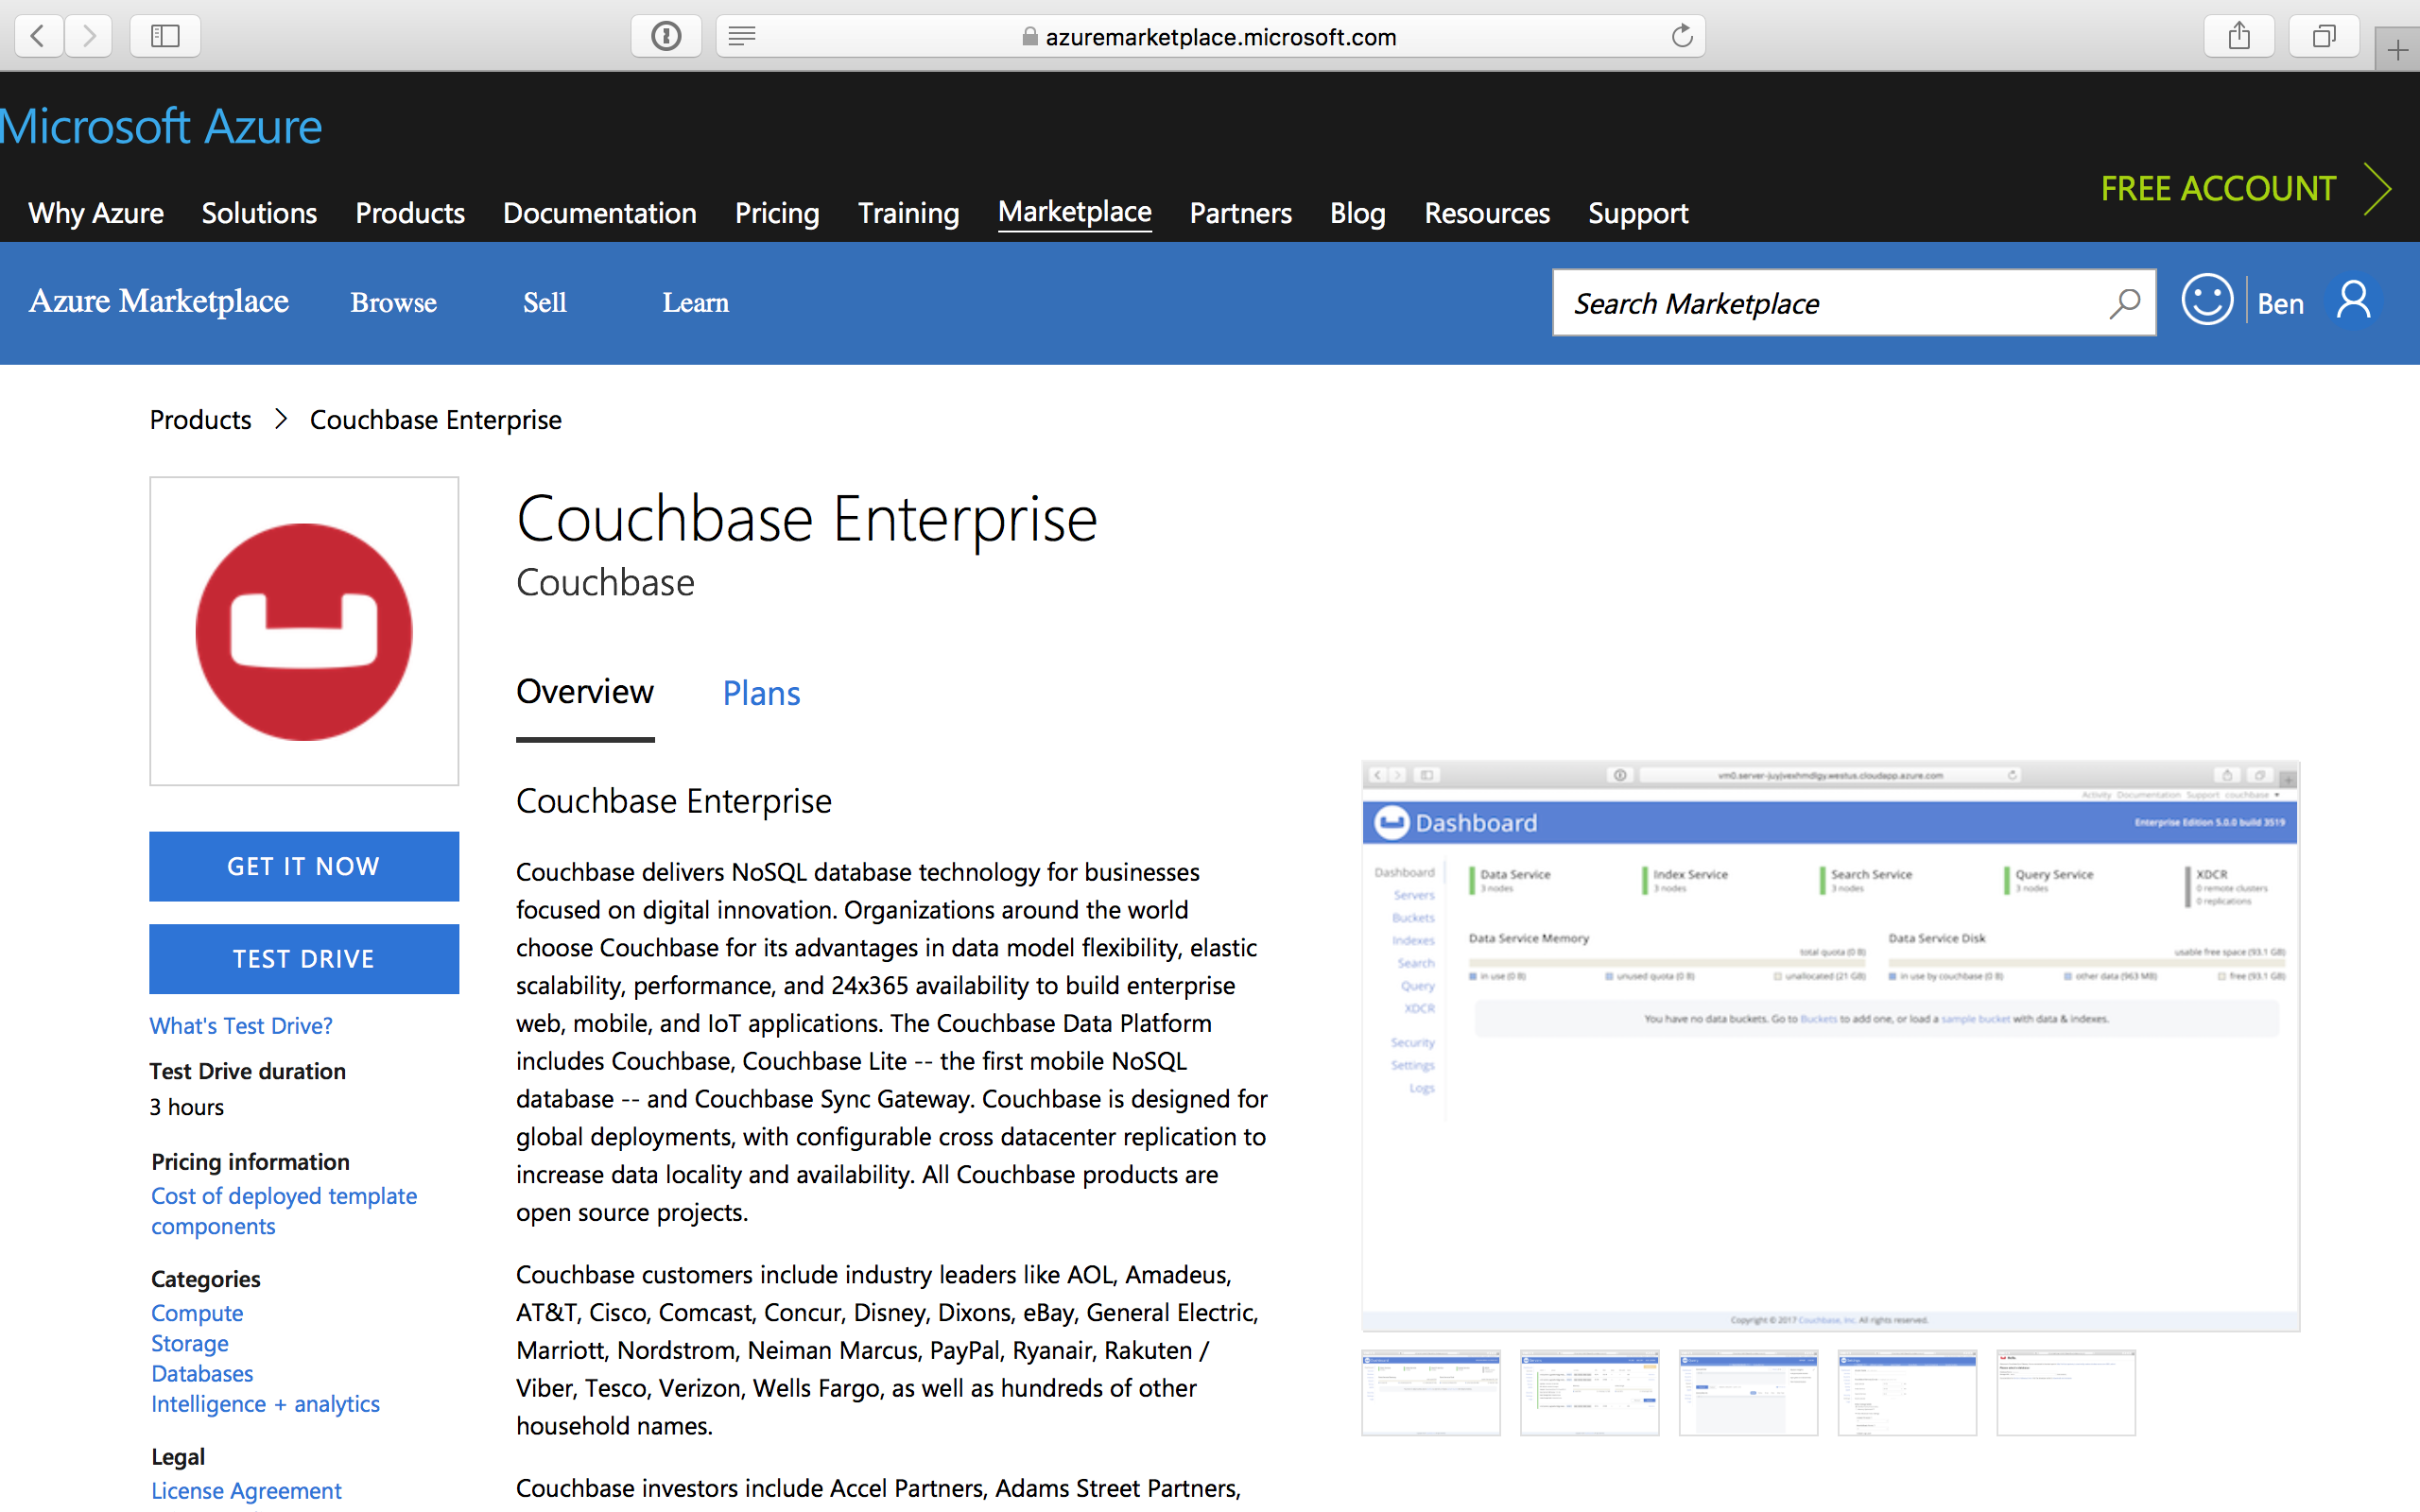
-
To deploy Couchbase Enterprise on Microsoft Azure, click Get it Now.
There are two plans that you can choose from: BYOL and Hourly Pricing.
-
Once you select a plan (we’ve selected Hourly Pricing for this example), you are redirected to portal.azure.com. If you’re not already logged in to Azure Portal, you will need to authenticate yourself before proceeding to the next step.
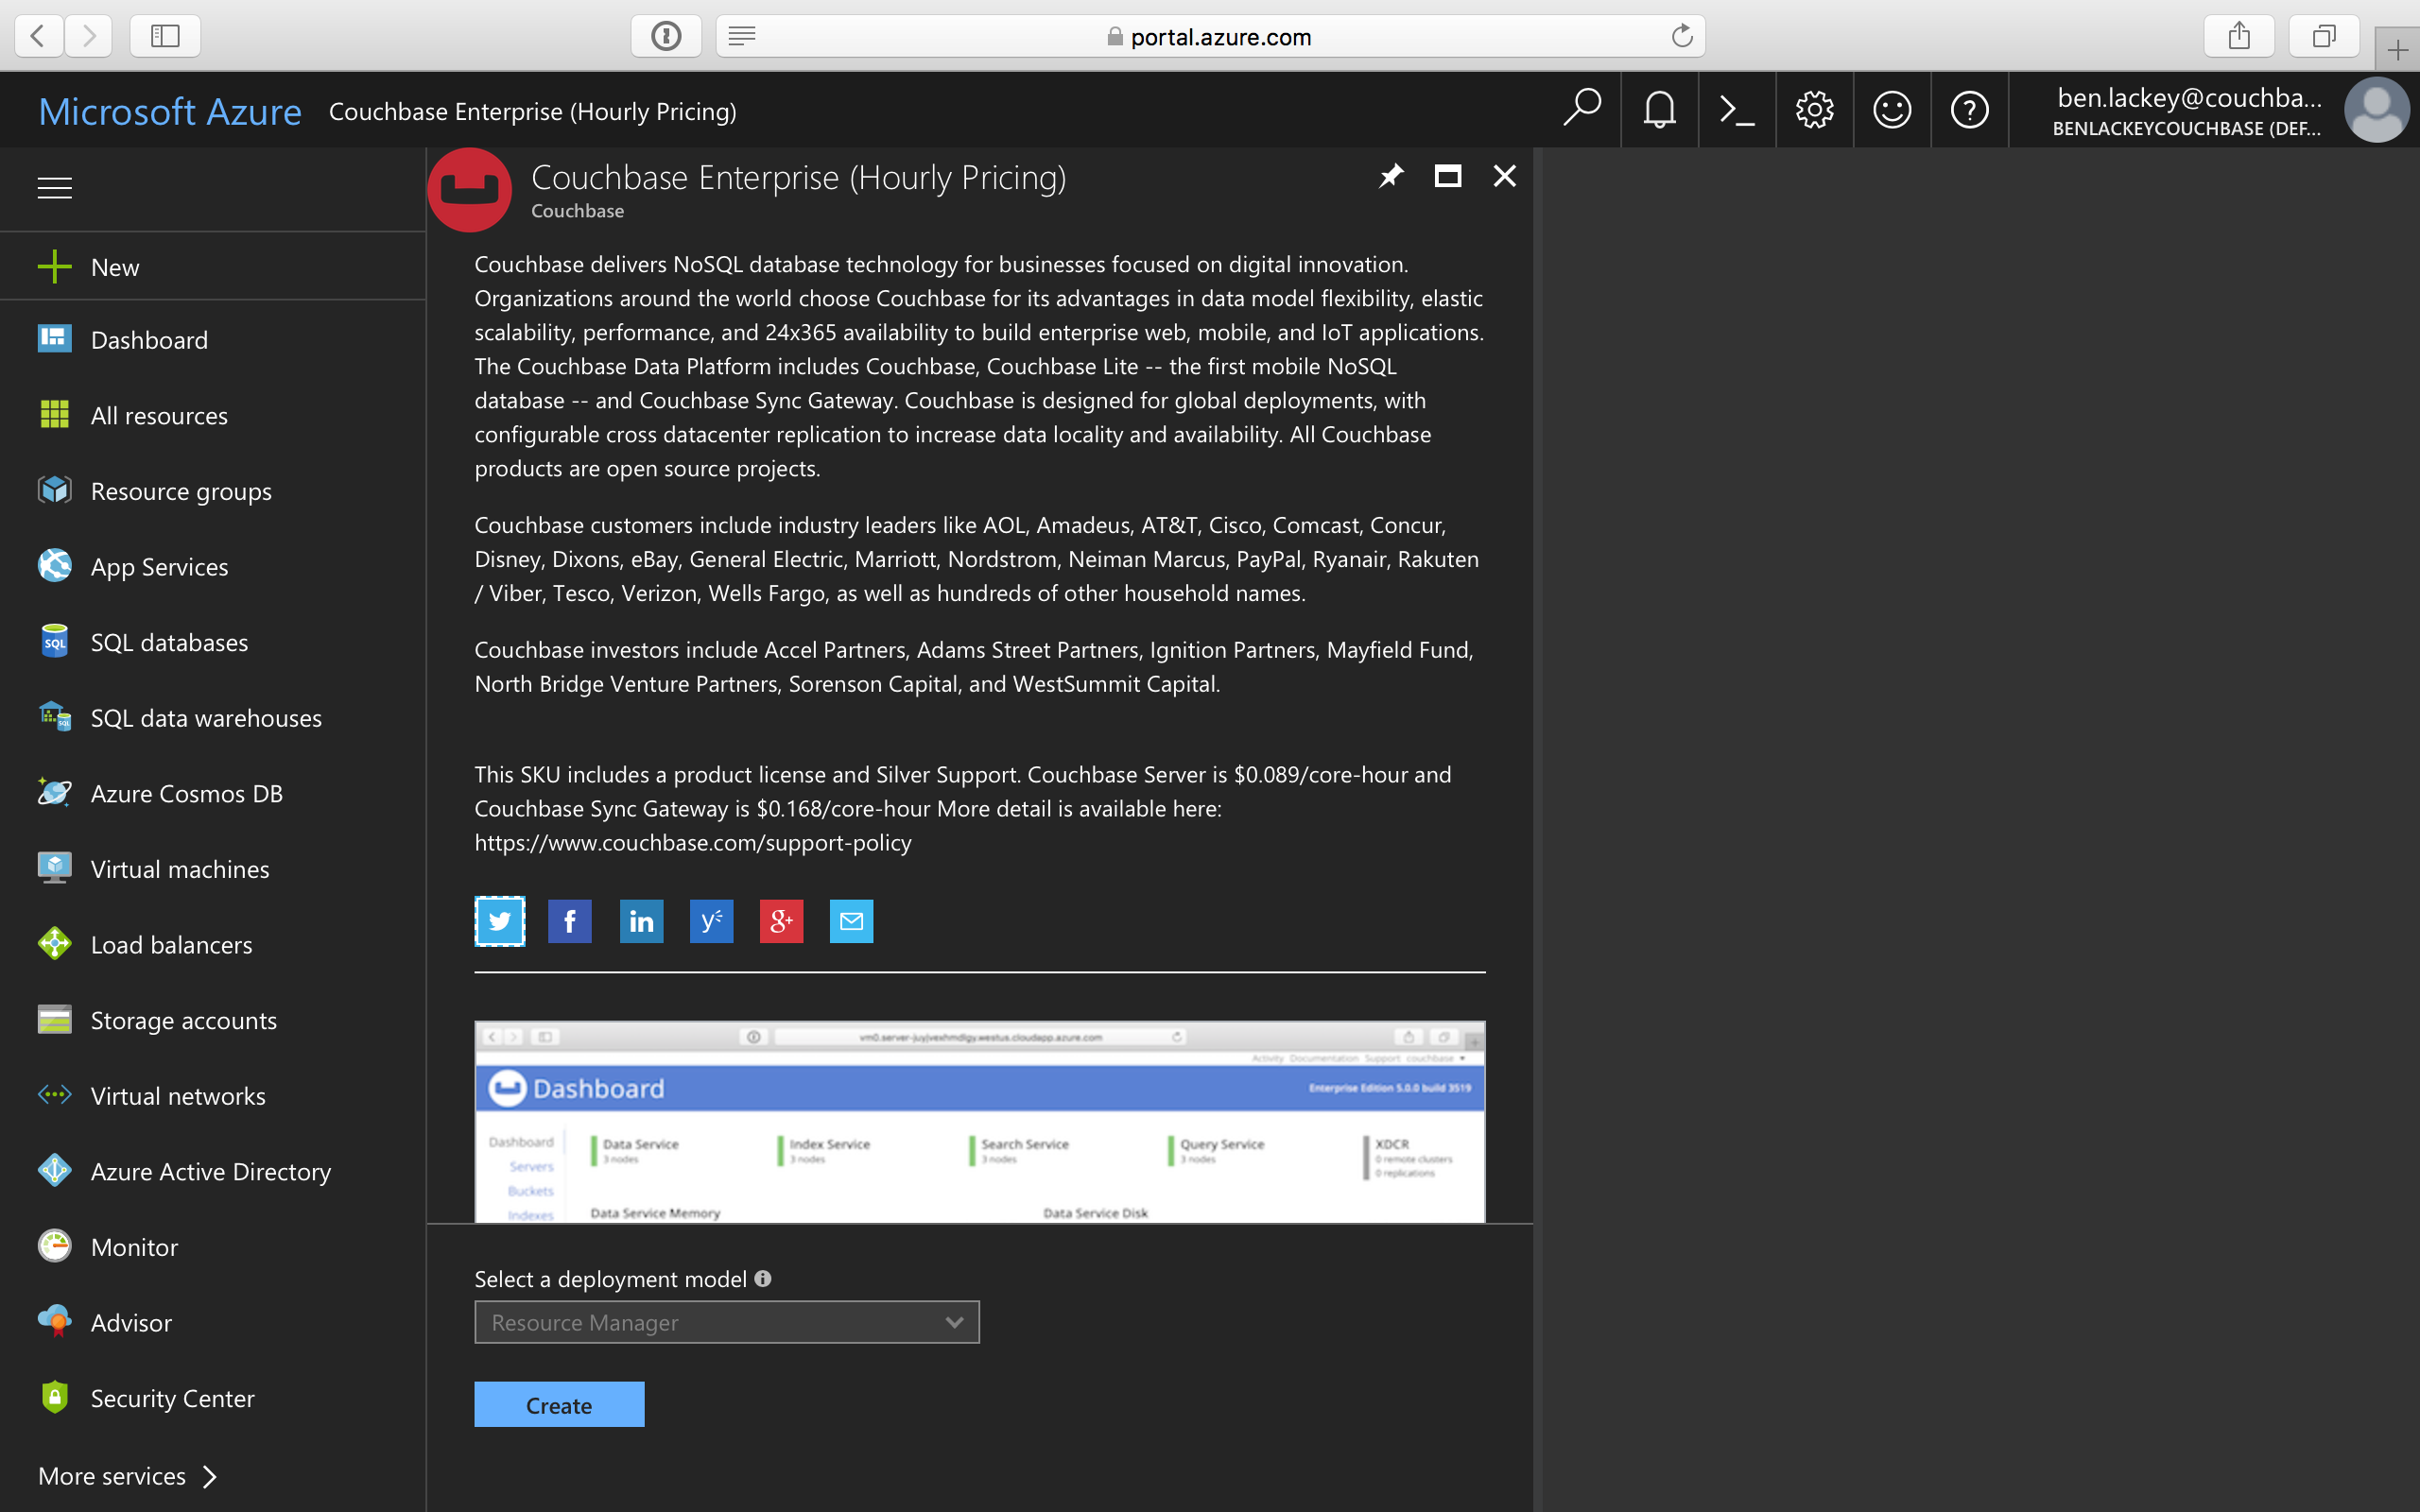
You can also land on this page directly if you have access to Azure Portal and need not go through the initial steps of navigating to this page from the Azure Marketplace. -
Click Create to deploy and load your first blade.
-
Configure the basic settings for your Couchbase Enterprise.
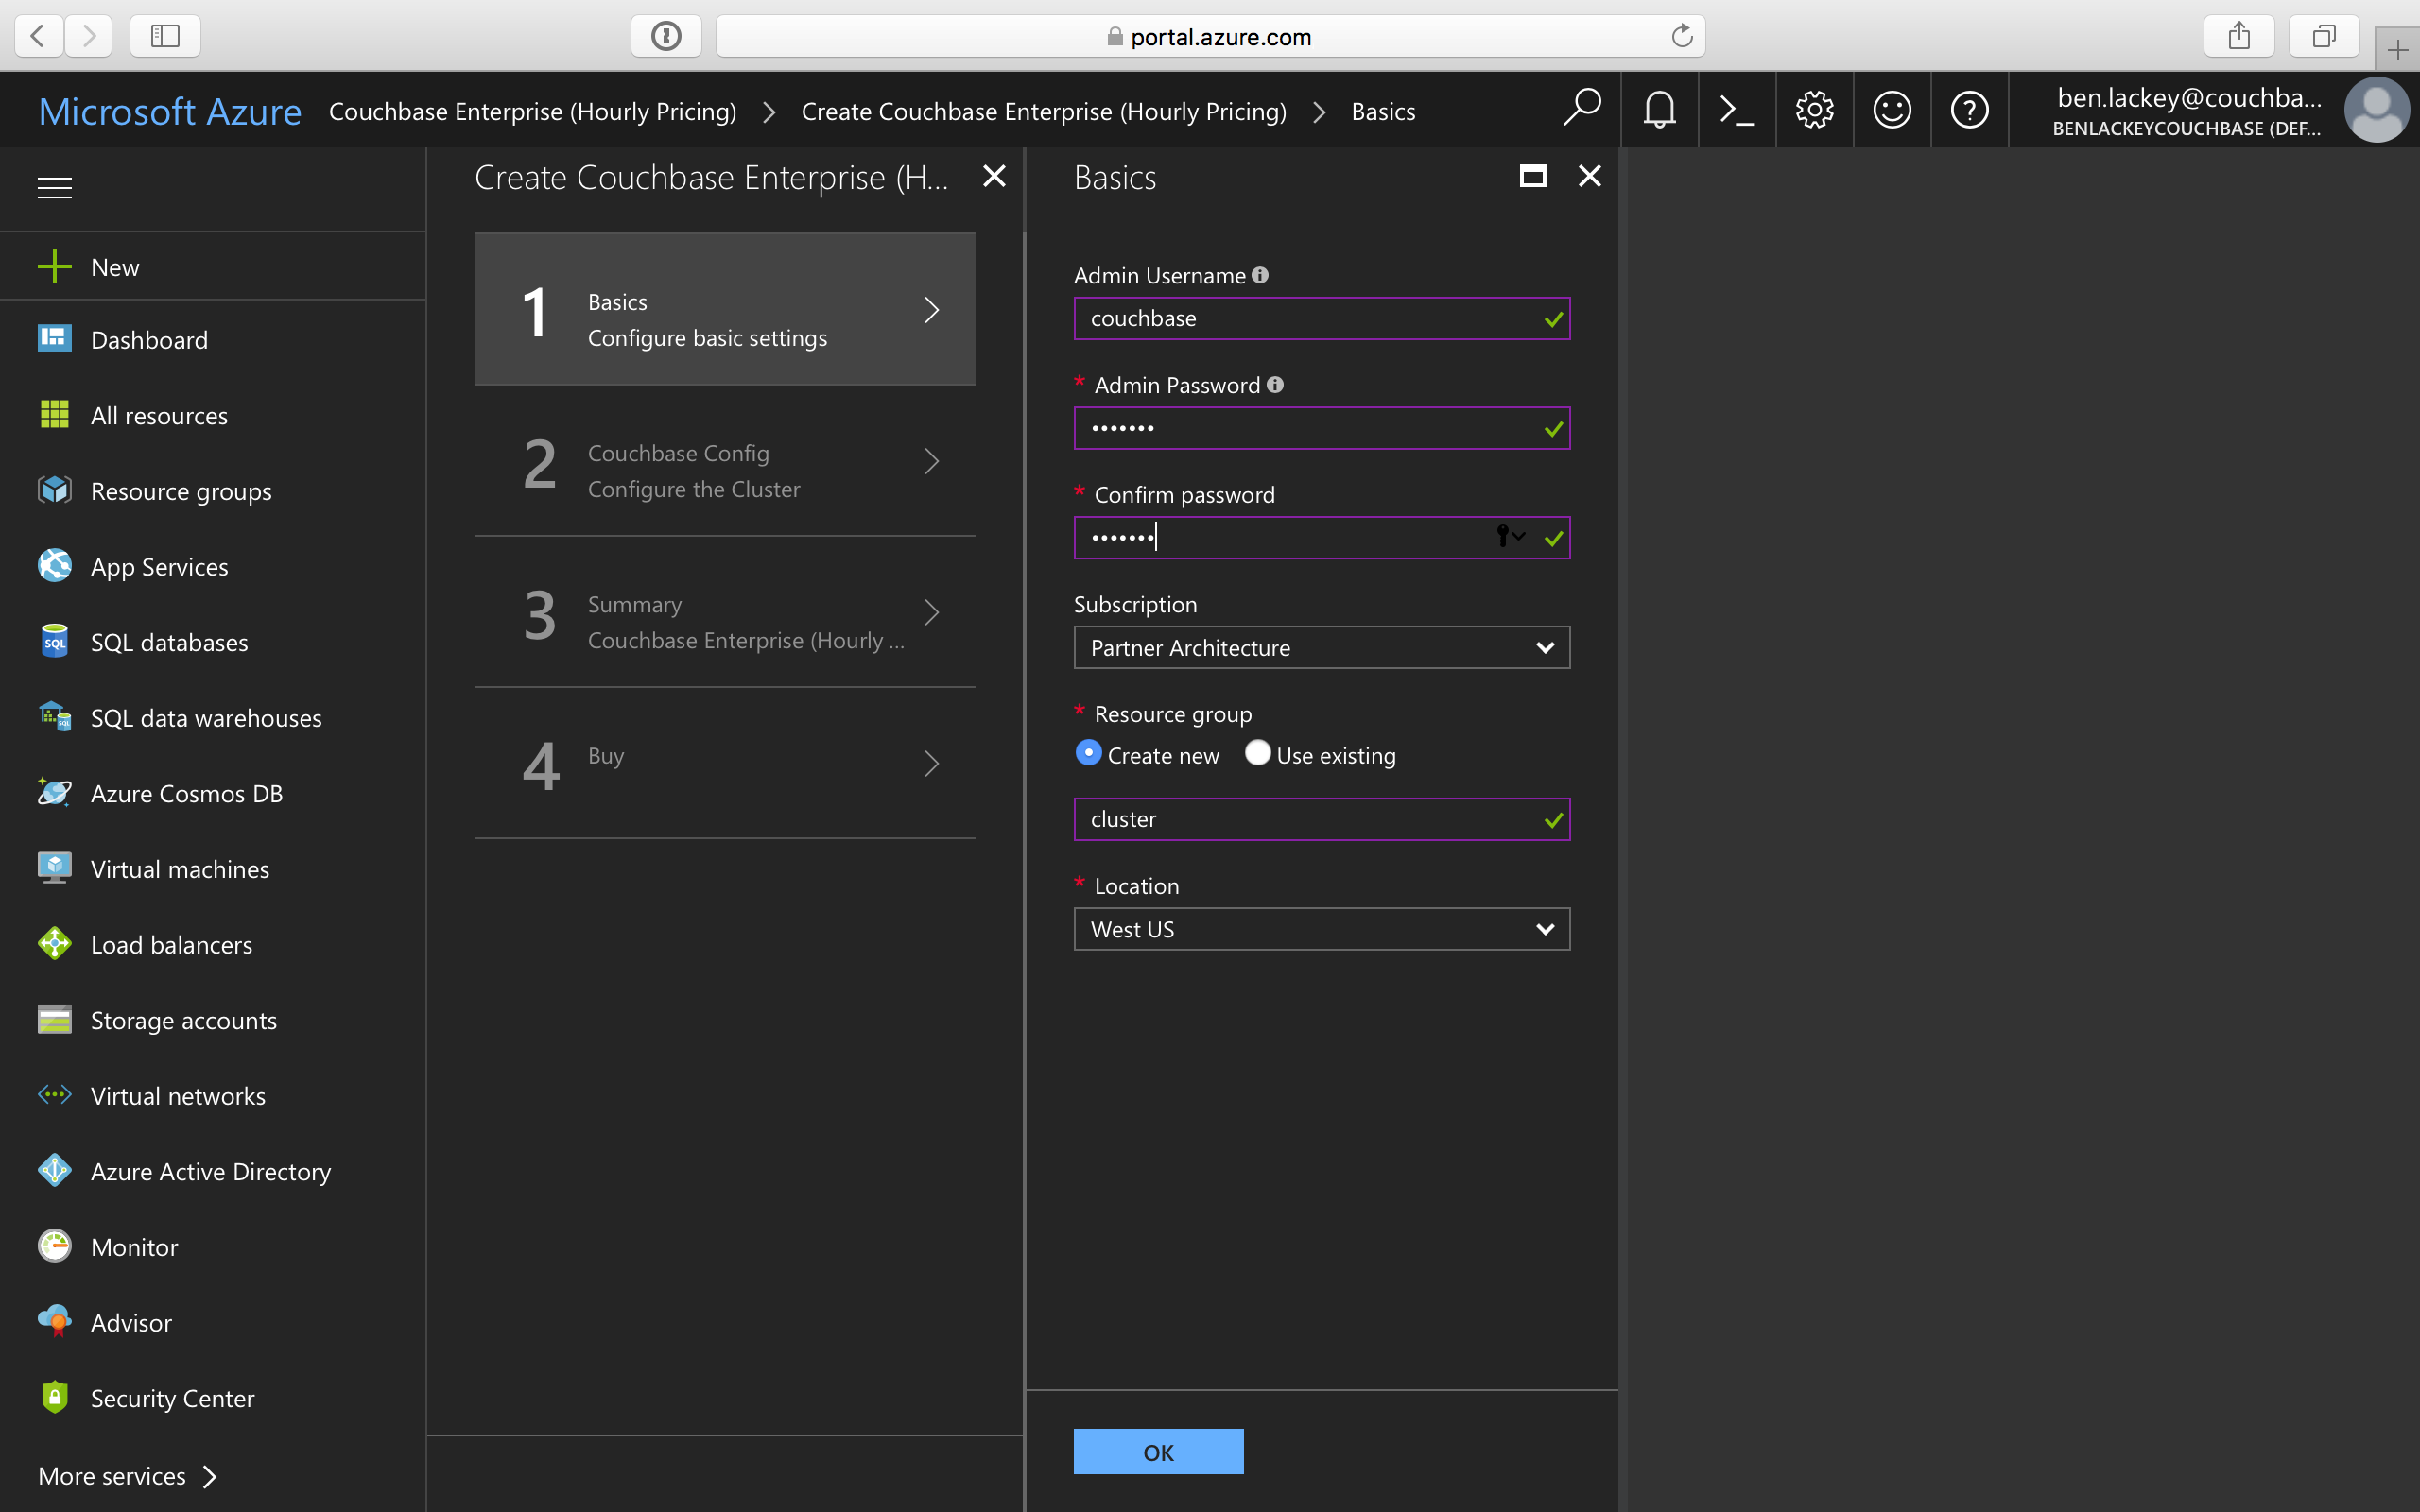
Field Name Description Admin Username
The Admin user name and password you provide on this screen will be used to log in to Couchbase and also to SSH into your machines.
Microsoft blacklists a number of user names including '
Administrator', so you’ll need to provide a different user name.Admin Password
The Admin user name and password you provide on this screen will be used to log in to Couchbase and also to SSH into your machines.
The password must satisfy at least three of the following four conditions:
-
Contains a lower case letter
-
Contains an upper case letter
-
Contains a numeric value
-
Contains a symbol
Subscription
Resource Group
The resource group is a logical container for all the things you’ll be deploying such as VM scale sets, disks, etc.
Provide a name for the resource group if you choose to create a new one, or select an existing one from the drop-down.
Location
Microsoft Azure has a wide range of locations available. Pick a location where you want your cluster to be deployed.
-
-
Configure the Couchbase Cluster.
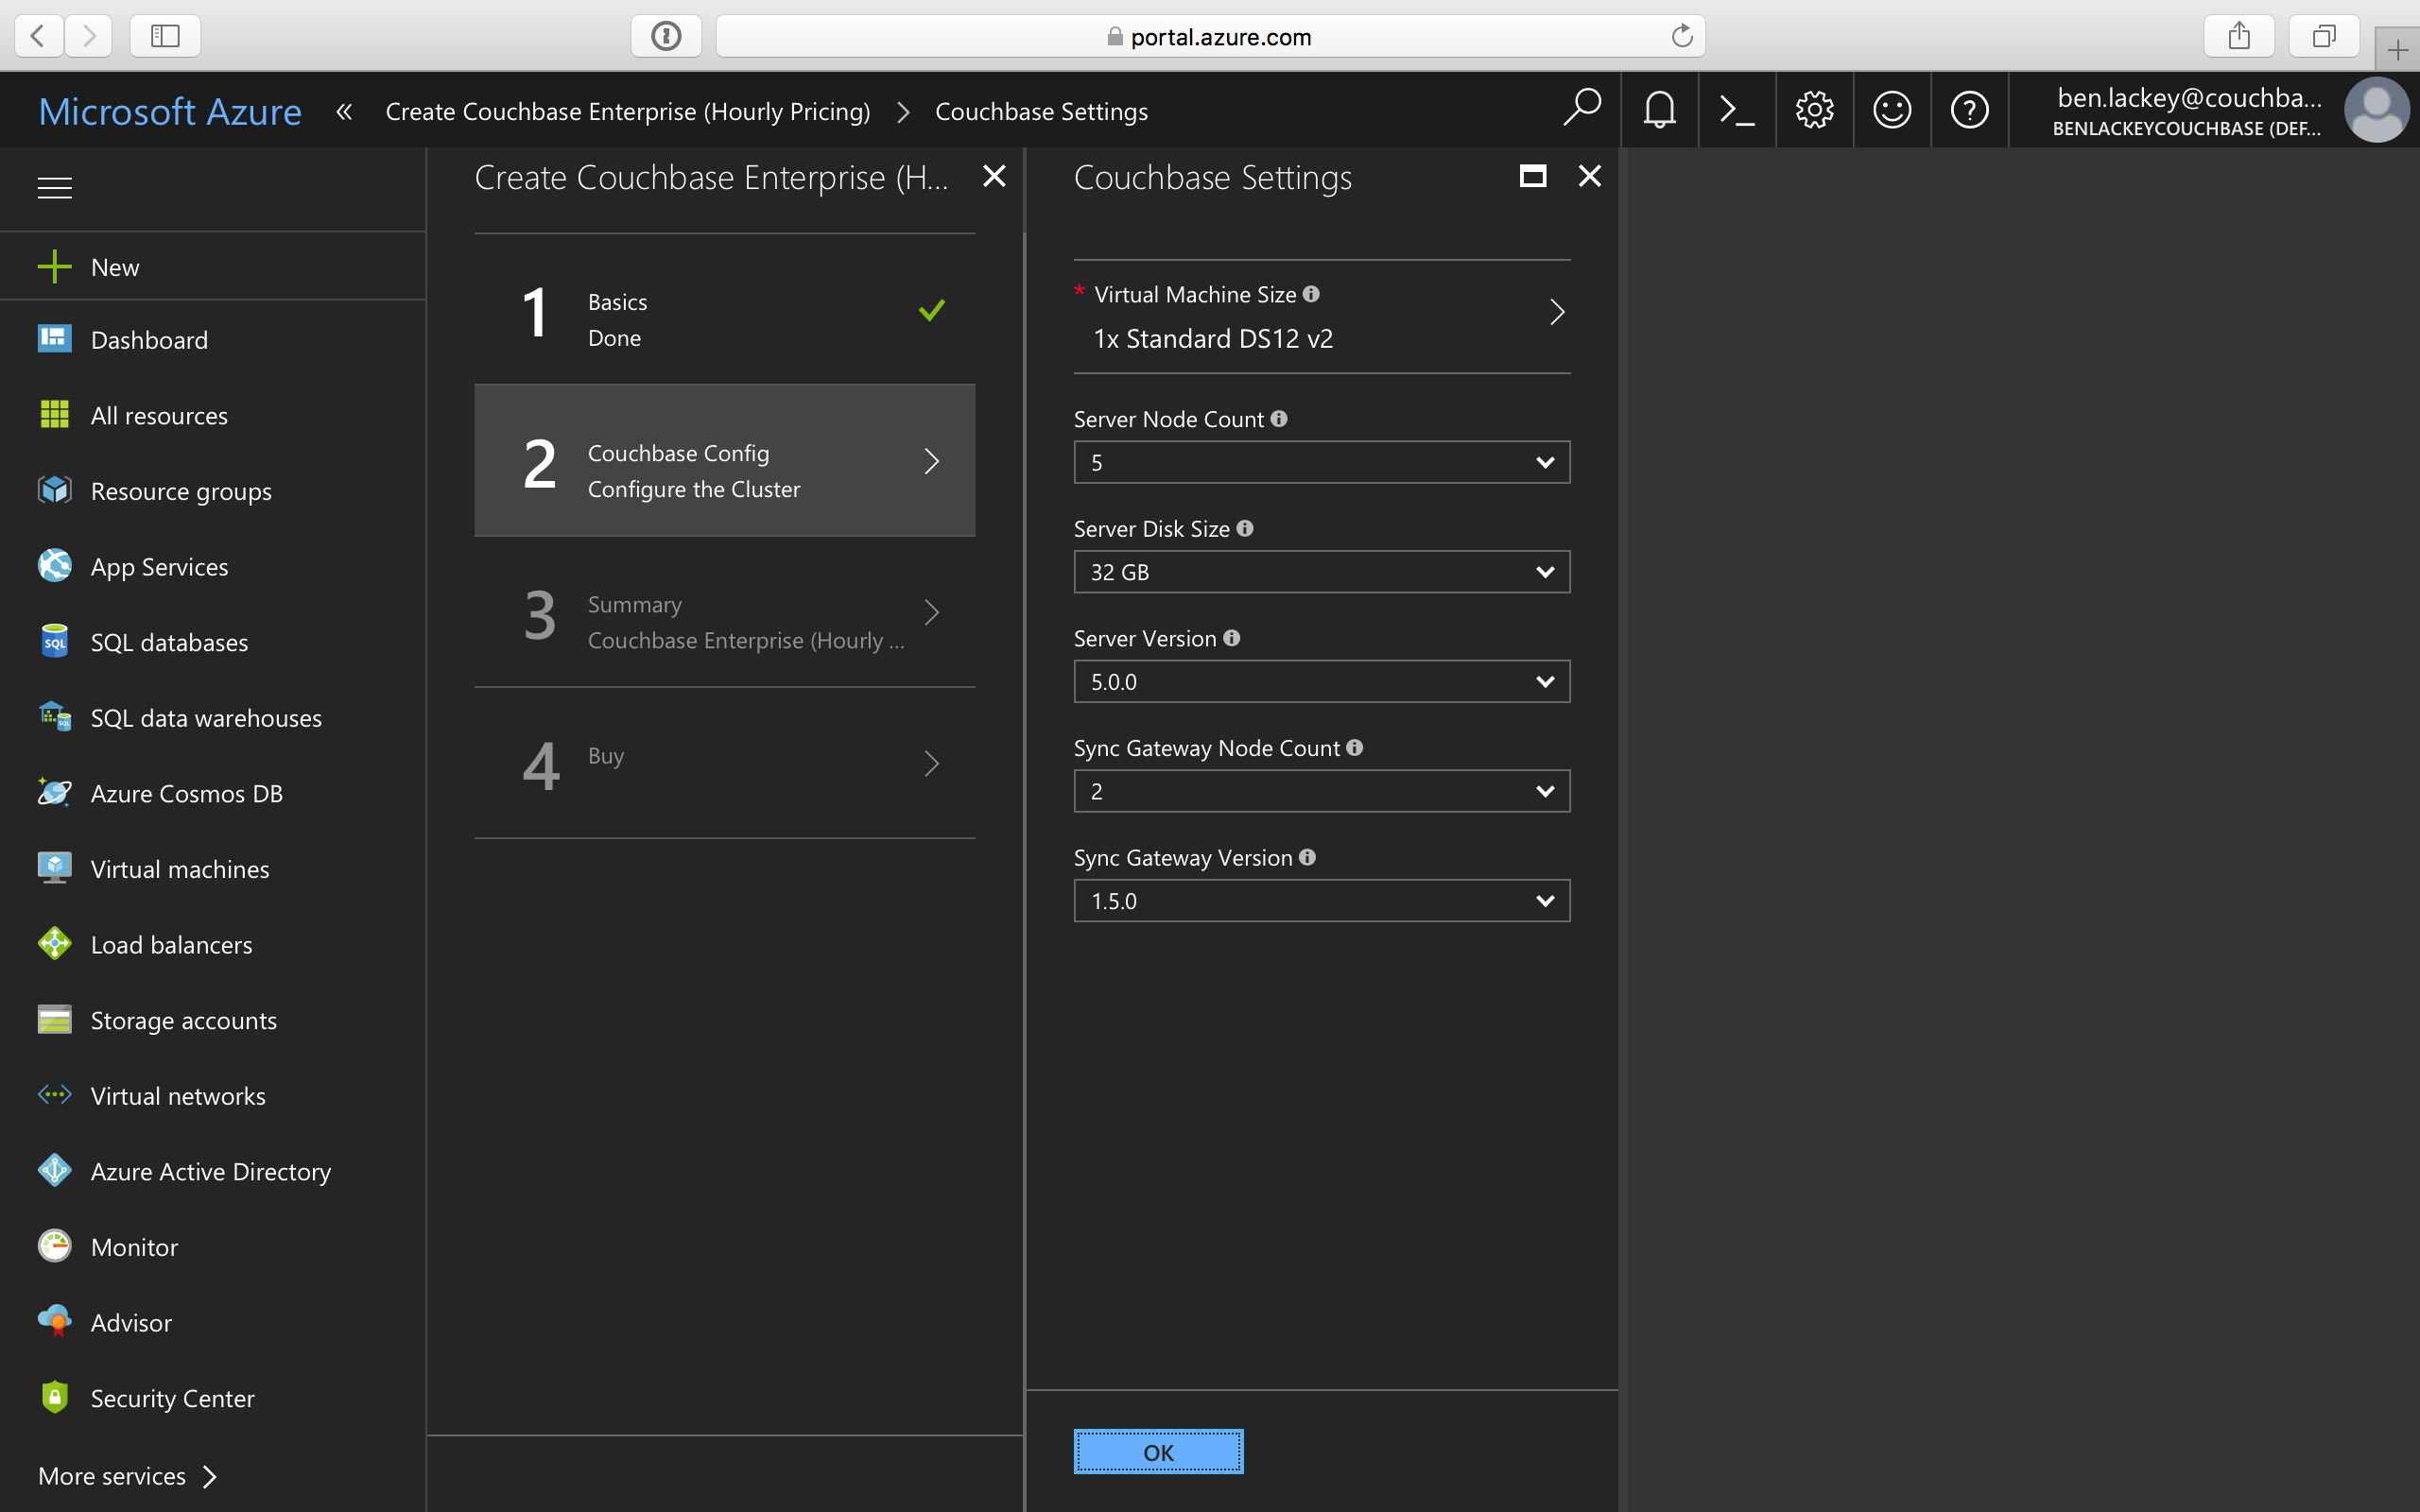
Field Name Description Virtual Machine Size
Server Node Count
Select the number of server nodes to deploy.
Server Disk Size
Select the disk size for each of the server nodes.
Server Version
Choose the Couchbase Server version to deploy.
The Compatibility Matrix summarizes the compatible versions of Sync Gateway and Couchbase Server. Sync Gateway Node Count
Select the number of Sync Gateway nodes to deploy.
Sync Gateway Version
Choose the Couchbase Sync Gateway version to deploy.
The Compatibility Matrix summarizes the compatible versions of Sync Gateway and Couchbase Server. -
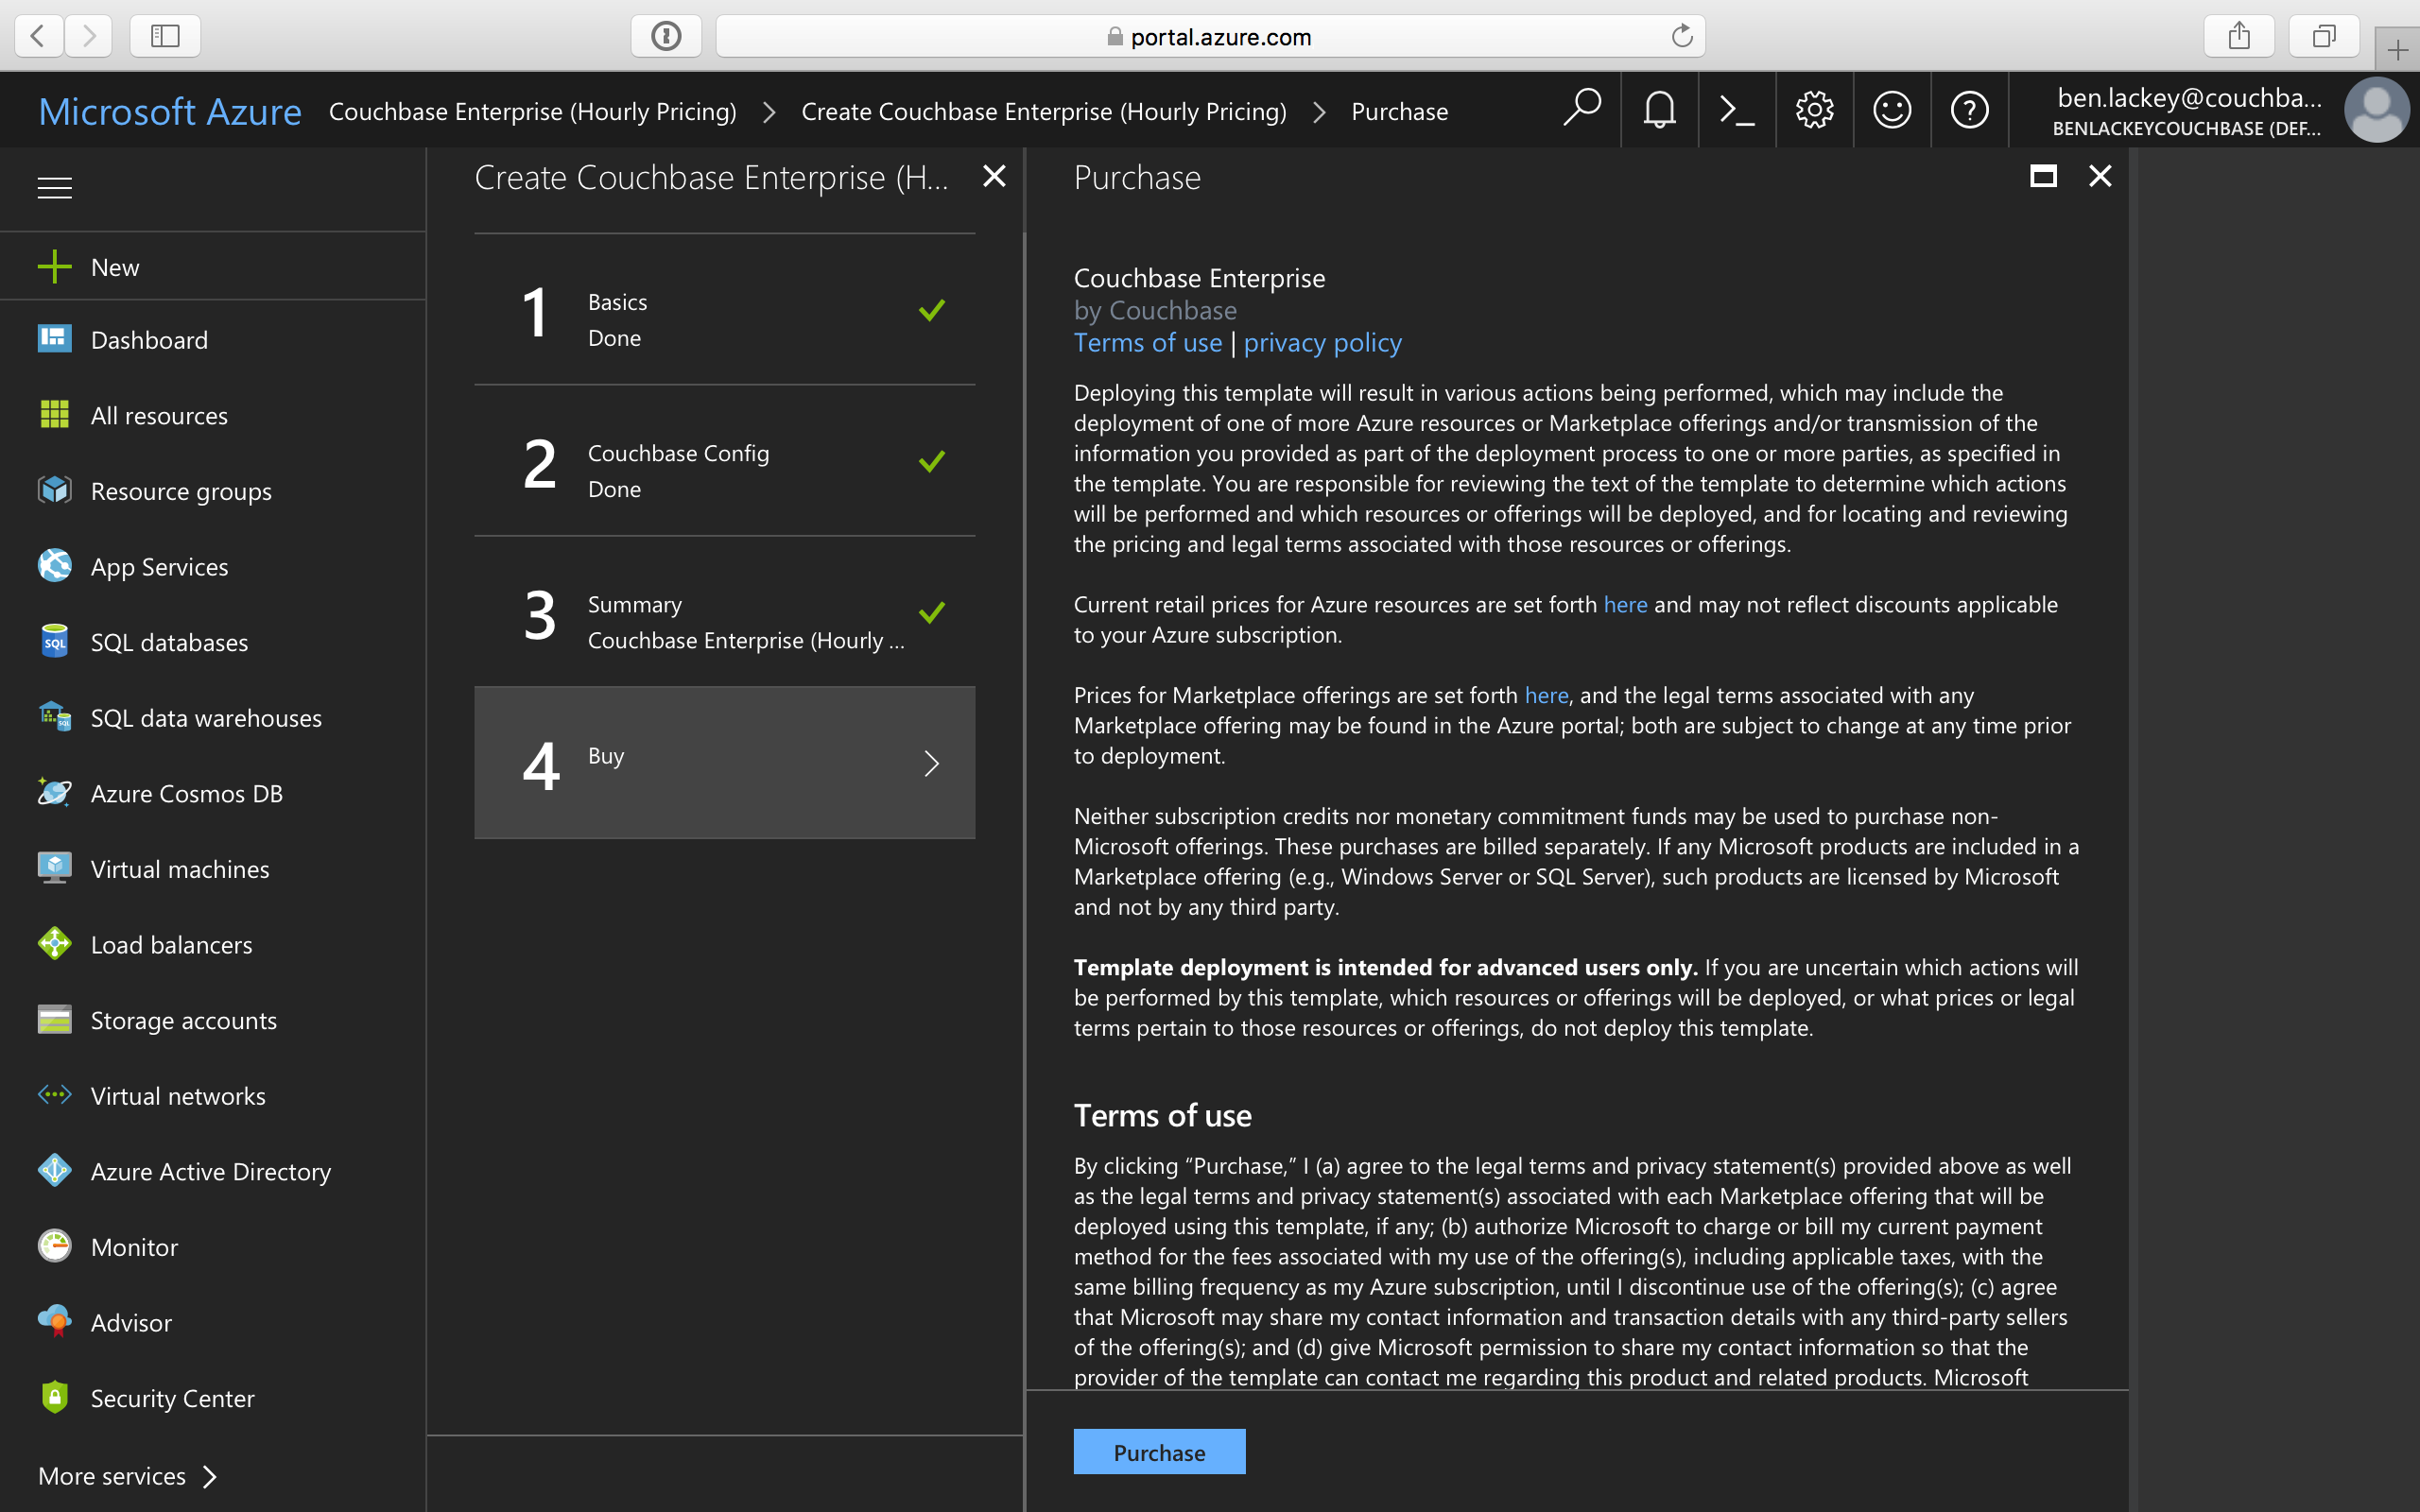
Review the summary and click OK to proceed to buy.
You can also choose to Download the templates and parameters to deploy later with a script.
Take a look at the sample templates and instructions to deploy the templates that are available here. Note that these templates are provided as a starting point for and may be customized as needed. Note that additional post deployment setup may be required. 
-
On the final screen, you’re presented with the Microsoft Azure and Couchbase End User License Agreements (EULA). Review the license agreements and click Purchase if you agree to the terms and conditions.
-
Deployment begins right after you click Purchase and is indicated by the blue Deploying Couchbase tile on your screen. You can click on the Deploying Couchbase tile to examine the progress closely.
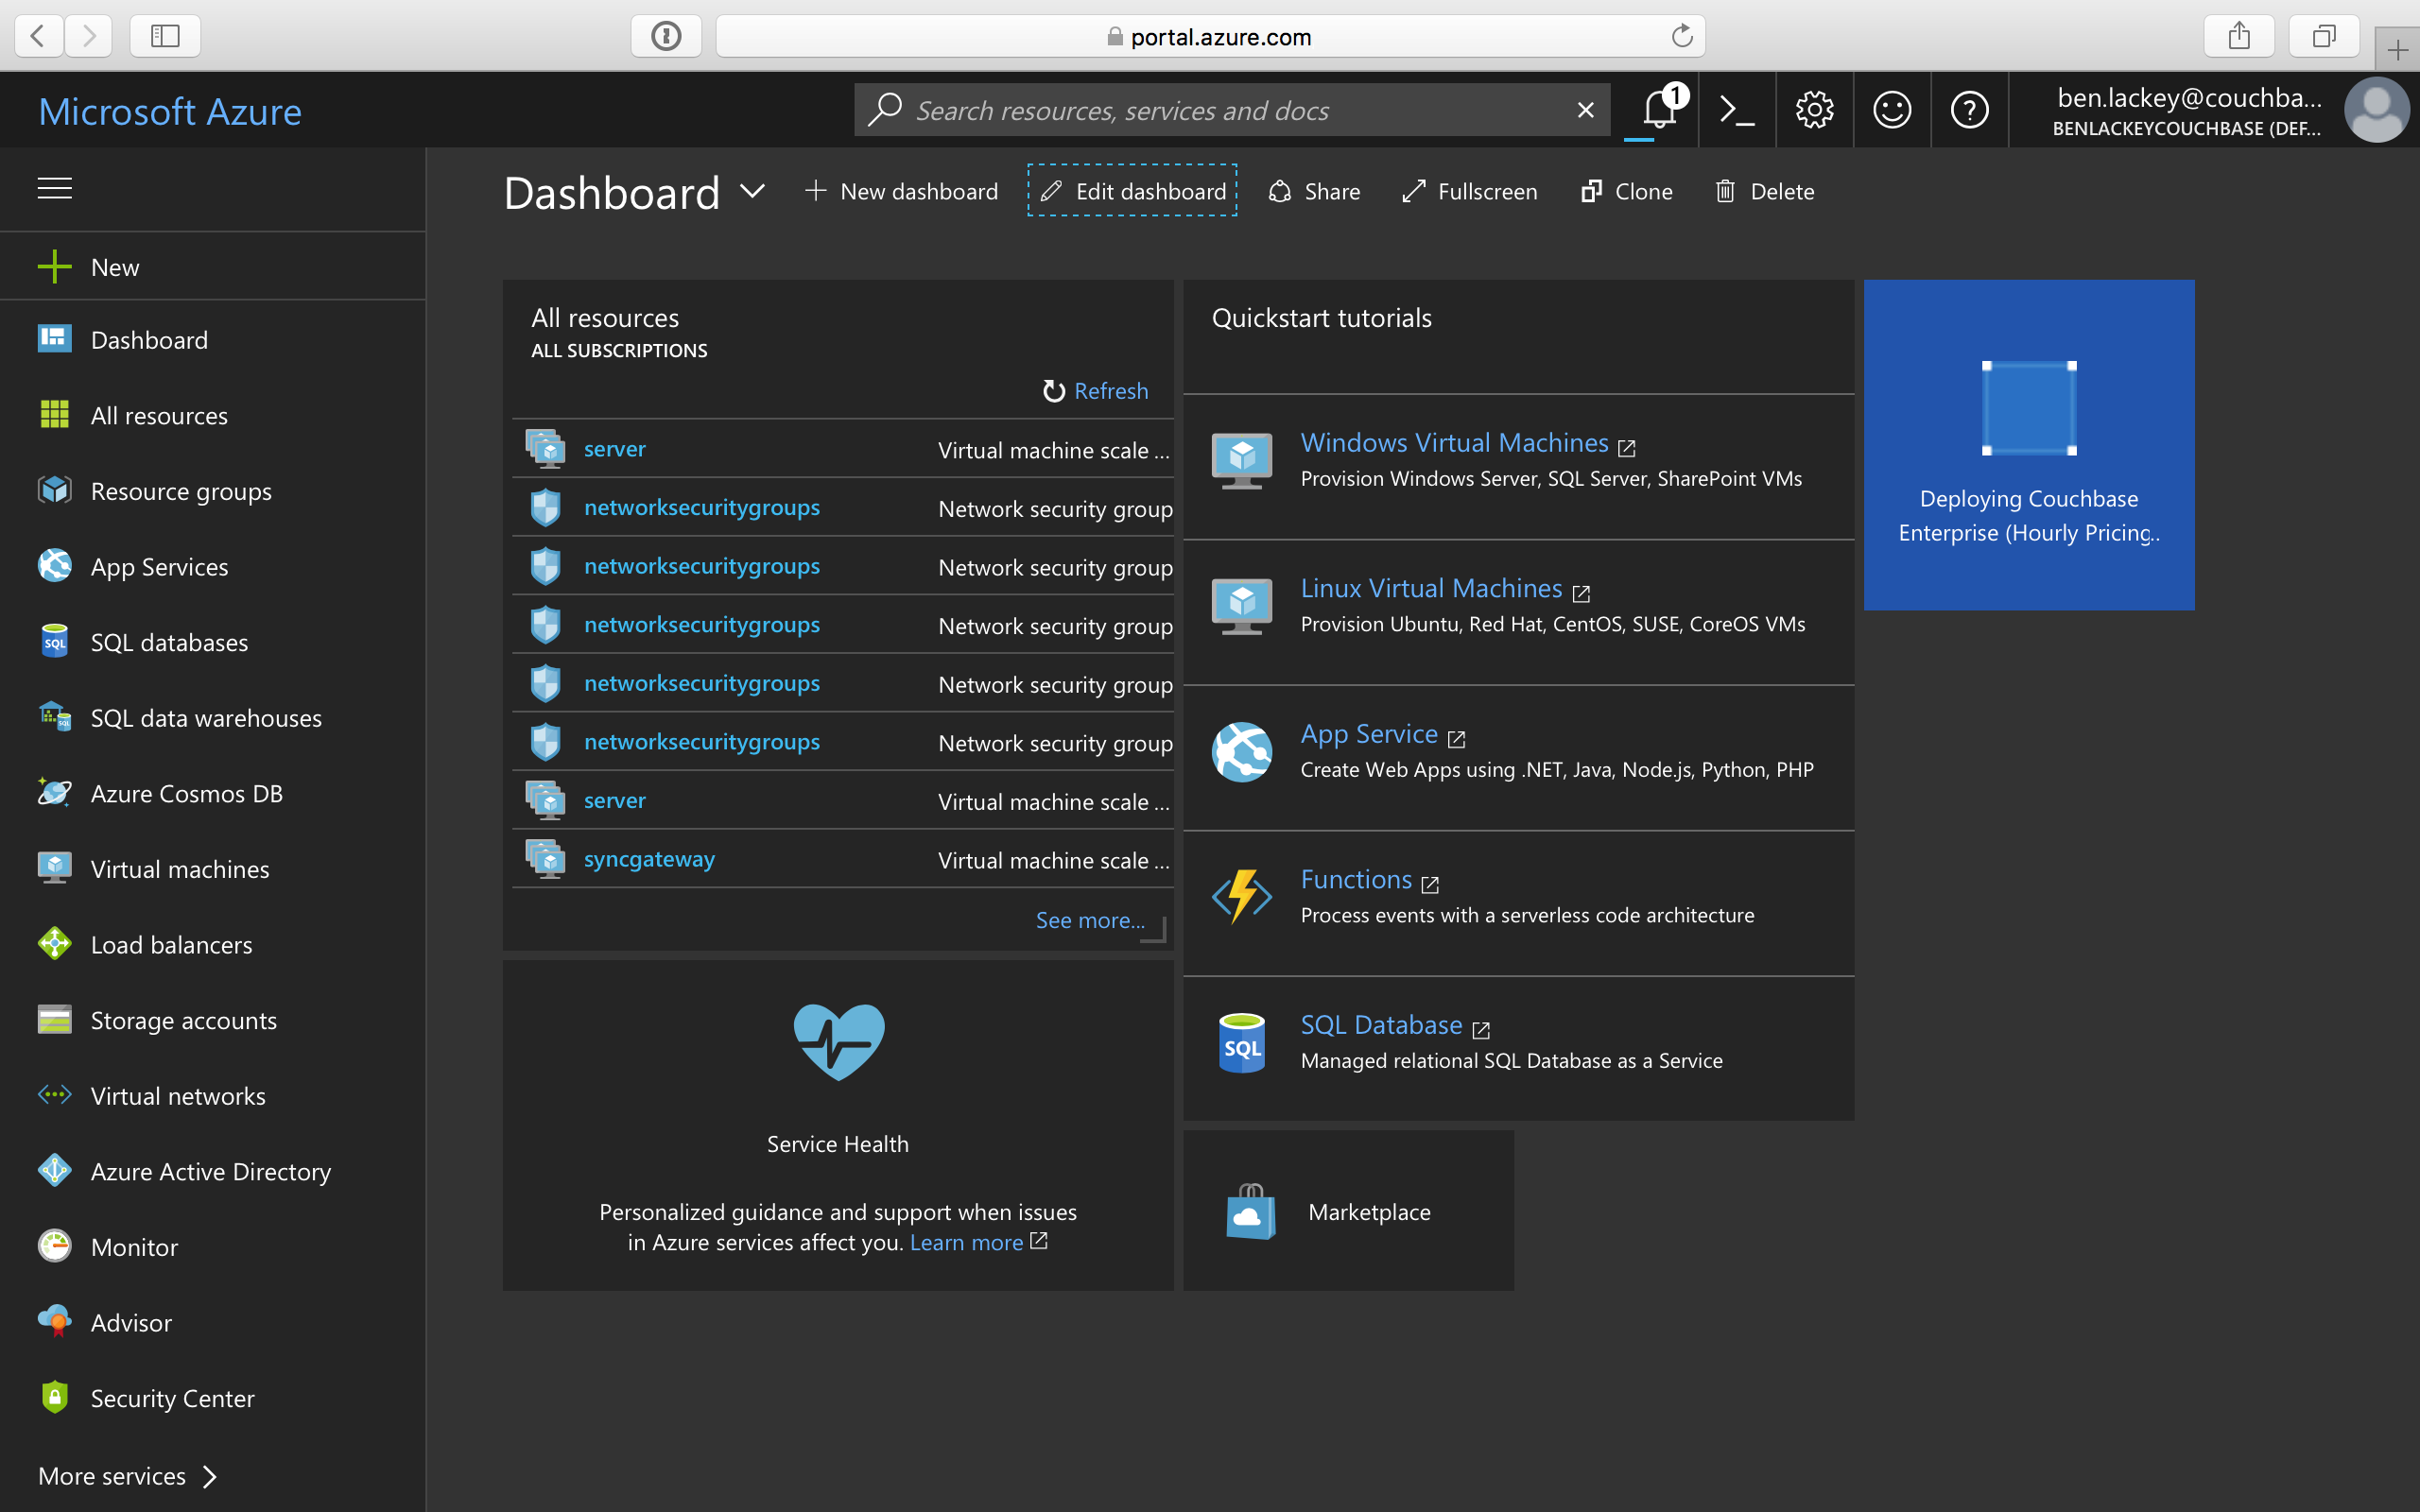
Note that it takes a few minutes for deployment to complete. You will receive a notification once deployment is completed.
Logging in to Your Couchbase Cluster
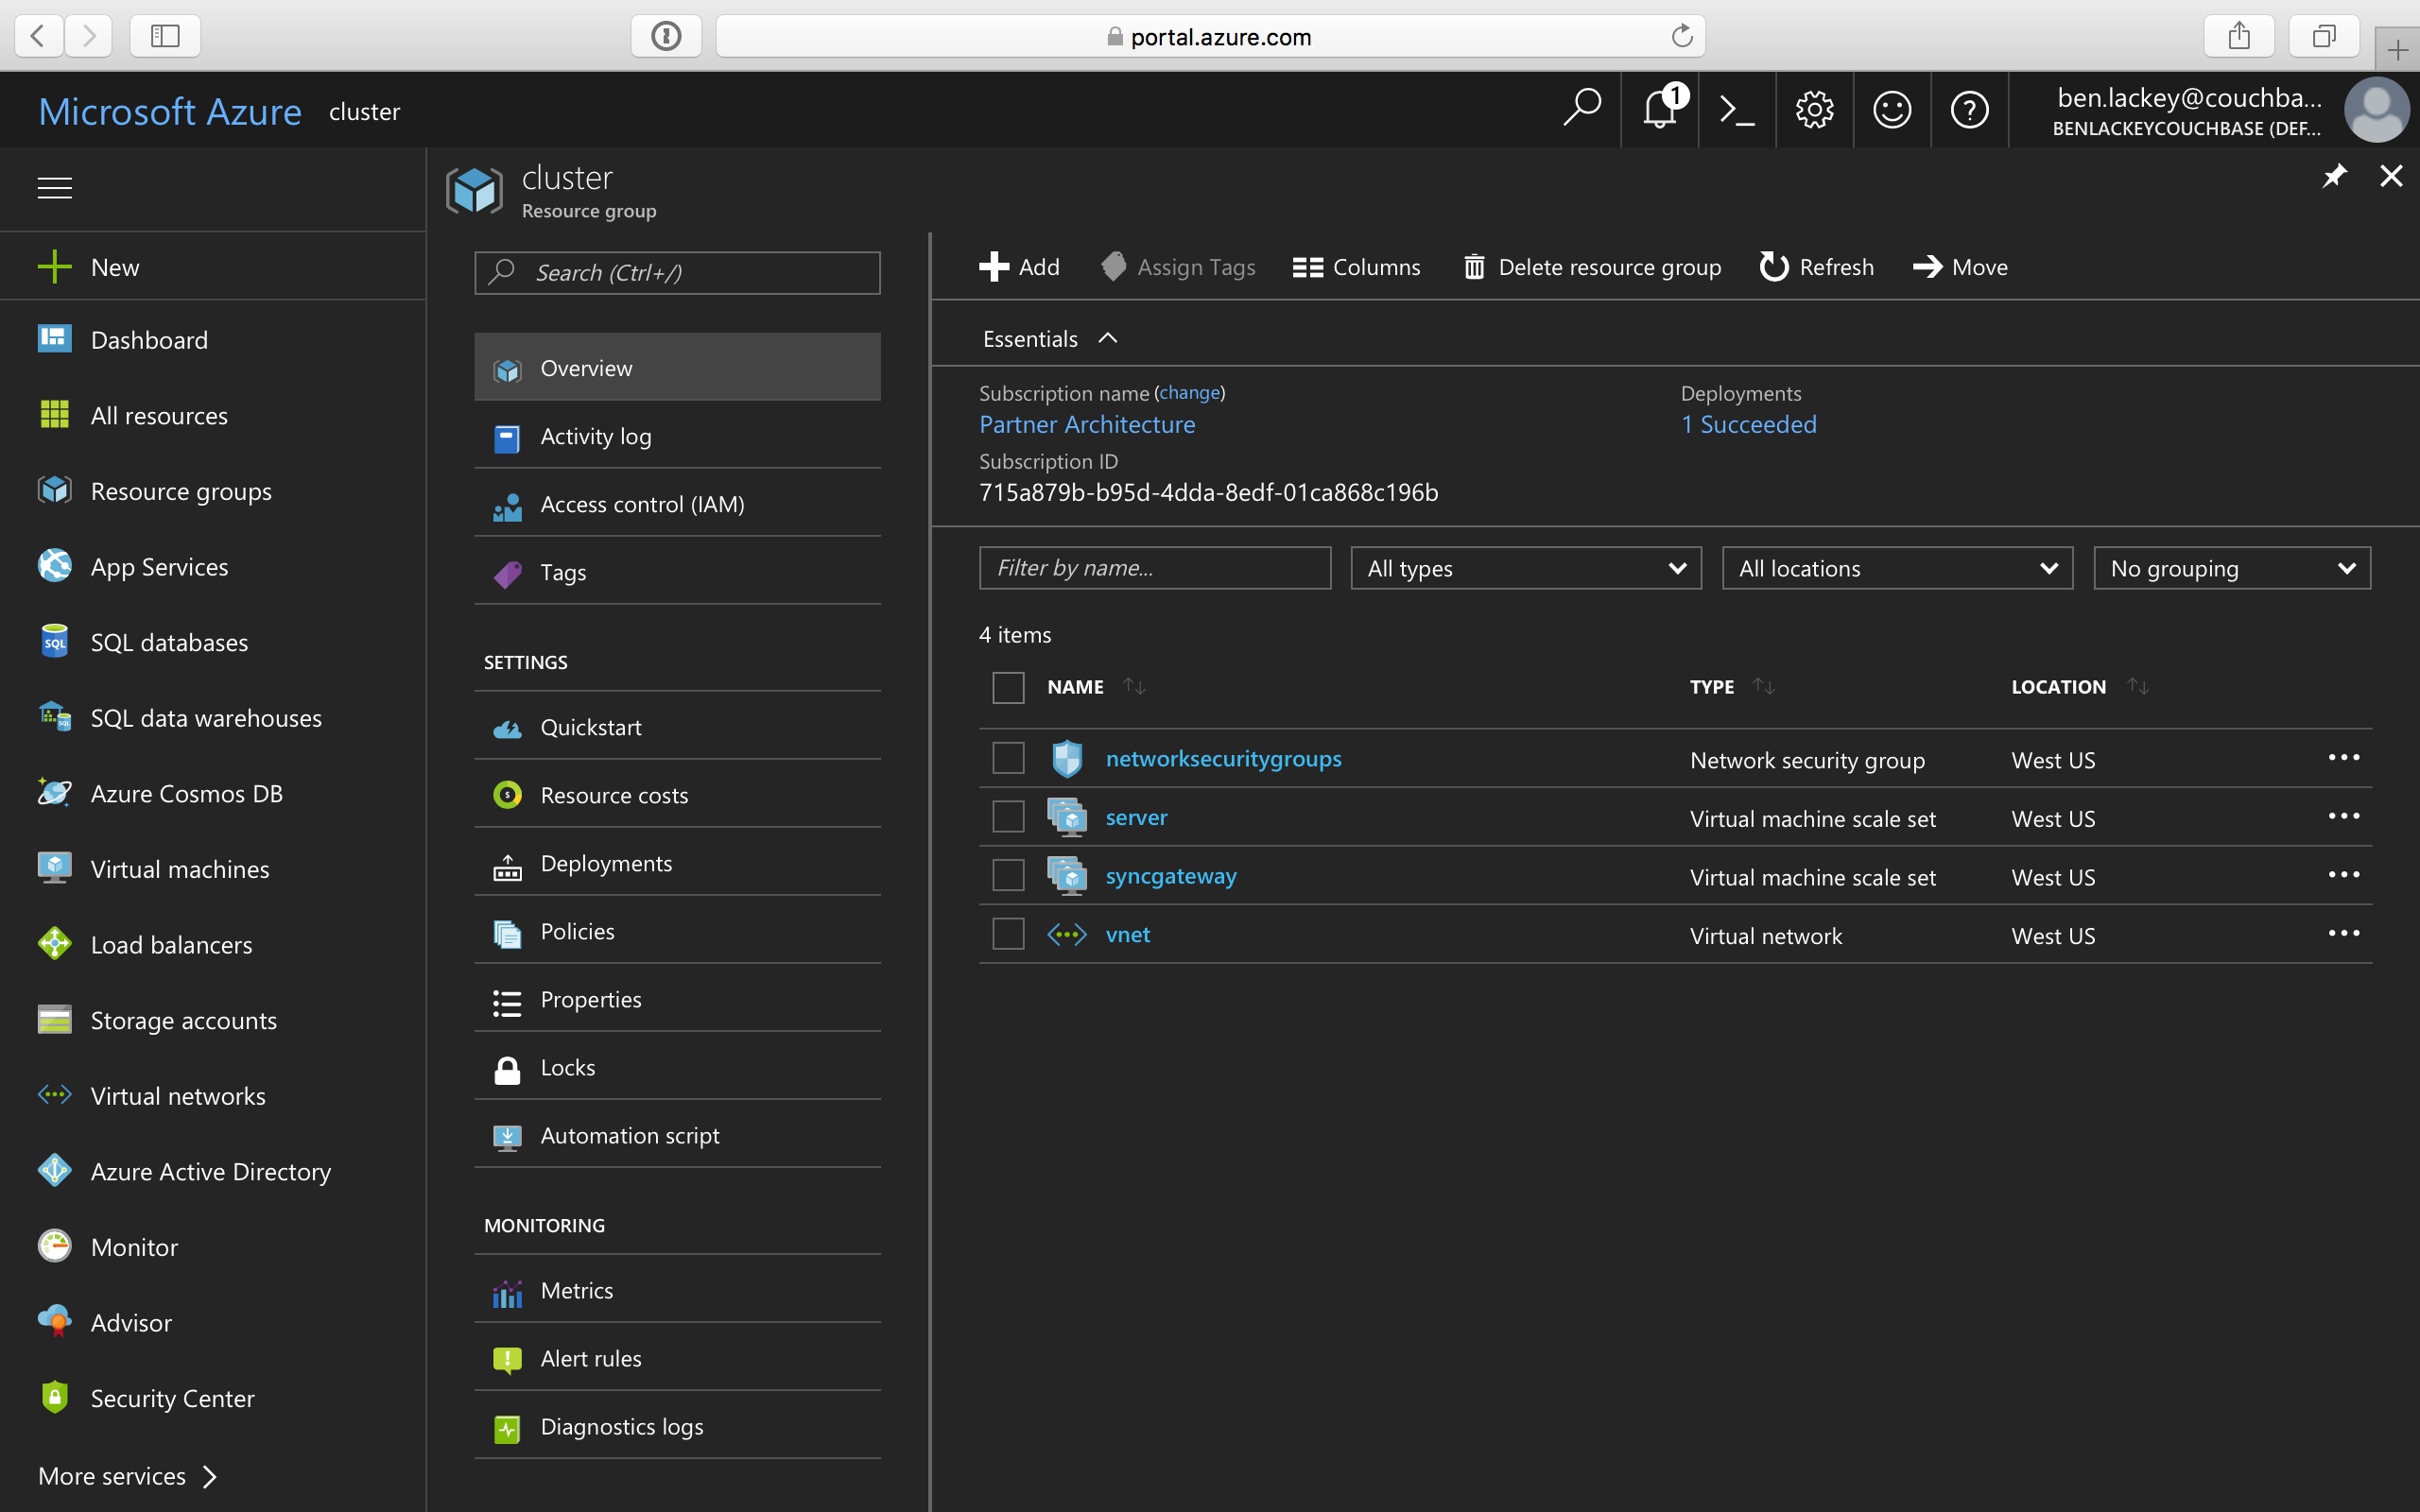
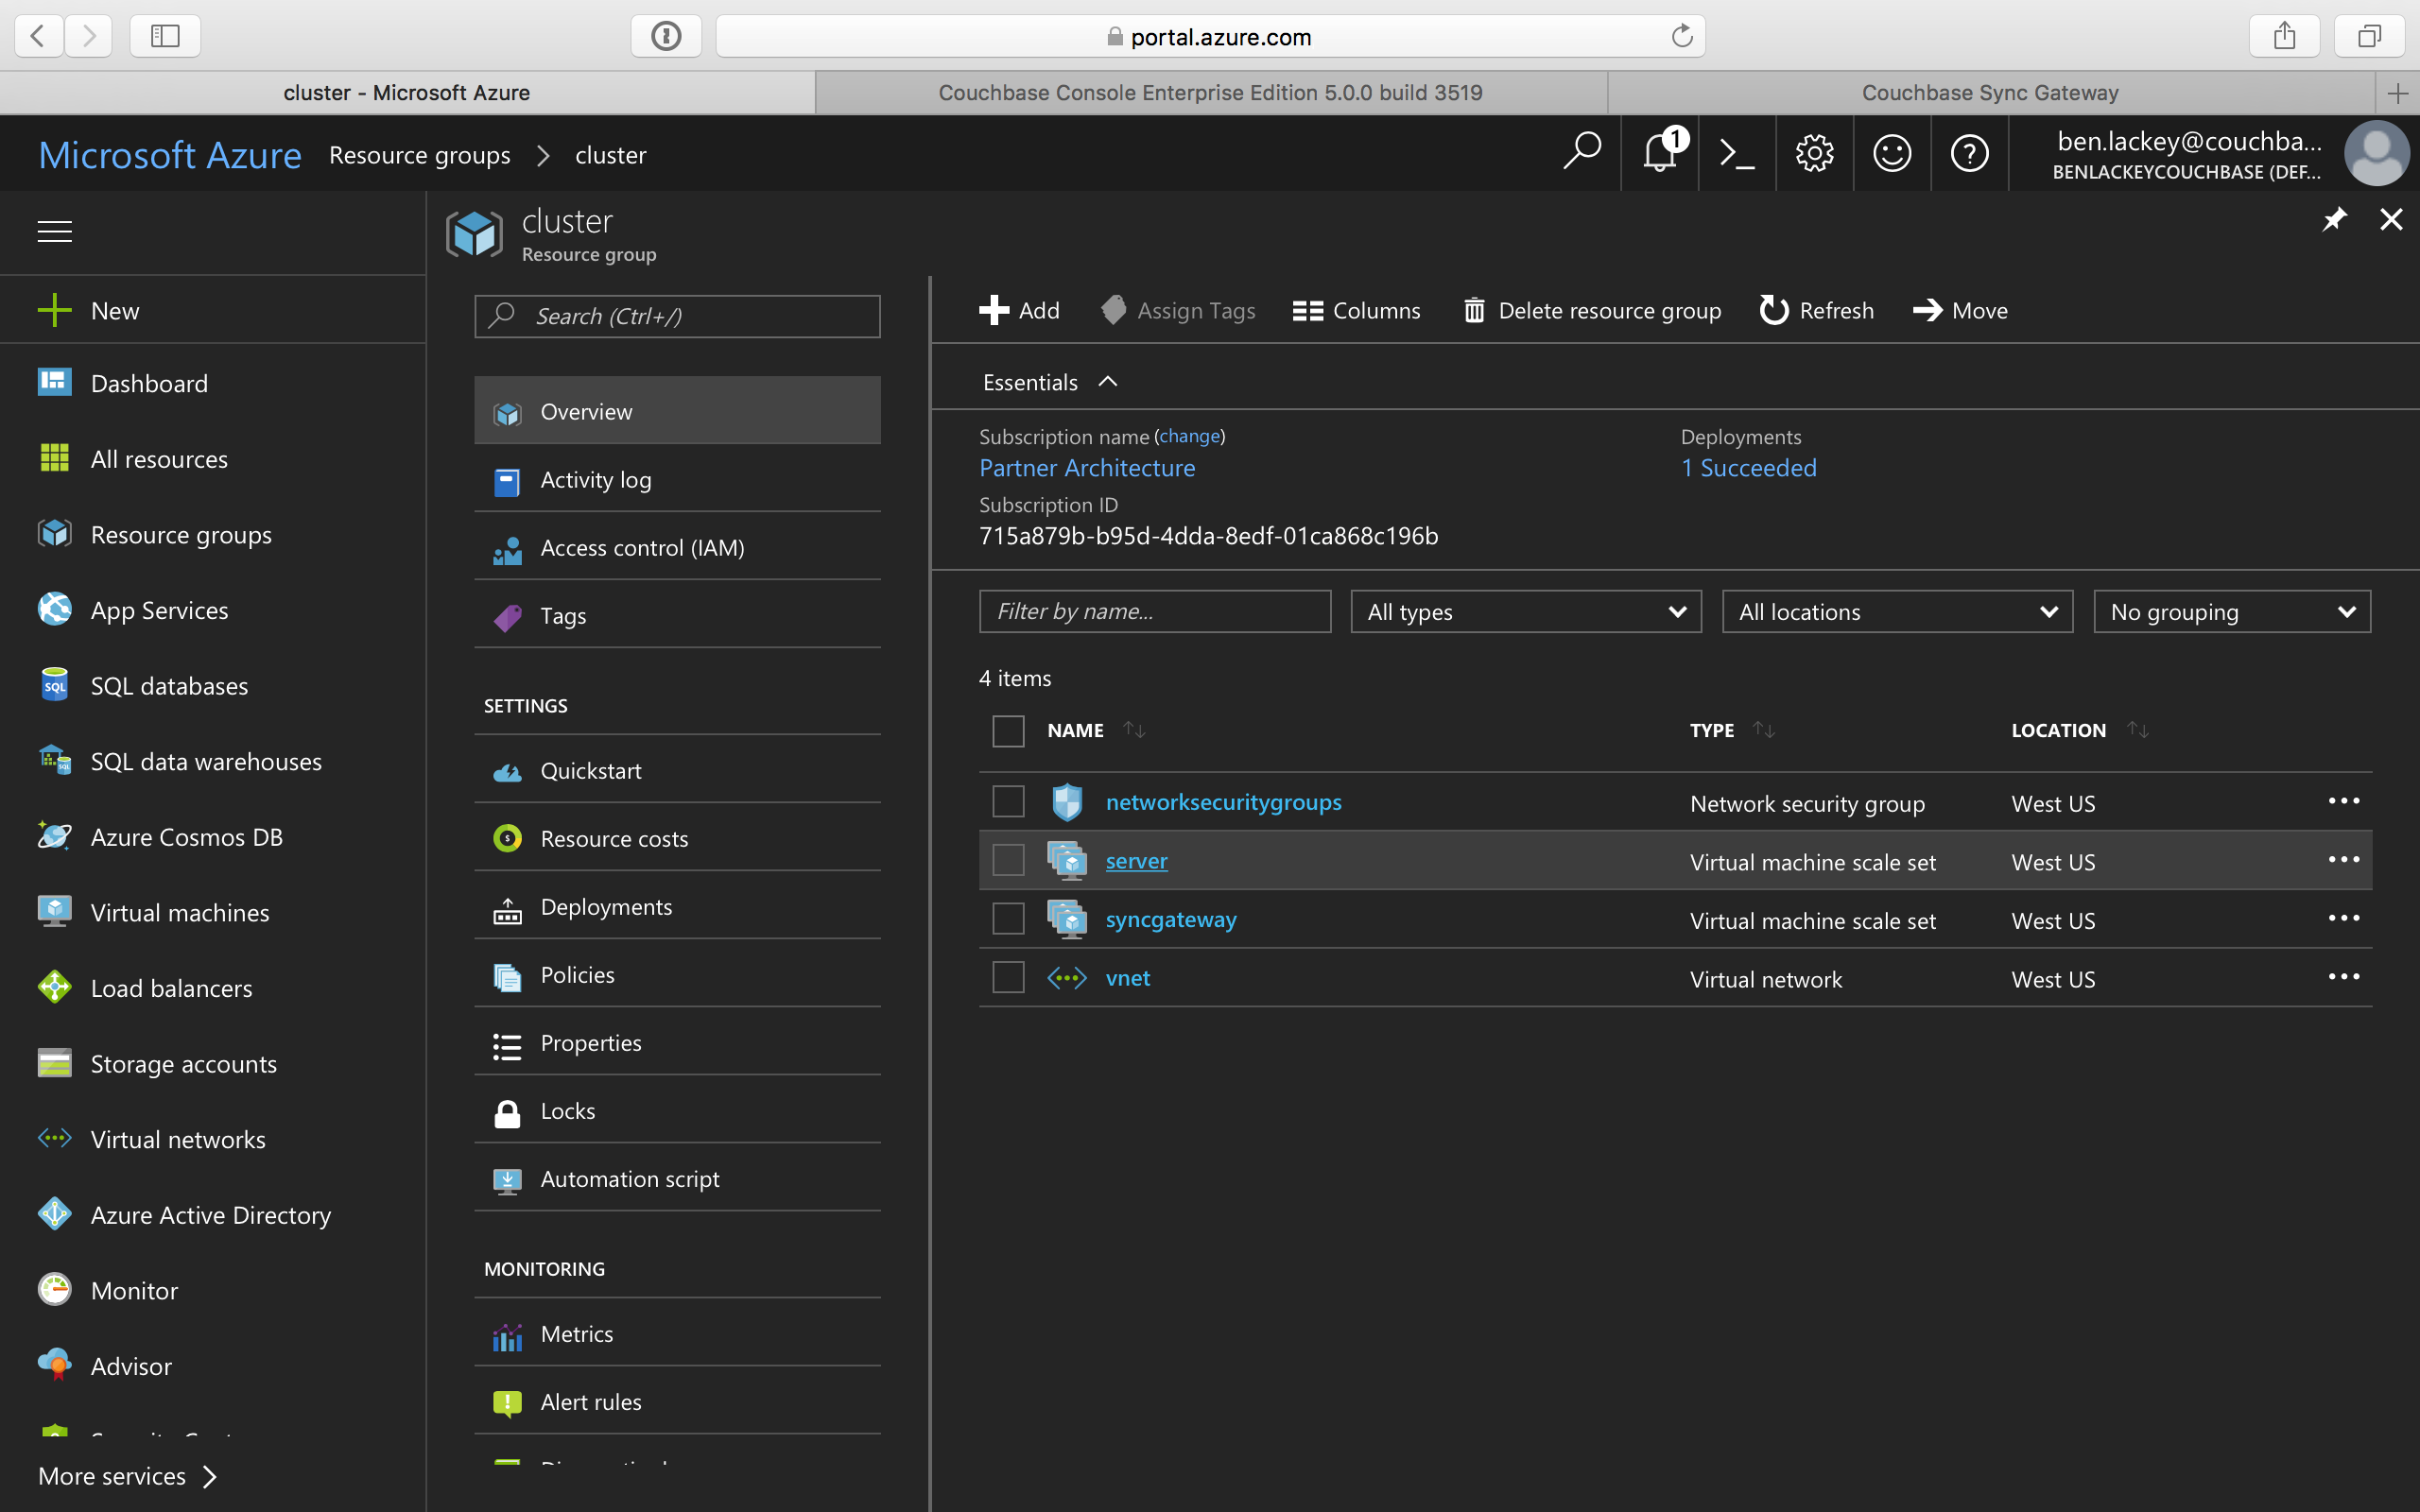
After the deployment is completed, you can drill-down into the resource group and explore the items created. The newly created resource group contains four items: network security groups, Couchbase Server VM scale sets, Couchbase Sync Gateway VM scale sets, and a virtual network that contains all these objects.
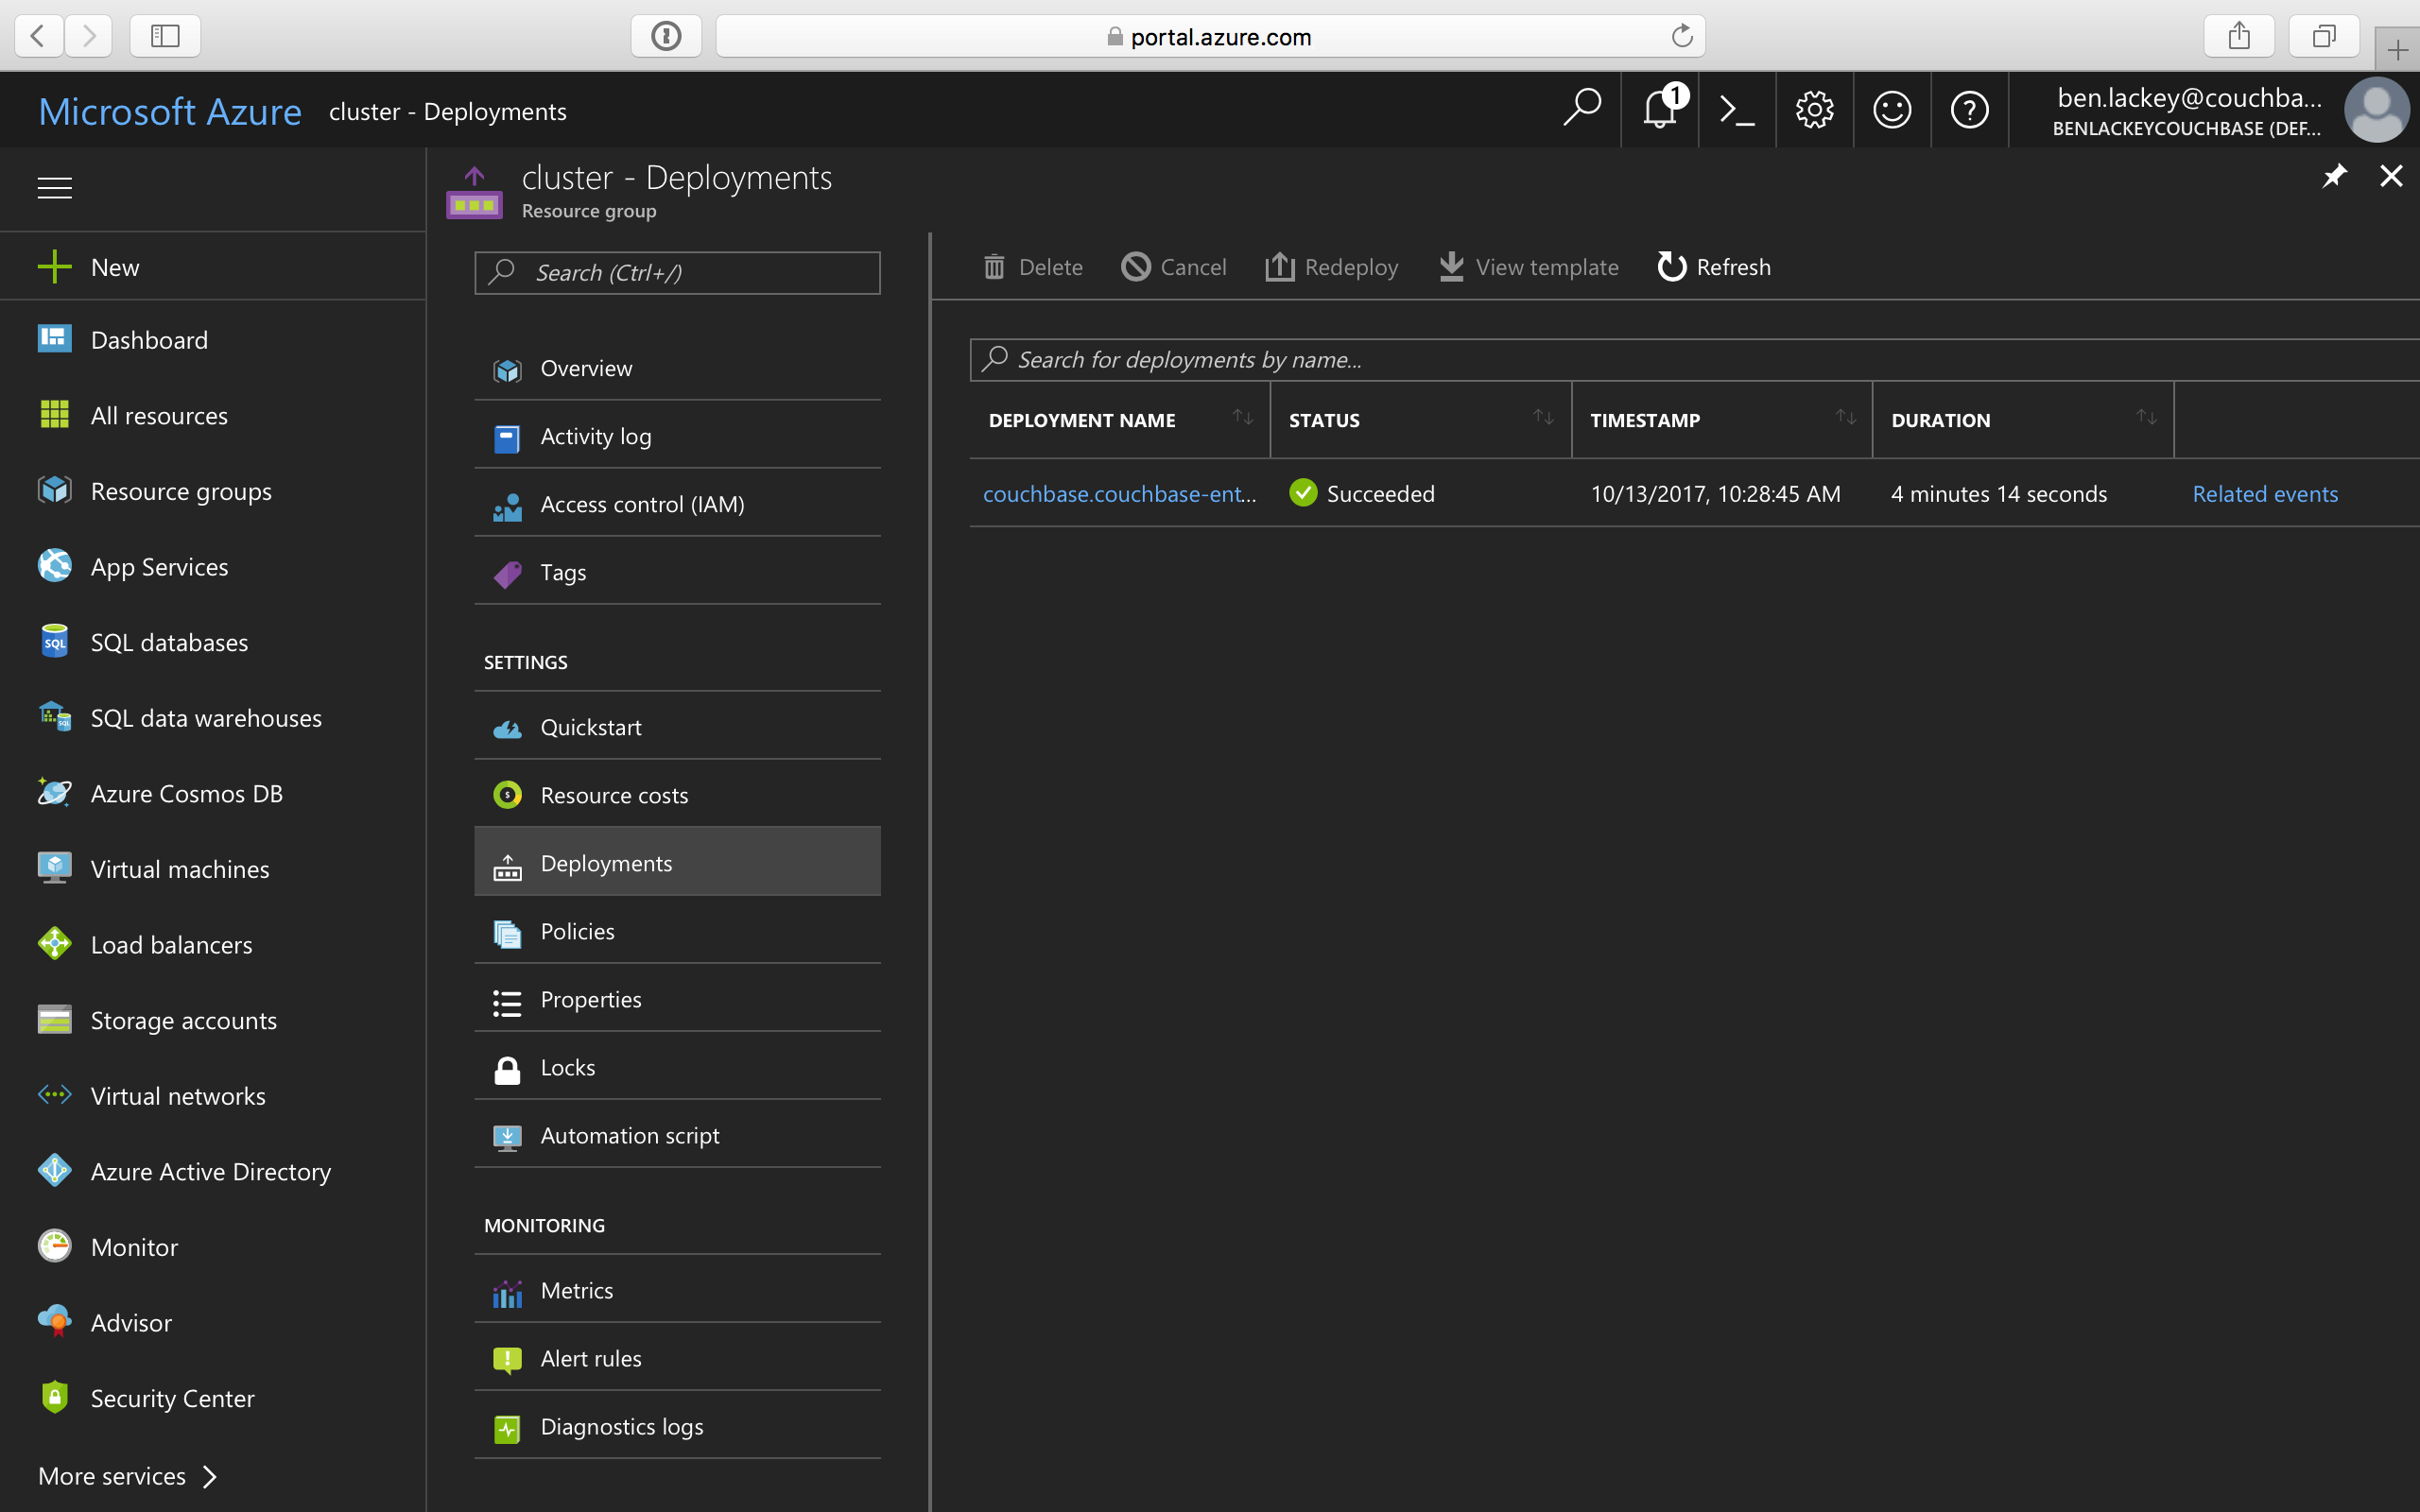
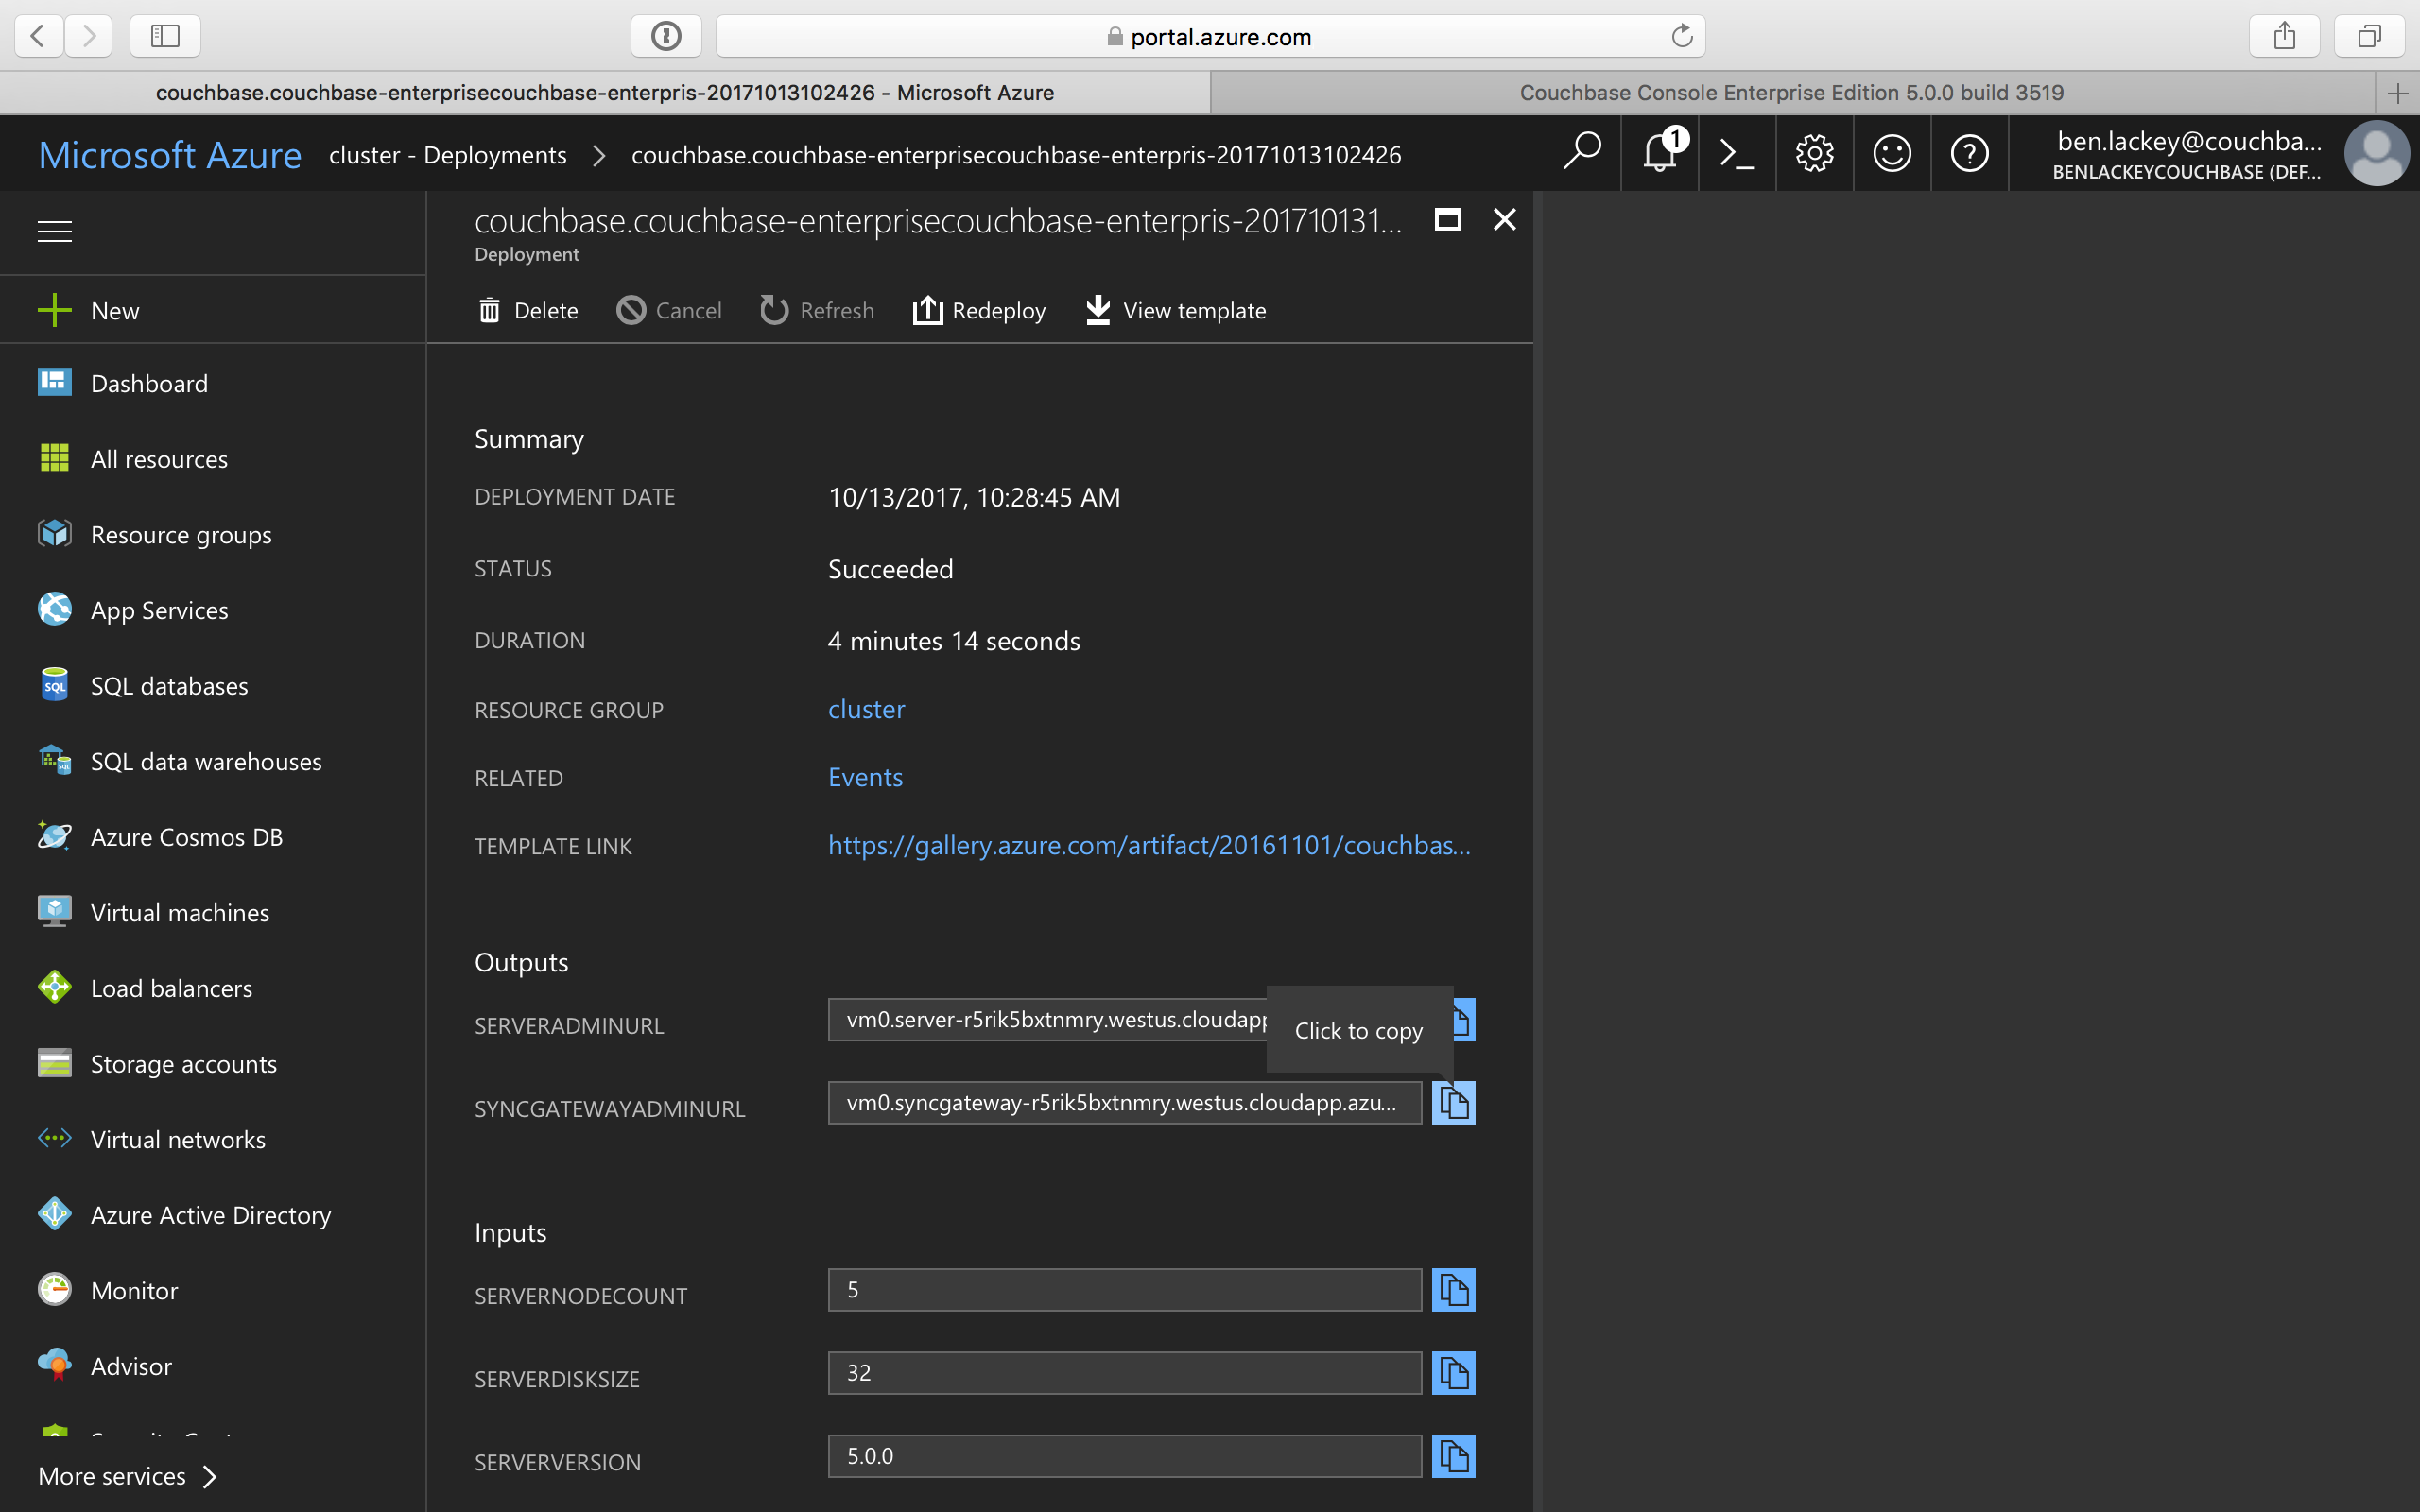
Navigate to the newly created resource group > Deployments and select the deployment.
(For example, couchbase.couchbase-enterprisecouchbase-enterpris-timestamp).
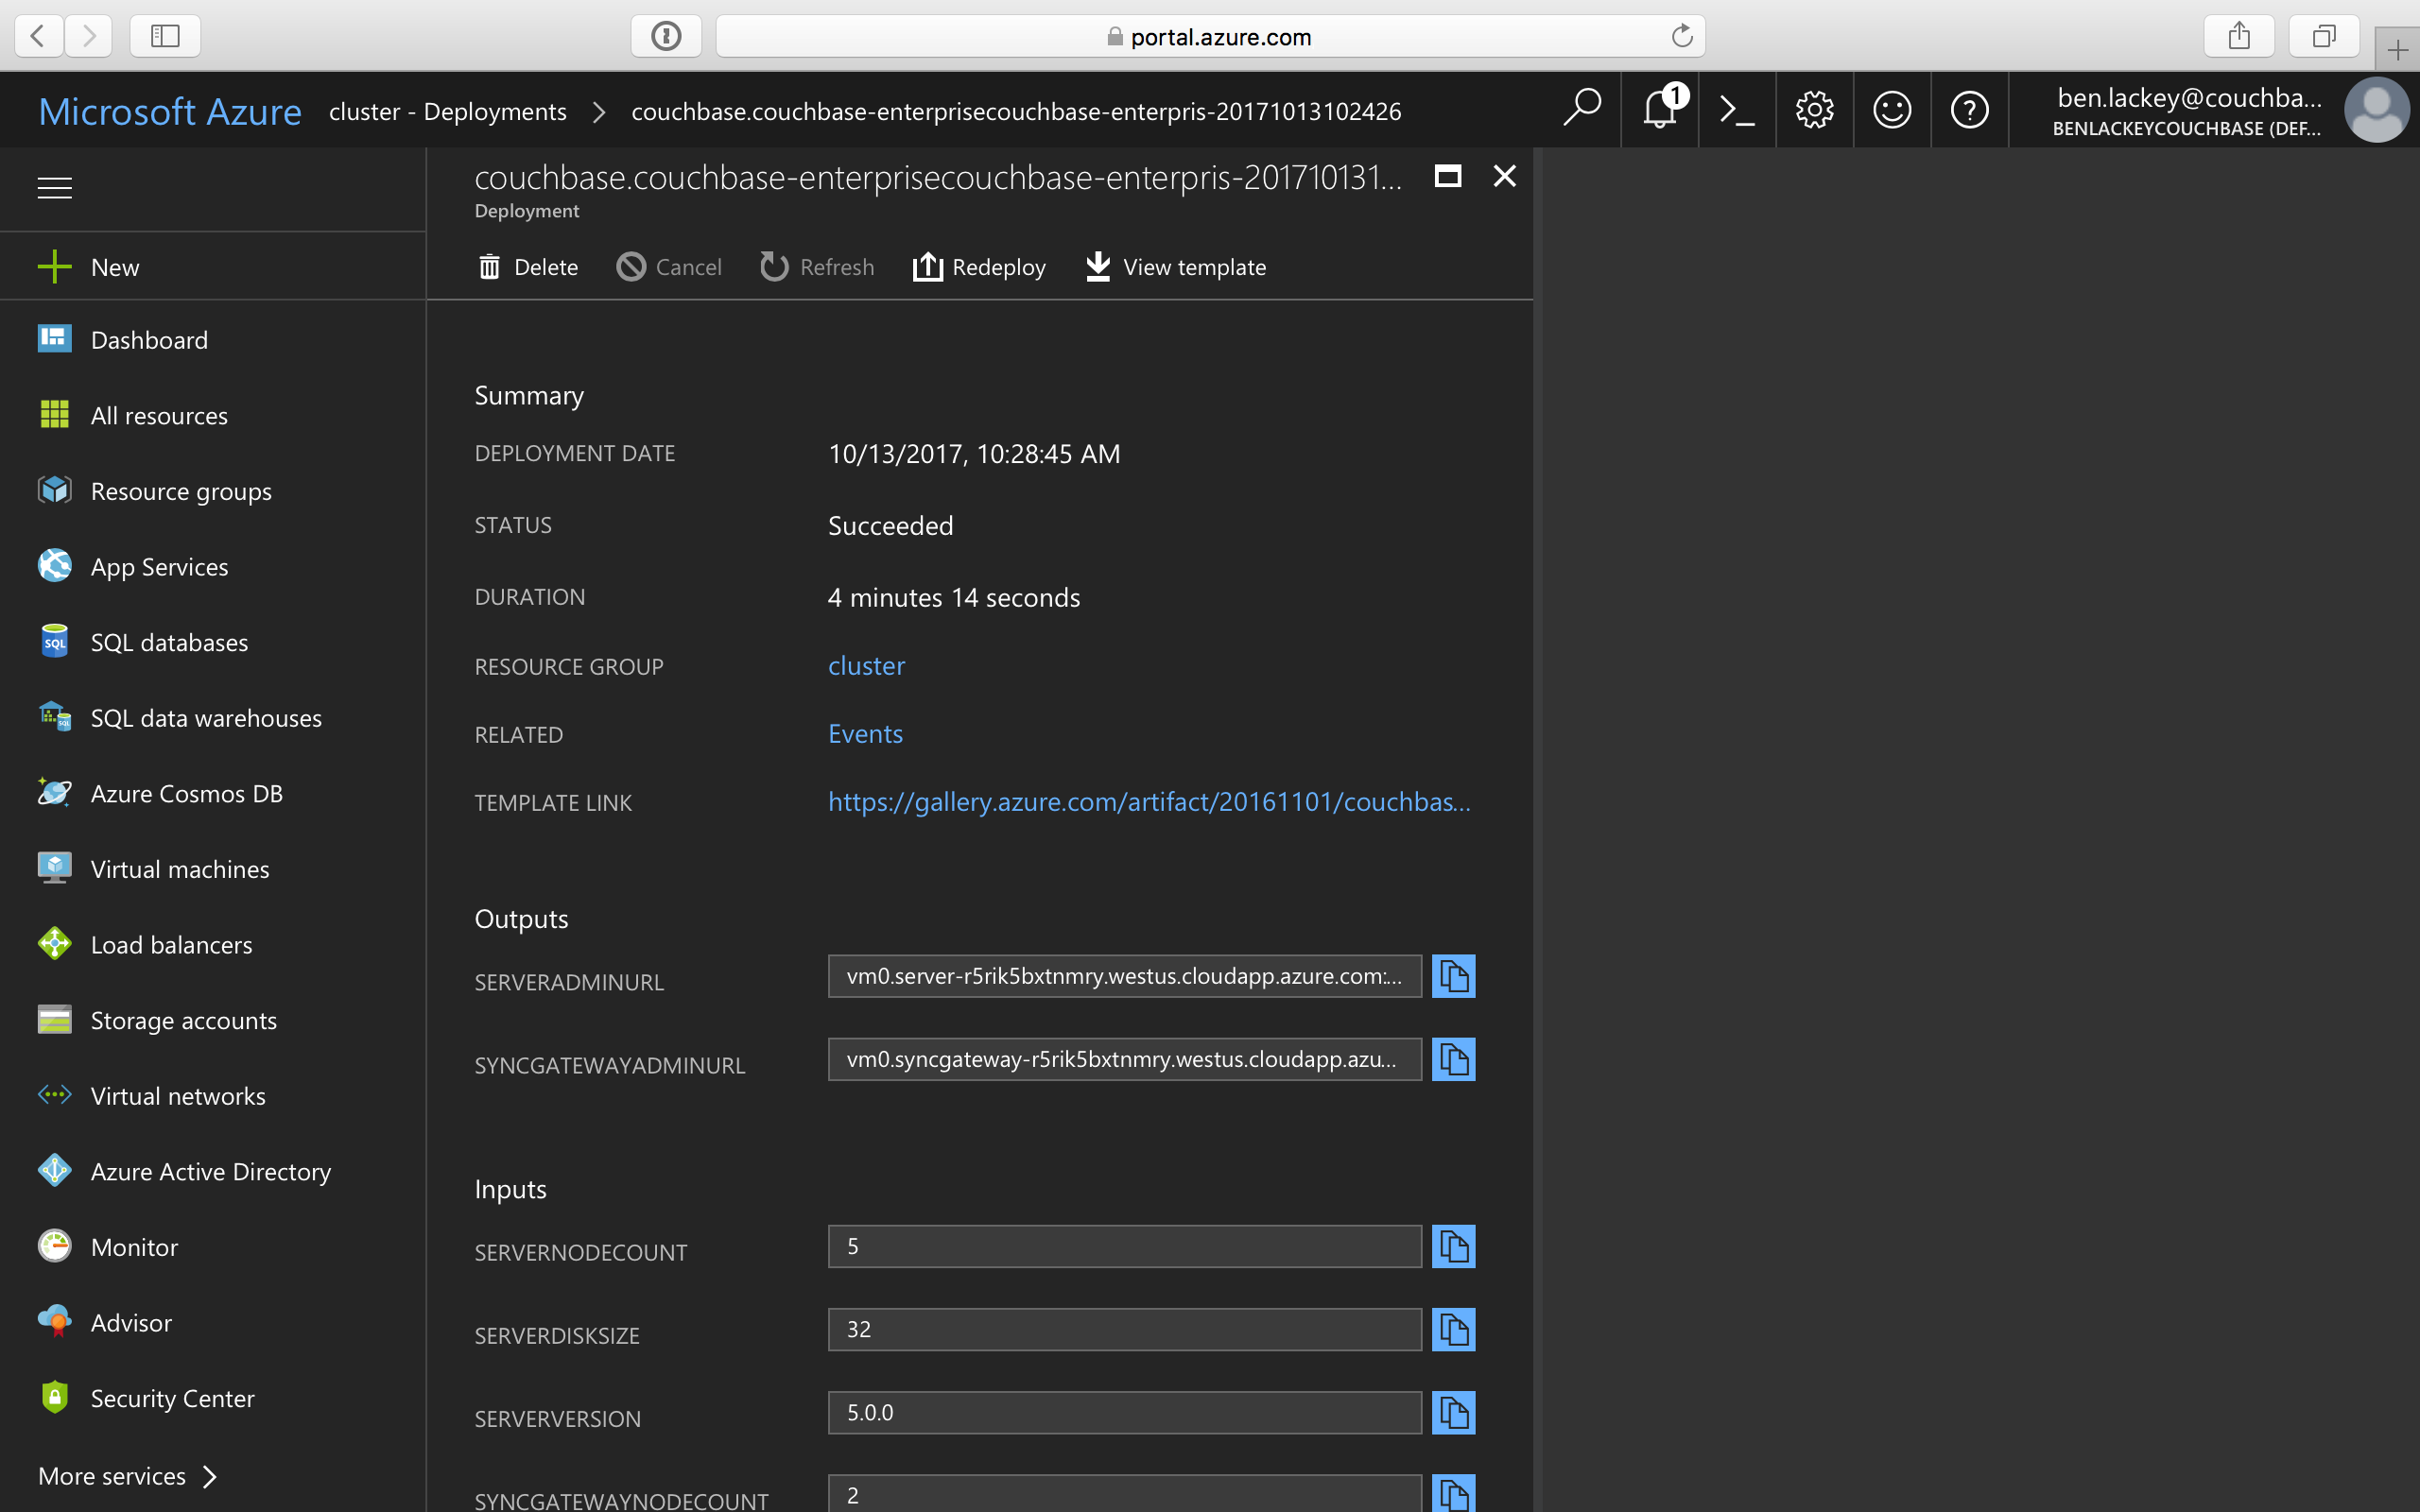
You can see that there are two outputs created: Server Admin URL and Sync Gateway Admin URL which can be used to access the Couchbase Server Web Console and Couchbase Sync Gateway Admin Portal respectively.
-
This step describes how to log in to the Couchbase Server Web Console.
-
Copy the Server Admin URL.

-
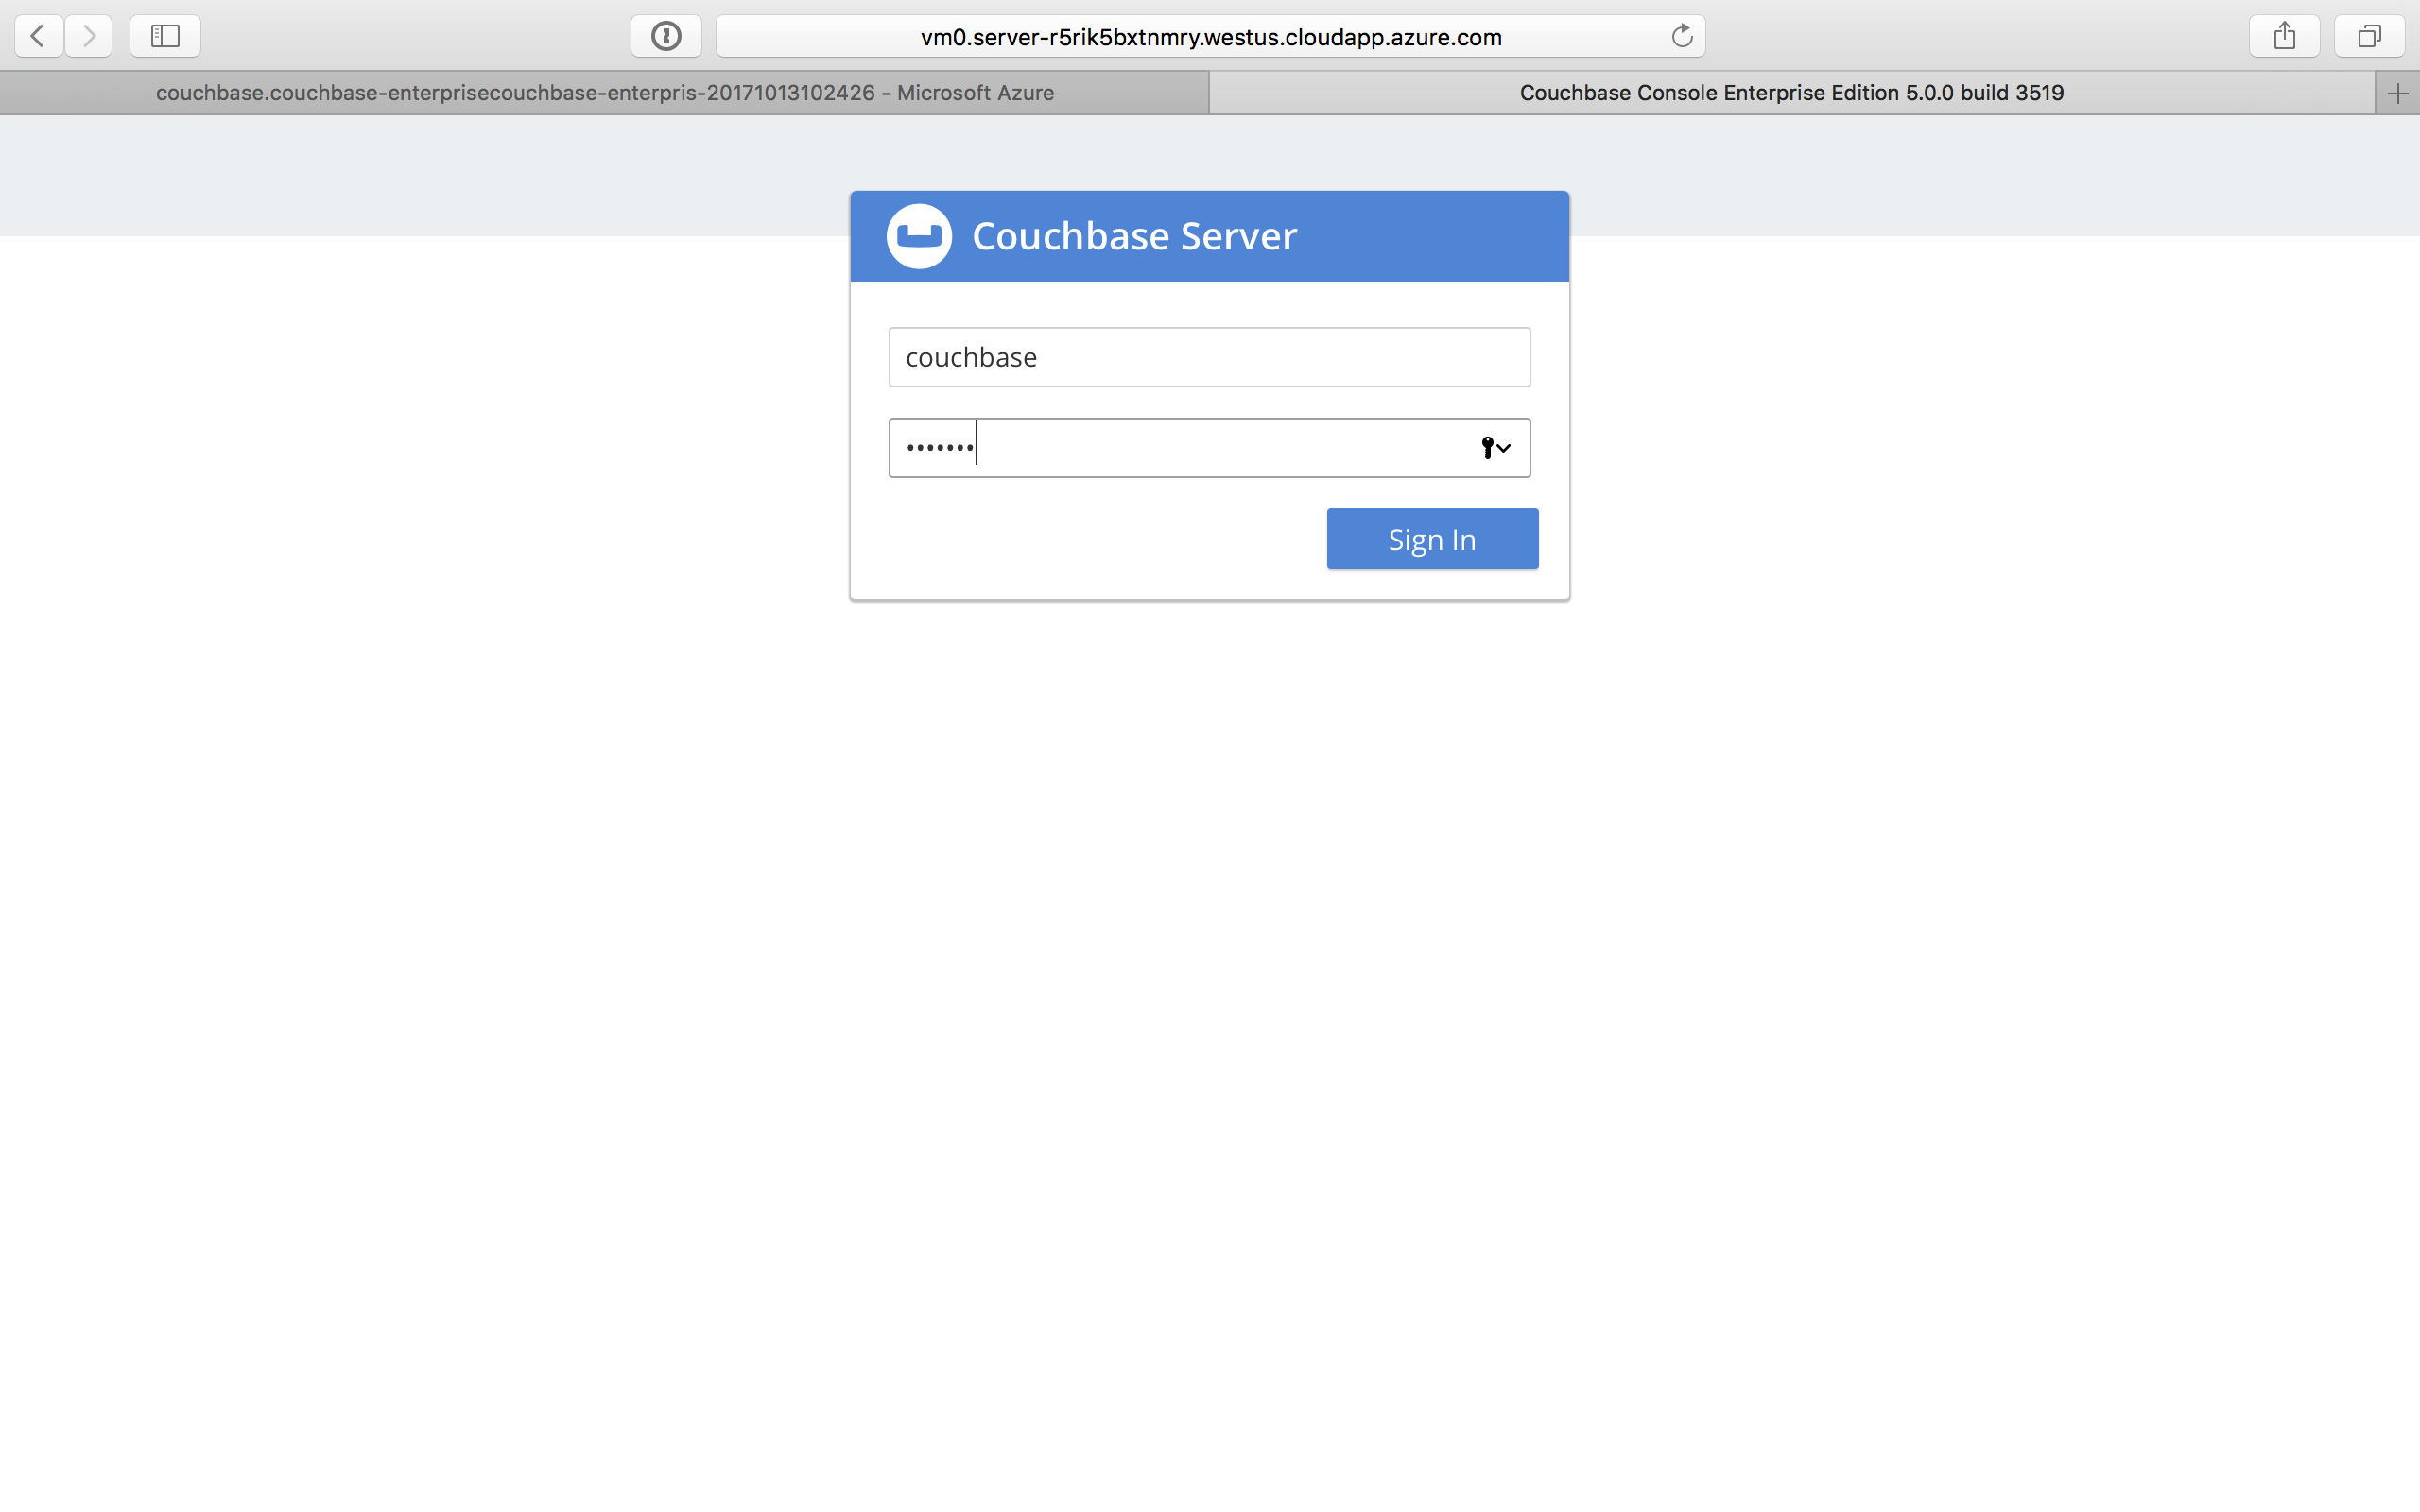
Paste the Server Admin URL on a browser tab to open the Couchbase Server Web Console.
-
Enter the Admin user name and password that you configured when creating the deployment to sign in.
-
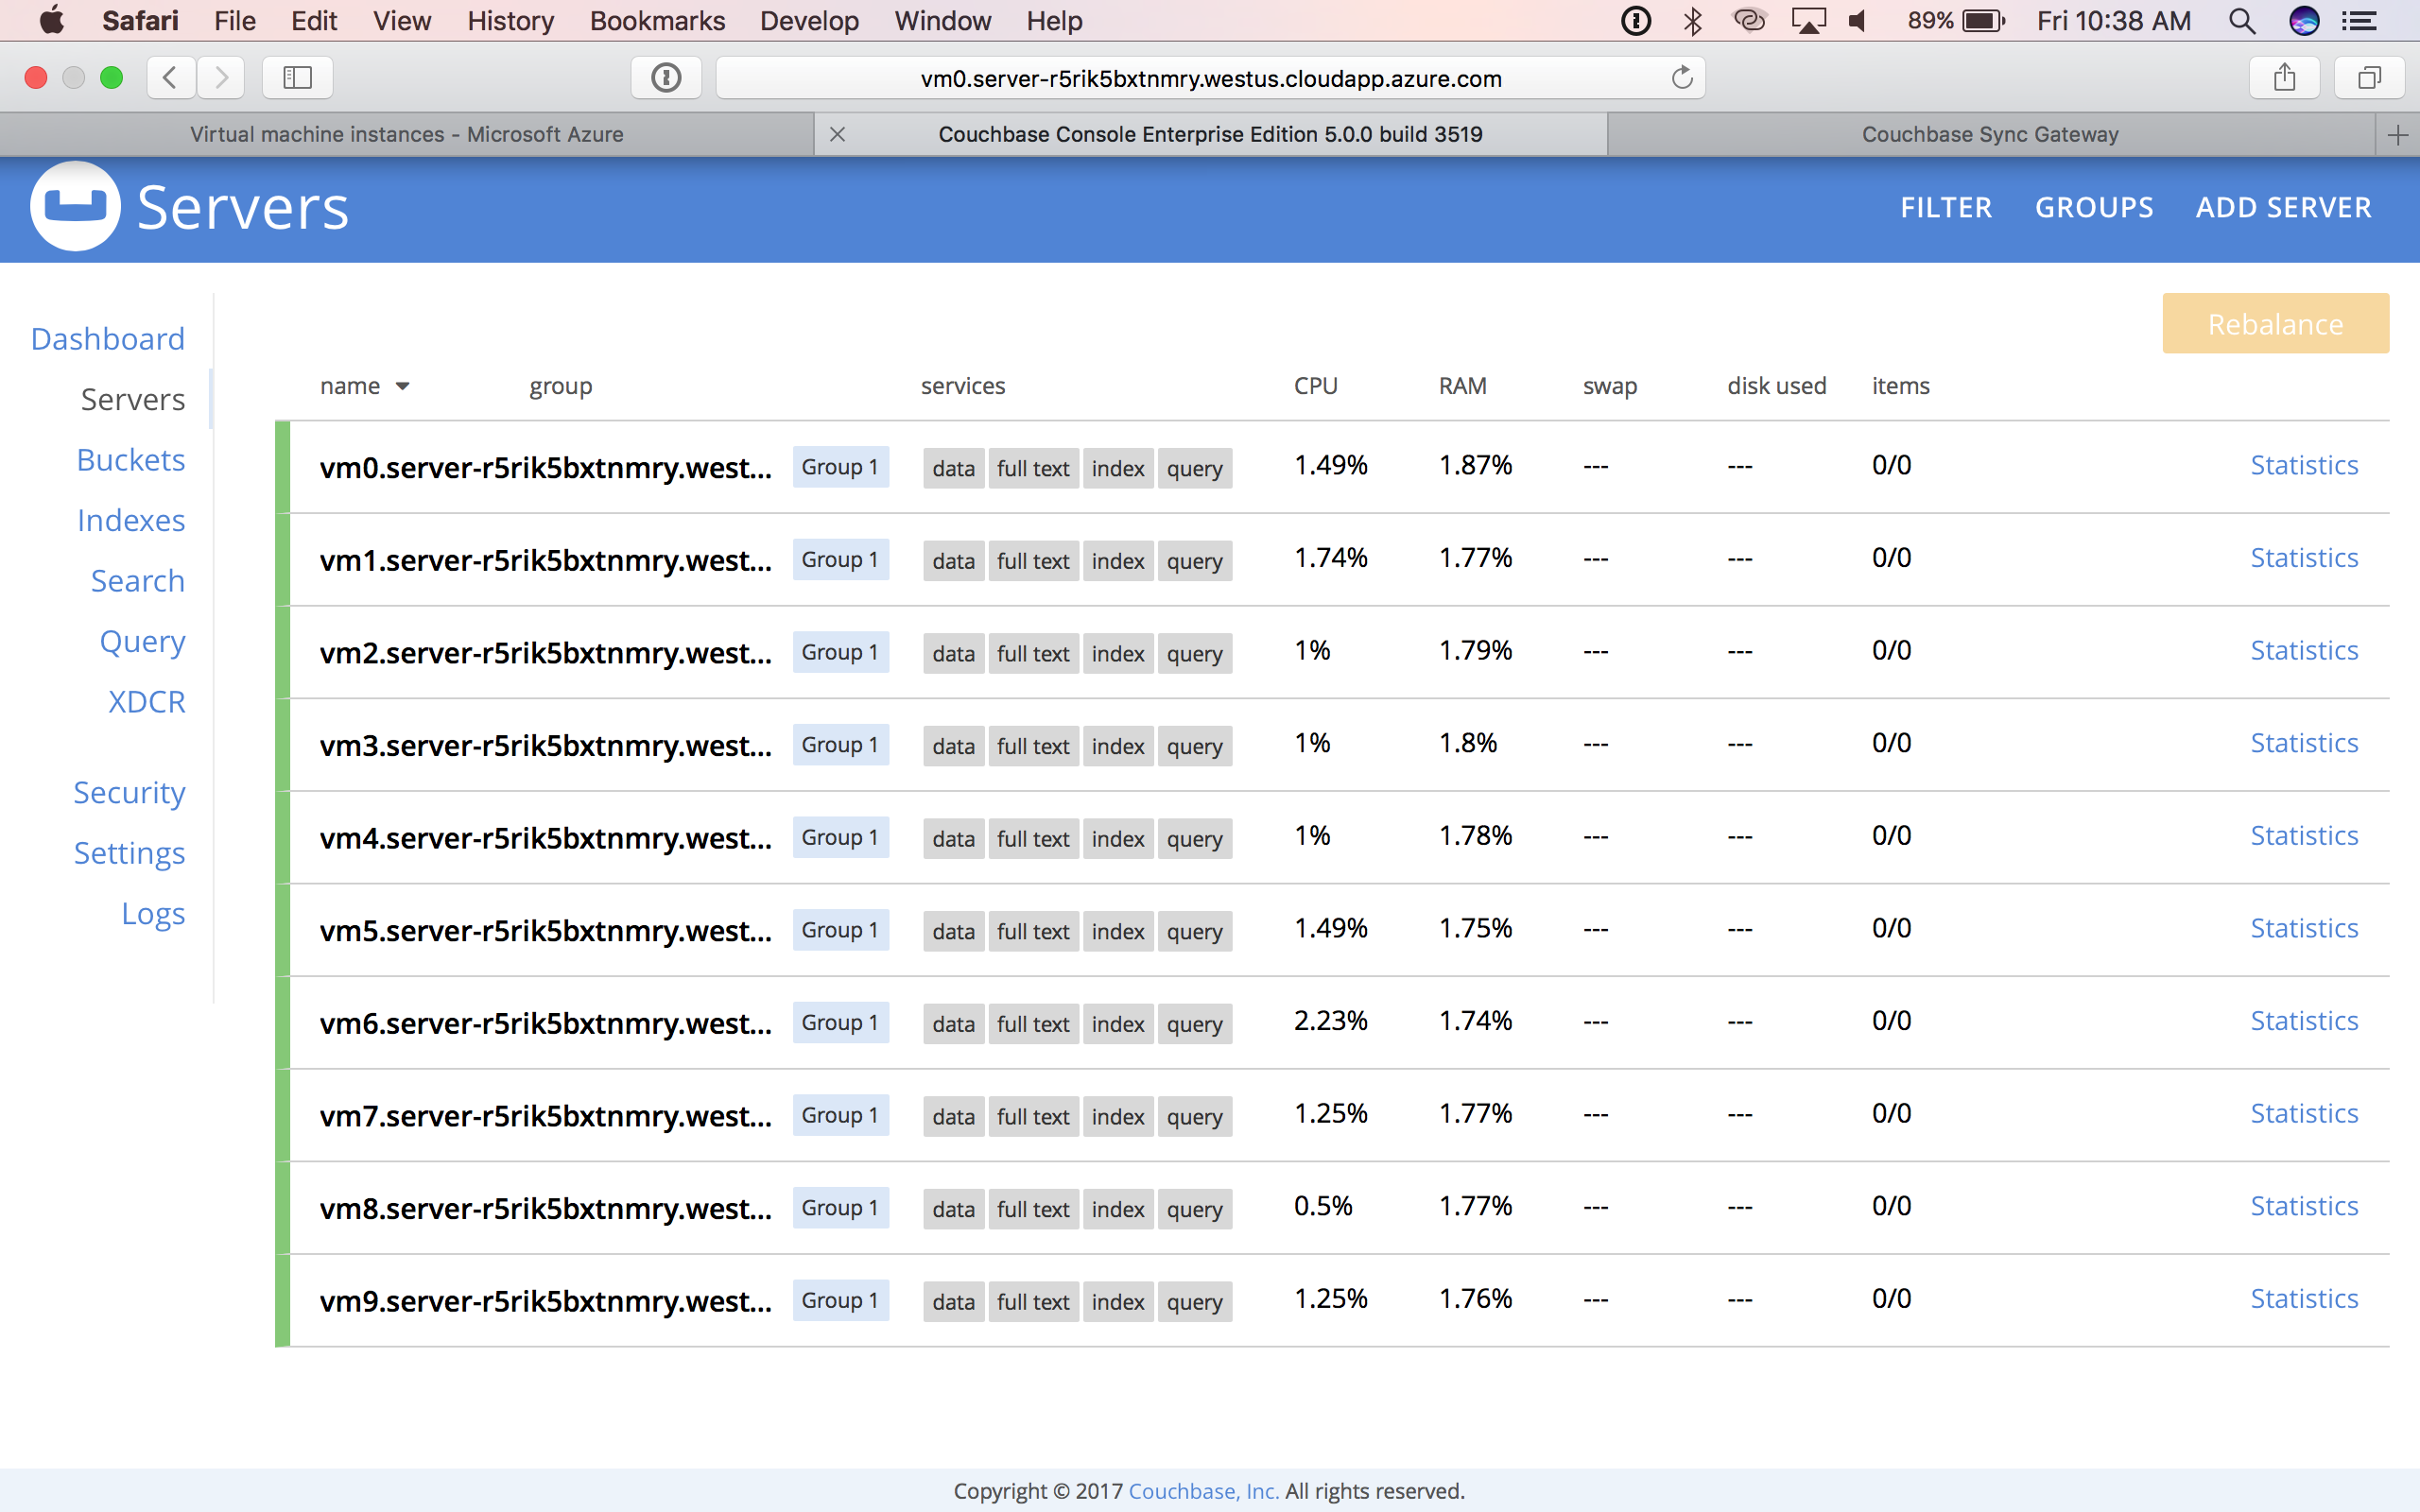
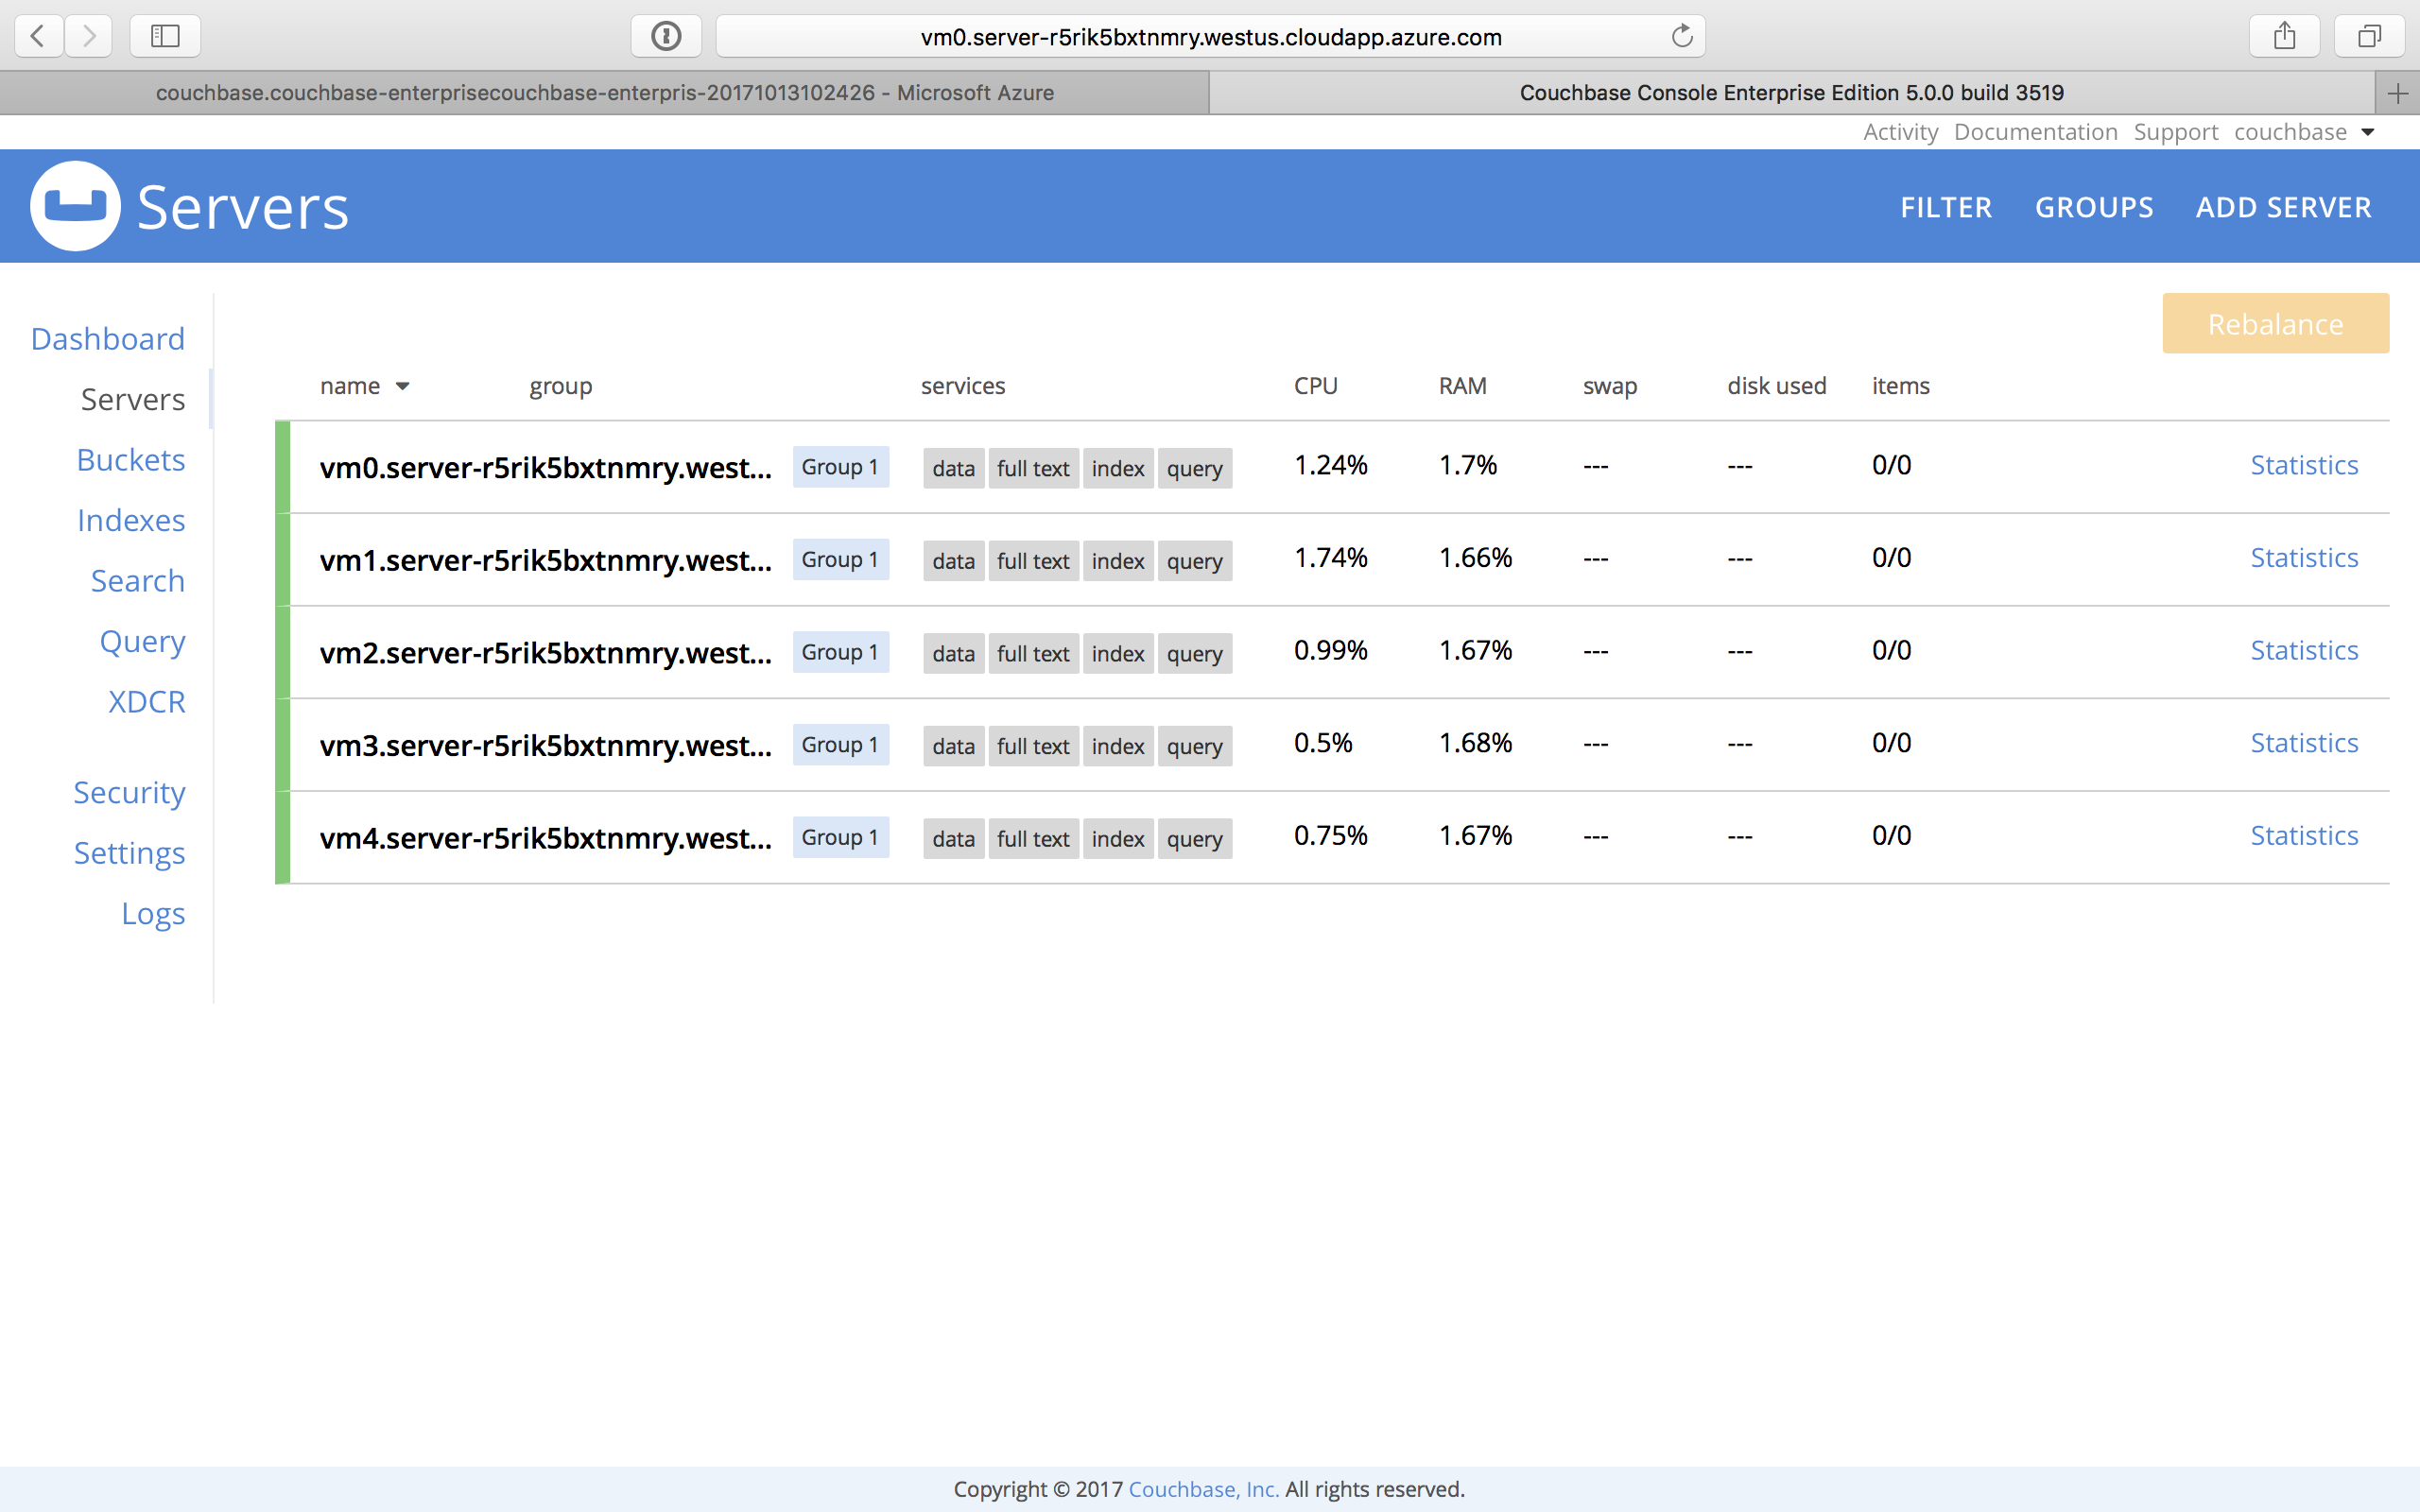
Once you log in successfully, you can see the status of your Couchbase Server cluster on the dashboard.

Click the Servers tab to explore the sever nodes that have been created.
-
-
This step describes how to log in to the Sync Gateway Admin portal.
-
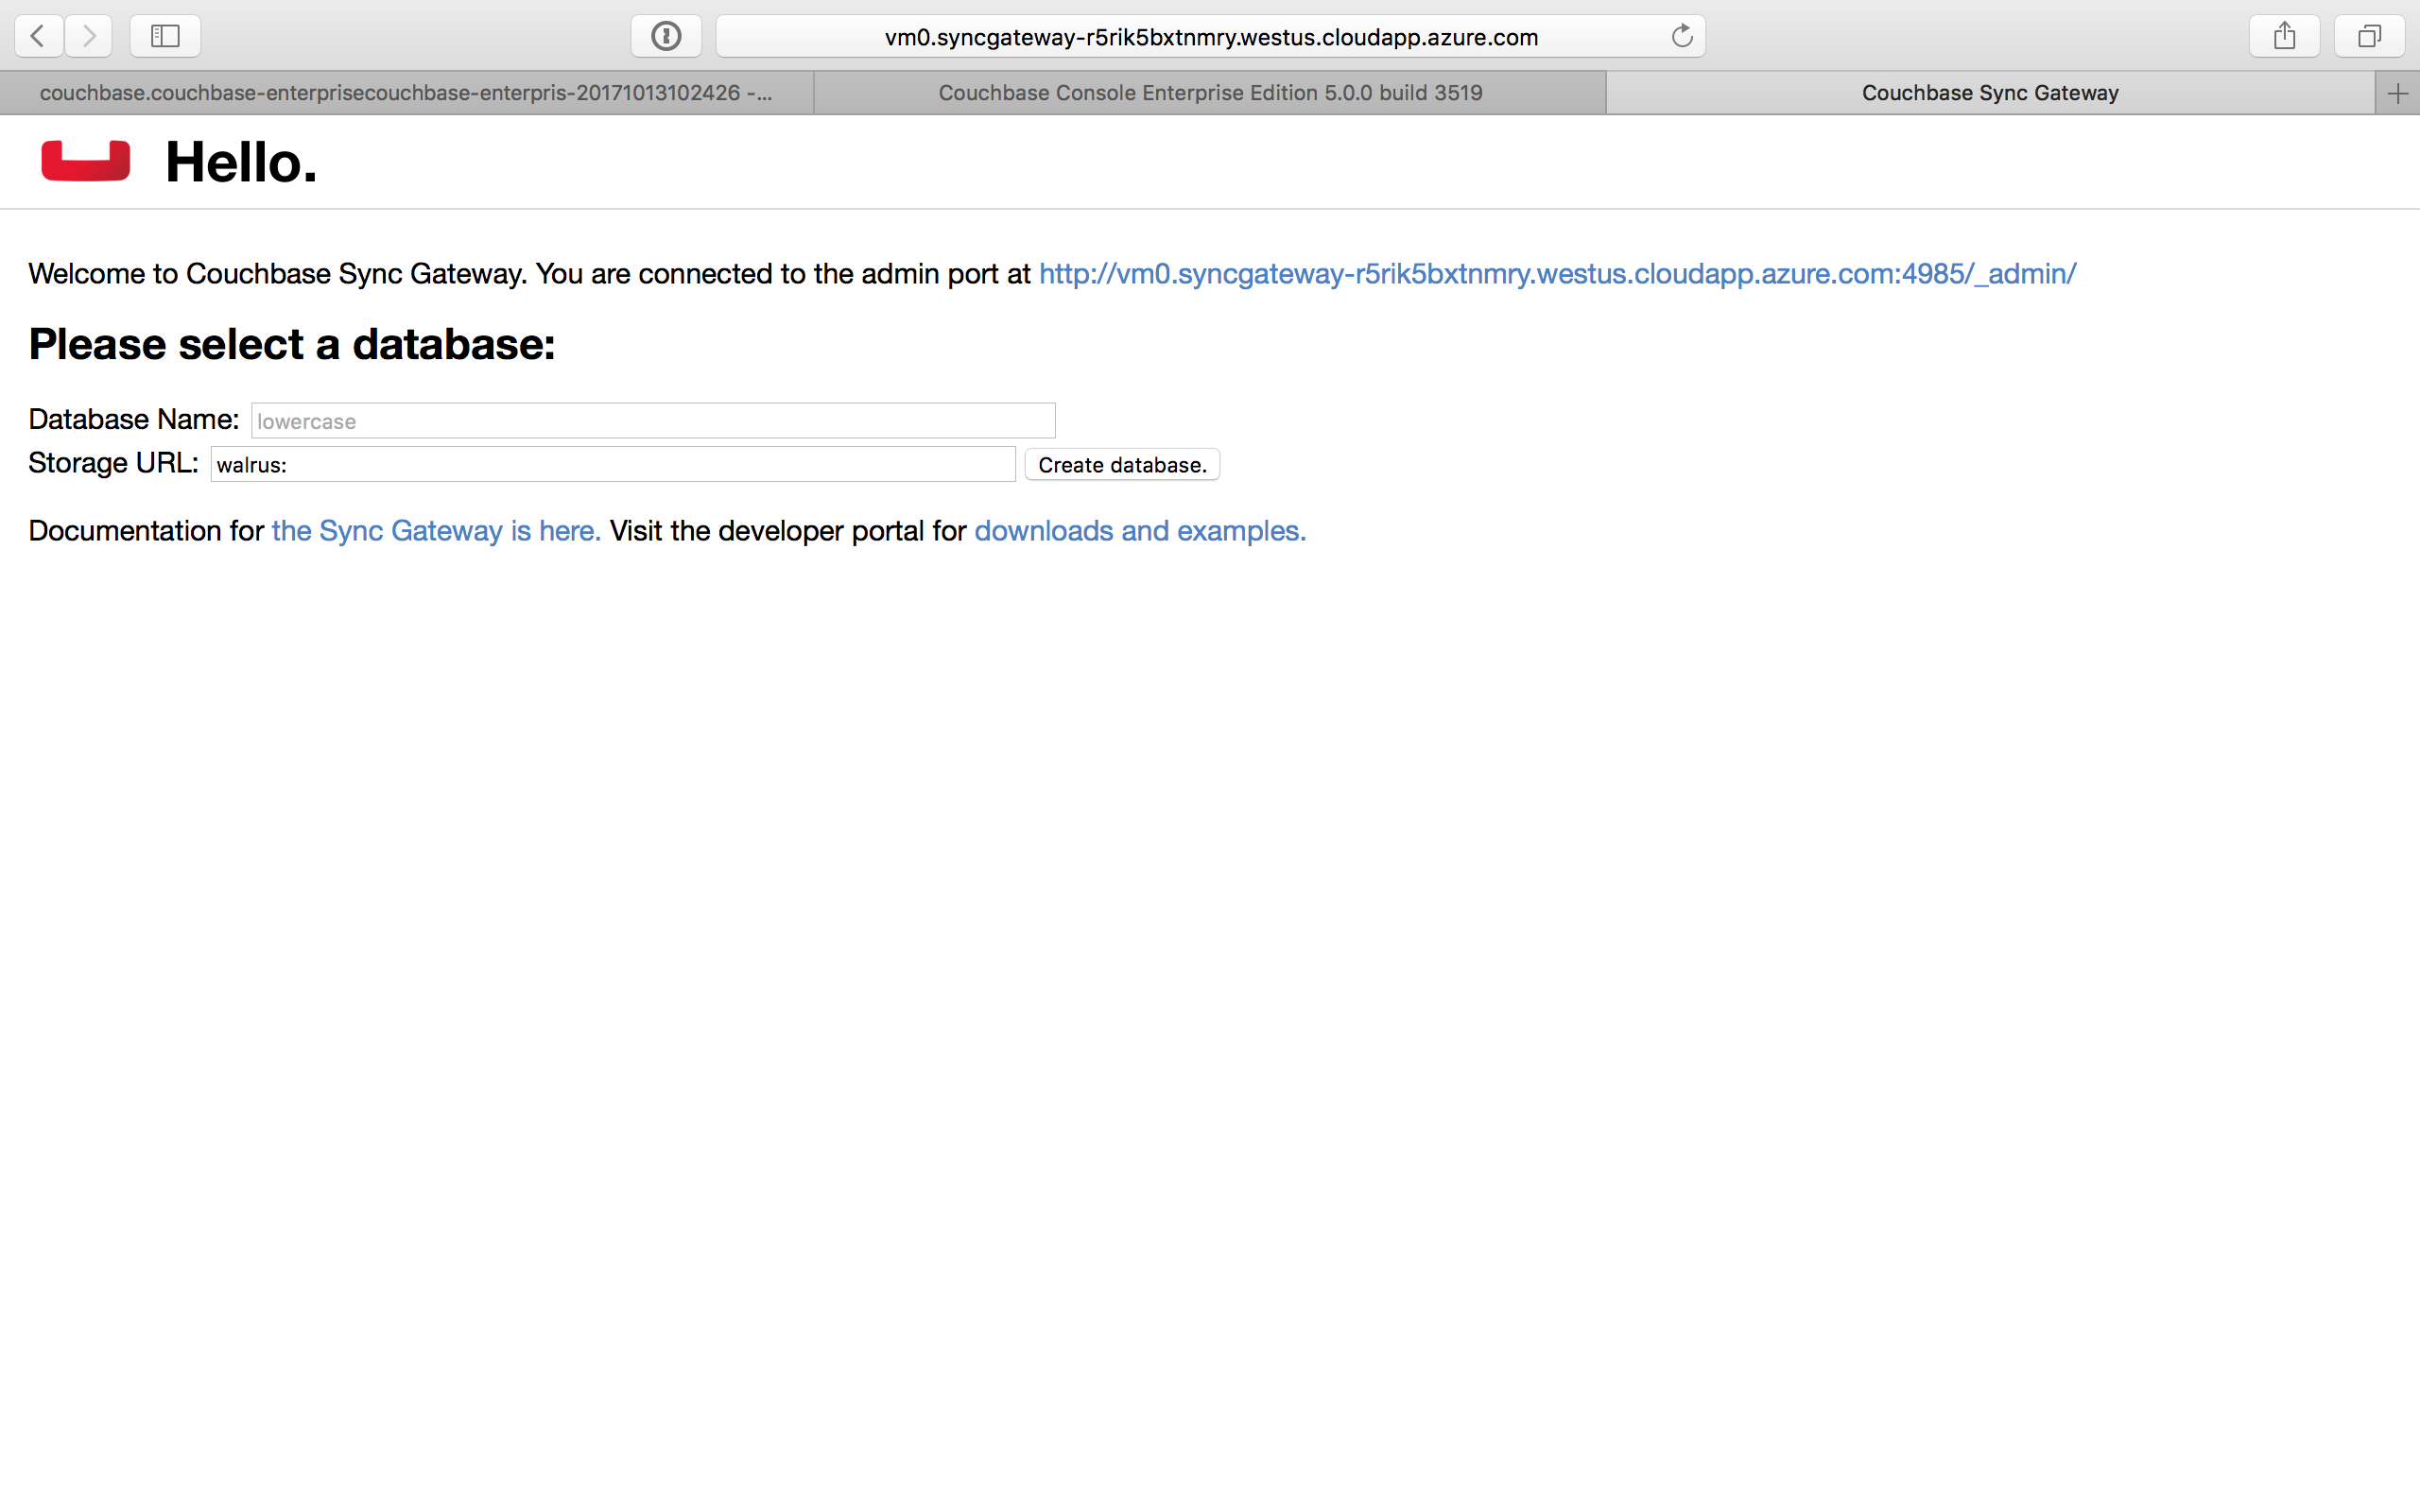
Copy the Sync Gateway Admin URL.
-
Paste the Sync Gateway Admin URL on a browser tab to open the Couchbase Sync Gateway Admin portal.
-
Scaling Your Couchbase Cluster
Couchbase simplifies scaling on Microsoft Azure by using virtual machine scale sets. This section describes how to scale up your cluster in three simple steps.
-
Log in to the Microsoft Azure Portal and navigate to your deployed Couchbase cluster > your Couchbase resource group > server VM scale set.
-
Click Scaling under Settings and move the slider on the instance count up (or down) as needed.
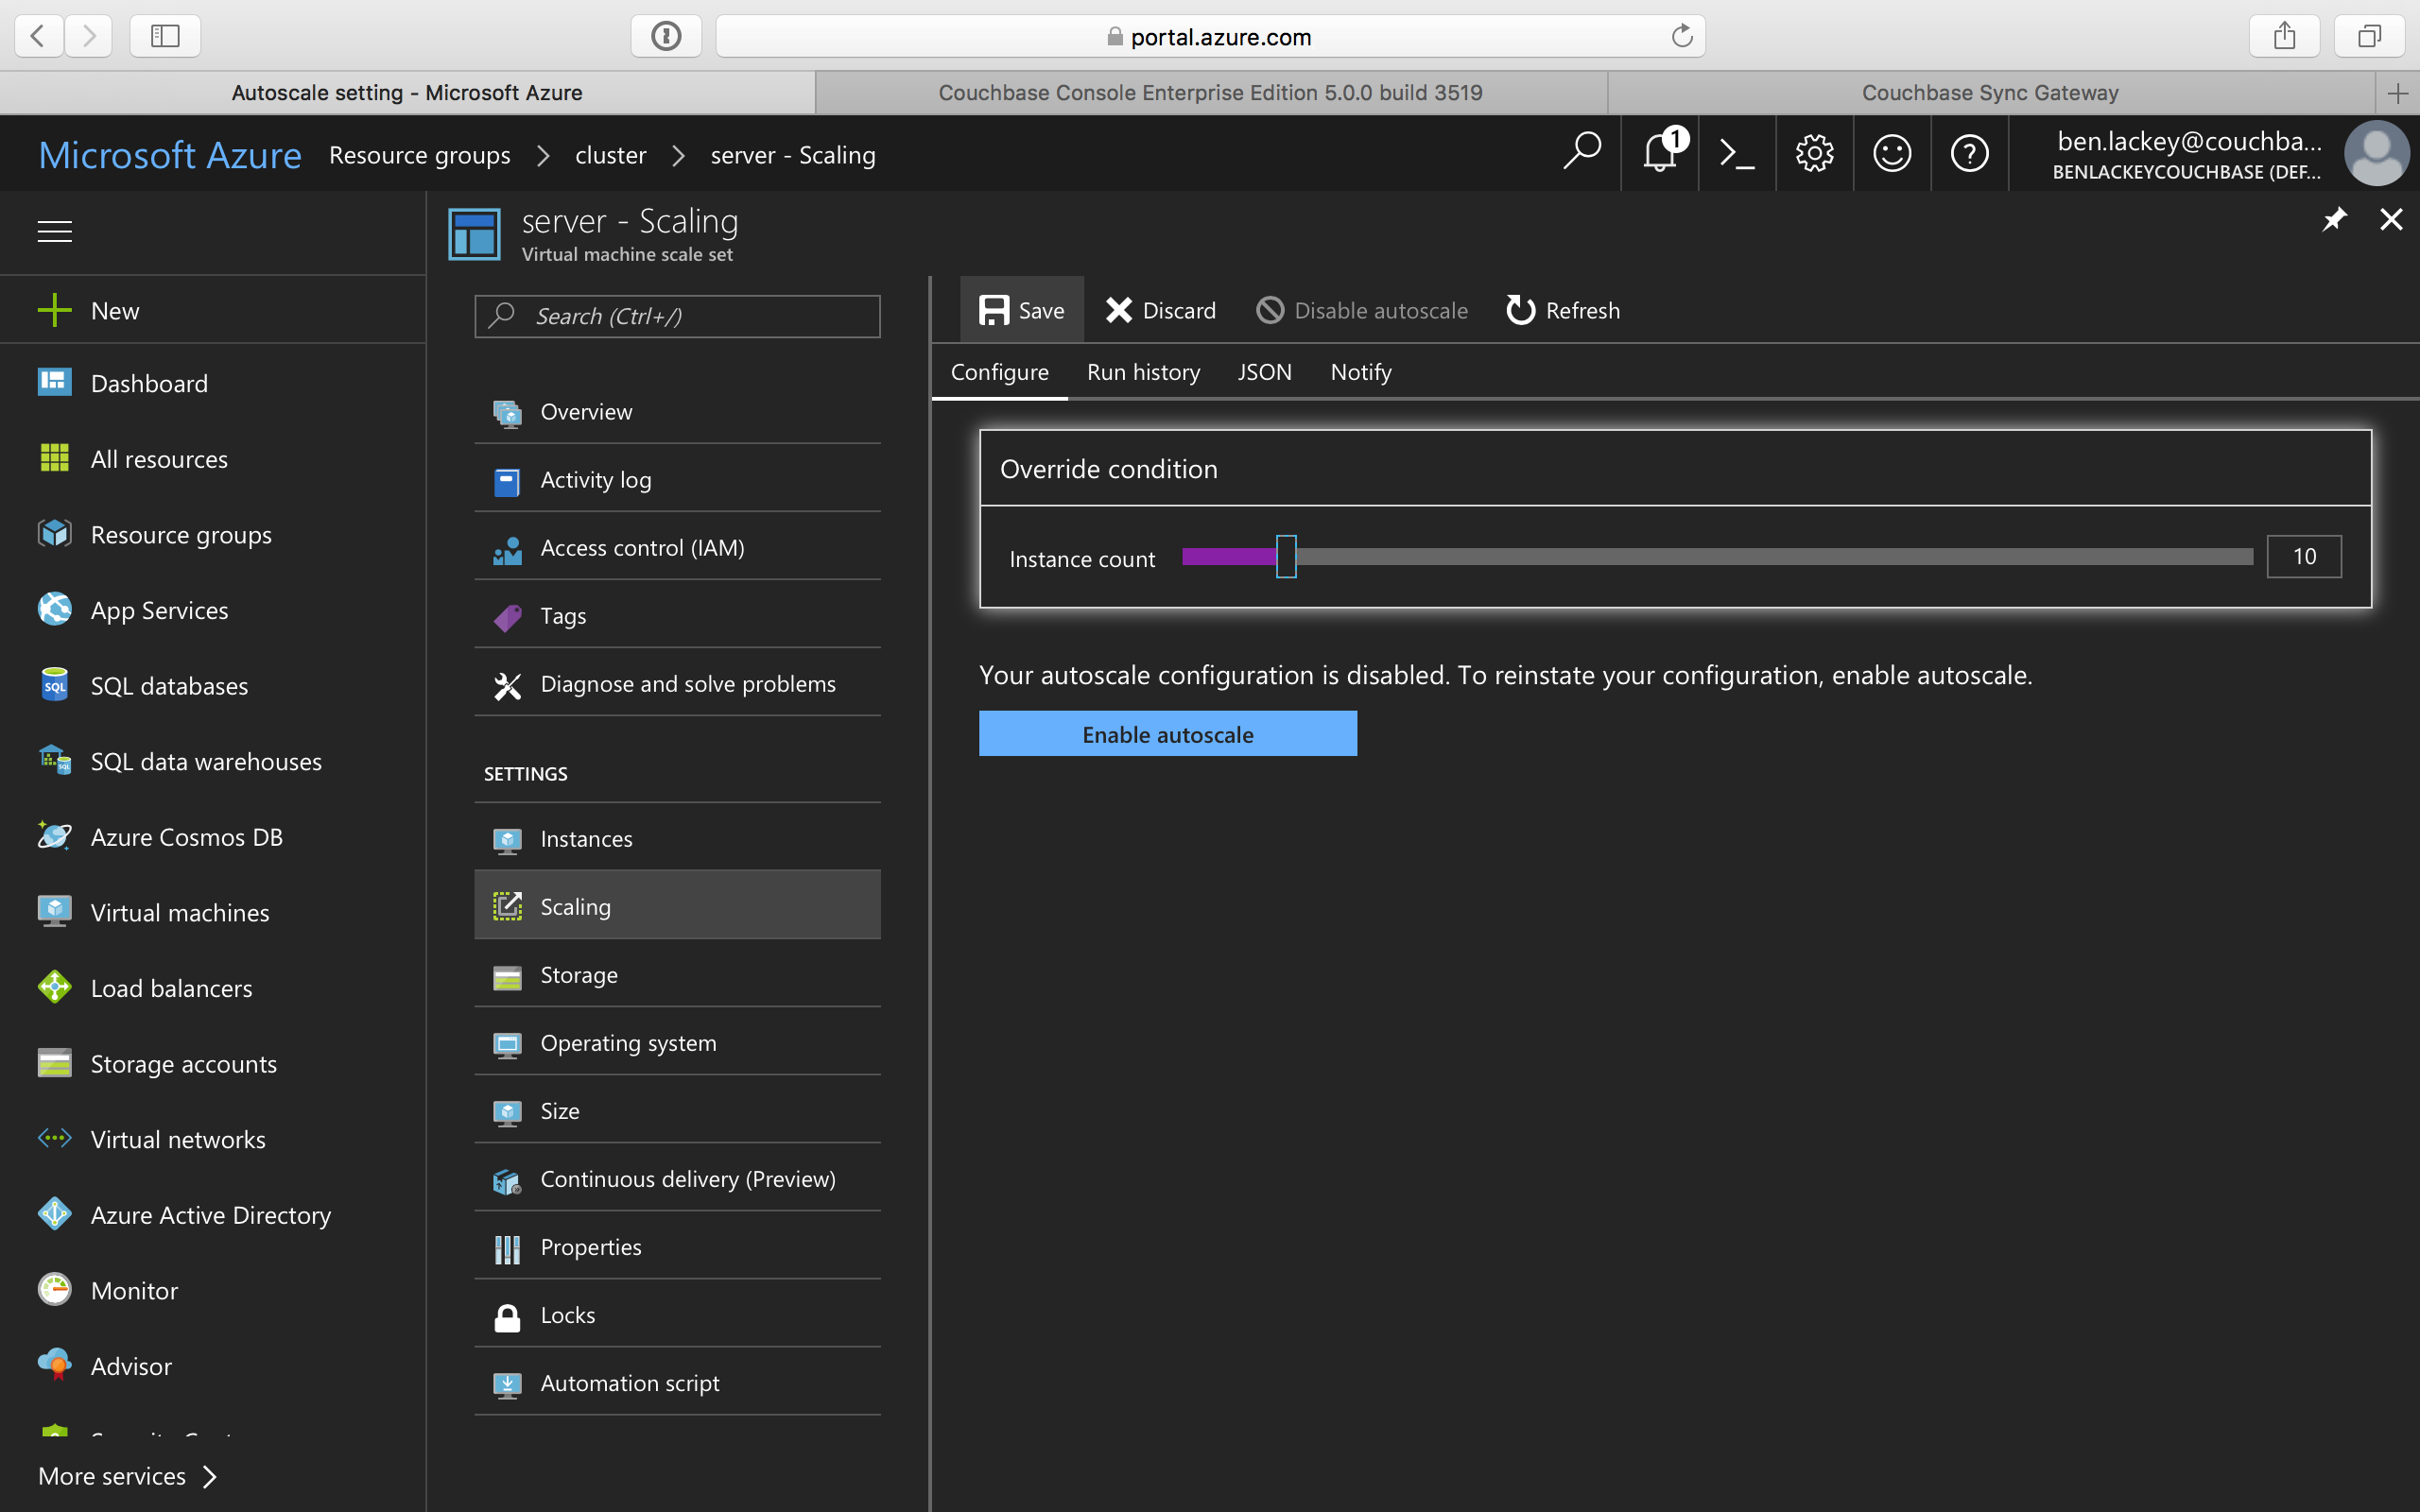
-
Click Save. You’ll see a notification that the autoscale configuration is being updated.
Do not enable autoscale. Go to Instances to see the updated instance count. In a few minutes, the additional instances will be up and running.
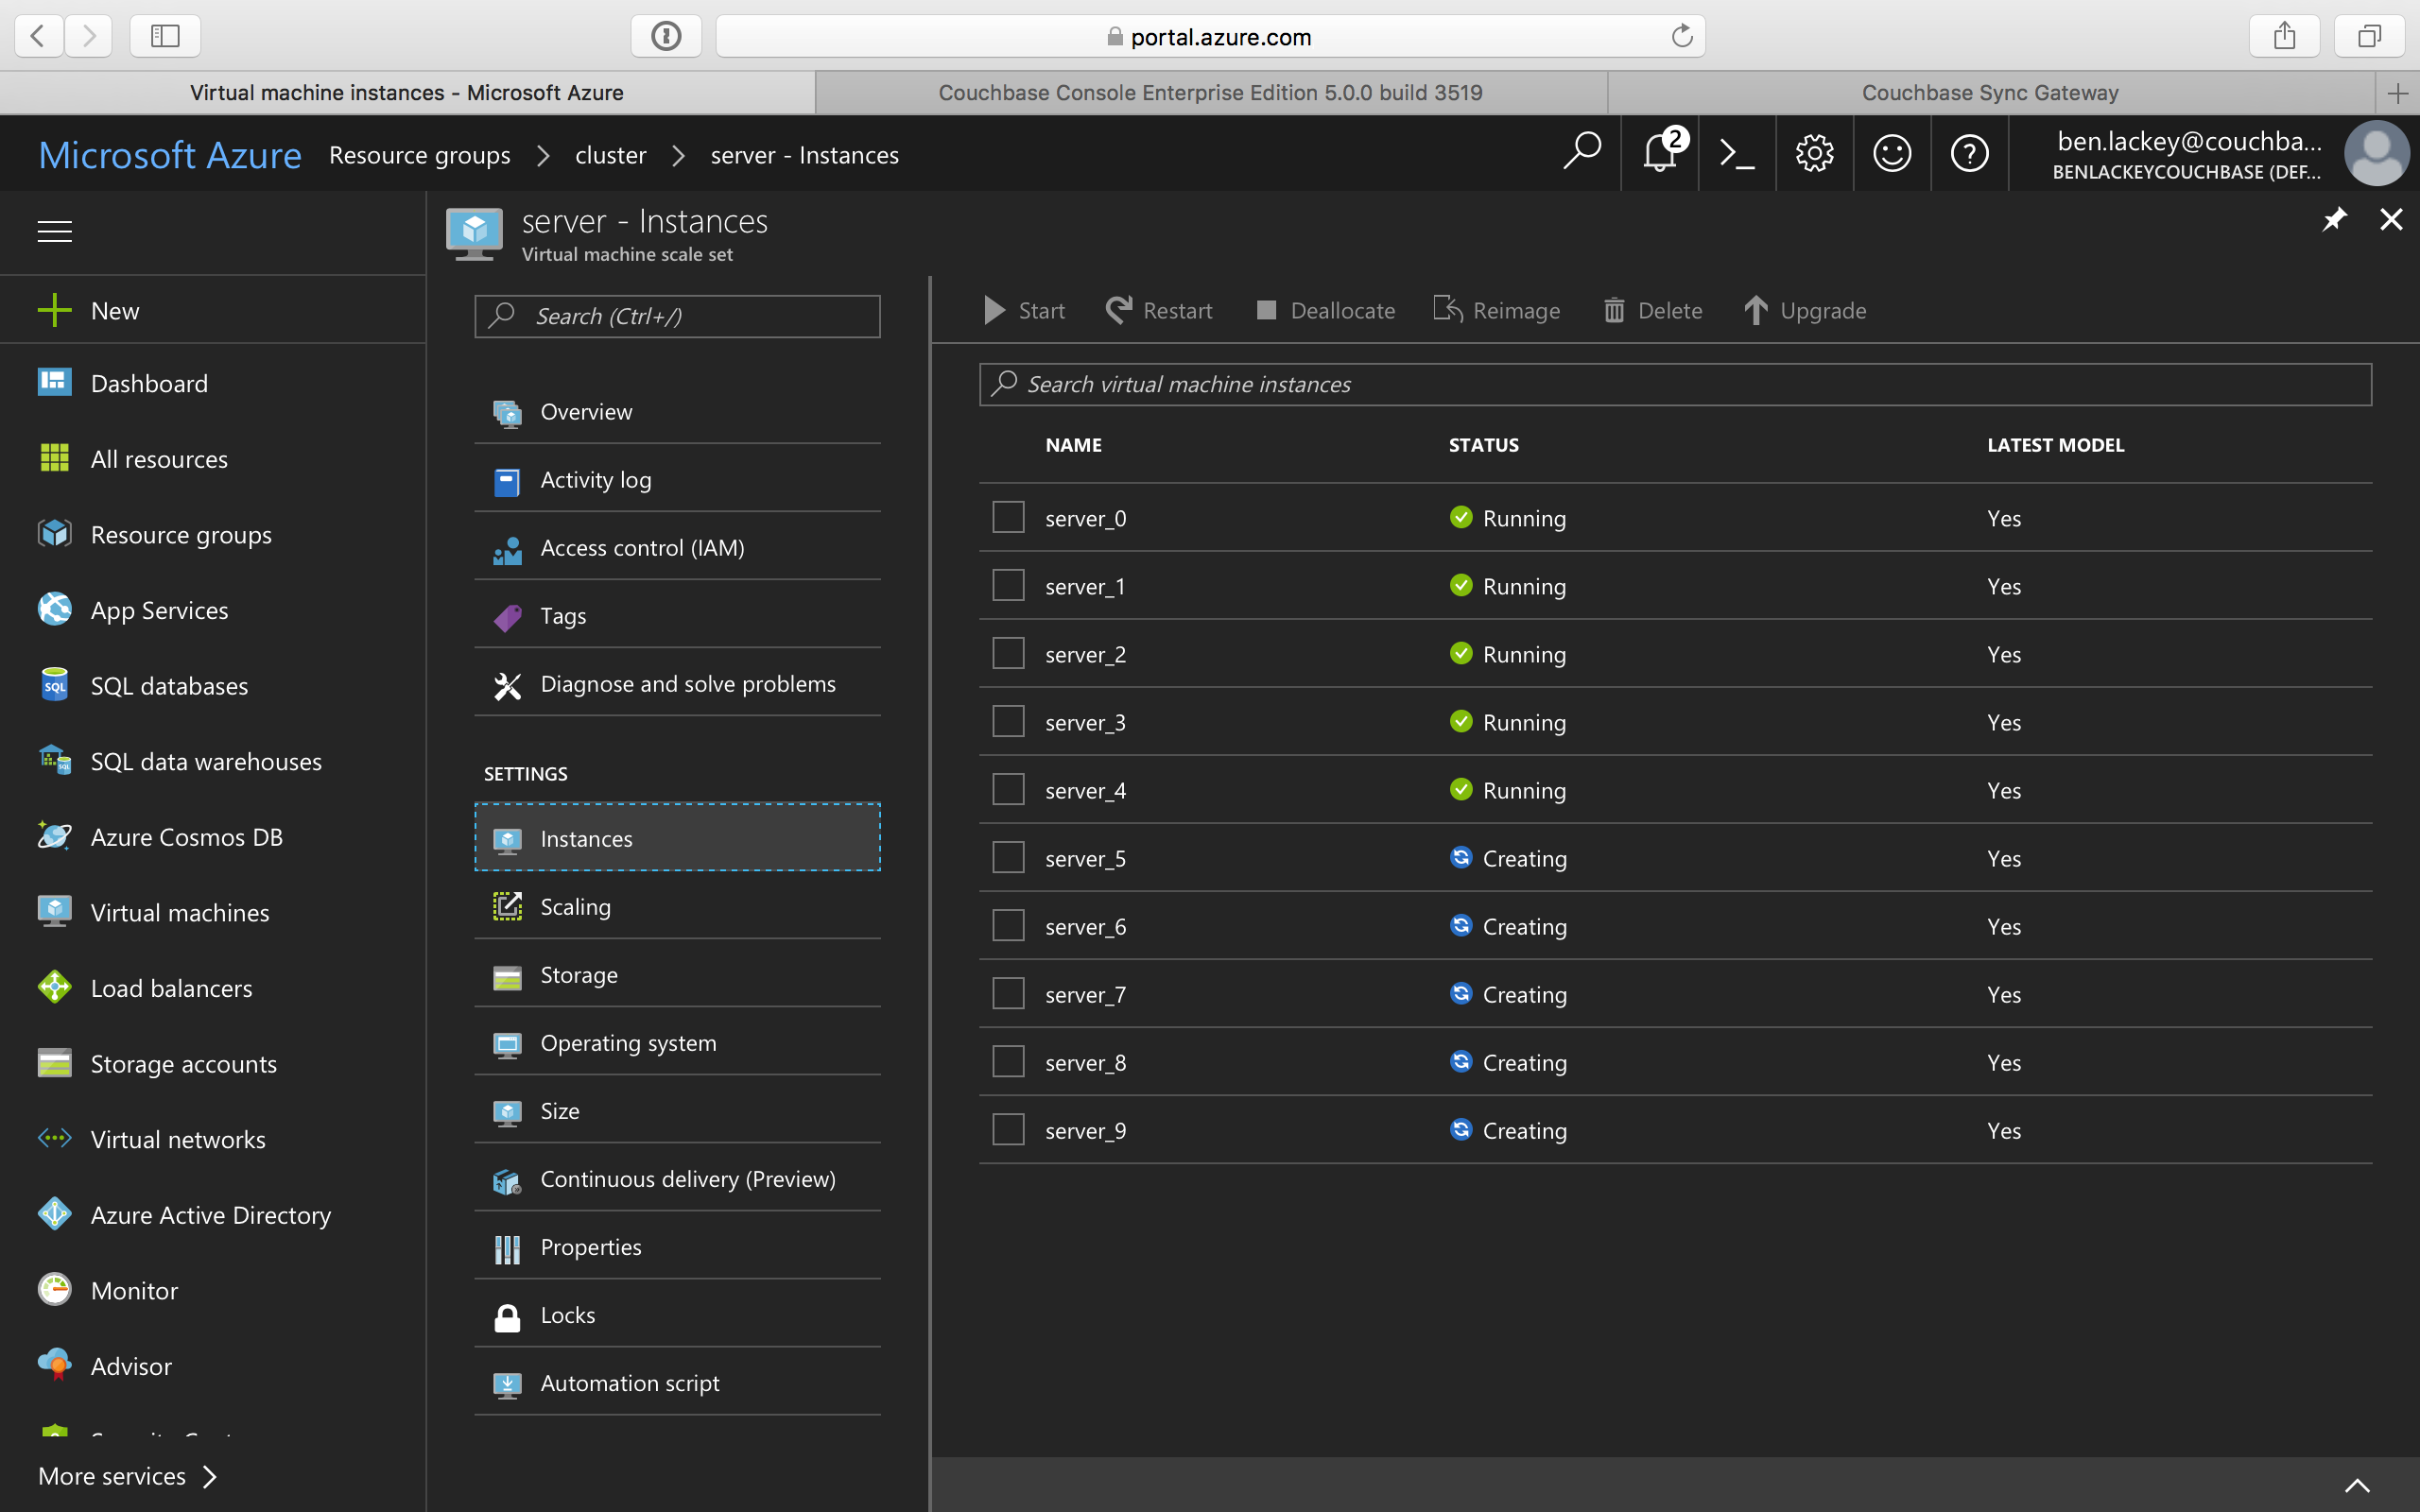
On a different browser tab, you can log in to the Couchbase Server Web Console to see the additional server nodes that were added to your cluster.