Configure LDAP
Couchbase Server can be configured to authenticate users by means of LDAP; and to map the LDAP groups of which a user is a member to roles defined on Couchbase Server.
Understanding LDAP Authentication and Authorization
For authentication purposes, Couchbase Server can be configured to use LDAP. This allows users, when they attempt to access Couchbase Server by presenting their credentials, to be authenticated by LDAP. Optionally, LDAP group information for the authenticated user can be fetched from the LDAP server. If an LDAP group has been mapped to Couchbase-Server roles, the roles are thereby granted to the user.
Note that LDAP authentication and authorization may be more appropriate for human users than for applications. For information, see LDAP: Users and Applications.
Note that Couchbase Server provides two different ways of setting up LDAP:
-
Native LDAP Support. For Couchbase Server Enterprise Edition 6.5+, this is the recommended way of setting up LDAP for external authentication. It provides support for encrypted communication, and for LDAP groups.
-
LDAP Support Based on
saslauthd. This is maintained for support of legacy LDAP authentication (as established on pre-6.5 versions of Couchbase Server), and for support of PAM-based authentication.
This page provides examples of how to configure Native LDAP Support.
For information on configuring saslauthd, see Configure saslauthd.
For an overview of Couchbase authentication, and more details on external-authentication options, see Authentication Domains.
Note that either Native LDAP Support or saslauthd must be selected for the cluster.
The two cannot be used simultaneously.
Note also that both Native LDAP Support and saslauthd require clients to use the PLAIN authentication mechanism, ideally with TLS.
Migrating to Native LDAP
If you have been using saslauthd with previous versions of Couchbase Server, you are strongly recommended to migrate to Native LDAP.
The overall migration procedure is provided as part of the saslauthd documentation, in Migrating from saslauthd to Native LDAP.
Note that the migration procedure itself involves some of the procedures given on the current page, below.
Examples on This Page
The examples in the subsections below show how to configure Native LDAP Support; using the UI, the CLI, and the REST API respectively. The examples assume:
-
A one-node cluster already exists; and is named after its IP address:
10.143.192.101. It is running the Data and Query Services, and has thetravel-samplebucket installed. (To install this bucket, see Sample Buckets.) -
The cluster has the Full Administrator username of
Administrator, and password ofpassword. -
Two fully configured LDAP servers are available, at
172.23.124.25and172.23.124.26, each using port389. -
External authentication for the cluster has been enabled. This can be achieved by means of the Couchbase CLI command,
setting-ldap, as follows:/opt/couchbase/bin/couchbase-cli setting-ldap \ -c 10.144.210.101 -u Administrator -p password \ --authentication-enabled 1
Each subsection also shows how to map LDAP groups to Couchbase-Server roles, by means of Couchbase-Server user-groups.
Throughout this page, references are made to LDAP Distinguished Names, which must be specified as part of Native-LDAP configuration. For the full definition of Distinguished Names, see RFC 4514 - Lightweight Directory Access Protocol (LDAP): String Representation of Distinguished Names.
Configure LDAP with the UI
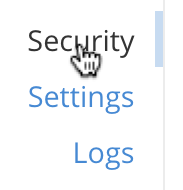
To configure LDAP, access the Security panel, by means of the entry in the left-hand navigation bar:
This brings up the Security screen. Note the options at the upper right:
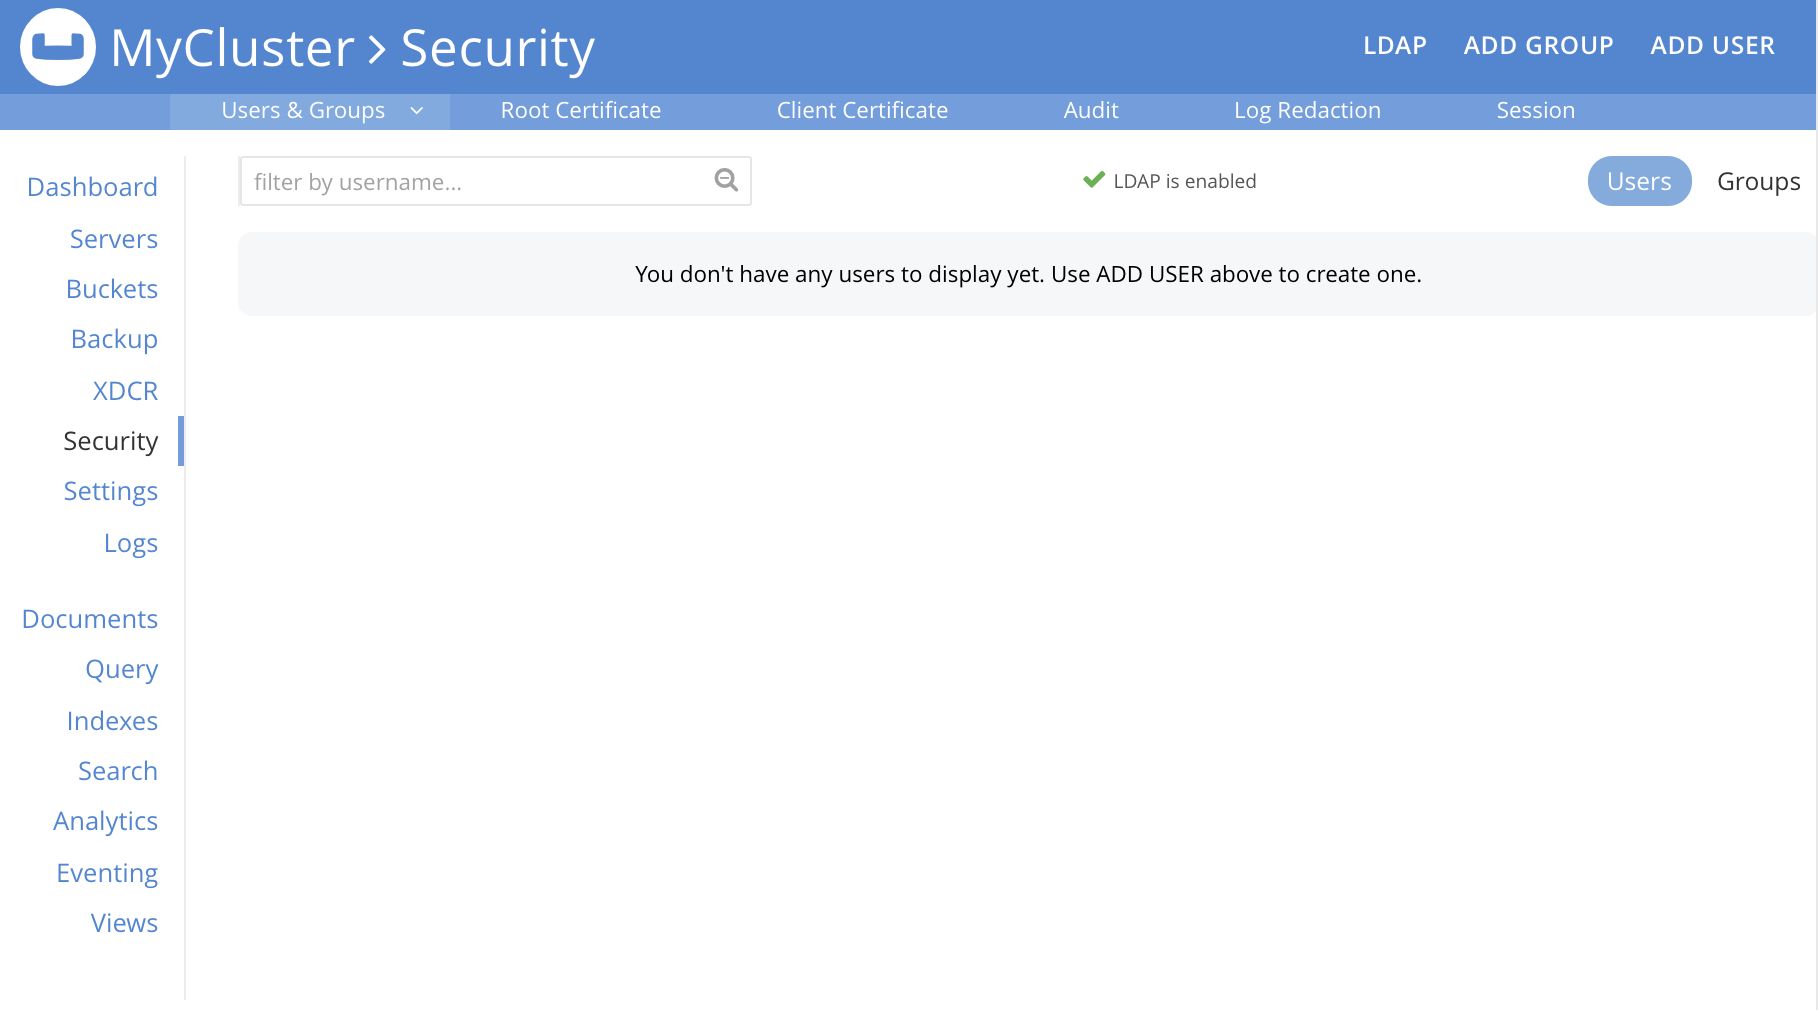
The LDAP tab allows an LDAP server to be specified for external authentication. The ADD GROUP tab allows definition of Couchbase-Server user-groups; which are to be associated with LDAP groups, and which can be assigned Couchbase-Server roles. The ADD USER tab allows individual users to be added, and allows their authentication optionally to be specified as external.
To perform LDAP configuration, left-click on the LDAP tab, at the upper right of the Security screen:
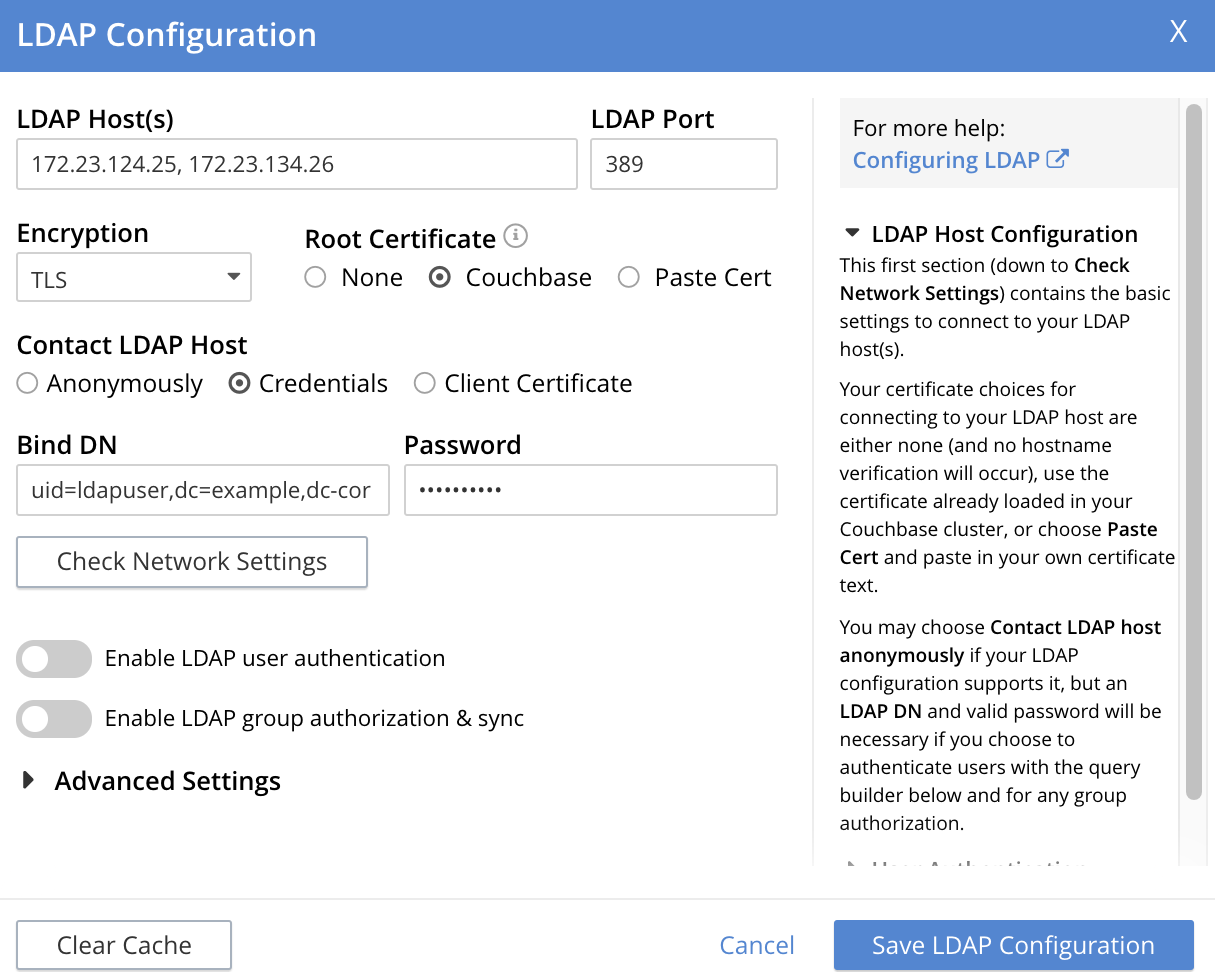
This brings up the LDAP Configuration dialog:
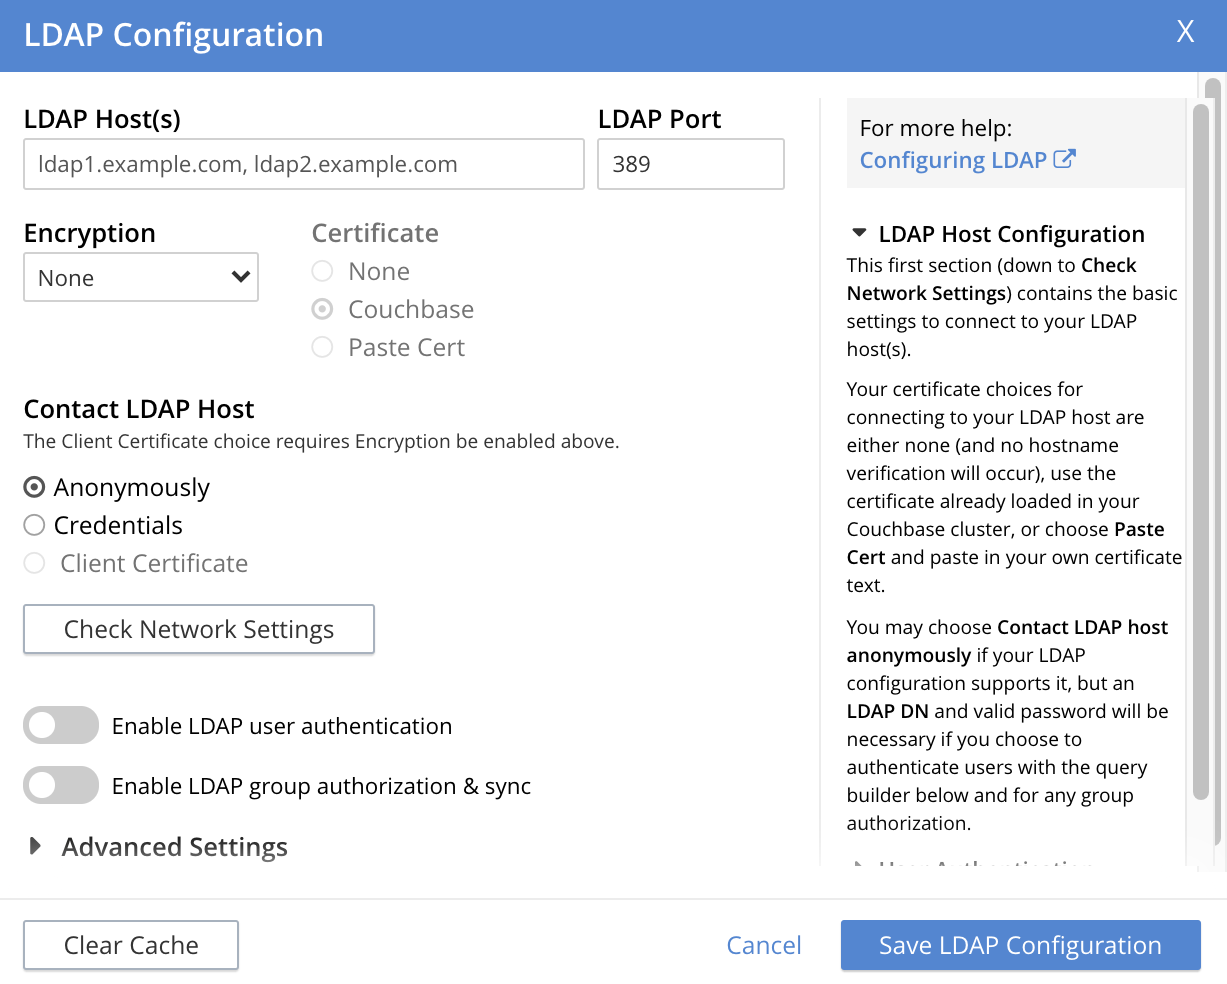
The dialog presents two main panels. The vertically scrollable right panel features help text, for LDAP Host Configuration, User Authentication, and Group Authorization. The left panel features options whereby LDAP can be configured.
The fields of the left panel are presented in three principal areas, each corresponding to a key aspect of LDAP configuration:
-
LDAP host configuration. These fields occupy the upper part of the left panel. They can be used to establish which servers run LDAP, and how they are to be contacted.
-
User authentication enablement. These fields can be accessed in the lower part of the left panel, by means of the Enable LDAP user authentication switch. They can be used to establish that users not recognized as local to Couchbase Server will be authenticated by means of the specified LDAP host configuration, and to specify the procedures to be used.
-
Group authorization enablement. These fields can be accessed from near the bottom of the left panel, by means of the Enable LDAP group authorization & sync switch. They can be used to establish that the LDAP group-membership of authenticated LDAP users will be checked, to determine whether mappings to Couchbase-Server user-groups exist, and to specify the procedures to be used.
Each of these areas is described below.
LDAP Host Configuration
The upper area of the left panel of the LDAP Configuration dialog displays the following fields:
-
LDAP Host(s). A comma-separated list of host-names, each of which is an LDAP server on which external authentication can occur. The first accessible server in the list is the one that is used. For example, if the list is
server1, server2, provided thatserver1is accessible, it is used. -
LDAP Port. The port used on each of the LDAP servers for authentication.
-
Encryption. Whether the connection with the LDAP server should be encrypted. Note that use of encryption is strongly recommended.
Left-click on the control at the right-hand side of the Encryption field, to display the pull-down menu:
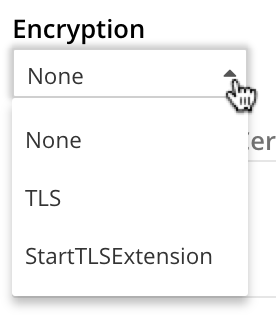
The options are None (to connect without encryption — this is insecure, and therefore is not recommended), TLS (to connect to a TLS-encrypted port), and StartTLSExtension (to upgrade an existing connection).
-
Certificate. Whether to provide Couchbase Server with a copy of the LDAP server’s root certificate, so as to allow Couchbase Server to validate the LDAP server when connecting. This set of radio-buttons is enabled only if TLS or StartTLSExtension has been selected from the Encryption pull-down menu.
The options are None, Couchbase, and Paste Cert. If None is selected, the LDAP server’s root certificate is not provided to Couchbase Server: this option is insecure, and therefore not recommended.
If Couchbase is selected, the root certificate for the Couchbase-Server cluster is used to validate the LDAP server: this assumes that the same root certificate is installed for both Couchbase Server and the LDAP server.
Paste Cert should be selected if the LDAP server root certificate is not the same certificate as has been installed for the Couchbase-Server cluster. When Paste Cert is selected, the panel expands vertically, to reveal the LDAP Server Root Certificate field:
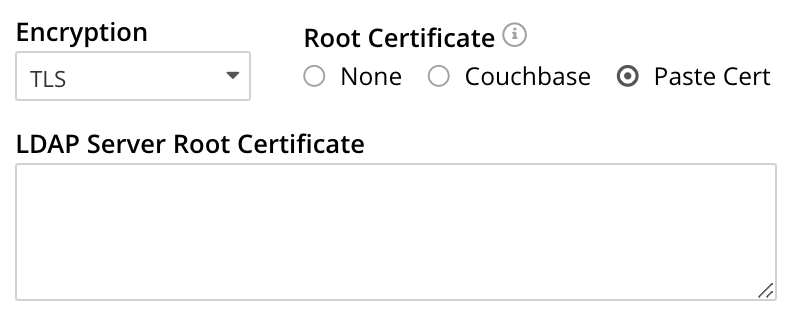
The text of the LDAP server root certificate should now be copied and pasted, in PEM format, into the LDAP Server Root Certificate field.
-
Contact LDAP host. The following options are provided, to determine how Couchbase Server will contact the LDAP host.
-
Anonymously. Checking this checkbox causes Couchbase Server to attempt to contact the LDAP host anonymously. However, the attempt succeeds only if supported by the LDAP server.
-
Credentials. Checking this checkbox allows credentials to be specified by the user, and submitted to the LDAP host for authentication. The UI expands, to display two additional fields:
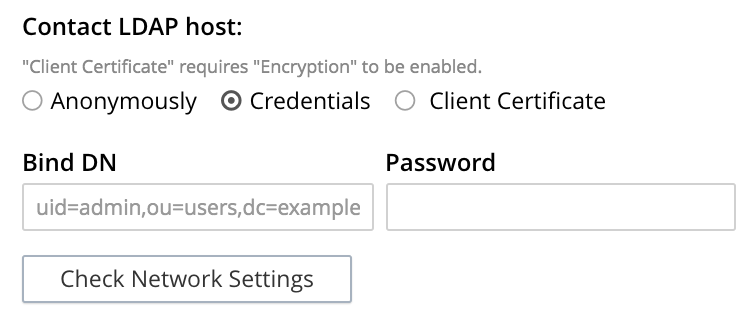
Bind DN requires the LDAP Distinguished Name of the user who will perform user-search and groups synchronization. This user needs to have read only access to the LDAP server, in order to be able to search for users and groups.
Password requires input of the user’s password, as stored on the LDAP server.
With data entered into these fields, the dialog might appear as follows:
-
Client Certificate. This option, which allows Couchbase Server to authenticate with LDAP by means of a client certificate, should be used only with an LDAP server that does not expect the
SASL EXTERNALbind command to be sent, once a TLS connection has been established. Note, therefore, that this option can be used with the GSuite LDAP server.This option is only enabled if either TLS or StartTLSExtension has been selected from the Encryption pull-down menu.
When the Client Certificate option is selected, the UI expands as follows:
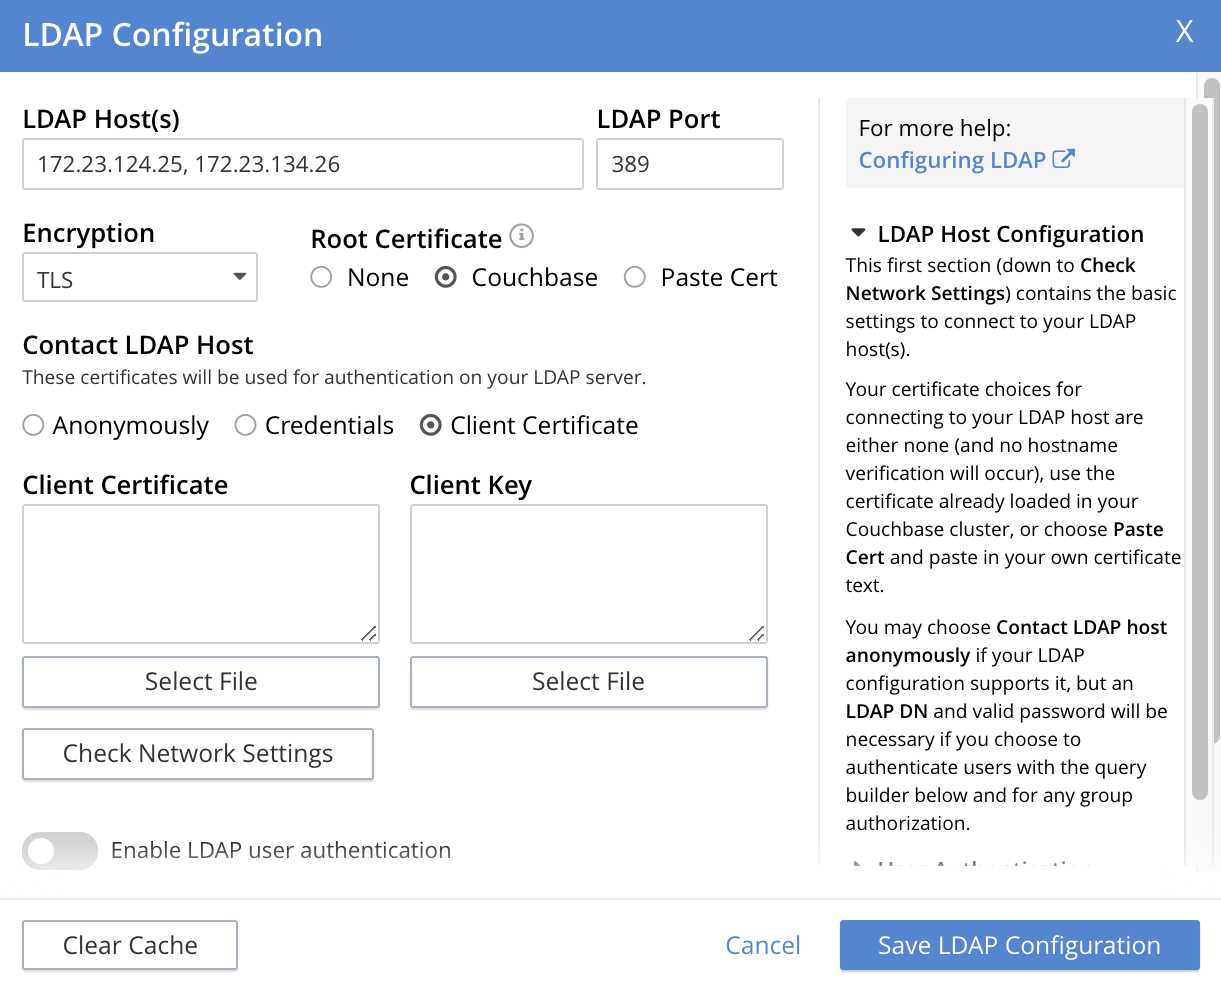
The client certificate of Couchbase Server should be pasted into the Client Certificate panel. The private key corresponding to the client certificate should be pasted into the Client Key panel. These files can be selected by means of the Select File buttons, which bring up a file-selection interface.
-
Once all appropriate settings have been made to LDAP Host(s), Encryption, Certificate, and Contact LDAP host fields, optionally, the Check Network Settings button can be left-clicked on. This tests whether a specified LDAP host can be accessed by the specified means. If no such access is possible, an error is displayed on the dialog.
User Authentication Enablement
In the area immediately below that used for LDAP Host Configuration, fields to enable user authentication can be made visible by means of the Enable LDAP user authentication switch. Enablement means that users who attempt to access Couchbase Server without having been added as local users will be authenticated against the specified LDAP Host(s).
Switch on, to enable. This expands the dialog vertically, as follows:
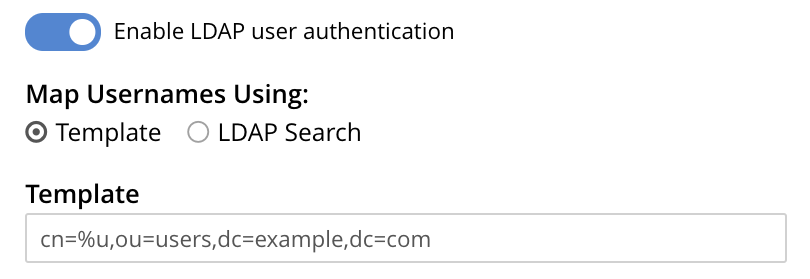
This provides two options whereby usernames can be mapped to LDAP Distinguished Names (DN). The options are as follows.
Template
The default option is Template. An appropriate username-to-DN mapping should be entered into the Template editable text field: this avoids the need to request the LDAP server itself to provide the mapping. The required format is indicated by the placeholder text, within the field.
The %u will be replaced by the username that has been presented to Couchbase Server by the user who is attempting to gain access.
For example, if the template is cn=%u,dc=example,dc=com and the user logs in as exampleUser, the user will be mapped to the DN cn=exampleUser,dc=example,dc=com.
LDAP Search
Selecting LDAP Search displays the following:
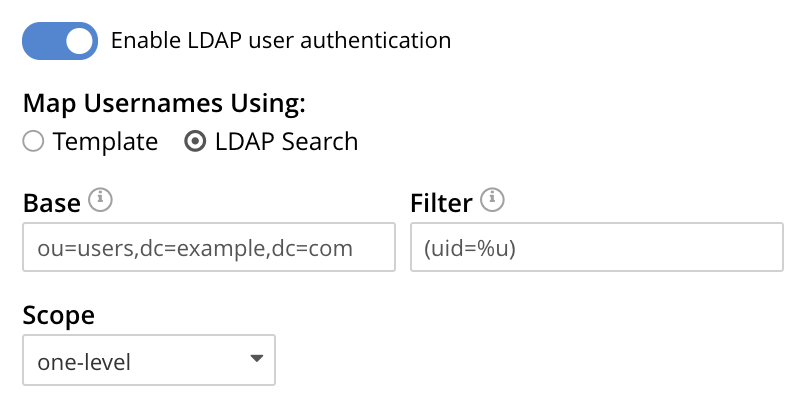
Couchbase Server performs the specified LDAP search operation to get the user’s DN from LDAP server.
Base is the search base DN.
Filter is the search filter.
For example, if Base is specified as ou=users,dc=example,dc=com, Filter as (uid=%u), and the user has provided exampleUser to Couchbase Server as their username, Couchbase Server performs the following search, in order to obtain the user’s DN: ou=users,dc=example,dc=com??one?(uid=exampleUser).
Scope (as defined in LDAP Search Scopes) can be determined by a pulldown menu:
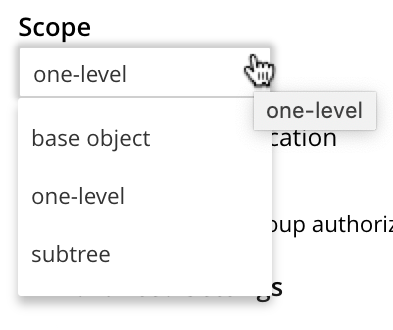
The possible values are base object, one-level, and subtree.
For further information on Base, Filter, and Scope, see The LDAP Search Operation.
Testing User Authentication
Test User Authentication, when opened, provides options for testing the authentication of specific users:
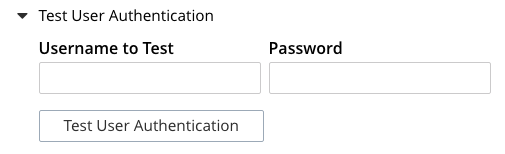
Enter the username and password for the user, and left-click on Test User Authentication. Couchbase Server maps the specified username to an LDAP DN, and performs authentication on the LDAP server. Notifications confirming success or failure duly appear on the dialog.
Group Authorization Enablement
In the area immediately below that used for User Authentication Enablement, fields for enabling LDAP Group Support can be made visible by means of the Enable LDAP group authorization & sync switch. Enablement means that when a user has been authenticated by the LDAP Hosts(s), Couchbase Server retrieves the LDAP group membership information for that user, in order to authorize them. In each case where an LDAP group has been mapped to a Couchbase-Server user-group, the user is granted the privileges corresponding to the roles assigned that user-group.
Switch on, to enable. This expands the dialog vertically, as follows:
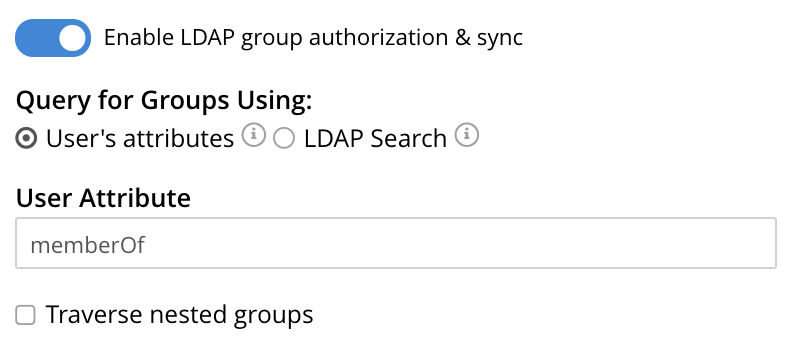
The LDAP groups of which a user is a member can be searched for by means of either the User’s attributes or an LDAP Search, each of which is provided as a radio-button option. Selection of either reveals a corresponding set of fields, in which information can be added. These are as follows.
User’s Attributes
The User’s attributes radio-button is selected by default.
This instructs Couchbase Server to assume that each LDAP user-record contains an attribute featuring the list of groups of which the user is a member.
Couchbase Server therefore performs the following LDAP search: <userDN>?<attribute>?one.
The value of the specified attribute is treated as a list of groups.
For example, if attribute is set in the User Attribute field to memberOf,
Couchbase Server performs the following search for the specified user’s groups:
uid=exampleUser,dc=example,dc=com?memberOf?one.
Traverse Nested Groups, for User Attribute Search
The Traverse nested groups checkbox, when checked, allows nested groups to be traversed by the search.
Couchbase Server uses the same search to find groups of groups recursively (with each group’s DN being substituted for %D).
If nested search is selected, %u cannot be used.
Note that use of nested groups may significantly increase load on the LDAP server; and should therefore only be used if essential.
Test Groups Query, for User Attribute Search
Test Groups Query permits a query to be tested for a specific user. Left-click to open:
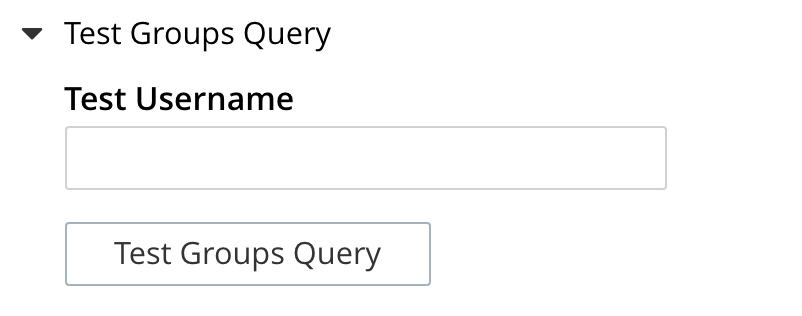
To perform the search, add a username, and left-click on the Test Groups Query button. Notifications confirming success or failure appear on the dialog.
LDAP Search
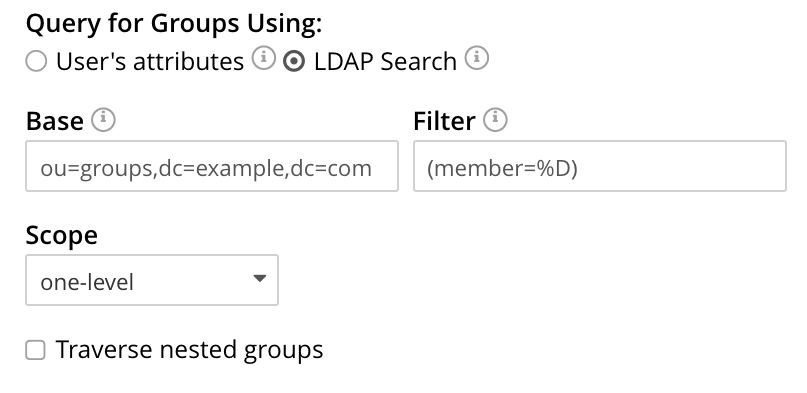
When the LDAP Search radio-button is selected, the Query for Groups Using panel appears as follows:
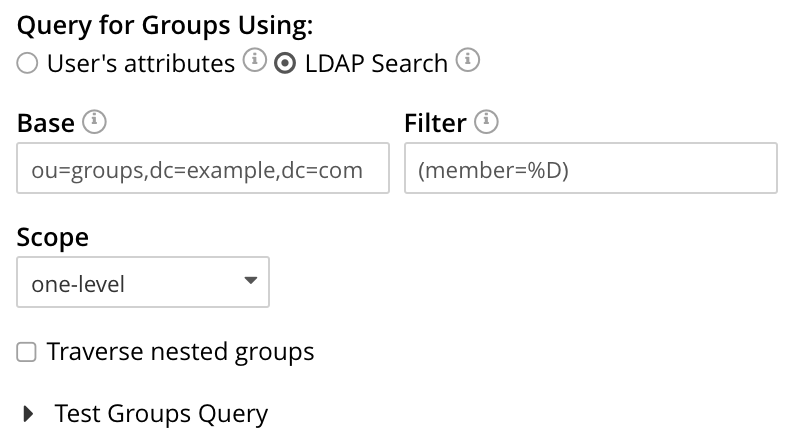
Selection of LDAP Search instructs Couchbase Server to perform an LDAP search operation, in order to retrieve a list of the user’s groups. Base is the search base DN. Filter is the search filter. Scope, accessed from a pulldown menu, can be base, one (the default), or sub.
When the search is conducted, %u is replaced with the specified username; and %D is replaced with the user’s DN.
For example, Base might be specified as ou=groups,dc=example,dc=com, Filter as (member=%D), and Scope as one-level:
For further information on Base, Filter, and Scope, see The LDAP Search Operation.
Traverse Nested Groups, LDAP Search
See the description provided above, in Traverse Nested Groups, for User Attribute Search
Test Groups Query, for LDAP Search
See the description provided above, in Test Groups Query, for User Attribute Search
Advanced Settings
It is strongly recommended that the Advanced Settings not be changed; except in unusual circumstances, and in accordance with expert advice. Inappropriate settings may seriously impair system responsiveness.
Left-click to open:
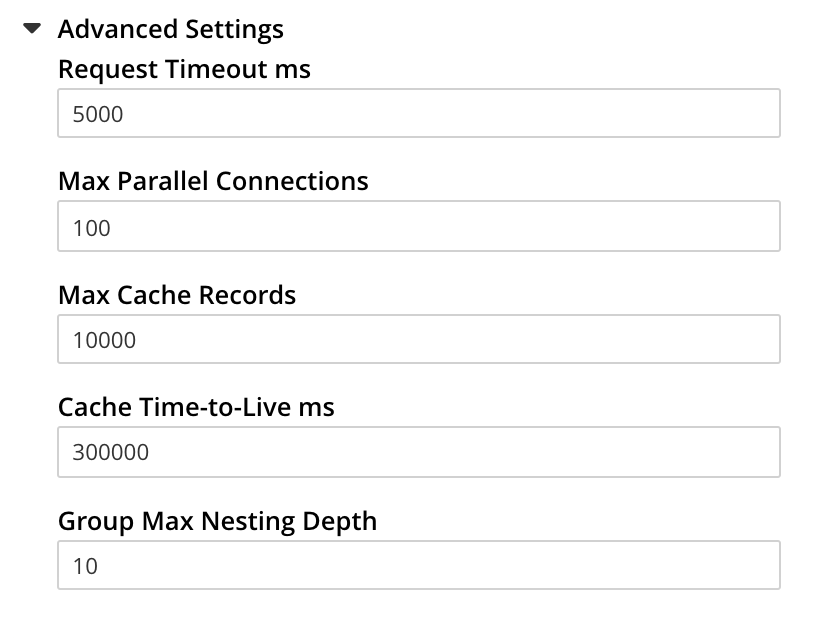
The advanced settings are as follows:
-
Request timeout ms. The number of milliseconds to elapse before a query times out. The default is 5000.
-
Max Parallel Connections. The maximum number of parallel connections to the LDAP server that can be maintained. The default is 100.
-
Max Cache Records. The maximum number of requests that can be cached. The default is 10000.
-
Cache Time-to-Live ms. The lifetime of values in cache, in milliseconds. The default is 300000.
-
Group Max Nesting Depth. The maximum number of recursive group-queries that the server is allowed to perform. This option is only valid when nested groups are enabled. The value must be an integer between 1 and 100: the default is 10.
When all required data has been entered, left-click on the Save LDAP Configuration button, at the bottom right:

Alternatively, left-click on Cancel to abandon the configuration procedure.
Clearing the Cache
The Clear Cache button is located at the lower left of the LDAP Configuration dialog:
Couchbase Server caches authentication responses and group-search results, thereby minimizing the number of requests to be made on the LDAP server. Each cached value is expired after a configured time-period (controlled by the Cache Time-to-Live ms value, provided in the Advanced Settings panel). Additionally, the Clear Cache button is provided, so that all currently cached values can be explicitly removed: each subsequent authentication or group request is, on its first instance following the removal, passed to the LDAP server; and the latest values established on the LDAP server are thereby retrieved.
Map LDAP Groups to Couchbase-Server Roles
To map an LDAP group to Couchbase-Server roles, create a Couchbase-Server user-group; associate the user-group with the LDAP group; and then assign roles to the user-group.
(Note that each Couchbase-Server user-group can be associated with at most one LDAP group — although if that LDAP group itself incorporates multiple additional LDAP groups by means of LDAP-group nesting, an indirect association with those LDAP groups occurs.)
Left-click on the ADD GROUP tab, at the upper right of the Users & Groups panel, on the Security screen:

This brings up the Add New Group dialog:
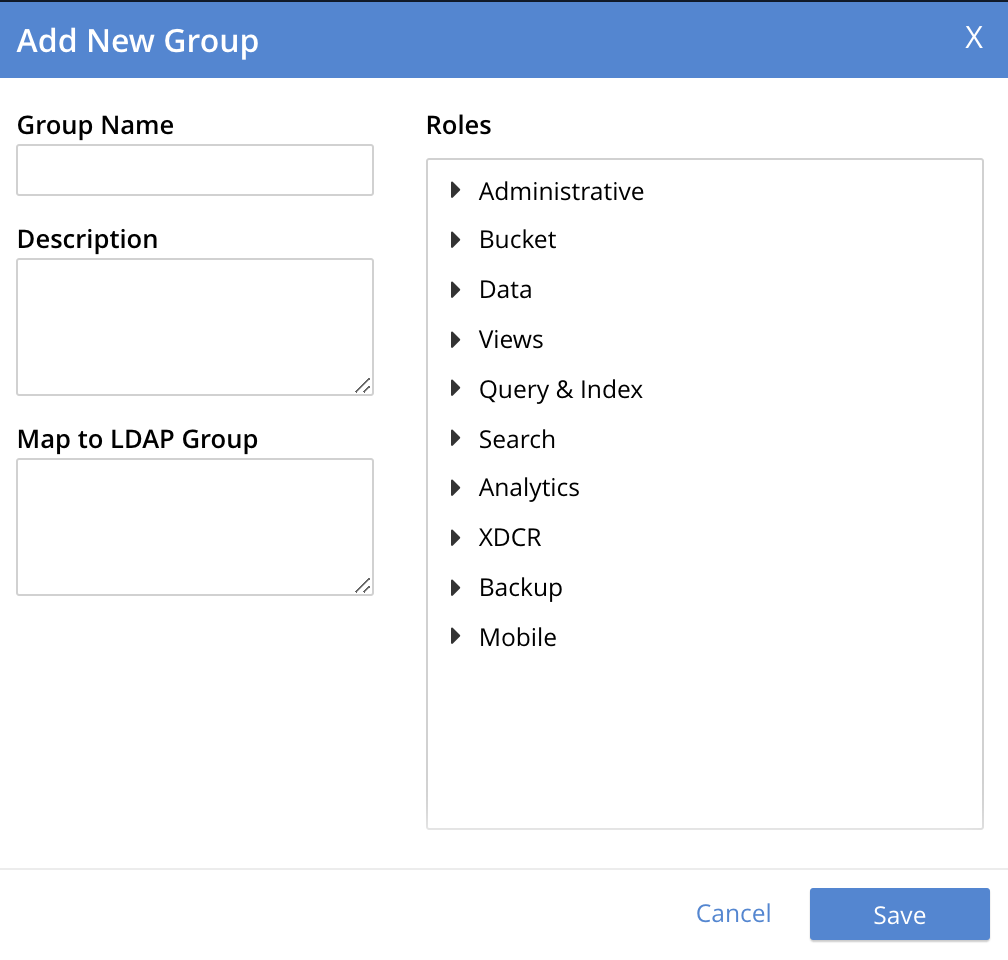
The fields are as follows:
-
Group Name. The name of the new Couchbase-Server group to be created.
-
Description. An optional description of the new Couchbase-Server group.
-
Map to LDAP Group. Optionally, the name of the existing LDAP group to which the new Couchbase-Server group is to be mapped. After a user has authenticated by means of LDAP, provided that LDAP group authorization has been enabled (by means of the Enable LDAP group authorization & sync control, described above), a list of the LDAP groups to which the user is assigned on that server is returned to Couchbase Server: if this list contains the LDAP group specified here, the user inherits the roles associated with the Couchbase-Server group here defined.
-
Roles. The roles to be associated with the new Couchbase-Server group. For information, see Authorization.
With appropriate data added, the dialog might appear as follows:
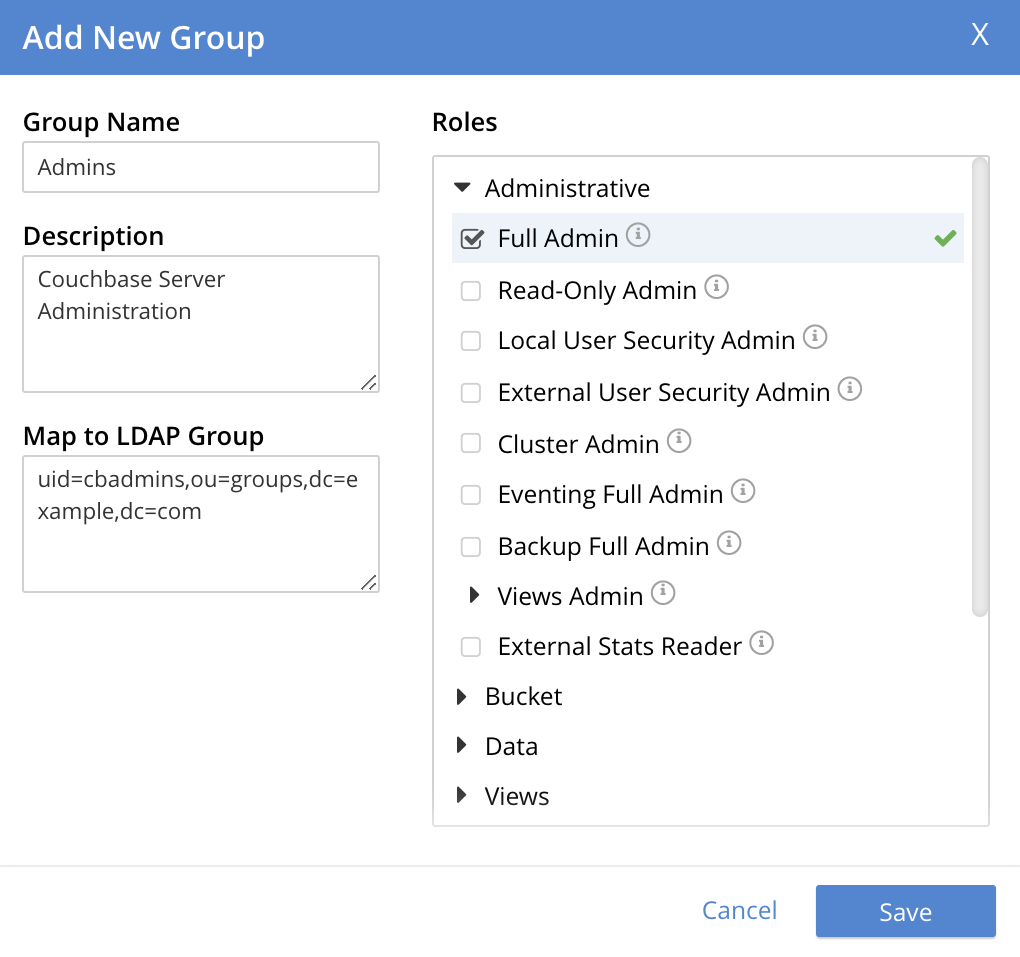
This creates a group named Admins, and assigns the Full Admin role to it, specifying as its LDAP-group mapping uid=cbadmins,ou=groups,dc=example,dc=com.
Alternatively, left-click on Cancel to abandon group configuration.
Editing a Group Mapping
Once a group-mapping has been defined, it can be edited.
Access the Users & Groups panel of the Security screen. By default, this presents a users view, listing the currently defined users for the cluster. To display the groups view, left-click on the Groups tab, towards the upper right:
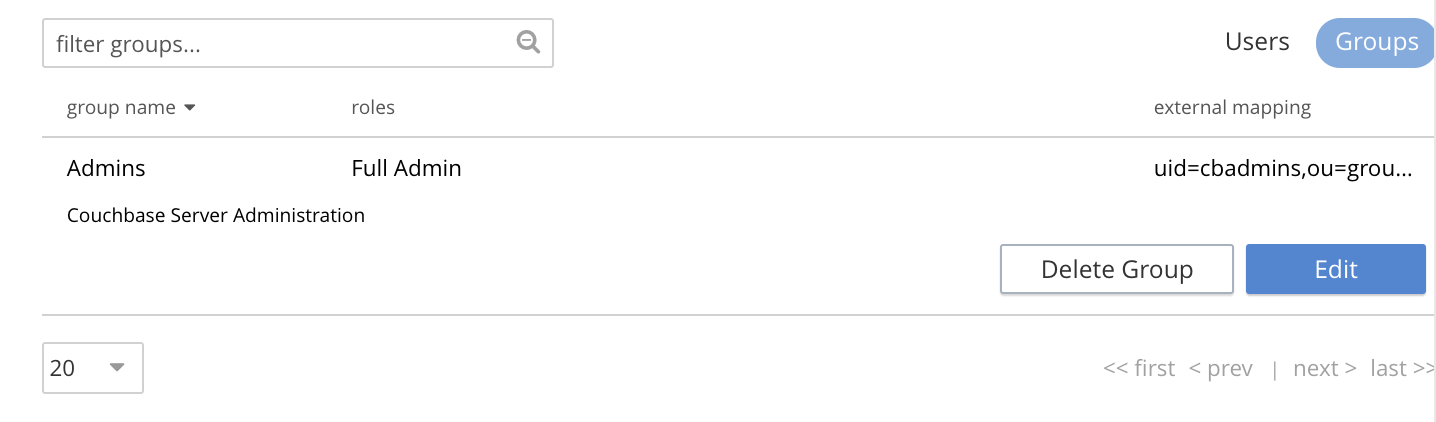
This brings up the groups view, which shows currently defined user-groups for the cluster.
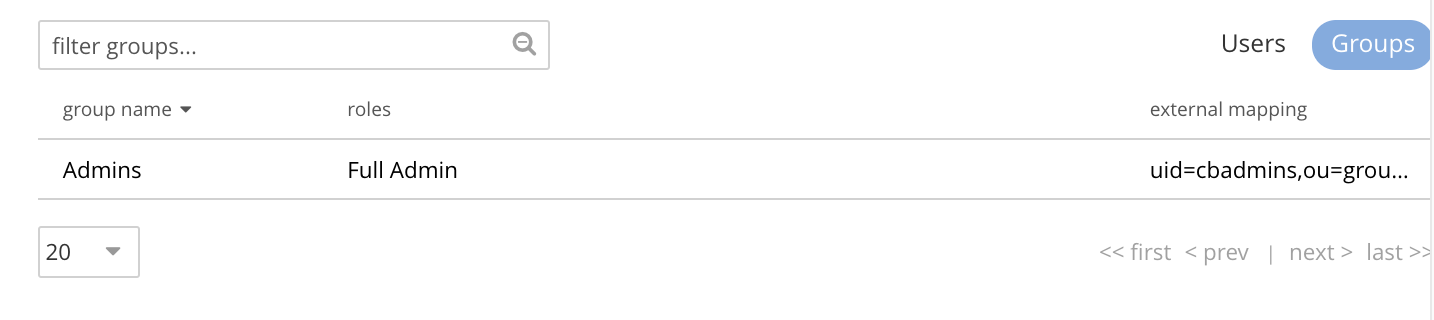
This confirms the existence of the user-group Admins.
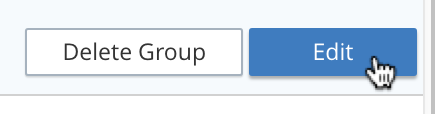
Now, left-click on the row displayed for this group. The row expands vertically, and exposes additional controls:
Left-click on the Edit button, at the lower right:
This brings up the Edit Group Admins dialog:
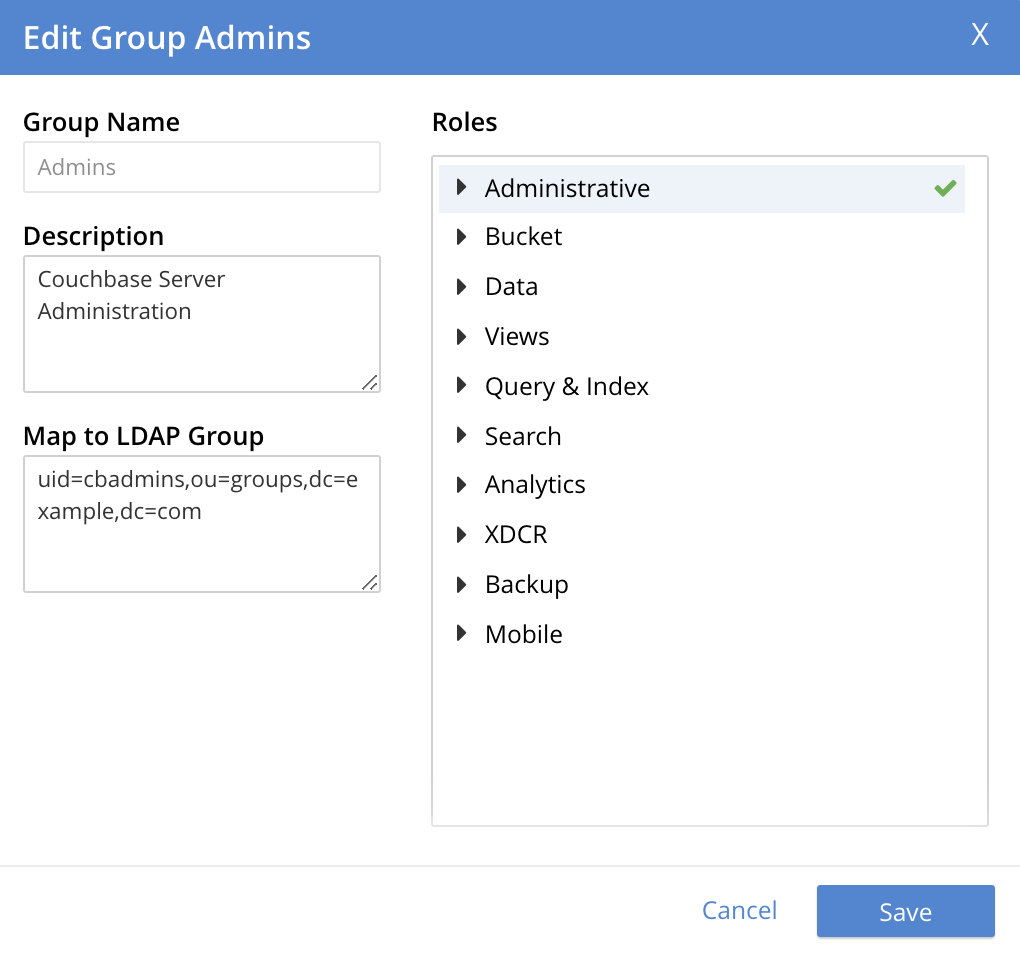
Within this dialog, the description, mapping, or roles for the group can be edited. For details of selecting roles within the Roles panel, see Manage Users, Groups, and Roles.
Note that if the Delete Group button is left-clicked on, the group is deleted. This means that all mappings between LDAP groups and the roles that were assigned to this group are also deleted.
Adding an Externally Authenticated User
Couchbase-Server users can be specified as externally authenticated, when they are added to the system. This allows roles to be assigned to them on the cluster; either directly, or by means of group-membership, or both. Additionally, if one or more LDAP group-mappings have been defined for LDAP groups of which the externally authenticated user is a member, the user is recognized as a member of the Couchbase-Server user-groups to which the mappings have been made, and is thereby assigned still more roles.
Step-by-step instructions on adding externally authenticated users are provided in Adding an Externally Authenticated User.
Configure LDAP with the CLI
To configure an LDAP server to be used as a point of authentication for Couchbase Server, use the setting-ldap command.
/opt/couchbase/bin/couchbase-cli setting-ldap \
--cluster http://10.143.192.101 \
--username Administrator \
--password password \
--hosts 172.23.124.25 --port 389 \
--encryption startTLS \
--ldap-cacert '/path/to/cert' \
--bind-dn 'cn=admin,dc=example,dc=com' \
--bind-password 'password' \
--authentication-enabled 1 \
--user-dn-template 'uid=%u,ou=users,dc=example,dc=com' \
--authorization-enabled 1 \
--group-query 'ou=groups,dc=example,dc=com??one?(member=%D)'
This call references the LDAP server at 172.23.125.25, on port 389, and specifies --authorization-enabled and --authentication-enabled for the user-credentials that will be passed from Couchbase Server.
The argument specified for --group-query is the query that retrieves the LDAP groups of which the user is a member.
A --user-dn-template is specified as a distinguished name template.
If successful, the call produces the following output:
SUCCESS: LDAP settings modified
For more information, see the command reference for setting-ldap.
Map Groups with the CLI
The user-manage command allows users and groups to be created and deleted, and roles to be assigned.
For example, a Couchbase-Server user-group can be defined as follows:
/opt/couchbase/bin/couchbase-cli user-manage -c 10.143.192.101 \
--username Administrator \
--password password \
--set-group \
--group-name admins \
--roles admin \
--group-description "Couchbase Server Administrators" \
--ldap-ref 'uid=cbadmins,ou=groups,dc=example,dc=com'
This establishes a Couchbase-Server group named admins, each of whose members is granted the admin (the Full Administrator) role.
It references the LDAP group uid=cbadmins,ou=groups,dc=example,dc=com: from this point, LDAP-authenticated users who are in the LDAP group uid=cbadmins,ou=groups,dc=example,dc=com are placed in the Couchbase-Server admins group, and thereby are granted the admin role.
For examples of using the user-manage command to create LDAP-authenticated users, and optionally assign them to groups, see Manage External Users.
Configure LDAP with the REST API
To configure an LDAP server to be used as a source of authentication for Couchbase Server, use the /settings/ldap endpoint, as follows:
curl -v -X POST -u Administrator:password \
http://10.143.192.101:8091/settings/ldap \
-d hosts=172.23.124.25 \
-d port=389 \
-d encryption=StartTLSExtension \
-d serverCertValidation=true \
--data-urlencode cacert@/path/to/cert \
-d bindDN='cn=admin,dc=example,dc=com' \
-d bindPass=password \
-d authenticationEnabled=true \
--data-urlencode userDNMapping='{"template":"uid=%u,ou=users,dc=example,dc=com"}' \
-d authorizationEnabled=true \
--data-urlencode groupsQuery='ou=groups,dc=example,dc=com??one?(member=%D)'
This call references the LDAP server at 172.23.125.25, on port 389, enabling authorization and authentication for user-credentials to be passed from Couchbase Server.
For more information, see Configure LDAP.
Map Groups with the REST API
Use the PUT /settings/rbac/groups/<group-name> method and URI, as follows:
curl -v -X PUT -u Administrator:password \
http://10.143.192.101:8091/settings/rbac/groups/admins \
-d roles=admin \
-d description=Couchbase+Server+Administrators \
--data-urlencode ldap_group_ref='uid=cbadmins,ou=groups,dc=example,dc=com'
This establishes a Couchbase Server group named admins, each of whose members is granted the admin (the Full Administrator) role.
It maps the admins group to the LDAP group uid=cbadmins,ou=groups,dc=example,dc=com: from this point, LDAP-authenticated external users who are in the LDAP uid=cbadmins,ou=groups,dc=example,dc=com group are placed in the Couchbase Server admins group, and thereby are granted the admin role.
For more information on using the REST API to manage roles, see Role Based Admin Control (RBAC).