Manual
Pre-requisites
Windows Users : If you are developing on Windows, use a Windows 10 machine. Also, note that you should also have administrative privileges on the Windows box so you can authorize the installation and running of the required executables.
-
Visual C++ 2017 (only Windows Users): Install the Microsoft Visual C++ Compiler for Python Downloadable from here.
-
Python 3.4+: downloadable from python.org. This should come packaged with pip3
Windows Users : If you are developing on Windows, make sure that Python is included in your system’s PATH environment variable. You can follow instructions here to set your PATH variable.
-
Git: downloadable from git-scm.org.
Workshop Repo
-
Clone the "master" branch of the workshop source from GitHub. We are doing a shallow pull with
depthas 1 to speed the cloning process.git clone -b master --depth 1 https://github.com/couchbaselabs/mobile-travel-sample.git
Couchbase Server
In this lesson, you will install and launch v7.1.x of Couchbase Server.
Screenshots below apply to Couchbase Server 7.1.1 and there will be some variation with CBS 7.0.x. However, equivalent functionality is available in earlier versions of server. Refer to documentation for compatible server versions.
Apple M1 Users: Install and launch v7.1.1 or later
If there is a later version available, you can download it as well bearing in mind that the instructions have been validated with the version that is specified in instructions below.
Couchbase Server 7.1.1
-
Download and install v7.1.1 of Couchbase Server. Follow the instructions specified in the appropriate platform specific install guide to install the same.
-
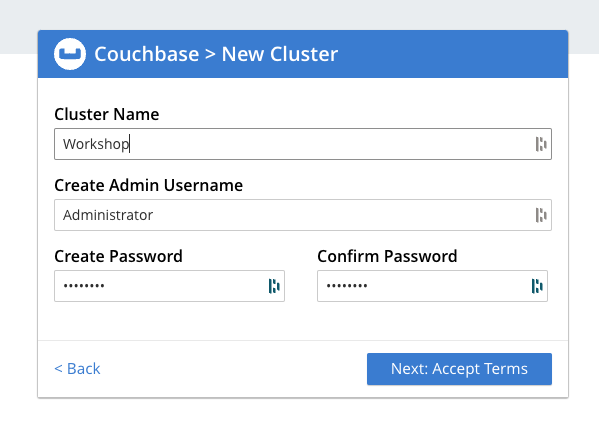
On the setup wizard, create an Administrator account with the user Administrator and password as password.
-
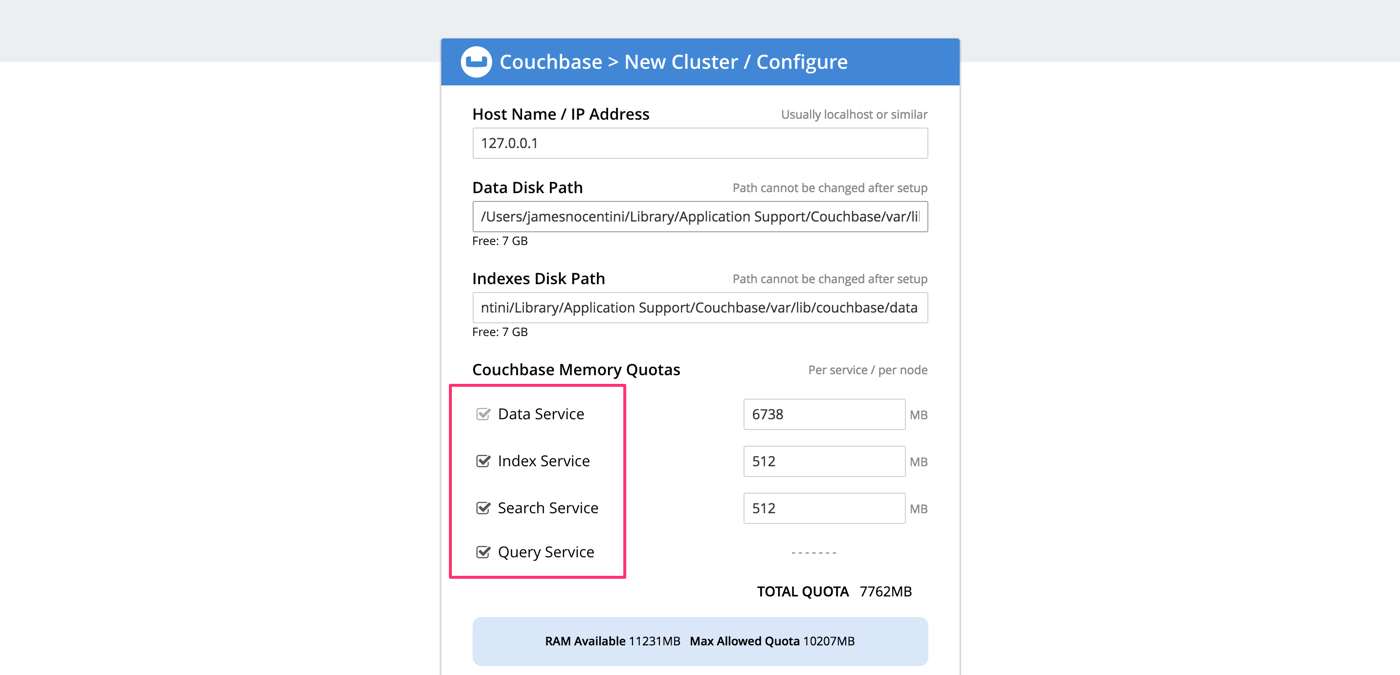
As you follow the download instructions and setup wizard, make sure you keep all the services (data, query, and index) selected.
-
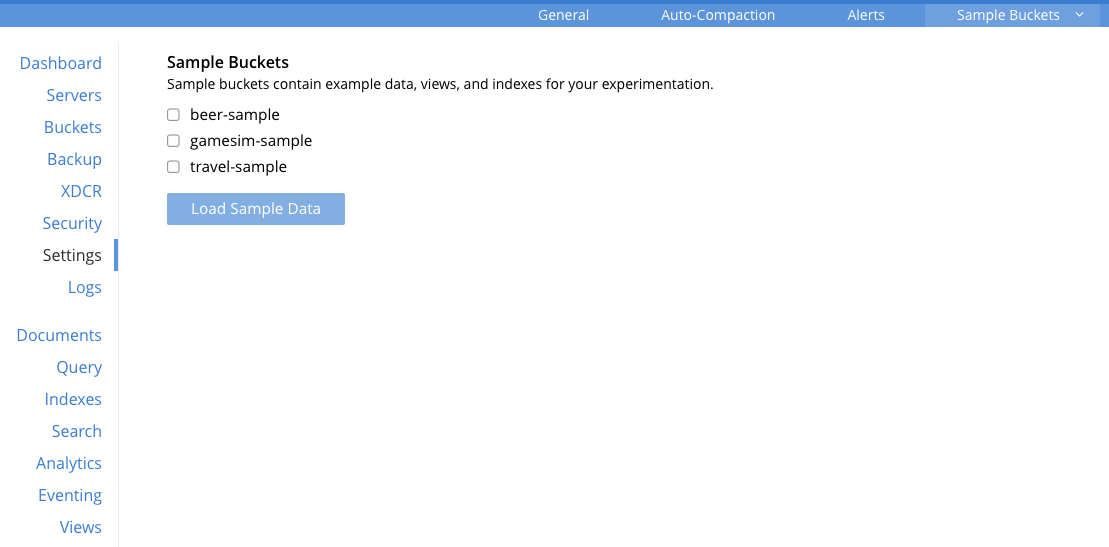
Install the sample bucket named travel-sample because it contains the data used in this tutorial. You can add the bucket from the "Sample Buckets" tab in the "Settings" menu in the admin console.
-
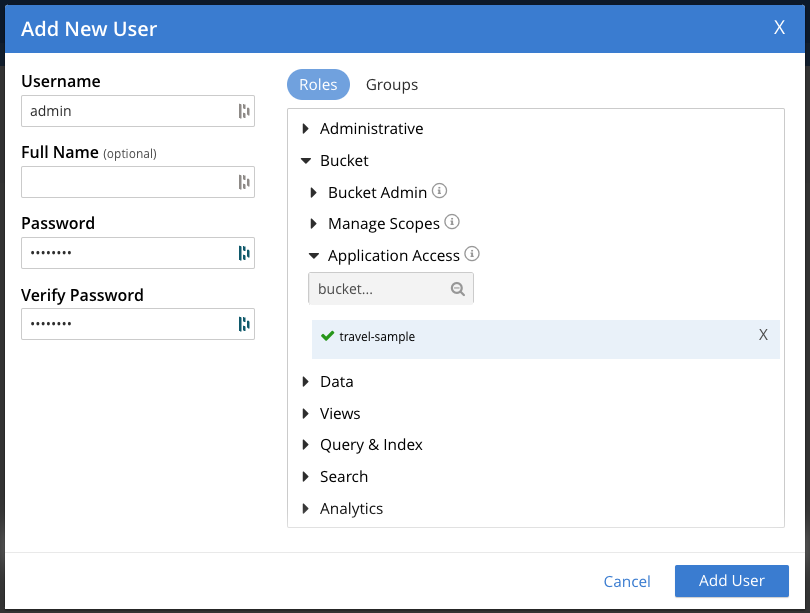
Create an RBAC user named admin with password password and Application Access to the travel-sample bucket. You can do this from the "Security" menu. These credentials will be used by the Sync Gateway to access the documents in this bucket.

-
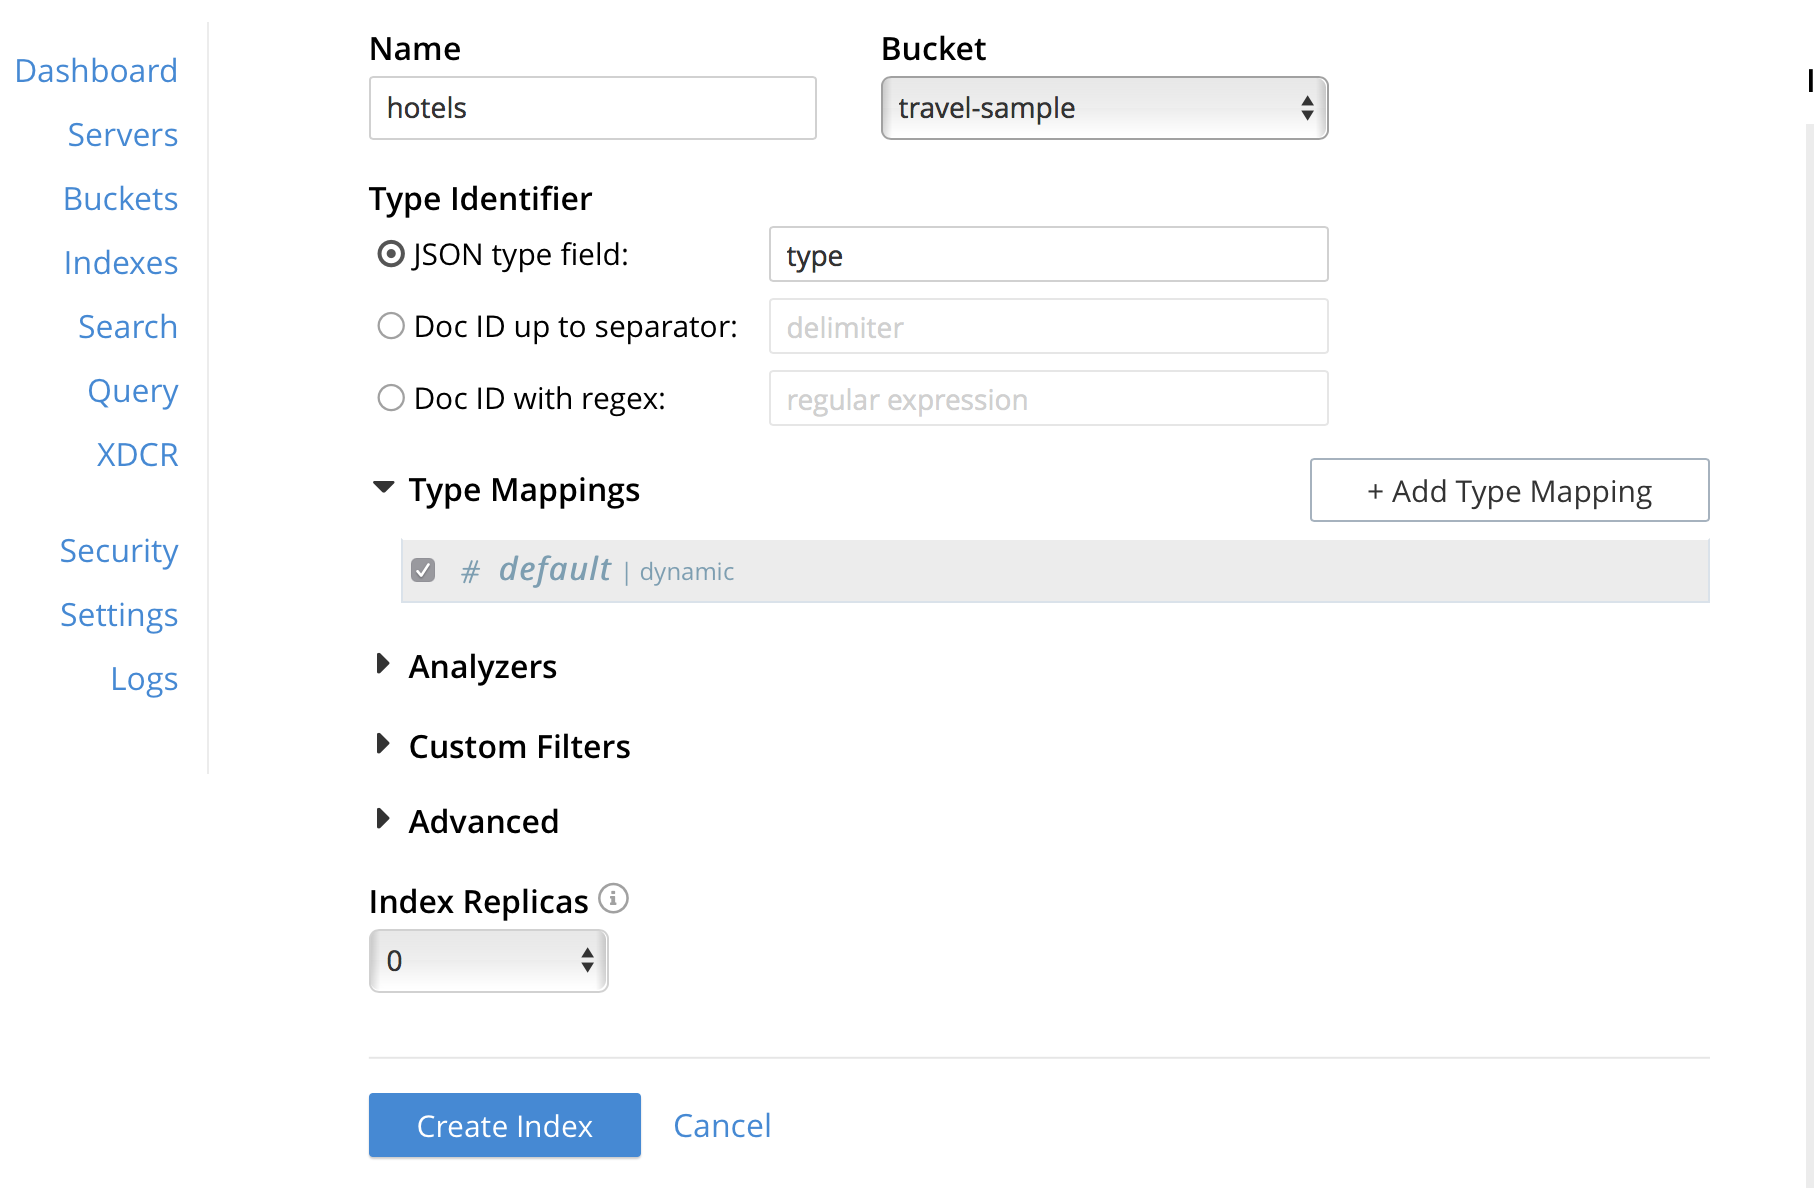
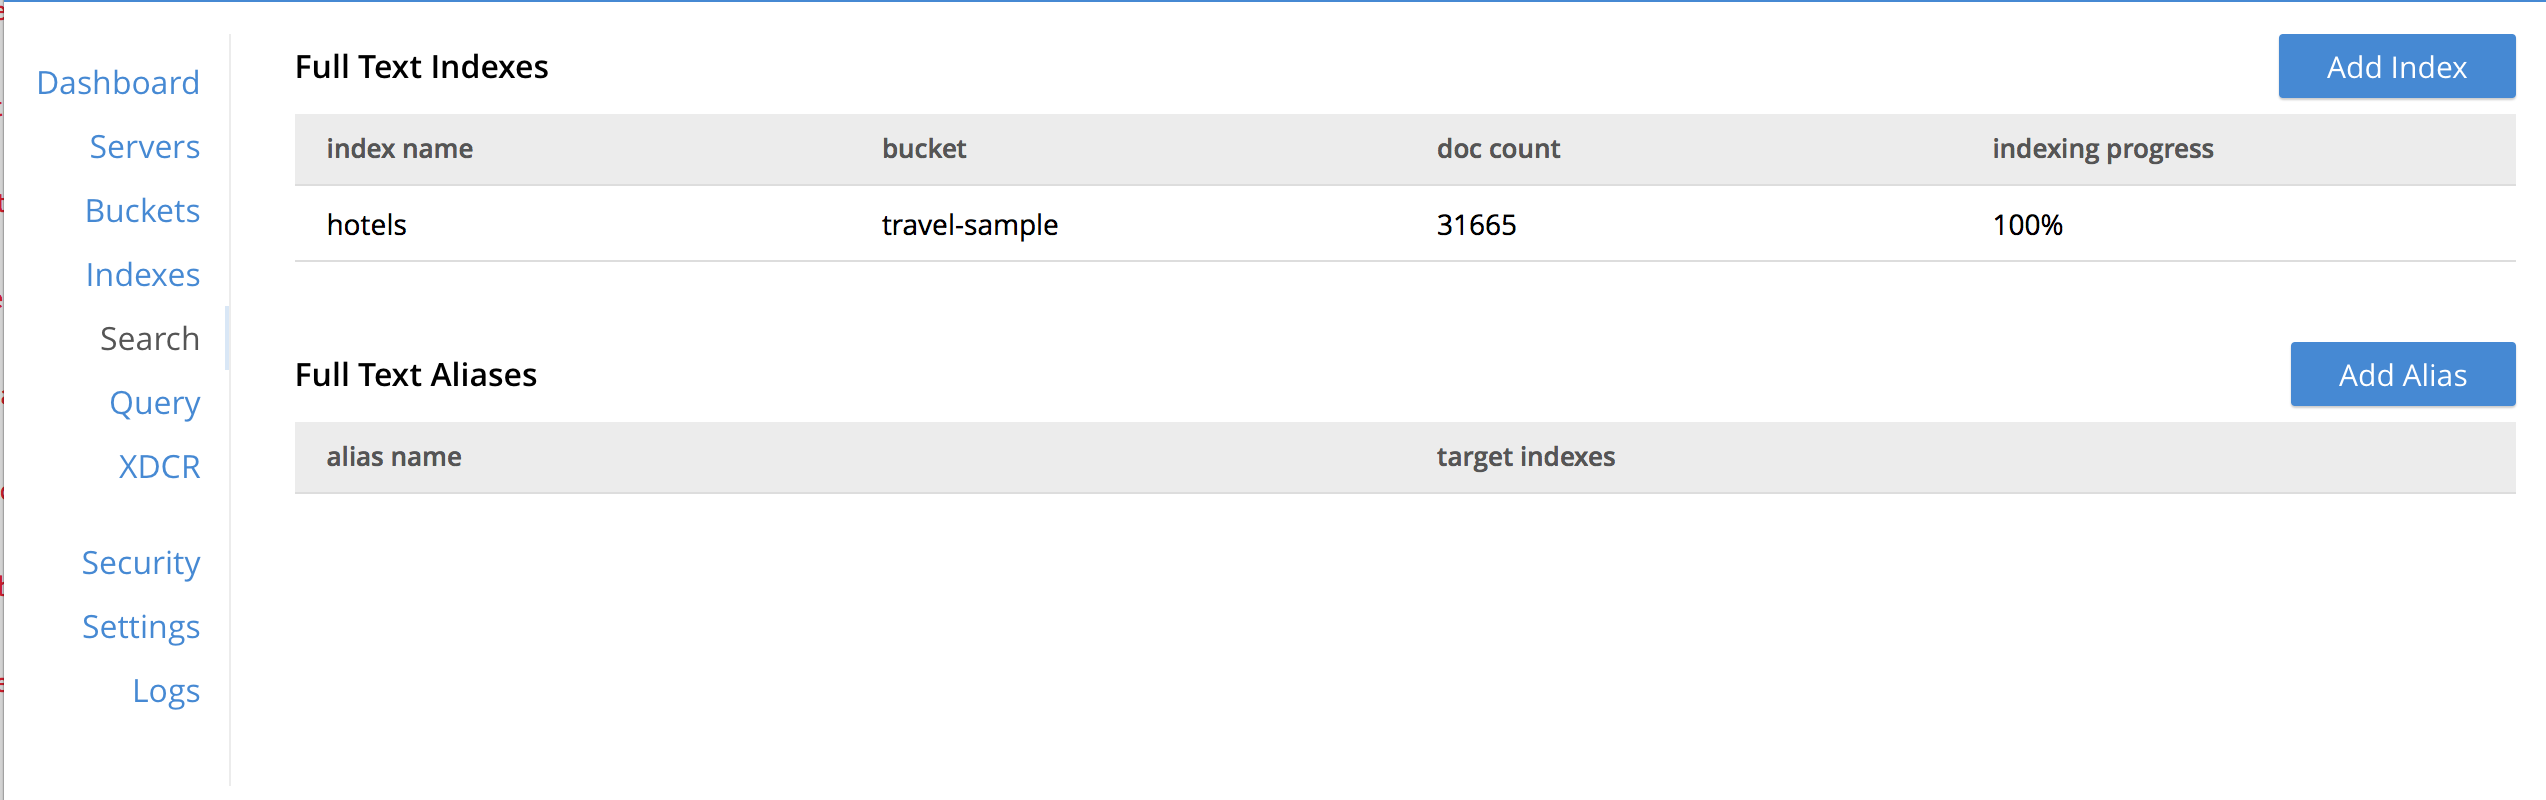
Create a Full text search index on travel-sample bucket called 'hotels'. You can do this from the "Search" menu. Just go with default index settings.
Sync Gateway
In this section, you will install and launch version 3.0.3 of Sync Gateway.
-
Download Sync Gateway 3.0.3 from here for your platform
-
The Sync Gateway will have to be launched with the config file named
sync-gateway-config-travelsample-manual.jsonthat you should have downloaded as per the instructions in the Workshop Repo section. The config file will be located in/path/to/mobile-travel-sample. -
Open the
sync-gateway-config-travelsample-manual.jsonand confirm that the RBAC user credentials configured on the Couchbase Server are used by Sync Gateway for accessing the bucket"username": "admin", "password": "password", -
Launch the Sync Gateway.
macOS
$ cd /path/to/couchbase-sync-gateway/bin $ ./sync_gateway /path/to/mobile-travel-sample/sync-gateway-config-travelsample-manual.jsonWindows
By default, the Sync Gateway service will install with serviceconfig.json as the configuration file at C:\Program%20Files\Couchbase\Sync%20Gateway\serviceconfig.json.
The Sync Gateway will have to be launched with the config file named
sync-gateway-config-travelsample-manual.jsonthat you should have downloaded as per the instructions in the Workshop Repo section. The config file will be located inC:/path/to/mobile-travel-sample.Open the sync-gateway-config-travelsample-manual.json and confirm that the RBAC user credentials configured on the Couchbase Server are used by Sync Gateway for accessing the bucket.
"username": "admin", "password": "password", -
Stop the Sync Gateway service (since it would be launched with the default version of config file). To stop the service, you can use the Services application (Control Panel -→ Admin Tools -→ Services).
-
Replace the serviceconfig.json file with the
sync-gateway-config-travelsample-manual.jsoncopy c:/path/to/mobile-travel-sample/sync-gateway-config-travelsample-manual.json "C:\Program Files\Couchbase\Sync Gateway\serviceconfig.json" -
Start the Sync Gateway service with the new version of serviceconfig.json file. To start the service, you can use the Services application (Control Panel -→ Admin Tools -→ Services).
Python Travel Sample Web Backend
Clone repository
Install Python
Windows Users Only
-
Verify the pip installation.
If you are developing on Windows, pip.exe will be found in the "Scripts" sub directory under the Python installation directory.Add the path to the "Scripts" folder to the system’s PATH environment variable.
You can follow instructions here to set your PATH variable.
Verify that pip is recognized by typing the following in the cmd terminal. You should see the help menu.
pip3
Others
-
We will run the Travel Web App in a Python virtual environment. First, check if
virtualenvis installed on your system.$ virtualenv --version -
If
virtualenvis not installed , you can useapt-getorpip3to install it.$ sudo pip3 install virtualenv -
Specify the folder for your virtual environment.
$ virtualenv . -
Activate your environment. You should see a prompt as shown below.
$ source bin/activate
(try-cb-python) $
Install dependencies & run app
The application uses several Python libraries that need to be installed, these are listed in requirements.txt and can be automatically loaded using the pip3 command.
pip3 install -r requirements.txt-
Update travel.py to reflect the username and password that you have used when installing Couchbase Server. This defaults to "Administrator" and "password".
DEFAULT_USER = "Administrator" PASSWORD = 'password' -
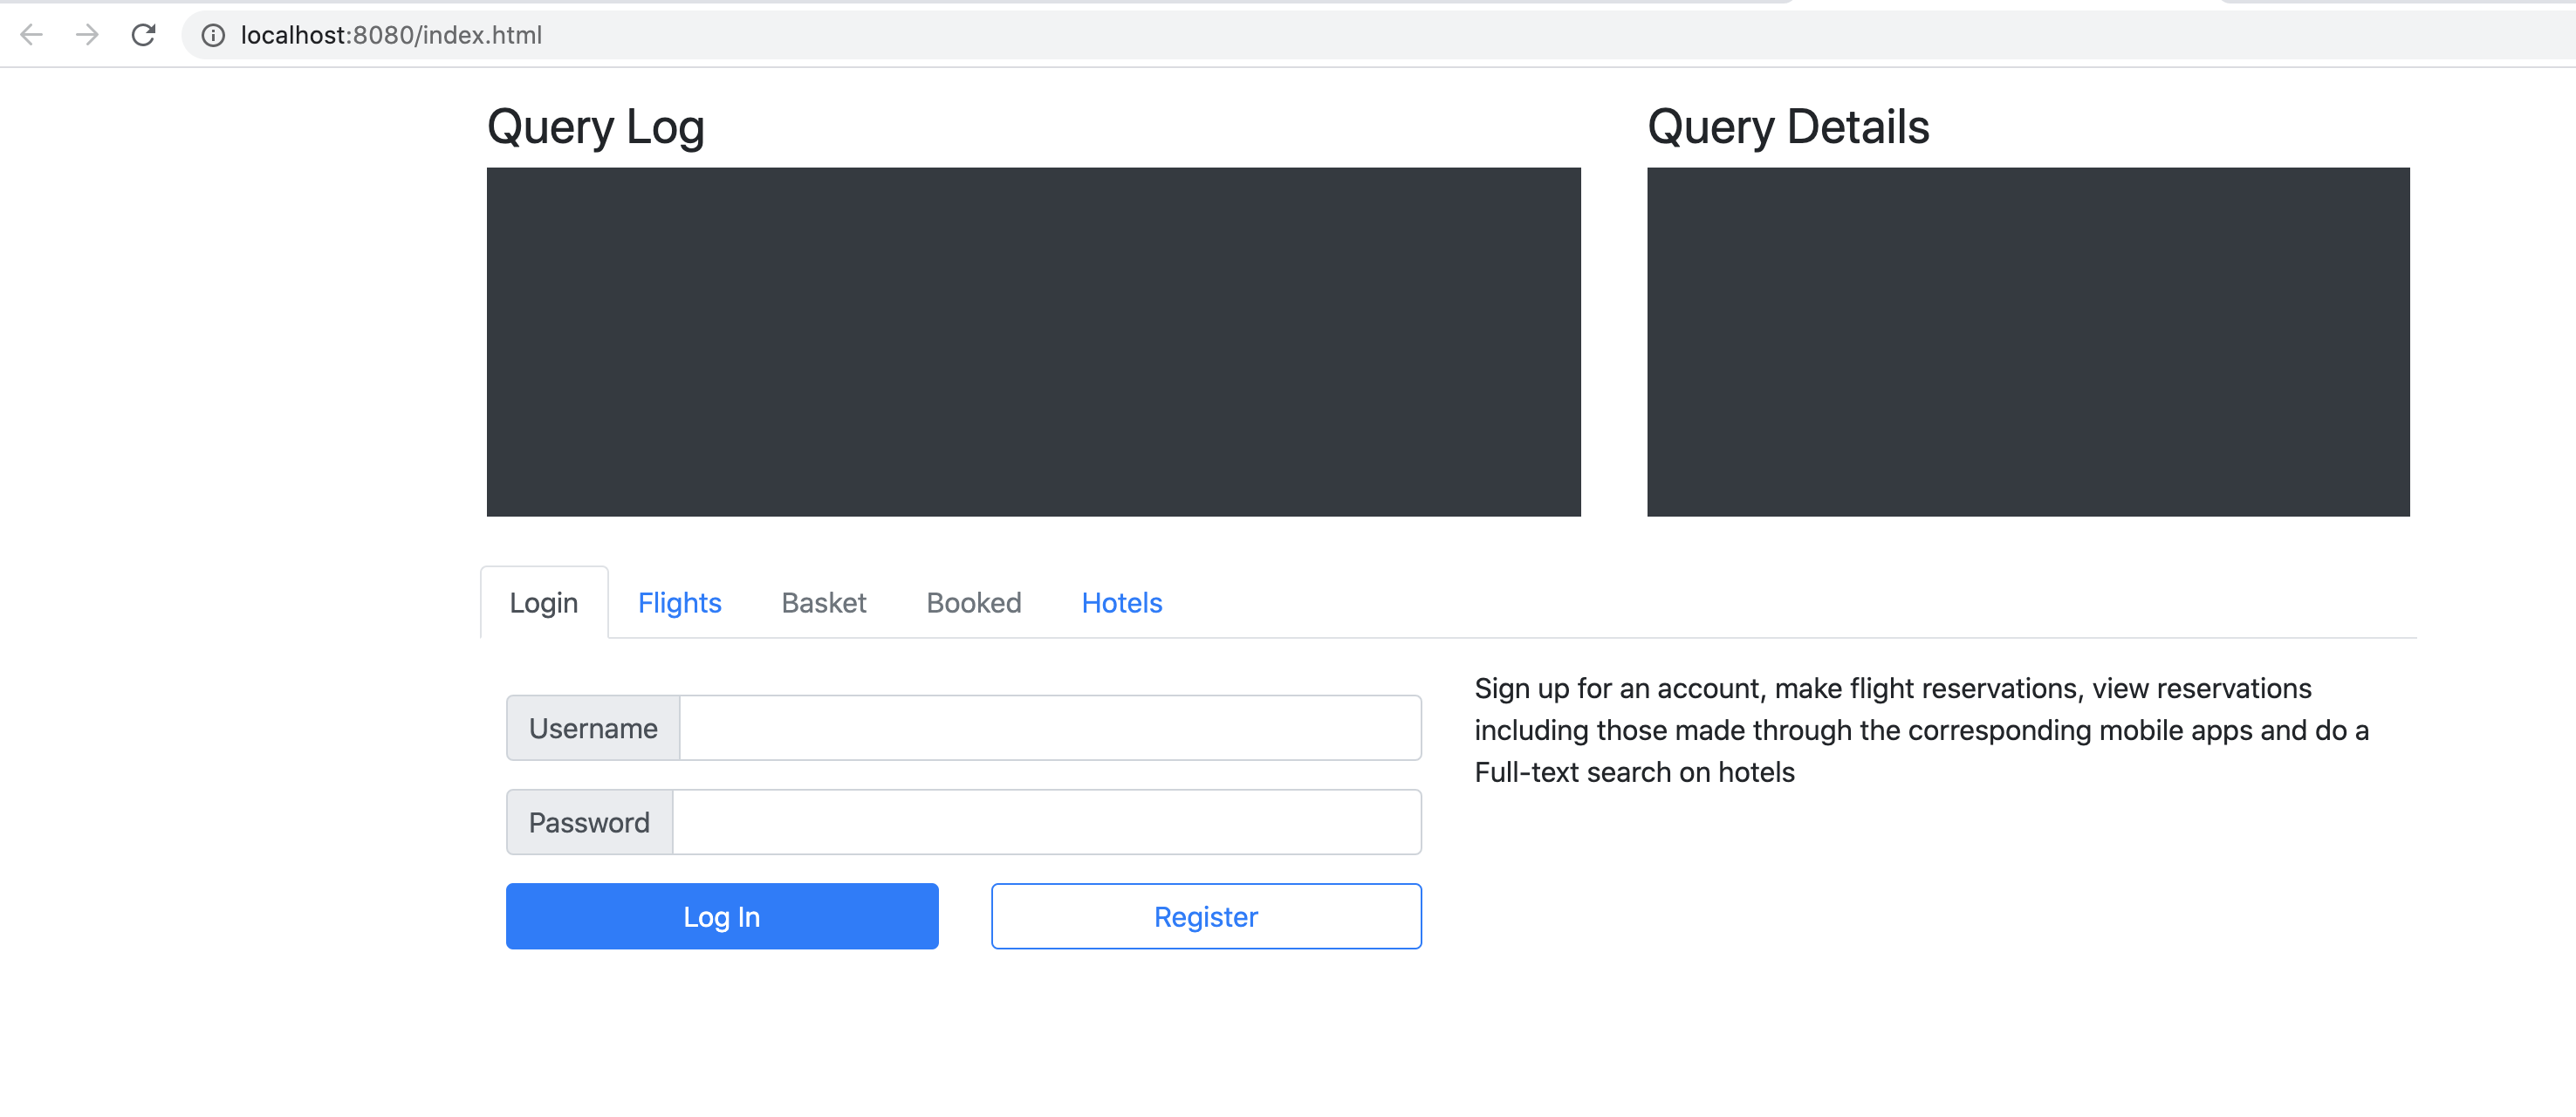
Now launch the Travel Web App
$ python travel.py
$ Running on http://127.0.0.1:8080/ (Press CTRL+C to quit)
You may see an alert similar to one below requesting access to run the app.
Make sure you select the "Allow access" option.