Creating the Courses Collection
Your first application created a single student record for the student collection. In this part, you’re going to populate the course collection.
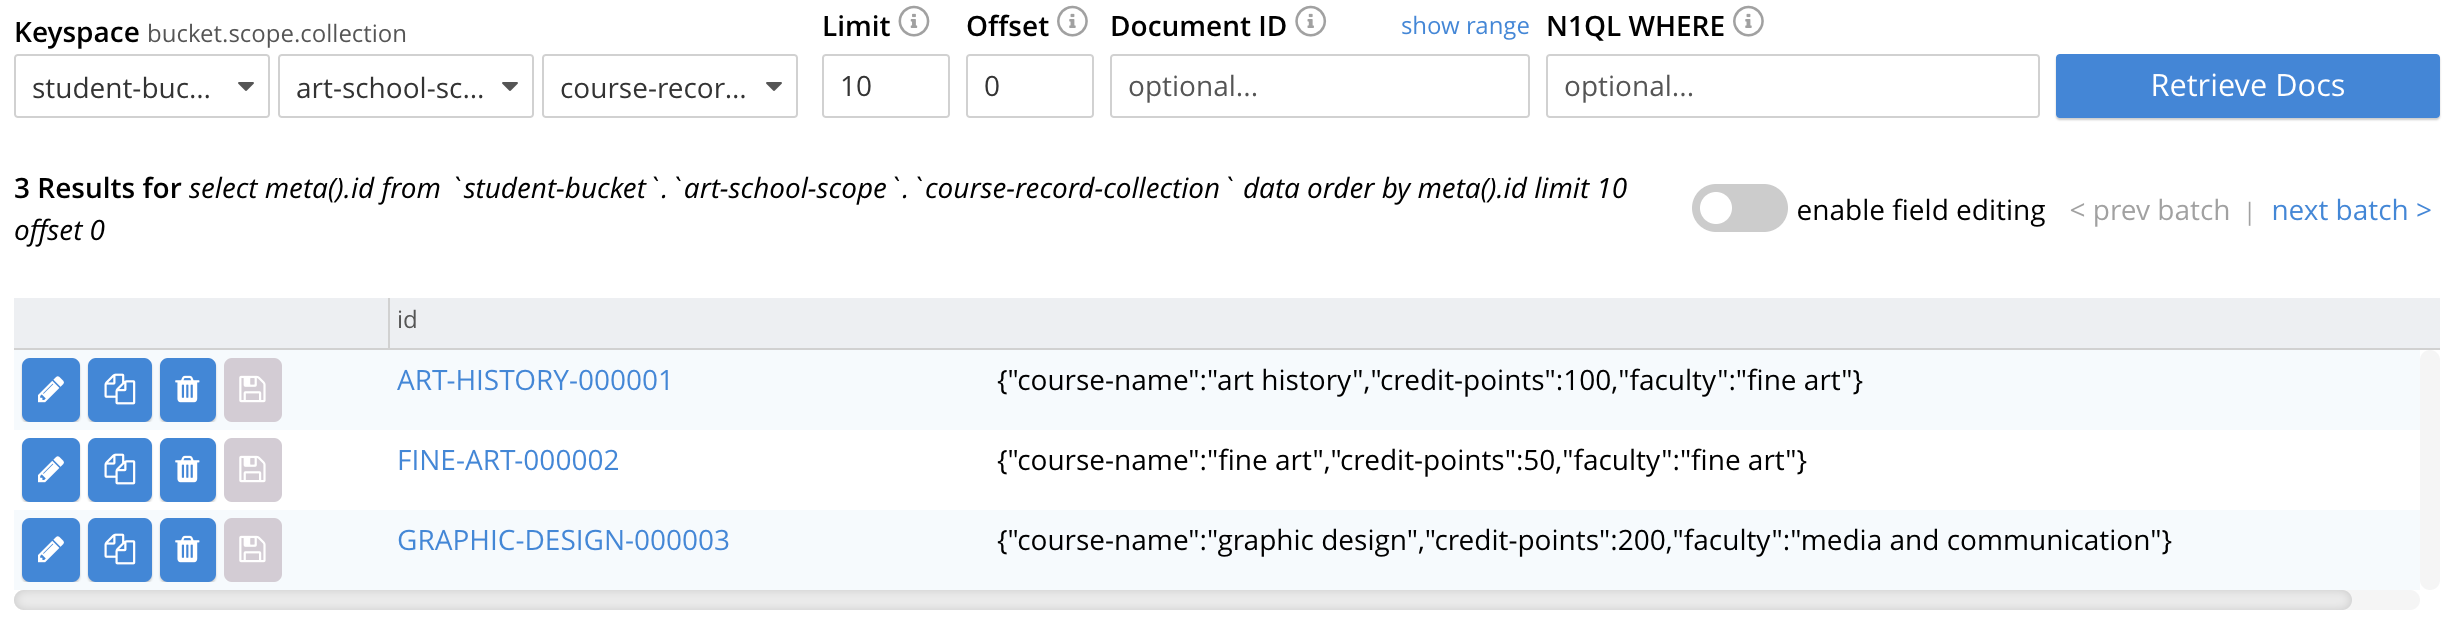
Populating the course details collection
You can use the same technique to build a store for the courses. Here’s a quick reminder of the course document structure:
-
art history
-
graphic design
-
fine art
{
  "course-name": "art history",
  "faculty": "fine art",
  "credit-points" : 100
}
{
"course-name": "graphic design",
"faculty": "media and communication",
"credit-points" : 200
}{
"course-name": "fine art",
"faculty": "fine art",
"credit-points" : 50
}The code should be familiar to you; there’s not much difference between writing to the course collection and writing to the student collection; you just have more records to deal with:
Unresolved include directive in modules/tutorials/pages/java-tutorial/creating-the-courses-collection.adoc - include::3.2@java-sdk:student:example$InsertCourses.java[]| 1 | Note that you’re now writing to a different collection. |
Make sure that you’ve created the course-collection in the admin console before you attempt to run the program.
|
You can use maven to run the application:
mvn exec:java -Dexec.mainClass="InsertCourses" -Dexec.cleanupDaemonThreads=falseUse the admin console to make sure the documents have been created in the correct collection.
Next steps
So you’ve created a cluster, a bucket, a scope and two collections. You’ve also populated your collections with documents. Well, a database isn’t much use until we can retrieve information from it, which is what you’re going to take a look at in the next part.