Command-line interface overview
A newer version of this software is available
You are viewing the documentation for an older version of this software. To find the documentation for the current version, visit the Couchbase documentation home page.
Couchbase Server includes a number of command-line tools that can be used to manage and monitor a Couchbase Server cluster or server. All operations are mapped to their appropriate REST API call (where available).
There are a number of command-line tools that perform different functions and operations, these are described individually within the following sections. Tools can be located in a number of directories, dependent on the tool in question in each case.
Command line tools and availability
As of Couchbase Server 2.0, the following publicly available tools have been renamed, consolidated or removed. This is to provide better usability, and reduce the number of commands required to manage Couchbase Server:
By default, the command-line tools are installed into the following locations on each platform:
| Operating System | Directory Locations |
|---|---|
| Linux | /opt/couchbase/bin, /opt/couchbase/bin/install, /opt/couchbase/bin/tools, /opt/couchbase/bin/tools/unsupported
|
| Windows | C:\Program Files\couchbase\server\bin, C:\Program Files\couchbase\server\bin\install, and C:\Program Files\couchbase\server\bin\tools. |
| Mac OS X | /Applications/Couchbase Server.app/Contents/Resources/couchbase-core/bin
|
Unsupported tools
The following are tools that are visible in Couchbase Server 2.0 installation; however the tools are unsupported. This means they are meant for Couchbase internal use and will not be supported by Couchbase Technical Support:
cbbrowse_logscbdump-configcbenable_core_dumps.shcouch_compactcouch_dbdumpcouch_dbinfomemslap
Deprecated and removed tools
The following are tools that existed in previous versions but have been deprecated and removed as of Couchbase Server 1.8:
| Tool | Server Versions | Description/Status |
|---|---|---|
tap.py |
1.8 | Deprecated in 1.8. |
cbclusterstats |
1.8 | Deprecated in 1.8. Replaced by cbstats in 1.8. |
membase |
1.7 | Deprecated in 1.8. Replaced by couchbase-cli in 1.8.1 |
mbadm-online-restore |
1.7 | Deprecated in 1.8. Replaced by cbadm-online-restore in 1.8.1 |
membase |
1.7 | Deprecated in 1.8, replaced by couchbase-cli
|
mbadm-online-restore |
1.7 | Deprecated in 1.8, replaced by cbadm-online-restore
|
mbadm-online-update |
1.7 | Deprecated in 1.8, replaced by cbadm-online-update
|
mbadm-tap-registration |
1.7 | Deprecated in 1.8, replaced by cbadm-tap-registration
|
mbbackup-incremental |
1.7 | Deprecated in 1.8 |
mbbackup-merge-incremental |
1.7 | Deprecated in 1.8 |
mbbackup |
1.7 | Deprecated in 1.8, replaced by cbbackup
|
mbbrowse_logs |
1.7 | Deprecated in 1.8, replaced by cbbrowse_logs
|
mbcollect_info |
1.7 | Deprecated in 1.8, replaced by cbcollect_info
|
mbdbconvert |
1.7 | Deprecated in 1.8, replaced by cbdbconvert
|
mbdbmaint |
1.7 | Deprecated in 1.8, replaced by cbdbmaint
|
mbdbupgrade |
1.7 | Deprecated in 1.8, replaced by cbdbupgrade
|
mbdumpconfig.escript |
1.7 | Deprecated in 1.8, replaced by cbdumpconfig.escript
|
mbenable_core_dumps.sh |
1.7 | Deprecated in 1.8, replaced by cbenable_core_dumps.sh
|
mbflushctl |
1.7 | Deprecated in 1.8, replaced by cbflushctl
|
mbrestore |
1.7 | Deprecated in 1.8, replaced by cbrestore
|
mbstats |
1.7 | Deprecated in 1.8, replaced by cbstats
|
mbupgrade |
1.7 | Deprecated in 1.8, replaced by cbupgrade
|
mbvbucketctl |
1.7 | Deprecated in 1.8, replaced by cbvbucketctl
|
couchbase-cli tool
The couchbase-cli tool is located in the following paths, depending upon the platform. This tool can perform operations on an entire cluster, on a bucket shared across an entire cluster, or on a single node in a cluster. For instance, if this tool is used to create a data bucket, all nodes in the cluster have access the bucket.
Note
Many of these same settings can be performed using the REST API.
| Operating System | Directory Locations |
|---|---|
| Linux | /opt/couchbase/bin/couchbase-cli
|
| Windows | C:\Program Files\Couchbase\Server\bin\couchbase-cli.exe
|
| Mac OS X | /Applications/Couchbase Server.app/Contents/Resources/couchbase-core/bin/couchbase-cli
|
This tool provides access to various management operations for Couchbase Server clusters, nodes and buckets. The basic usage format is:
couchbase-cli COMMAND [BUCKET_NAME] CLUSTER [OPTIONS]
Where:
COMMANDis a command listed below.CLUSTERis a cluster specification. The following shows both short and long form syntax:
// Short form
    -c HOST[:PORT]
// Long form
    --cluster=HOST[:PORT]
| Option | Description |
|---|---|
-u USERNAME, --user=USERNAME |
Admin username of the cluster |
-p PASSWORD, --password=PASSWORD |
Admin password of the cluster |
-o KIND, --output=KIND |
Type of document: JSON or standard |
-d, --debug |
Output debug information |
couchbase-cli commands
| Command | Description |
|---|---|
server-list |
List all servers in a cluster |
server-info |
Show details on one server |
server-add |
Add one or more servers to the cluster |
server-readd |
Readds a server that was failed over |
group-manage |
Manages server groups (Enterprise Edition only) |
rebalance |
Start a cluster rebalancing |
rebalance-stop |
Stop current cluster rebalancing |
rebalance-status |
Show status of current cluster rebalancing |
failover |
Failover one or more servers |
cluster-init |
Set the username,password and port of the cluster |
cluster-edit |
Modify cluster settings |
node-init |
Set node specific parameters |
bucket-list |
List all buckets in a cluster |
bucket-create |
Add a new bucket to the cluster |
bucket-edit |
Modify an existing bucket |
bucket-delete |
Delete an existing bucket |
bucket-flush |
Flush all data from disk for a given bucket |
bucket-compact |
Compact database and index data |
setting-compaction |
Set auto compaction settings |
setting-notification |
Set notifications. |
setting-alert |
Email alert settings |
setting-autofailover |
Set auto failover settings |
setting-xdcr |
Set XDCR-related configuration which affect behavior. |
xdcr-setup |
Set up XDCR replication. |
xdcr-replicate |
Create and run replication via XDCR |
help show longer |
usage/help and examples |
couchbase-cli command options
The following are options which can be used with their respective commands.
Administration — couchbase-cli Tool commands options:
server-list option
| server-list options | Description |
|---|---|
| –group-name=GROUPNAME | Displays all server in a server group (Enterprise Edition only) |
server-add options
| server-add options | Description |
|---|---|
--server-add=HOST[:PORT] |
Server to add to cluster |
--server-add-username=USERNAME |
Admin username for the server to be added |
--server-add-password=PASSWORD |
Admin password for the server to be added |
--group-name=GROUPNAME |
Server group where the server is to be added (Enterprise Edition only) |
server-readd options
| server-readd options | Description |
|---|---|
--server-add=HOST[:PORT] |
Server to re-add to cluster |
--server-add-username=USERNAME |
Admin username for the server to be added |
--server-add-password=PASSWORD |
Admin password for the server to be added |
--group-name=GROUPNAME |
Server group where the server is to be added (Enterprise Edition only) |
group-manage options (Enterprise Edition only)
| group-manage options | Description |
|---|---|
--group-name=GROUPNAME |
Server group name |
--list |
Shows the server groups and the server assigned to each server group |
--create |
Creates a server group. |
--delete |
Removes an empty server group. |
--rename=NEWGROUPNAME |
Renames an existing server group. |
---add-servers="HOST:PORT;HOST:PORT" |
Adds servers to a group |
--move-servers="HOST:PORT;HOST:PORT" |
Moves a list of server from a group |
--from-group=GROUPNAME |
Moves one or more servers from a group. |
--to-group=GROUPNAME |
Moves one or more server to a group |
rebalance options
| rebalance options | Description |
|---|---|
--server-add* |
See server-add OPTIONS |
--server-remove=HOST[:PORT] |
The server to remove from cluster |
failover option
| failover option | Description |
|---|---|
--server-failover=HOST[:PORT] |
Server to failover |
cluster-* options
| cluster-* options | Description |
|---|---|
--cluster-username=USER |
New admin username |
--cluster-password=PASSWORD |
New admin password |
--cluster-port=PORT |
New cluster REST/http port |
--cluster-ramsize=RAMSIZEMB |
Per node RAM quota in MB |
node-init options
| node-init options | Description |
|---|---|
--node-init-data-path=PATH |
Per node path to store data |
--node-init-index-path=PATH |
Per node path to store index |
--node-init-hostname=NAME |
Host name for the node. Default: 127.0.0.1 |
bucket-* options
| bucket-* options | Description |
|---|---|
--bucket=BUCKETNAME |
Named bucket to act on |
--bucket-type=TYPE |
Bucket type, either memcached or couchbase |
--bucket-port=PORT |
Supports ASCII protocol and does not require authentication |
--bucket-password=PASSWORD |
Standard port, exclusive with bucket-port |
--bucket-ramsize=RAMSIZEMB |
Bucket RAM quota in MB |
--bucket-replica=COUNT |
Replication count |
--enable-flush=[0|1] |
Enable/disable flush |
--enable-index-replica=[0|1] |
Enable/disable index replicas |
--wait |
Wait for bucket create to be complete before returning |
--force |
Force command execution without asking for confirmation |
--data-only |
Compact database data only |
--view-only |
Compact view data only |
setting-compaction options
| setting-compaction options | Description |
|---|---|
--compaction-db-percentage=PERCENTAGE |
Percentage of disk fragmentation when database compaction is triggered |
--compaction-db-size=SIZE[MB] |
Size of disk fragmentation when database compaction is triggered |
--compaction-view-percentage=PERCENTAGE |
Percentage of disk fragmentation when views compaction is triggered |
--compaction-view-size=SIZE[MB] |
Size of disk fragmentation when views compaction is triggered |
--compaction-period-from=HH:MM |
Enable compaction from this time onwards |
--compaction-period-to=HH:MM |
Stop enabling compaction at this time |
--enable-compaction-abort=[0|1] |
Allow compaction to abort when time expires |
--enable-compaction-parallel=[0|1] |
Allow parallel compaction processes for database and view |
setting-alert and notification options
| setting-alert options | Description |
|---|---|
--enable-email-alert=[0|1] |
Allow email alert |
--email-recipients=RECIPIENT |
Email recipents, separate addresses with, or ; |
--email-sender=SENDER |
Sender email address |
--email-user=USER |
Email server username |
--email-password=PWD |
Email server password |
--email-host=HOST |
Email server hostname |
--email-port=PORT |
Email server port |
--enable-email-encrypt=[0|1] |
Email encryption with 0 the default for no encryption |
--alert-auto-failover-node |
Node was failed over via autofailover |
--alert-auto-failover-max-reached |
Maximum number of auto failover nodes reached |
--alert-auto-failover-node-down |
Node not auto failed-over as other nodes are down at the same time |
--alert-auto-failover-cluster-small |
Node not auto failed-over as cluster was too small |
--alert-ip-changed |
Node ip address changed unexpectedly |
--alert-disk-space |
Disk space used for persistent storage has reached at least 90% capacity |
--alert-meta-overhead |
Metadata overhead is more than 50% of RAM for node |
--alert-meta-oom |
Bucket memory on a node is entirely used for metadata |
--alert-write-failed |
Writing data to disk for a specific bucket has failed |
| setting-notification option | Description |
|---|---|
--enable-notification=[0|1] |
Allow notifications |
setting-autofailover options
| setting-autofailover options | Description |
|---|---|
--enable-auto-failover=[0|1] |
Allow auto failover |
--auto-failover-timeout=TIMEOUT (>=30) |
Specify amount of node timeout that triggers auto failover |
setting-xdcr options
| setting-xdcr options | Description |
|---|---|
--max-concurrent-reps=[32] |
Maximum concurrent replicators per bucket, 8 to 256. |
--checkpoint-interval=[1800] |
Intervals between checkpoints, 60 to 14400 seconds. |
--worker-batch-size=[500] |
Doc batch size, 500 to 10000. |
--doc-batch-size=[2048]KB |
Document batching size, 10 to 100000 KB |
--failure-restart-interval=[30] |
Interval for restarting failed xdcr, 1 to 300 seconds |
--optimistic-replication-threshold=[256] |
Document body size threshold (bytes) to trigger optimistic replication |
xdcr-setup options
| xdcr-setup options | Description |
|---|---|
--create |
Create a new xdcr configuration |
--edit |
Modify existed xdcr configuration |
--delete |
Delete existing xdcr configuration |
--xdcr-cluster-name=CLUSTERNAME |
Remote cluster name |
--xdcr-hostname=HOSTNAME |
Remote host name to connect to |
--xdcr-username=USERNAME |
Remote cluster admin username |
--xdcr-password=PASSWORD |
Remote cluster admin password |
--xdcr-demand-encryption=[0|1] |
Enables data encryption using Secure Socket Layer (SSL). 1 (one) enables data encryption. Default: 0 (Enterprise Edition only) |
--xdcr-certificate=CERTIFICATE |
Specifies the pem-encoded certificate. The certificate is required for XDCR data encryption. Specify the full path for the location of the pem-encoded certificate file on the source cluster. (Enterprise Edition only) |
xdcr-replicate options
| xdcr-replicate options | Description |
|---|---|
--create |
Create and start a new replication |
--delete |
Stop and cancel a replication |
--xdcr-from-bucket=BUCKET |
Source bucket name to replicate from |
--xdcr-clucter-name=CLUSTERNAME |
Remote cluster to replicate to |
--xdcr-to-bucket=BUCKETNAME |
Remote bucket to replicate to |
--xdcr-replication-mode= PROTOCOL |
Select REST protocol or memcached for replication. xmem indicates memcached while capi indicates REST protocol. |
ssl-manage options
| ssl-manage options | Description |
|---|---|
--regenerate-cert=CERTIFICATE |
Regenerates a self-signed certificate on the destination cluster. Specify the full path for the location of the pem-encoded certificate file. For example, --regenerate-cert=./new.pem. (Enterprise Edition only) |
--retrieve-cert=CERTIFICATE |
Retrieves the self-signed certificate from the destination cluster to the source cluster. Specify a local location (full path) and file name for the pem-encoded certificate. For example, --retrieve-cert=./newCert.pem. (Enterprise Edition only) |
Managing servers
To set a data path for an unprovisioned cluster:
couchbase-cli node-init -c 192.168.0.1:8091 \
       --node-init-data-path=/tmp/data \
       --node-init-index-path=/tmp/index
To list servers in a cluster:
couchbase-cli server-list -c 192.168.0.1:8091
Retrieving server information
couchbase-cli server-info -c 192.168.0.1:8091
Adding nodes to clusters
The following example adds a node to a cluster but does not rebalance:
couchbase-cli server-add -c 192.168.0.1:8091 \
    --server-add=192.168.0.2:8091 \
    --server-add-username=Administrator \
    --server-add-password=password
The following example adds a node to a cluster and rebalances:
couchbase-cli rebalance -c 192.168.0.1:8091 \
    --server-add=192.168.0.2:8091 \
    --server-add-username=Administrator \
    --server-add-password=password
Removing nodes
The following example removes a node from a cluster and rebalances:
couchbase-cli rebalance -c 192.168.0.1:8091 \
    --server-remove=192.168.0.2:8091
The following example removes and adds nodes from/to a cluster and rebalances:
couchbase-cli rebalance -c 192.168.0.1:8091 \
    --server-remove=192.168.0.2 \
    --server-add=192.168.0.4 \
    --server-add-username=Administrator \
    --server-add-password=password
Stopping rebalance
The following example stops the current rebalancing:
couchbase-cli rebalance-stop -c 192.168.0.1:8091
Setting cluster parameters
The following example sets the username, password, port and ram quota:
couchbase-cli cluster-init -c 192.168.0.1:8091 \
    --cluster-init-username=Administrator \
    --cluster-init-password=password \
    --cluster-init-port=8080 \
    --cluster-init-ramsize=300
The following example changes the cluster username, password, port and ram quota:
couchbase-cli cluster-edit -c 192.168.0.1:8091 \
       --cluster-username=Administrator \
       --cluster-password=password \
       --cluster-port=8080 \
       --cluster-ramsize=300
Changing data paths
The following example changes the data path:
couchbase-cli node-init -c 192.168.0.1:8091 \
       --node-init-data-path=/tmp
Managing Rack Awareness
The Rack Awareness feature allows logical groupings of servers on a cluster where each server group physically belongs to a rack or availability zone. This feature provides the ability to specify that active and corresponding replica partitions be created on servers that are part of a separate rack or zone. To enable Rack Awareness, all servers in a cluster must be upgraded to use the Rack Awareness feature.
Note
The Rack Awareness feature with its server group capability is an Enterprise Edition feature.
To configure servers into groups, use the couchbase-cli tool with the group-manage command.
General syntax with group-manage:
couchbase-cli group-manage -c HOST:PORT
    -u USERNAME -p PASSWORD
    [OPTIONS]
-
-c HOST:PORT or --cluster=HOST:PORT - Cluster location
-
-u USERNAME or --username=USERNAME - Administrator username for the cluster
-
-p PASSWORD or --password=PASSWORD - Administrator password for the cluster
-
--list - Shows the server groups and the servers assigned to each server group.
--create --group-name=groupName- Creates a server group .
--delete --group-name=groupName- Removes an empty server group.
--rename=newGroupName --group-name=oldGroupName- Renames an existing server group.
-
--group-name=groupName --add-servers="HOST:PORT;HOST:PORT" - Adds servers to a group.
--from-group=groupName --to-group=groupName --move-servers="HOST:PORT;HOST:PORT"- Moves one or more servers from one group to another.
Creating server groups
In the following example, a server group is created.
Note
The `--create --group-name` command may fail when an exclamation (!) is present inside the group name.
couchbase-cli group-manage -c 192.168.0.1:8091
   -u myAdminName
   -p myAdminPassword
   --create --group-name=myGroupName
Adding servers to server groups
In the following example, two servers are added to a server group using the group-manage command.
couchbase-cli group-manage -c 192.168.0.1:8091
   -u myAdminName
   -p myAdminPassword
   --group-name=myNewGroup
   --add-servers="10.1.1.1:8091;10.1.1.2:8091"
In the following example, a server is added to the server group using the server-add command.
Note
The `couchbase-cli group-manage' command is the preferred method of adding servers to server group.
If the `--group-name` option is not specified with the `server-add` command, the server is added to the default group.
couchbase-cli server-add -c 192.168.0.1:8091
   --server-add=192.168.0.2:8091
   --server-add-username=Administrator
   --server-add-password=password
   --group-name=groupName
Moving servers from server groups
In the following example, two servers are moved from one server group to another using the group-manage command.
couchbase-cli group-manage -c 192.168.0.1:8091
   -u myAdminName
   -p myAdminPassword
   --from-group=myFirstGroup
   --to-group=mySecondGroup
   --move-servers="10.1.1.1:8091;10.1.1.2:8091"
Managing buckets
This section provides examples for listing, creating, modifying, flushing, and compacting buckets.
Listing bucketss
To list buckets in a cluster:
couchbase-cli bucket-list -c 192.168.0.1:8091
Creating buckets
To create a new dedicated port couchbase bucket:
couchbase-cli bucket-create -c 192.168.0.1:8091 \
       --bucket=test_bucket \
       --bucket-type=couchbase \
       --bucket-port=11222 \
       --bucket-ramsize=200 \
       --bucket-replica=1
To create a couchbase bucket and wait for bucket ready:
couchbase-cli bucket-create -c 192.168.0.1:8091 \
       --bucket=test_bucket \
       --bucket-type=couchbase \
       --bucket-port=11222 \
       --bucket-ramsize=200 \
       --bucket-replica=1 \
       --wait
To create a new sasl memcached bucket:
couchbase-cli bucket-create -c 192.168.0.1:8091 \
       --bucket=test_bucket \
       --bucket-type=memcached \
       --bucket-password=password \
       --bucket-ramsize=200 \
       --enable-flush=1 \
       --enable-index-replica=1
Modifying buckets
To modify a dedicated port bucket:
couchbase-cli bucket-edit -c 192.168.0.1:8091 \
       --bucket=test_bucket \
       --bucket-port=11222 \
       --bucket-ramsize=400 \
       --enable-flush=1
Deleting buckets
To delete a bucket:
couchbase-cli bucket-delete -c 192.168.0.1:8091 \
       --bucket=test_bucket
Flushing buckets
Flushing buckets involves:
- Enable the flush buckets option.
- Flush the bucket.
To enable the flush bucket option:
When you want to flush a data bucket you must first enable this option then actually issue the command to flush the data bucket. The other option available to enable data bucket flush is to use the Couchbase Web Console, see Creating and editing data buckets.
Note
We do not advise that you enable this option if your data bucket is in a production environment. Be aware that this is one of the preferred methods for enabling data bucket flush.
You can enable this option when you actually create the data bucket, or when you edit the bucket properties:
// To enable, set bucket flush to 1. Default:0
// To enable bucket flush when creating a bucket:

couchbase-cli bucket-create [bucket_name] [cluster_admin:pass] --enable-flush=[0|1]

// To enable bucket flush when editing the bucket properties:

couchbase-cli bucket-edit [bucket_name] [cluster_admin:pass] --enable-flush=[0|1]
After you enable this option, you can then flush the data bucket.
To flush a bucket:
After you explicitly enable data bucket flush, flush the data from the
bucket. Flushing a bucket is data destructive. Client applications using this
are advised to double check with the end user before sending such a request. You
can control and limit the ability to flush individual buckets by setting the
flushEnabled parameter on a bucket in Couchbase Web Console or via
couchbase-cli as described in the previous section. See also Creating and
Editing data buckets.
Syntax
> couchbase-cli bucket-flush [cluster_admin:pass] [bucket_name OPTIONS]
By default, this command confirms whether or not you truly want to flush the
data bucket. You can optionally call this command with the --force option to
flush data without confirmation.
Example
couchbase-cli bucket-flush -c 192.168.0.1:8091 \
       --force
Compacting buckets
To compact a bucket for both data and view:
couchbase-cli bucket-compact -c 192.168.0.1:8091 \
        --bucket=test_bucket
To compact a bucket for data only:
couchbase-cli bucket-compact -c 192.168.0.1:8091 \
        --bucket=test_bucket \
        --data-only
To compact a bucket for view only:
couchbase-cli bucket-compact -c 192.168.0.1:8091 \
        --bucket=test_bucket \
        --view-only
Managing XDCR
To create a XDCR remote cluster:
couchbase-cli xdcr-setup -c 192.168.0.1:8091 \
        --create \
        --xdcr-cluster-name=test \
        --xdcr-hostname=10.1.2.3:8091 \
        --xdcr-username=Administrator \
        --xdcr-password=password
To delete a XDCR remote cluster:
couchbase-cli xdcr-delete -c 192.168.0.1:8091 \
        --xdcr-cluster-name=test
Managing XDCR replication streams
To start a replication stream:
couchbase-cli xdcr-replicate -c 192.168.0.1:8091 \
        --create \
        --xdcr-cluster-name=test \
        --xdcr-from-bucket=default \
        --xdcr-to-bucket=default1
To delete a replication stream:
couchbase-cli xdcr-replicate -c 192.168.0.1:8091 \
        --delete \
        --xdcr-replicator=f4eb540d74c43fd3ac6d4b7910c8c92f/default/default
Managing remote clusters
To create a remote cluster reference:
In the following example the remote cluster is “RemoteCluster”.
couchbase-cli xdcr-setup -c 10.3.121.121:8091 -u Administrator  -p password \
    --create
    --xdcr-cluster-name=RemoteCluster
    --xdcr-hostname=10.3.121.123:8091
    --xdcr-username=Administrator
    --xdcr-password=password
To set a XDCR protocol:
An XDCR protocol for the mode of replication can be specified for XDCR. For information about this feature, see XDCR Behavior and Limitations.
To change a XDCR replication protocol for an existing XDCR replication:
If you change want the replication protocol for an existing XDCR replication:
- Delete the replication.
- Re-create the replication with your preference.
First we create a destination cluster reference named “RemoteCluster”:
couchbase-cli xdcr-setup -c hostname_:8091 -u Administrator  -p password \
  --create --xdcr-cluster-name=RemoteCluster  --xdcr-hostname=10.3.121.123:8091 \
  --xdcr-username=Administrator  --xdcr-password=password
Upon success, we get this response:
SUCCESS: init RemoteCluster
Now you can start replication to the remote cluster using memcached protocol as the existing default:
couchbase-cli xdcr-replicate -c host_name:8091 -u Administrator -p password
        --xdcr-cluster-name RemoteCluster
        --xdcr-from-bucket default
        --xdcr-to-bucket backup
To explicitly set the protocol to memcached:
couchbase-cli xdcr-replicate -c host_name:8091 -u Administrator -p password \
    --xdcr-cluster-name RemoteCluster
    --xdcr-from-bucket default
    --xdcr-to-bucket backup
    --xdcr-replication-mode xmem
To set the protocol to CAPI:
couchbase-cli xdcr-replicate -c host_name:8091 -u Administrator -p password \
    --xdcr-cluster-name RemoteCluster
    --xdcr-from-bucket default
    --xdcr-to-bucket backup
    --xdcr-replication-mode capi
If there is already an existing replication for a bucket, you get an error when you try to start the replication again with any new settings:
couchbase-cli xdcr-replicate -c 10.3.121.121:8091 -u Administrator -p password
    --xdcr-cluster-name RemoteCluster
    --xdcr-from-bucket default
    --xdcr-to-bucket backup
    --xdcr-replication-mode capi
Results in the following error:
ERROR: unable to create replication (400) Bad Request
        {u'errors': {u'_': u'Replication to the same remote cluster and bucket already exists'}}
ERROR: Replication to the same remote cluster and bucket already exists
Managing XDCR data encryption
The Couchbase Server command line interface (CLI) enables XDCR data encryption (Enterprise Edition only)
when an XDCR cluster reference is created or modified. The CLI provides the couchbase-cli tool and the xdcr-setup command.
The option --xdcr-demand-encryption=1 enables XDCR data encryption -xdcr-certificate=CERTIFICATE
provides the SSL certificate for data security.
Enabling XDCR data encryption
To setup XDCR with SSL data encryption:
- Retrieve the certificate from the destination cluster. See Managing SSL certificates for more information
- Create or modify the XDCR configuration to allow data encryption and provide the SSL certificate.
- Define the replication.
To configure XDCR with SSL data encryption, the xdcr-setup command is used.
Syntax
couchbase-cli xdcr-setup -c localHost:port -u localAdmin -p localPassword
  --create --xdcr-cluster-name=remoteClustername
  --xdcr-hostname=remoteHost:port
  --xdcr-username=remoteAdmin --xdcr-password=remotePassword
  --xdcr-demand-encryption=[0|1]   // 1 to enable, 0 to disable (default)
  --xdcr-certificate=<localPath>/<certFile>.pem
Example
couchbase-cli xdcr-setup -c 10.3.4.186:8091 -u localAdmin -p localPassword
  --create --xdcr-cluster-name=Omaha
  --xdcr-hostname=10.3.4.187:8091
  --xdcr-username=Peyton --xdcr-password=Manning
  --xdcr-demand-encryption=1
  --xdcr-certificate=./new.pem
Results
The following is an example of results for a successful XDCR configuration.
SUCCESS: init/edit test
<<replication reference created>>
Disabling XDCR data encryption
To disable XDCR data encryption, execute couchbase-cli xdcr-setup with --xdcr-demand-encryption=0.
Example
couchbase-cli xdcr-setup -c 10.3.4.186:8091 -u localAdmin -p localPassword
  --create --xdcr-cluster-name=Omaha
  --xdcr-hostname=10.3.4.187:8091
  --xdcr-username=Peyton --xdcr-password=Manning
  --xdcr-demand-encryption=0
Managing SSL certificates
Retrieving an SSL certificate for XDCR data encryption, should be done in a secure manner, such as with ssh and scp. For example:
- Use a secure method to log in to a node on the destination cluster. For example:
ssh. - Retrieve the certificate with the
couchbase-cli ssl-managecommand. - Use a secure method to transfer the certificate from the destination cluster to the source cluster. For example:
scp. - Proceed with setting up XDCR with SSL data encryption. See Managing XDCR data encryption.
The couchbase-cli ssl-manage command provides the following options for regenerating and retrieving certificates.
--regenerate-cert=CERTIFICATE- Regenerates a self-signed certificate on the destination cluster. Specify the full path for the location of the pem-encoded certificate file. For example,
--regenerate-cert=./new.pem. --retrieve-cert=CERTIFICATE- Retrieves the self-signed certificate from the destination cluster to the source cluster. Specify a local location (full path) and file name for the pem-encoded certificate. For example,
--retrieve-cert=./newCert.pem.
Retrieving certificates
To retrieve an existing self-signed certificate, the ssl-manage command is used.
Syntax
couchbase-cli ssl-manage -c localHost:port
  -u Administrator -p password
  --retrieve-cert=./<newCert>.pem
Example
couchbase-cli ssl-manage -c 10.3.4.187:8091
  -u Administrator -p password
  --retrieve-cert=./newCert.pem
Results
The following is an example of results for a successful retrieval of the certificate:
SUCCESS: retrieve certificate to './newCert.pem'
Certificate matches what seen on GUI
Regenerating certificates
To regenerate a self-signed certificate, use couchbase-cli ssl-manage command.
Syntax
couchbase-cli ssl-manage
  -c remoteHost:port
  -u adminName -p adminPassword
  --regenerate-cert=CERTIFICATE
Example
The following is an example of the CLI commands and options for regenerating a self-signed certificate with the ssl-manage command:
couchbase-cli ssl-manage
  -c 10.3.4.187:8091
  -u Administrator -p password
  --regenerate-cert=./new.pem
Results
The following is an example of results for a successful regeneration of the certification:
SUCCESS: regenerate certificate to './new.pem'
To retrieve an existing self-signed certificate, the ssl-manage command is used.
Syntax
couchbase-cli ssl-manage -c localHost:port
  -u Administrator -p password
  --retrieve-cert=./<newCert>.pem
Example
couchbase-cli ssl-manage -c 10.3.4.187:8091
  -u Administrator -p password
  --retrieve-cert=./newCert.pem
Results
The following is an example of results for a successful retrieval of the certificate:
SUCCESS: retrieve certificate to './newCert.pem'
Certificate matches what seen on GUI
cbstats tool
You use the cbstats tool to get node- and cluster-level statistics about
performance and items in storage. The tool can be found in the following
locations, depending on your platform:
| Linux | /opt/couchbase/bin/cbstats
|
|---|---|
| Windows | C:\Program Files\Couchbase\Server\bin\cbstats.exe
|
| Mac OS X | /Applications/Couchbase Server.app/Contents/Resources/couchbase-core/bin/cbstats
|
Be aware that this tool is a per-node, per-bucket operation. That means that if you want to perform this operation, you must specify the IP address of a node in the cluster and a named bucket. If you do not provided a named bucket, the server will apply the setting to any default bucket that exists at the specified node. If you want to perform this operation for an entire cluster, you will need to perform the command for every node/bucket combination that exists for that cluster.
Use this tool to get the couchbase node statistics. The general format for the command is:
> cbstats <IP>:11210 <command> -b <bucket_name> [-p <bucket_password>]
Where BUCKET_HOST is the hostname and port ( HOSTNAME[:PORT] ) combination
for a Couchbase bucket, and username and password are the authentication for
the named bucket. COMMAND (and [options] ) are one of the follow options:
all
allocator
checkpoint [vbid]
dispatcher [logs]
hash [detail]
items
kvstore
kvtimings
raw argument
reset
slabs
tap [username password]
tapagg
timings
vkey keyname vbid
From these options, all and timings will be the main ones you will use to
understand cluster or node performance. The other options are used by Couchbase
internally and to help resolve customer support incidents.
For example, the cbstats output can be used with other command-line tools to
sort and filter the data.
> watch --diff "cbstats \
    ip-10-12-19-81:11210 -b bucket_name -p bucket_password all | egrep 'item|mem|flusher|ep_queue|bg|eje|resi|warm'"
The following provides the stats that are created by cbstats:
Toplevel stats
| Stat | Description |
|---|---|
| uuid | The unique identifier for the bucket |
| ep_version | Version number of ep_engine |
| ep_storage_age | Seconds since most recently |
| stored object was initially queued | |
| ep_storage_age_highwat | ep_storage_age high water mark |
| ep_startup_time | System-generated engine startup time |
| ep_max_txn_size | Max number of updates per transaction |
| ep_data_age | Seconds since most recently |
| stored object was modified | |
| ep_data_age_highwat | ep_data_age high water mark |
| ep_too_young | Number of times an object was |
| not stored due to being too young | |
| ep_too_old | Number of times an object was |
| stored after being dirty too long | |
| ep_total_enqueued | Total number of items queued for |
| persistence | |
| ep_total_new_items | Total number of persisted new items |
| ep_total_del_items | Total number of persisted deletions |
| ep_total_persisted | Total number of items persisted |
| ep_item_flush_failed | Number of times an item failed to |
| flush due to storage errors | |
| ep_item_commit_failed | Number of times a transaction failed |
| to commit due to storage errors | |
| ep_item_begin_failed | Number of times a transaction failed |
| to start due to storage errors | |
| ep_expired_access | Number of times an item was expired on |
| application access. | |
| ep_expired_pager | Number of times an item was expired by |
| ep engine item pager | |
| ep_item_flush_expired | Number of times an item is not flushed |
| due to the expiry of the item | |
| ep_queue_size | Number of items queued for storage |
| ep_flusher_todo | Number of items currently being |
| written | |
| ep_flusher_state | Current state of the flusher thread |
| ep_commit_num | Total number of write commits |
| ep_commit_time | Number of milliseconds of most recent |
| commit | |
| ep_commit_time_total | Cumulative milliseconds spent |
| committing | |
| ep_vbucket_del | Number of vbucket deletion events |
| ep_vbucket_del_fail | Number of failed vbucket deletion |
| events | |
| ep_vbucket_del_max_walltime | Max wall time (µs) spent by deleting |
| a vbucket | |
| ep_vbucket_del_avg_walltime | Avg wall time (µs) spent by deleting |
| a vbucket | |
| ep_flush_duration_total | Cumulative seconds spent flushing |
| ep_flush_all | True if disk flush_all is scheduled |
| ep_num_ops_get_meta | Number of getMeta operations |
| ep_num_ops_set_meta | Number of setWithMeta operations |
| ep_num_ops_del_meta | Number of delWithMeta operations |
| ep_num_ops_set_meta_res_failed | Number of setWithMeta ops that failed |
| conflict resolution | |
| ep_num_ops_del_meta_res_failed | Number of delWithMeta ops that failed |
| conflict resolution | |
| ep_num_ops_set_ret_meta | Number of setRetMeta operations |
| ep_num_ops_del_ret_meta | Number of delRetMeta operations |
| curr_items | Num items in active vbuckets (temp + |
| live) | |
| curr_temp_items | Num temp items in active vbuckets |
| curr_items_tot | Num current items including those not |
| active (replica, dead and pending | |
| states) | |
| ep_kv_size | Memory used to store item metadata, |
| keys and values, no matter the | |
| vbucket’s state. If an item’s value is | |
| ejected, this stats will be | |
| decremented by the size of the item’s | |
| value. | |
| ep_value_size | Memory used to store values for |
| resident keys | |
| ep_overhead | Extra memory used by transient data |
| like persistence queues, replication | |
| queues, checkpoints, etc | |
| ep_mem_low_wat | Low water mark for auto-evictions |
| ep_mem_high_wat | High water mark for auto-evictions |
| ep_total_cache_size | The total byte size of all items, no |
| matter the vbucket’s state, no matter | |
| if an item’s value is ejected | |
| ep_oom_errors | Number of times unrecoverable OOMs |
| happened while processing operations | |
| ep_tmp_oom_errors | Number of times temporary OOMs |
| happened while processing operations | |
| ep_mem_tracker_enabled | True if memory usage tracker is |
| enabled | |
| ep_bg_fetched | Number of items fetched from disk |
| ep_bg_meta_fetched | Number of meta items fetched from disk |
| ep_bg_remaining_jobs | Number of remaining bg fetch jobs |
| ep_max_bg_remaining_jobs | Max number of remaining bg fetch jobs |
| that we have seen in the queue so far | |
| ep_tap_bg_fetched | Number of tap disk fetches |
| ep_tap_bg_fetch_requeued | Number of times a tap bg fetch task is |
| requeued | |
| ep_num_pager_runs | Number of times we ran pager loops |
| to seek additional memory | |
| ep_num_expiry_pager_runs | Number of times we ran expiry pager |
| loops to purge expired items from | |
| memory/disk | |
| ep_num_access_scanner_runs | Number of times we ran access scanner |
| to snapshot working set | |
| ep_access_scanner_num_items | Number of items that last access |
| scanner task swept to access log. | |
| ep_access_scanner_task_time | Time of the next access scanner task |
| (GMT) | |
| ep_access_scanner_last_runtime | Number of seconds that last access |
| scanner task took to complete. | |
| ep_items_rm_from_checkpoints | Number of items removed from closed |
| unreferenced checkpoints | |
| ep_num_value_ejects | Number of times item values got |
| ejected from memory to disk | |
| ep_num_eject_failures | Number of items that could not be |
| ejected | |
| ep_num_not_my_vbuckets | Number of times Not My VBucket |
| exception happened during runtime | |
| ep_tap_keepalive | Tap keepalive time |
| ep_dbname | DB path |
| ep_io_num_read | Number of io read operations |
| ep_io_num_write | Number of io write operations |
| ep_io_read_bytes | Number of bytes read (key + values) |
| ep_io_write_bytes | Number of bytes written (key + values) |
| ep_pending_ops | Number of ops awaiting pending |
| vbuckets | |
| ep_pending_ops_total | Total blocked pending ops since reset |
| ep_pending_ops_max | Max ops seen awaiting 1 pending |
| vbucket | |
| ep_pending_ops_max_duration | Max time (µs) used waiting on pending |
| vbuckets | |
| ep_bg_num_samples | The number of samples included in the |
| average | |
| ep_bg_min_wait | The shortest time (µs) in the wait |
| queue | |
| ep_bg_max_wait | The longest time (µs) in the wait |
| queue | |
| ep_bg_wait_avg | The average wait time (µs) for an item |
| before it’s serviced by the dispatcher | |
| ep_bg_min_load | The shortest load time (µs) |
| ep_bg_max_load | The longest load time (µs) |
| ep_bg_load_avg | The average time (µs) for an item to |
| be loaded from the persistence layer | |
| ep_num_non_resident | The number of non-resident items |
| ep_bg_wait | The total elapse time for the wait |
| queue | |
| ep_bg_load | The total elapse time for items to be |
| loaded from the persistence layer | |
| ep_allow_data_loss_during_shutdown | Whether data loss is allowed during |
| server shutdown | |
| ep_alog_block_size | Access log block size |
| ep_alog_path | Path to the access log |
| ep_alog_sleep_time | Interval between access scanner runs |
| in minutes | |
| ep_alog_task_time | Hour in GMT time when access scanner |
| task is scheduled to run | |
| ep_backend | The backend that is being used for |
| data persistence | |
| ep_bg_fetch_delay | The amount of time to wait before |
| doing a background fetch | |
| ep_chk_max_items | The number of items allowed in a |
| checkpoint before a new one is created | |
| ep_chk_period | The maximum lifetime of a checkpoint |
| before a new one is created | |
| ep_chk_persistence_remains | Number of remaining vbuckets for |
| checkpoint persistence | |
| ep_chk_persistence_timeout | Timeout for vbucket checkpoint |
| persistence | |
| ep_chk_remover_stime | The time interval for purging closed |
| checkpoints from memory | |
| ep_config_file | The location of the ep-engine config |
| file | |
| ep_couch_bucket | The name of this bucket |
| ep_couch_host | The hostname that the CouchDB views |
| server is listening on | |
| ep_couch_port | The port the CouchDB views server is |
| listening on | |
| ep_couch_reconnect_sleeptime | The amount of time to wait before |
| reconnecting to CouchDB | |
| ep_couch_response_timeout | Length of time to wait for a response |
| from CouchDB before reconnecting | |
| ep_data_traffic_enabled | Whether or not data traffic is enabled |
| for this bucket | |
| ep_degraded_mode | True if the engine is either warming |
| up or data traffic is disabled | |
| ep_exp_pager_stime | The time interval for purging expired |
| items from memory | |
| ep_expiry_window | Expiry window to not persist an object |
| that is expired | |
| ep_failpartialwarmup | True if we want kill the bucket if |
| warmup fails | |
| ep_flushall_enabled | True if this bucket allows the use of |
| the flush_all command | |
| ep_getl_default_timeout | The default getl lock duration |
| ep_getl_max_timeout | The maximum getl lock duration |
| ep_ht_locks | The amount of locks per vb hashtable |
| ep_ht_size | The initial size of each vb hashtable |
| ep_item_num_based_new_chk | True if the number of items in the |
| current checkpoint plays a role in a | |
| new checkpoint creation | |
| ep_keep_closed_chks | True if we want to keep the closed |
| checkpoints for each vbucket unless | |
| the memory usage is above high water | |
| mark | |
| ep_max_checkpoints | The maximum amount of checkpoints that |
| can be in memory per vbucket | |
| ep_max_item_size | The maximum value size |
| ep_max_size | The maximum amount of memory this |
| bucket can use | |
| ep_max_vbuckets | The maximum amount of vbuckets that |
| can exist in this bucket | |
| ep_mutation_mem_threshold | The ratio of total memory available |
| that we should start sending temp oom | |
| or oom message when hitting | |
| ep_pager_active_vb_pcnt | Active vbuckets paging percentage |
| ep_tap_ack_grace_period | The amount of time to wait for a tap |
| acks before disconnecting | |
| ep_tap_ack_initial_sequence_number | The initial sequence number for a tap |
| ack when a tap stream is created | |
| ep_tap_ack_interval | The amount of messages a tap producer |
| should send before requesting an ack | |
| ep_tap_ack_window_size | The maximum amount of ack requests |
| that can be sent before the consumer | |
| sends a response ack. When the window | |
| is full the tap stream is paused. | |
| ep_tap_backfill_resident | The resident ratio for deciding how to |
| do backfill. If under the ratio we | |
| schedule full disk backfill. If above | |
| the ratio then we do bg fetches for | |
| non-resident items. | |
| ep_tap_backlog_limit | The maximum amount of backfill items |
| that can be in memory waiting to be | |
| sent to the tap consumer | |
| ep_tap_backoff_period | The number of seconds the tap |
| connection | |
| ep_tap_bg_fetch_requeued | Number of times a tap bg fetch task is |
| requeued | |
| ep_tap_bg_max_pending | The maximum number of bg jobs a tap |
| connection may have | |
| ep_tap_noop_interval | Number of seconds between a noop is |
| sent on an idle connection | |
| ep_tap_requeue_sleep_time | The amount of time to wait before a |
| failed tap item is requeued | |
| ep_tap_throttle_cap_pcnt | Percentage of total items in write |
| queue at which we throttle tap input | |
| ep_tap_throttle_queue_cap | Max size of a write queue to throttle |
| incoming tap input | |
| ep_tap_throttle_threshold | Percentage of max mem at which we |
| begin NAKing tap input | |
| ep_uncommitted_items | The amount of items that have not been |
| written to disk | |
| ep_vb0 | Whether vbucket 0 should be created by |
| default | |
| ep_waitforwarmup | True if we should wait for the warmup |
| process to complete before enabling | |
| traffic | |
| ep_warmup | Shows if warmup is enabled / disabled |
| ep_warmup_batch_size | The size of each batch loaded during |
| warmup | |
| ep_warmup_dups | Number of Duplicate items encountered |
| during warmup | |
| ep_warmup_min_items_threshold | Percentage of total items warmed up |
| before we enable traffic | |
| ep_warmup_min_memory_threshold | Percentage of max mem warmed up before |
| we enable traffic | |
| ep_warmup_oom | The amount of oom errors that occurred |
| during warmup | |
| ep_warmup_thread | The status of the warmup thread |
| ep_warmup_time | The amount of time warmup took |
vBucket total stats
| Stat | Description |
|---|---|
| ep_vb_total | Total vBuckets (count) |
| curr_items_tot | Total number of items |
| curr_items | Number of active items in memory |
| curr_temp_items | Number of temporary items in memory |
| vb_dead_num | Number of dead vBuckets |
| ep_diskqueue_items | Total items in disk queue |
| ep_diskqueue_memory | Total memory used in disk queue |
| ep_diskqueue_fill | Total enqueued items on disk queue |
| ep_diskqueue_drain | Total drained items on disk queue |
| ep_diskqueue_pending | Total bytes of pending writes |
| ep_vb_snapshot_total | Total VB state snapshots persisted in disk |
| ep_meta_data_memory | Total memory used by meta data |
Active vBucket class stats
| Stat | Description |
|---|---|
| vb_active_num | Number of active vBuckets |
| vb_active_curr_items | Number of in memory items |
| vb_active_num_non_resident | Number of non-resident items |
| vb_active_perc_mem_resident | % memory resident |
| vb_active_eject | Number of times item values got ejected |
| vb_active_expired | Number of times an item was expired |
| vb_active_ht_memory | Memory overhead of the hashtable |
| vb_active_itm_memory | Total item memory |
| vb_active_meta_data_memory | Total metadata memory |
| vb_active_ops_create | Number of create operations |
| vb_active_ops_update | Number of update operations |
| vb_active_ops_delete | Number of delete operations |
| vb_active_ops_reject | Number of rejected operations |
| vb_active_queue_size | Active items in disk queue |
| vb_active_queue_memory | Memory used for disk queue |
| vb_active_queue_age | Sum of disk queue item age in milliseconds |
| vb_active_queue_pending | Total bytes of pending writes |
| vb_active_queue_fill | Total enqueued items |
| vb_active_queue_drain | Total drained items |
Replica vBucket stats
| Stat | Description |
|---|---|
| vb_replica_num | Number of replica vBuckets |
| vb_replica_curr_items | Number of in memory items |
| vb_replica_num_non_resident | Number of non-resident items |
| vb_replica_perc_mem_resident | % memory resident |
| vb_replica_eject | Number of times item values got ejected |
| vb_replica_expired | Number of times an item was expired |
| vb_replica_ht_memory | Memory overhead of the hashtable |
| vb_replica_itm_memory | Total item memory |
| vb_replica_meta_data_memory | Total metadata memory |
| vb_replica_ops_create | Number of create operations |
| vb_replica_ops_update | Number of update operations |
| vb_replica_ops_delete | Number of delete operations |
| vb_replica_ops_reject | Number of rejected operations |
| vb_replica_queue_size | Replica items in disk queue |
| vb_replica_queue_memory | Memory used for disk queue |
| vb_replica_queue_age | Sum of disk queue item age in milliseconds |
| vb_replica_queue_pending | Total bytes of pending writes |
| vb_replica_queue_fill | Total enqueued items |
| vb_replica_queue_drain | Total drained items |
Pending vBucket stats
| Stat | Description |
|---|---|
| vb_pending_num | Number of pending vBuckets |
| vb_pending_curr_items | Number of in memory items |
| vb_pending_num_non_resident | Number of non-resident items |
| vb_pending_perc_mem_resident | % memory resident |
| vb_pending_eject | Number of times item values got ejected |
| vb_pending_expired | Number of times an item was expired |
| vb_pending_ht_memory | Memory overhead of the hashtable |
| vb_pending_itm_memory | Total item memory |
| vb_pending_meta_data_memory | Total metadata memory |
| vb_pending_ops_create | Number of create operations |
| vb_pending_ops_update | Number of update operations |
| vb_pending_ops_delete | Number of delete operations |
| vb_pending_ops_reject | Number of rejected operations |
| vb_pending_queue_size | Pending items in disk queue |
| vb_pending_queue_memory | Memory used for disk queue |
| vb_pending_queue_age | Sum of disk queue item age in milliseconds |
| vb_pending_queue_pending | Total bytes of pending writes |
| vb_pending_queue_fill | Total enqueued items |
| vb_pending_queue_drain | Total drained items |
Tap stats
| Stat | Description |
|---|---|
| ep_tap_ack_grace_period | The amount of time to wait for a tap acks |
| before disconnecting | |
| ep_tap_ack_interval | The amount of messages a tap producer |
| should send before requesting an ack | |
| ep_tap_ack_window_size | The maximum amount of ack requests that |
| can be sent before the consumer sends a | |
| response ack. When the window is full the | |
| tap stream is paused | |
| ep_tap_queue_backfillremaining | Number of items needing to be backfilled |
| ep_tap_total_backlog_size | Number of remaining items for replication |
| ep_tap_total_queue | Sum of tap queue sizes on the current |
| tap queues | |
| ep_tap_total_fetched | Sum of all tap messages sent |
| ep_tap_bg_max_pending | The maximum number of bg jobs a tap |
| connection may have | |
| ep_tap_bg_fetched | Number of tap disk fetches |
| ep_tap_bg_fetch_requeued | Number of times a tap bg fetch task is |
| requeued | |
| ep_tap_fg_fetched | Number of tap memory fetches |
| ep_tap_deletes | Number of tap deletion messages sent |
| ep_tap_throttled | Number of tap messages refused due to |
| throttling | |
| ep_tap_count | Number of tap connections |
| ep_tap_bg_num_samples | The number of tap bg fetch samples |
| included in the avg | |
| ep_tap_bg_min_wait | The shortest time (µs) for a tap item |
| before it is serviced by the dispatcher | |
| ep_tap_bg_max_wait | The longest time (µs) for a tap item |
| before it is serviced by the dispatcher | |
| ep_tap_bg_wait_avg | The average wait time (µs) for a tap item |
| before it is serviced by the dispatcher | |
| ep_tap_bg_min_load | The shortest time (µs) for a tap item to |
| be loaded from the persistence layer | |
| ep_tap_bg_max_load | The longest time (µs) for a tap item to |
| be loaded from the persistence layer | |
| ep_tap_bg_load_avg | The average time (µs) for a tap item to |
| be loaded from the persistence layer | |
| ep_tap_noop_interval | The number of secs between a noop is |
| added to an idle connection | |
| ep_tap_backoff_period | The number of seconds the tap connection |
| should back off after receiving ETMPFAIL | |
| ep_tap_queue_fill | Total enqueued items |
| ep_tap_queue_drain | Total drained items |
| ep_tap_queue_backoff | Total back-off items |
| ep_tap_queue_backfill | Number of backfill remaining |
| ep_tap_queue_itemondisk | Number of items remaining on disk |
| ep_tap_throttle_threshold | Percentage of memory in use before we |
| throttle tap streams | |
| ep_tap_throttle_queue_cap | Disk write queue cap to throttle |
| tap streams |
Per Tap client stats
Each stat begins with =ep_tapq:= followed by a unique /client_id/ and another colon. For example, if your client is named, =slave1=, the =qlen= stat would be =ep_tapq:slave1:qlen=.
| Stat | Description | P/C |
|---|---|---|
| type | The kind of tap connection (producer or | PC |
| consumer) | ||
| created | Creation time for the tap connection | PC |
| supports_ack | true if the connection use acks | PC |
| connected | true if this client is connected | PC |
| disconnects | Number of disconnects from this client | PC |
| reserved | true if the tap stream is reserved | P |
| suspended | true if the tap stream is suspended | P |
| qlen | Queue size for the given client_id | P |
| qlen_high_pri | High priority tap queue items | P |
| qlen_low_pri | Low priority tap queue items | P |
| vb_filters | Size of connection vbucket filter set | P |
| vb_filter | The content of the vbucket filter | P |
| rec_fetched | Tap messages sent to the client | P |
| rec_skipped | Number of messages skipped due to | P |
| tap reconnect with a different filter | P | |
| idle | True if this connection is idle | P |
| has_queued_item | True if there are any remaining items | P |
| from hash table or disk | ||
| bg_result_size | Number of ready background results | P |
| bg_jobs_issued | Number of background jobs started | P |
| bg_jobs_completed | Number of background jobs completed | P |
| flags | Connection flags set by the client | P |
| pending_disconnect | true if we’re hanging up on this client | P |
| paused | true if this client is blocked | P |
| pending_backfill | true if we’re still backfilling keys | P |
| for this connection | P | |
| pending_disk_backfill | true if we’re still backfilling keys | P |
| from disk for this connection | P | |
| backfill_completed | true if all items from backfill is | P |
| successfully transmitted to the client | P | |
| backfill_start_timestamp | Timestamp of backfill start | P |
| reconnects | Number of reconnects from this client | P |
| backfill_age | The age of the start of the backfill | P |
| ack_seqno | The current tap ACK sequence number | P |
| recv_ack_seqno | Last receive tap ACK sequence number | P |
| ack_log_size | Tap ACK backlog size | P |
| ack_window_full | true if our tap ACK window is full | P |
| seqno_ack_requested | The seqno of the ack message that the | P |
| producer is wants to get a response for | ||
| expires | When this ACK backlog expires | P |
| queue_memory | Memory used for tap queue | P |
| queue_fill | Total queued items | P |
| queue_drain | Total drained items | P |
| queue_backoff | Total back-off items | P |
| queue_backfillremaining | Number of backfill remaining | P |
| queue_itemondisk | Number of items remaining on disk | P |
| total_backlog_size | Num of remaining items for replication | P |
| total_noops | Number of NOOP messages sent | P |
| num_checkpoint_end | Number of chkpoint end operations | C |
| num_checkpoint_end_failed | Number of chkpoint end operations failed | C |
| num_checkpoint_start | Number of chkpoint end operations | C |
| num_checkpoint_start_failed | Number of chkpoint end operations failed | C |
| num_delete | Number of delete operations | C |
| num_delete_failed | Number of failed delete operations | C |
| num_flush | Number of flush operations | C |
| num_flush_failed | Number of failed flush operations | C |
| num_mutation | Number of mutation operations | C |
| num_mutation_failed | Number of failed mutation operations | C |
| num_opaque | Number of opaque operation | C |
| num_opaque_failed | Number of failed opaque operations | C |
| num_vbucket_set | Number of vbucket set operations | C |
| num_vbucket_set_failed | Number of failed vbucket set operations | C |
| num_unknown | Number of unknown operations | C |
Tap aggregated stats
Aggregated tap stats allow named tap connections to be logically grouped and aggregated together by prefixes.
For example, if all of your tap connections started with =rebalance= or =replication=, you could call =stats tapagg = to request stats grouped by everything before the first == character, giving you a set for =rebalance= and a set for =replication=.
Results
| Stat | Description |
|---|---|
| [prefix]:count | Number of connections matching this prefix |
| [prefix]:qlen | Total length of queues with this prefix |
| [prefix]:backfill_remaining | Number of items needing to be backfilled |
| [prefix]:backoff | Total number of backoff events |
| [prefix]:drain | Total number of items drained |
| [prefix]:fill | Total number of items filled |
| [prefix]:itemondisk | Number of items remaining on disk |
| [prefix]:total_backlog_size | Num of remaining items for replication |
Timing stats
Timing stats provide histogram data from high resolution timers over various operations within the system.
General form
As this data is multi-dimensional, some parsing may be required for machine processing. It’s somewhat human readable, but the =stats= script mentioned in the Getting Started section above will do fancier formatting for you.
- Consider the following sample stats:
STAT disk_insert_8,16 9488
- STAT disk_insert_16,32 290
- STAT disk_insert_32,64 73
- STAT disk_insert_64,128 86
- STAT disk_insert_128,256 48
- STAT disk_insert_256,512 2
- STAT disk_insert_512,1024 12
- STAT disk_insert_1024,2048 1
This tells you that =disk_insert= took 8-16µs 9,488 times, 16-32µs 290 times, and so on.
- The same stats displayed through the =stats= CLI tool would look like
- this:
disk_insert (10008 total)
- 8us - 16us : ( 94.80%) 9488 ###########################################
- 16us - 32us : ( 97.70%) 290 #
- 32us - 64us : ( 98.43%) 73
- 64us - 128us : ( 99.29%) 86
- 128us - 256us : ( 99.77%) 48
- 256us - 512us : ( 99.79%) 2
- 512us - 1ms : ( 99.91%) 12
- 1ms - 2ms : ( 99.92%) 1
Available stats
The following histograms are available from “timings” in the above form to describe when time was spent doing various things:
| Stat | Description |
|---|---|
| bg_wait | bg fetches waiting in the dispatcher queue |
| bg_load | bg fetches waiting for disk |
| bg_tap_wait | tap bg fetches waiting in the dispatcher queue |
| bg_tap_load | tap bg fetches waiting for disk |
| pending_ops | client connections blocked for operations in pending vbuckets |
| storage_age | Analogous to ep_storage_age in main stats |
| data_age | Analogous to ep_data_age in main stats |
| get_cmd | servicing get requests |
| arith_cmd | servicing incr/decr requests |
| get_stats_cmd | servicing get_stats requests |
| get_vb_cmd | servicing vbucket status requests |
| set_vb_cmd | servicing vbucket set state commands |
| del_vb_cmd | servicing vbucket deletion commands |
| chk_persistence_cmd | waiting for checkpoint persistence |
| tap_vb_set | servicing tap vbucket set state commands |
| tap_vb_reset | servicing tap vbucket reset commands |
| tap_mutation | servicing tap mutations |
| notify_io | waking blocked connections |
| paged_out_time | time (in seconds) objects are non-resident |
| disk_insert | waiting for disk to store a new item |
| disk_update | waiting for disk to modify an existing item |
| disk_del | waiting for disk to delete an item |
| disk_vb_del | waiting for disk to delete a vbucket |
| disk_commit | waiting for a commit after a batch of updates |
| disk_vbstate_snapshot | Time spent persisting vbucket state changes |
| item_alloc_sizes | Item allocation size counters (in bytes) |
Hash stats
Hash stats provide information on your vbucket hash tables.
Requesting these stats does affect performance, so don’t do it too regularly, but it’s useful for debugging certain types of performance issues. For example, if your hash table is tuned to have too few buckets for the data load within it, the =max_depth= will be too large and performance will suffer.
| Stat | Description |
|---|---|
| avg_count | The average number of items per vbucket |
| avg_max | The average max depth of a vbucket hash table |
| avg_min | The average min depth of a vbucket hash table |
| largest_max | The largest hash table depth of in all vbuckets |
| largest_min | The largest minimum hash table depth of all vbuckets |
| max_count | The largest number of items in a vbucket |
| min_count | The smallest number of items in a vbucket |
| total_counts | The total number of items in all vbuckets |
It is also possible to get more detailed hash tables stats by using ‘hash detail’. This will print per-vbucket stats.
Each stat is prefixed with =vb_= followed by a number, a colon, then the individual stat name.
For example, the stat representing the size of the hash table for vbucket 0 is =vb_0:size=.
| Stat | Description |
|---|---|
| state | The current state of this vbucket |
| size | Number of hash buckets |
| locks | Number of locks covering hash table operations |
| min_depth | Minimum number of items found in a bucket |
| max_depth | Maximum number of items found in a bucket |
| reported | Number of items this hash table reports having |
| counted | Number of items found while walking the table |
| resized | Number of times the hash table resized |
| mem_size | Running sum of memory used by each item |
| mem_size_counted | Counted sum of current memory used by each item |
Checkpoint stats
Checkpoint stats provide detailed information on per-vbucket checkpoint data structure.
Like Hash stats, requesting these stats has some impact on performance. Therefore, please do not poll them from the server frequently. Each stat is prefixed with =vb_= followed by a number, a colon, and then each stat name.
| Stat | Description |
|---|---|
| cursor_name:cursor_checkpoint_id | Checkpoint ID at which the cursor is |
| name ‘cursor_name’ is pointing now | |
| open_checkpoint_id | ID of the current open checkpoint |
| num_tap_cursors | Number of referencing TAP cursors |
| num_checkpoint_items | Number of total items in a checkpoint |
| data structure | |
| num_open_checkpoint_items | Number of items in the open checkpoint |
| num_checkpoints | Number of checkpoints in a checkpoint |
| data structure | |
| num_items_for_persistence | Number of items remaining for persistence |
| checkpoint_extension | True if the open checkpoint is in the |
| extension mode | |
| state | The state of the vbucket this checkpoint |
| contains data for | |
| last_closed_checkpoint_id | The last closed checkpoint number |
| persisted_checkpoint_id | The last persisted checkpoint number |
Memory stats
This provides various memory-related stats including the stats from tcmalloc. Note that tcmalloc stats are not available on some operating systems (e.g., Windows) that do not support tcmalloc.
| Stat | Description |
|---|---|
| mem_used (deprecated) | Engine’s total memory usage |
| bytes | Engine’s total memory usage |
| ep_kv_size | Memory used to store item metadata, |
| keys and values, no matter the | |
| vbucket’s state. If an item’s value | |
| is ejected, this stat will be | |
| decremented by the size of the | |
| item’s value. | |
| ep_value_size | Memory used to store values for |
| resident keys | |
| ep_overhead | Extra memory used by transient data |
| like persistence queue, replication | |
| queues, checkpoints, etc | |
| ep_max_size | Max amount of data allowed in memory |
| ep_mem_low_wat | Low water mark for auto-evictions |
| ep_mem_high_wat | High water mark for auto-evictions |
| ep_oom_errors | Number of times unrecoverable OOMs |
| happened while processing operations | |
| ep_tmp_oom_errors | Number of times temporary OOMs |
| happened while processing operations | |
| ep_mem_tracker_enabled | If smart memory tracking is enabled |
| tcmalloc_allocated_bytes | Engine’s total memory usage reported |
| from tcmalloc | |
| tcmalloc_heap_size | Bytes of system memory reserved by |
| tcmalloc | |
| tcmalloc_free_bytes | Number of bytes in free, mapped |
| pages in page heap | |
| tcmalloc_unmapped_bytes | Number of bytes in free, unmapped |
| pages in page heap. These are bytes | |
| that have been released back to OS | |
| tcmalloc_max_thread_cache_bytes | A limit to how much memory TCMalloc |
| dedicates for small objects | |
| tcmalloc_current_thread_cache_bytes | A measure of some of the memory |
| TCMalloc is using for small objects |
Stats key and Vkey
| Stat | Description | K/V |
|---|---|---|
| key_cas | The keys current cas value | KV |
| key_data_age | How long the key has waited for its | KV |
| value to be persisted (0 if clean) | KV | |
| key_exptime | Expiration time from the epoch | KV |
| key_flags | Flags for this key | KV |
| key_is_dirty | If the value is not yet persisted | KV |
| key_valid | See description below | V |
| key_vb_state | The vbucket state of this key | KV |
key_valid= can have the following responses:
this_is_a_bug - Some case we didn’t take care of.
dirty - The value in memory has not been persisted yet.
length_mismatch - The key length in memory doesn’t match the length on disk.
data_mismatch - The data in memory doesn’t match the data on disk.
flags_mismatch - The flags in memory don’t match the flags on disk.
valid - The key is both on disk and in memory
ram_but_not_disk - The value doesn’t exist yet on disk.
item_deleted - The item has been deleted.
Warmup
Stats _warmup_ shows statistics related to warmup logic
| Stat | Description |
|---|---|
| ep_warmup | Shows if warmup is enabled / disabled |
| ep_warmup_estimated_key_count | Estimated number of keys in database |
| ep_warmup_estimated_value_count | Estimated number of values in database |
| ep_warmup_state | The current state of the warmup thread |
| ep_warmup_thread | Warmup thread status |
| ep_warmup_key_count | Number of keys warmed up |
| ep_warmup_value_count | Number of values warmed up |
| ep_warmup_dups | Duplicates encountered during warmup |
| ep_warmup_oom | OOMs encountered during warmup |
| ep_warmup_item_expired | Number of items expired during warmup |
| ep_warmup_time | Time (µs) spent by warming data |
| ep_warmup_keys_time | Time (µs) spent by warming keys |
| ep_warmup_mutation_log | Number of keys present in mutation log |
| ep_warmup_access_log | Number of keys present in access log |
| ep_warmup_min_items_threshold | Percentage of total items warmed up |
| before we enable traffic | |
| ep_warmup_min_memory_threshold | Percentage of max mem warmed up before |
| we enable traffic | |
| ep_warmup_estimate_time | Estimated time in microseconds to do warmup |
KV store stats
These provide various low-level stats and timings from the underlying KV storage system and useful to understand various states of the storage system.
The following stats are available for all database engine:
| Stat | Description |
|---|---|
| open | Number of database open operations |
| close | Number of database close operations |
| readTime | Time spent in read operations |
| readSize | Size of data in read operations |
| writeTime | Time spent in write operations |
| writeSize | Size of data in write operations |
| delete | Time spent in delete() calls |
The following stats are available for the CouchStore database engine:
| Stat | Description |
|---|---|
| backend_type | Type of backend database engine |
| commit | Time spent in CouchStore commit operation |
| commitRetry | Time spent in retry of commit operation |
| numLoadedVb | Number of Vbuckets loaded into memory |
| numCommitRetry | Number of commit retry |
| lastCommDocs | Number of docs in the last commit |
| failure_set | Number of failed set operation |
| failure_get | Number of failed get operation |
| failure_vbset | Number of failed vbucket set operation |
| save_documents | Time spent in CouchStore save documents operation |
Dispatcher stats and job logs
This provides the stats from AUX dispatcher and non-IO dispatcher, and from all the reader and writer threads running for the specific bucket. Along with stats, the job logs for each of the dispatchers and worker threads is also made available.
The following stats are available for the workers and dispatchers:
| Stat | Description |
|---|---|
| state | Threads’s current status: running, sleeping etc. |
| runtime | The amount of time since the thread started running |
| task | The activity/job the thread is involved with at the moment |
The following stats are for individual job logs:
| Stat | Description |
|---|---|
| starttime | The timestamp when the job started |
| runtime | Time it took for the job to run |
| task | The activity/job the thread ran during that time |
Stats reset
Resets the list of stats below.
Reset Stats:
| Stat | |
|---|---|
| ep_bg_load | |
| ep_bg_wait | |
| ep_bg_max_load | |
| ep_bg_min_load | |
| ep_bg_max_wait | |
| ep_bg_min_wait | |
| ep_commit_time | |
| ep_flush_duration | |
| ep_flush_duration_highwat | |
| ep_io_num_read | |
| ep_io_num_write | |
| ep_io_read_bytes | |
| ep_io_write_bytes | |
| ep_items_rm_from_checkpoints | |
| ep_num_eject_failures | |
| ep_num_pager_runs | |
| ep_num_not_my_vbuckets | |
| ep_num_value_ejects | |
| ep_pending_ops_max | |
| ep_pending_ops_max_duration | |
| ep_pending_ops_total | |
| ep_storage_age | |
| ep_storage_age_highwat | |
| ep_too_old | |
| ep_too_young | |
| ep_tap_bg_load_avg | |
| ep_tap_bg_max_load | |
| ep_tap_bg_max_wait | |
| ep_tap_bg_min_load | |
| ep_tap_bg_min_wait | |
| ep_tap_bg_wait_avg | |
| ep_tap_throttled | |
| ep_tap_total_fetched | |
| ep_vbucket_del_max_walltime | |
| pending_ops |
Reset Histograms:
| Stat | |
|---|---|
| bg_load | |
| bg_wait | |
| bg_tap_load | |
| bg_tap_wait | |
| chk_persistence_cmd | |
| data_age | |
| del_vb_cmd | |
| disk_insert | |
| disk_update | |
| disk_del | |
| disk_vb_del | |
| disk_commit | |
| get_stats_cmd | |
| item_alloc_sizes | |
| get_vb_cmd | |
| notify_io | |
| pending_ops | |
| set_vb_cmd | |
| storage_age | |
| tap_mutation | |
| tap_vb_reset | |
| tap_vb_set |
Getting server timings
Be aware that this tool is a per-node, per-bucket operation. That means that if you want to perform this operation, you must specify the IP address of a node in the cluster and a named bucket. If you do not provided a named bucket, the server will apply the setting to any default bucket that exists at the specified node. If you want to perform this operation for an entire cluster, you will need to perform the command for every node/bucket combination that exists for that cluster.
The following is sample output from cbstats timings :
disk_insert (10008 total)
   8us - 16us    : ( 94.80%)8 ###########################################
   16us - 32us   : ( 97.70%)  290 #
   32us - 64us   : ( 98.43%)   73
   64us - 128us  : ( 99.29%)   86
   128us - 256us : ( 99.77%)   48
   256us - 512us : ( 99.79%)    2
   512us - 1ms   : ( 99.91%)   12
   1ms - 2ms     : ( 99.92%)    1
disk_commit (1 total)
    0 - 1s        : (100.00%) 1 #############################################################
disk_vbstate_snapshot (2 total)
    4s - 8s       : (100.00%) 2 #############################################################
get_stats_cmd (1535 total)
    ....
set_vb_cmd (1024 total)
    4us - 8us     : ( 97.95%) 1003 ########################################################
    8us - 16us    : ( 98.83%)    9
    ....
The first statistic tells you that disk_insert took 8-16µs8 times, 16-32µs 290
times, and so forth.
The following are the possible return values provided by cbstats timings. The
return values provided by this command depend on what has actually occurred on a
data bucket:
| bg_load | Background fetches waiting for disk |
|---|---|
| bg_wait | Background fetches waiting in the dispatcher queue |
| data_age | Age of data written to disk |
| disk_commit | Time waiting for a commit after a batch of updates |
| disk_del | Wait for disk to delete an item |
| disk_insert | Wait for disk to store a new item |
| disk_vbstate_snapshot | Time spent persisting vbucket state changes |
| disk_update | Wait time for disk to modify an existing item |
| get_cmd | Servicing get requests |
| get_stats_cmd | Servicing get_stats requests |
| set_vb_cmd | Servicing vbucket set state commands |
| item_alloc_sizes | Item allocation size counters (in bytes) |
| notify_io | Time for waking blocked connections |
| storage_age | Time since most recently persisted item was initially queued for storage. |
| tap_mutation | Time spent servicing tap mutations |
Getting warmup information
Be aware that this tool is a per-node, per-bucket operation. That means that if you want to perform this operation, you must specify the IP address of a node in the cluster and a named bucket. If you do not provided a named bucket, the server will apply the setting to any default bucket that exists at the specified node. If you want to perform this operation for an entire cluster, you will need to perform the command for every node/bucket combination that exists for that cluster.
You can use cbstats to get information about server warmup, including the
status of warmup and whether warmup is enabled. The following are two alternates
to filter for the information:
cbstats hostname:port -b bucket_name -p bucket_password | grep 'warmup'

cbstats hostname:port -b bucket_name -p bucket_password raw warmup
- ep_warmup_thread - Indicates if the warmup has completed. Returns “running” or “complete”.
-
ep_warmup_state - Indicates the current progress of the warmup:
- Initial - Start warmup processes.
- EstimateDatabaseItemCount - Estimating database item count.
- KeyDump - Begin loading keys and metadata, but not documents, into RAM.
- CheckForAccessLog - Determine if an access log is available. This log indicates which keys have been frequently read or written.
- LoadingAccessLog - Load information from access log.
- LoadingData - The server is loading data first for keys listed in the access log, or if no log available, based on keys found during the ‘Key Dump’ phase.
- Done - The server is ready to handle read and write requests.
High-level warmup statistics that are available are as follows:
| Name | Description | Value Type |
|---|---|---|
| ep_warmup_dups | Number of failures due to duplicate keys | Integer |
| ep_warmup_estimated_key_count | Estimated number of keys in database | Integer (DEFAULT = “unknown”) |
| ep_warmup_estimated_value_count | Estimated number of key data to read based on the access log | Integer (DEFAULT = “unknown”) |
| ep_warmup_keys_time | Total time spent by loading persisted keys | Integer |
| ep_warmup_min_items_threshold | Enable data traffic after loading this percentage of key data | Integer |
| ep_warmup_min_memory_threshold | Enable data traffic after filling this % of memory | Integer (%) |
| ep_warmup_oom | Number of out of memory failures during warmup | Integer |
| ep_warmup_state | What is current warmup state | String, refer to WarmupStateTable |
| ep_warmup_thread | Is warmup running? | String (“running”, “complete”) |
| ep_warmup_time | Total time spent by loading data (warmup) | Integer (microseconds) |
There are also additional lower-level, detailed statistics returned by passing the keyword “warmup” for the command. For instance:
cbstats hostname:port -b bucket_name -p bucket_password raw warmup
The additional lower-level stats are as follows. Note that some of these items are also available as higher-level summary statistics about warmup:
| Name | Description | Value Type |
|---|---|---|
| ep_warmup | Is warmup enabled? | String (“enabled”) |
| ep_warmup_key_count | How many keys have been loaded? | Integer |
| ep_warmup_value_count | How many key values (data) have been loaded? | Integer |
| ep_warmup_dups | Number of failures due to duplicate keys | Integer |
| ep_warmup_estimated_key_count | Estimated number of keys in database | Integer (DEFAULT = “unknown”) |
| ep_warmup_estimated_value_count | Estimated number of key data to read based on the access log | Integer (DEFAULT = “unknown”) |
| ep_warmup_keys_time | Total time spent by loading persisted keys | Integer |
| ep_warmup_min_items_threshold | Enable data traffic after loading this percentage of key data | Integer |
| ep_warmup_min_memory_threshold | Enable data traffic after filling this % of memory | Integer (%) |
| ep_warmup_oom | Number of out of memory failures during warmup | Integer |
| ep_warmup_state | What is current warmup state | String, refer to WarmupStateTable |
| ep_warmup_thread | Is warmup running? | String (“running”, “complete”) |
| ep_warmup_time | Total time spent by loading data (warmup) | Integer (microseconds) |
Getting TAP information
Couchbase Server uses an internal protocol known as TAP to stream information about data changes between cluster nodes. Couchbase Server uses the TAP protocol during 1) rebalance, 2) replication at other cluster nodes, and 3) persistence of items to disk.
Be aware that this tool is a per-node, per-bucket operation. That means that if you want to perform this operation, you must specify the IP address of a node in the cluster and a named bucket. If you do not provided a named bucket, the server will apply the setting to any default bucket that exists at the specified node. If you want to perform this operation for an entire cluster, you will need to perform the command for every node/bucket combination that exists for that cluster.
The following statistics will be output in response to a cbstats tap request:
| ep_tap_total_queue | Sum of tap queue sizes on the current tap queues |
|---|---|
| ep_tap_total_fetched | Sum of all tap messages sent |
| ep_tap_bg_max_pending | The maximum number of background jobs a tap connection may have |
| ep_tap_bg_fetched | Number of tap disk fetches |
| ep_tap_bg_fetch_requeued | Number of times a tap background fetch task is requeued. |
| ep_tap_fg_fetched | Number of tap memory fetches |
| ep_tap_deletes | Number of tap deletion messages sent |
| ep_tap_throttled | Number of tap messages refused due to throttling. |
| ep_tap_keepalive | How long to keep tap connection state after client disconnect. |
| ep_tap_count | Number of tap connections. |
| ep_tap_bg_num_samples | The number of tap background fetch samples included in the average |
| ep_tap_bg_min_wait | The shortest time (µs) for a tap item before it is serviced by the dispatcher |
| ep_tap_bg_max_wait | The longest time (µs) for a tap item before it is serviced by the dispatcher |
| ep_tap_bg_wait_avg | The average wait time (µs) for a tap item before it is serviced by the dispatcher |
| ep_tap_bg_min_load | The shortest time (µs) for a tap item to be loaded from the persistence layer |
| ep_tap_bg_max_load | The longest time (µs) for a tap item to be loaded from the persistence layer |
| ep_tap_bg_load_avg | The average time (µs) for a tap item to be loaded from the persistence layer |
| ep_tap_noop_interval | The number of secs between a no-op is added to an idle connection |
| ep_tap_backoff_period | The number of seconds the tap connection should back off after receiving ETMPFAIL |
| ep_tap_queue_fill | Total enqueued items |
| ep_tap_queue_drain | Total drained items |
| ep_tap_queue_backoff | Total back-off items |
| ep_tap_queue_backfill | Number of backfill remaining |
| ep_tap_queue_itemondisk | Number of items remaining on disk |
| ep_tap_throttle_threshold | Percentage of memory in use before we throttle tap streams |
| ep_tap_throttle_queue_cap | Disk write queue cap to throttle tap streams |
You use the cbstats tapagg to get statistics from named tap connections which
are logically grouped and aggregated together by prefixes.
For example, if all of your tap connections started with rebalance_ or
replication_, you could call cbstats tapagg _ to request stats grouped by
the prefix starting with _. This would return a set of statistics for
rebalance and a set for replication. The following are possible values
returned by cbstats tapagg :
| [prefix]:count | Number of connections matching this prefix |
|---|---|
| [prefix]:qlen | Total length of queues with this prefix |
| [prefix]:backfill_remaining | Number of items needing to be backfilled |
| [prefix]:backoff | Total number of backoff events |
| [prefix]:drain | Total number of items drained |
| [prefix]:fill | Total number of items filled |
| [prefix]:itemondisk | Number of items remaining on disk |
| [prefix]:total_backlog_size | Number of remaining items for replication |
cbepctl tool
The cbepctl command enables you to control many of the configuration, RAM and
disk parameters of a running cluster. This tool is for controlling the vBucket
states on a Couchbase Server node. It is also responsible for controlling the
configuration, memory and disk persistence behavior. This tool was formerly
provided as the separate tools, cbvbucketctl and cbflushctl in Couchbase
1.8.
Caution
Changes to the cluster configuration using cbepctl are not persisted over a
cluster restart.
| Linux | /opt/couchbase/bin/cbepctl
|
|---|---|
| Windows | C:\Program Files\Couchbase\Server\bin\cbepctl.exe
|
| Mac OS X | /Applications/Couchbase Server.app/Contents/Resources/couchbase-core/bin/cbepctl
|
Be aware that this tool is a per-node, per-bucket operation. That means that if you want to perform this operation, you must specify the IP address of a node in the cluster and a named bucket. If you do not provided a named bucket, the server will apply the setting to any default bucket that exists at the specified node. If you want to perform this operation for an entire cluster, you will need to perform the command for every node/bucket combination that exists for that cluster.
cbepctl host:11210 -b bucket_name -p bucket_password start
cbepctl host:11210 -b bucket_name -p bucket_password stop
cbepctl host:11210 -b bucket_name -p bucket_password set type param value
For this command, host is the IP address for your Couchbase cluster, or node
in the cluster. The port will always be the standard port used for cluster-wide
stats and is at 11210. You also provide the named bucket and the password for
the named bucket. After this you provide command options and authentication.
You can use the following command options to manage persistence:
| Option | Description |
|---|---|
| stop | stop persistence |
| start | start persistence |
| drain | wait until queues are drained |
| set | to set checkpoint_param, flush_param, and tap_param. This changes how or when persistence occurs. |
You can use the following command options, combined with the parameters to set
checkpoint_param, flush_param, and tap_param. These changes the behavior
of persistence in Couchbase Server.
The command options for checkpoint_param are:
| Parameter | Description |
|---|---|
| chk_max_items | Max number of items allowed in a checkpoint. |
| chk_period | Time bound (in sec.) on a checkpoint. |
| item_num_based_new_chk | True if a new checkpoint can be created based on. the number of items in the open checkpoint. |
| keep_closed_chks | True if we want to keep closed checkpoints in memory, as long as the current memory usage is below high water mark. |
| max_checkpoints | Max number of checkpoints allowed per vbucket. |
Changing the disk cleanup interval
One of the most important use cases for the cbepctl flush_param is the set the
time interval for disk cleanup. Couchbase Server does
lazy expiration, that is, expired items are flagged as deleted rather than being
immediately erased. Couchbase Server has a maintenance process that will
periodically look through all information and erase expired items. This
maintenance process will run every 60 minutes, but it can be configured to run
at a different interval. For example, the following options will set the cleanup
process to run every 10 minutes:
./cbepctl localhost:11210 -b bucket_name -p bucket_password set flush_param exp_pager_stime 600
Be aware that this tool is a per-node, per-bucket operation. That means that if you want to perform this operation, you must specify the IP address of a node in the cluster and a named bucket. If you do not provided a named bucket, the server will apply the setting to any default bucket that exists at the specified node. If you want to perform this operation for an entire cluster, you will need to perform the command for every node/bucket combination that exists for that cluster.
Here we specify 600 seconds, or 10 minutes as the interval Couchbase Server waits before it tries to remove expired items from disk.
Changing disk write queue quotas
One of the specific uses of cbepctl is to the change the default maximum items
for a disk write queue. This impacts replication of data that occurs between
source and destination nodes within a cluster. Both data that a node receives
from client applications, and replicated items that it receives are placed on a
disk write queue. If there are too many items waiting in the disk write queue at
any given destination, Couchbase Server will reduce the rate of data that is
sent to a destination. This is process is also known as backoff.
By default, when a disk write queue contains one million items, a Couchbase node will reduce the rate it sends out data to be replicated. You can change this setting to be the greater of 10% of the items at a destination node or a number you specify. For instance:
> ./cbepctl 10.5.2.31:11210 -b bucket_name -p bucket_password set tap_param tap_throttle_queue_cap 2000000
Be aware that this tool is a per-node, per-bucket operation. That means that if you want to perform this operation, you must specify the IP address of a node in the cluster and a named bucket. If you do not provided a named bucket, the server will apply the setting to any default bucket that exists at the specified node. If you want to perform this operation for an entire cluster, you will need to perform the command for every node/bucket combination that exists for that cluster.
In this example we specify that a replica node send a request to backoff when it has two million items or 10% of all items, whichever is greater. You will see a response similar to the following:
setting param: tap_throttle_queue_cap 2000000
In this next example, we change the default percentage used to manage the replication stream. If the items in a disk write queue reach the greater of this percentage or a specified number of items, replication requests will slow down:
> ./cbepctl 10.5.2.31:11210 -b bucket_name -p bucket_password set tap_param tap_throttle_cap_pcnt 15
In this example, we set the threshold to 15% of all items at a replica node.
When a disk write queue on a replica node reaches this point, it will request
replication backoff. For more information about replicas, replication and
backoff from replication, see Replicas and
Replication. The other
command options for tap_param are:
| Parameter | Description |
|---|---|
| tap_keepalive | Seconds to hold a named tap connection. |
| tap_throttle_queue_cap | Max disk write queue size when tap streams will put into a temporary, 5-second pause. ‘Infinite’ means there is no cap. |
| tap_throttle_cap_pcnt | Maximum items in disk write queue as percentage of all items on a node. At this point tap streams will put into a temporary, 5-second pause. |
| tap_throttle_threshold | Percentage of memory in use when tap streams will be put into a temporary, 5-second pause. |
Changing access log settings
In Couchbase Server 2.0, we provide a more optimized disk warmup. In past
versions of Couchbase Server, the server would load all keys and data
sequentially from vBuckets in RAM. Now the server pre-fetches a list of
most-frequently accessed keys and fetches these documents first. The server runs
a periodic scanner process which will determine which keys are most
frequently-used. You can use cbepctl flush_param to change the initial time
and the interval for the process. You may want to do this, for instance, if you
have a peak time for your application when you want the keys used during this
time to be quickly available after server restart.
Be aware that this tool is a per-node, per-bucket operation. That means that if you want to perform this operation, you must specify the IP address of a node in the cluster and a named bucket. If you do not provided a named bucket, the server will apply the setting to any default bucket that exists at the specified node. If you want to perform this operation for an entire cluster, you will need to perform the command for every node/bucket combination that exists for that cluster.
By default the scanner process will run once every 24 hours with a default initial start time of 2:00 AM UTC. This means after you install a new Couchbase Server 2.0 instance or restart the server, by default the scanner will run every 24- hour time period at 2:00 AM GMT and then 2:00 PM GMT by default. To change the time interval when the access scanner process runs to every 20 minutes:
> ./cbepctl hostname:port -b bucket_name -p bucket_password set flush_param alog_sleep_time 20
To change the initial time that the access scanner process runs from the default of 2:00 AM UTC:
> ./cbepctl hostname:port -b bucket_name -p bucket_password set flush_param alog_task_time 23
In this example we set the initial time to 11:00 PM UTC.
Changing thresholds for ejection
The item pager process ejects items from RAM when too much space is being taken up in RAM. Ejection means that documents are removed from RAM but the key and metadata remain.
If the amount of RAM used by items reaches the high water mark (upper threshold), both active and replica data are ejected until the memory usage (amount of RAM consumed) reaches the low water mark (lower threshold).
The server determines that items are not frequently used based on a not-recently-used (NRU) boolean. There a few settings you can adjust to change server behavior during the ejection process. In general, we do not recommend you change ejection defaults for Couchbase Server unless you are required to do so.
Be aware that this tool is a per-node, per-bucket operation. To perform this operation, the IP address of a node in the cluster and a named bucket must be specified. If a named bucket is not provided, the server applies the setting to any default bucket that exists at the specified node. To perform this operation for an entire cluster, perform the command for every node/bucket combination that exists for that cluster.
For technical information about the ejection process, the role of NRU and server processes related to ejection, see Ejection and Working Set Management.
Setting the Low Water Mark
This represents the lower threshold of RAM to be consumed on a node. The item pager stops ejecting items once the low water mark is reached. To change this percentage amount of RAM, use the cpepctl tool:
> ./cbepctl 10.5.2.31:11210 -b bucket_name -p bucket_password set flush_param mem_low_wat 70
Setting the High Water Mark
This represents the amount of RAM consumed by items that must be breached before
infrequently used active and replica items are ejected. To change this amount, use the
cbepctl tool. In the following example, the high water mark is set to 80% of RAM for a specific data bucket on a
given node.
This means that items in RAM on this node can consume up to 80% of RAM before the item pager begins ejecting items.
> ./cbepctl 10.5.2.31:11210 -b bucket_name -p bucket_password set flush_param mem_high_wat 80
Setting Percentage of Ejected Items
Based on the NRU algorithm, the server ejects active and replica data from a node. By default, the server is configured to 40% active items and 60% replica data from a node.
To change default percentage for ejecting active and replica items, use the cbepctl tool. The following example increases the percentage of active items that can be ejected from a node to 50%.
> ./cbepctl 10.5.2.31:11210 -b bucket_name -p bucket_password set flush_param pager_active_vb_pcnt 50
Be aware of potential performance implications when making this change. It may seem more desirable to eject as many replica items as possible and limit the amount of active data that can be ejected. In doing so, you will be able to maintain as much active data from a source node as possible, and maintain incoming requests to that node. However, if you have the server eject a very large percentage of replica data, should a node fail, the replica data is not immediately available. In that case, the items are retrieved from disk and put back into RAM. Once in RAM, the request can be fulfilled. Couchbase recommends that you do not change these defaults.
For technical information about the ejection process, the role of NRU and server processes related to ejection, see Ejection and Working Set Management.
Changing setting for out of memory errors
By default, Couchbase Server will send clients a temporary out of memory error if RAM is 95% consumed and only 5% RAM remains for overhead. We do not suggest you change this default to a higher value; however you may choose to reduce this value if you think you need more RAM available for system overhead such as disk queue or for server data structures. To change this value:
>./cbepctl 10.5.2.31:11210 -b bucket_name -p bucket_password set flush_param mutation_mem_threshold 65
Be aware that this tool is a per-node, per-bucket operation. That means that if you want to perform this operation, you must specify the IP address of a node in the cluster and a named bucket. If you do not provided a named bucket, the server will apply the setting to any default bucket that exists at the specified node. If you want to perform this operation for an entire cluster, you will need to perform the command for every node/bucket combination that exists for that cluster.
In this example we reduce the threshold to 65% of RAM. This setting must be updated on a per-node, per-bucket basis, meaning you need to provide the specific node and named bucket to update this setting. To update it for an entire cluster, you will need to issue the command for every combination of node and named bucket that exists in the cluster.
Enabling flush of data buckets - will be deprecated
By default, this setting appears in Couchbase Web Console and is disabled; when it is enabled Couchbase Server is able to flush all the data in a bucket. Be also aware that this operation will be deprecated as a way to enable data bucket flushes. This is because cbepctl is designed for individual node configuration not operating on data buckets shared by multiple nodes.
The preferred way to enable data bucket flush is either 1) Couchbase Web Console or via 2) couchbase-cli. For more information about these two options, see Creating and editing data buckets and Flushing buckets with couchbase-cli.
Warning
Flushing a bucket is data destructive. If you use cbepctl, it makes no
attempt to confirm or double check the request. Client applications using this
are advised to double check with the end user before sending such a request. You
can control and limit the ability to flush individual buckets by setting the
flushEnabled parameter on a bucket in Couchbase Web Console or via cbepctl
flush_param.
Be aware that this tool is a per-node, per-bucket operation. That means that if you want to perform this operation, you must specify the IP address of a node in the cluster and a named bucket. If you do not provided a named bucket, the server will apply the setting to any default bucket that exists at the specified node. If you want to perform this operation for an entire cluster, you will need to perform the command for every node/bucket combination that exists for that cluster.
To enable flushing a data bucket:
> ./cbepctl hostname:port -b bucket_name -p bucket_password set flush_param flushall_enabled true
To disable flushing a data bucket:
> ./cbepctl hostname:port -b bucket_name -p bucket_password set flush_param flushall_enabled false
You can initiate the flush via the REST API. For information about changing this setting in the Web Console, see Viewing Data Buckets. For information about flushing data buckets via REST, see Flushing a Bucket.
Other cbepctl flush_param
The complete list of options for flush_param are:
| Parameter | Description |
|---|---|
| alog_sleep_time | Access scanner interval (minute) |
| alog_task_time | Access scanner next task time (UTC) |
| bg_fetch_delay | Delay before executing a bg fetch (test feature). |
| couch_response_timeout | timeout in receiving a response from CouchDB. |
| exp_pager_stime | Expiry Pager interval. Time interval that Couchbase Server waits before it performs cleanup and removal of expired items from disk. |
| flushall_enabled | Enable flush operation. |
| klog_compactor_queue_cap | queue cap to throttle the log compactor. |
| klog_max_log_size | maximum size of a mutation log file allowed. |
| klog_max_entry_ratio | max ratio of # of items logged to # of unique items. |
| pager_active_vb_pcnt | Percentage of active vbuckets items among all ejected items by item pager. |
| pager_unbiased_period | Period after last access scanner run during which item pager preserve working set. |
| queue_age_cap | Maximum queue age before flushing data. |
| max_size | Max memory used by the server. |
| max_txn_size | Maximum number of items in a flusher transaction. |
| min_data_age | Minimum data age before flushing data. |
| mutation_mem_threshold | Amount of RAM that can be consumed in that caching layer before clients start receiving temporary out of memory messages. |
| timing_log | path to log detailed timing stats. |
cbcollect_info tool
This is one of the most important diagnostic tools used by Couchbase technical support teams; this command-line tool provides detailed statistics for a specific node. The tool is at the following locations, depending upon your platform:
| Operating System | Location |
|---|---|
| Linux | /opt/couchbase/bin/cbcollect_info
|
| Windows | C:\Program Files\Couchbase\Server\bin\cbcollect_info
|
| Mac OS X | /Applications/Couchbase Server.app/Contents/Resources/couchbase-core/bin/cbcollect_info
|
Be aware that this tool is a per-node operation. If you want to perform this operation for an entire cluster, you will need to perform the command for every node that exists for that cluster.
You will need a root account to run this command and collect all the server information needed. There are internal server files and directories that this tool accesses which require root privileges.
To use this command, you remotely connect to the machine which contains your
Couchbase Server then issue the command with options. You typically run this
command under the direction of technical support at Couchbase and it will
generate a large.zip file. This archive will contain several different files
which contain performance statistics and extracts from server logs. The
following describes usage, where output_file is the name of the.zip file you
will create and send to Couchbase technical support:
cbcollect_info hostname:port output_file

Options:
  -h, --help  show this help message and exit
  -v          increase verbosity level
If you choose the verbosity option, -v debugging information for
cbcollect_info will be also output to your console. When you run
cbcollect_info, it will gather statistics from an individual node in the
cluster.
This command will collect information from an individual Couchbase Server node. If you are experiencing problems with multiple nodes in a cluster, you may need to run it on all nodes in a cluster.
The tool will create the following.log files in your named archive:
| couchbase.log | OS-level information about a node. |
|---|---|
| ns_server.couchdb.log | Information about the persistence layer for a node. |
| ns_server.debug.log | Debug-level information for the cluster management component of this node. |
| ns_server.error.log | Error-level information for the cluster management component of this node. |
| ns_server.info.log | Info-level entries for the cluster management component of this node. |
| ns_server.views.log | Includes information about indexing, time taken for indexing, queries which have been run, and other statistics about views. |
| stats.log | The results from multiple cbstats options run for the node. For more information, see cbstats Tool
|
After you finish running the tool, you should upload the archive and send it to Couchbase technical support:
> curl --upload-file file_name https://s3.amazonaws.com/customers.couchbase.com/company_name/
Where file_name is the name of your archive, and company_name is the name of
your organization. After you have uploaded the archive, please contact Couchbase
technical support. For more information, see Working with Couchbase Customer
Support.
cbbackup tool
The cbbackup tool creates a copy of data from an entire running cluster, an
entire bucket, a single node, or a single bucket on a single functioning node.
Your node or cluster needs to be functioning in order to create the backup.
Couchbase Server will write a copy of data onto disk.
Note
cbbackup, cbrestore and cbtransfer do not communicate with external IP
addresses for server nodes outside of a cluster. They can only communicate with
nodes from a node list obtained within a cluster. You should perform backup,
restore, or transfer to data from a node within a Couchbase cluster. This also
means that if you install Couchbase Server with the default IP address, you
cannot use an external hostname to access it. For general information about
hostnames for the server, see Using Hostnames with Couchbase Server.
Depending upon your platform, this tool is the following directories:
| Linux | /opt/couchbase/bin/cbbackup
|
|---|---|
| Windows | C:\Program Files\Couchbase\Server\bin\cbbackup
|
| Mac OS X | /Applications/Couchbase Server.app/Contents/Resources/couchbase-core/bin/cbbackup
|
The format of the cbbackup command is:
cbbackup [options] [source] [destination]
Where:
-
[options]Same options available for
cbtransfer, see cbtransfer Tool -
[source]Source for the backup. This can be either a URL of a node when backing up a single node or the cluster, or a URL specifying a directory where the data for a single bucket is located.
-
[destination]The destination directory for the backup files to be stored. Either the directory must exist, and be empty, or the directory will be created. The parent directory must exist.
This tool has several different options which you can use to:
Backup all buckets in an entire cluster,
Backup one named bucket in a cluster,
Backup all buckets on a node in a cluster,
Backup one named buckets on a specified node,
All command options for cbbackup are the same options available for
cbtransfer. For a list of standard and special-use options, see cbtransfer
Tool.
You can backup an entire cluster, which includes all of the data buckets and data at all nodes. This will also include all design documents; do note however that you will need to rebuild any indexes after you restore the data. To backup an entire cluster and all buckets for that cluster:
> cbbackup http://HOST:8091 ~/backups \
          -u Administrator -p password
Where ~/backups is the directory where you want to store the data. When you
perform this operation, be aware that cbbackup will create the following
directory structure and files in the ~/backups directory assuming you have two
buckets in your cluster named my_name and sasl and two nodes N1 and N2 :
~/backups
        bucket-my_name
            N1
            N2
        bucket-sasl
            N1
            N2
Where bucket-my_name and bucket-sasl are directories containing data files
and where N1 and N2 are two sets of data files for each node in the cluster.
To backup a single bucket in a cluster:
> cbbackup http://HOST:8091 /backups/backup-20120501 \
  -u Administrator -p password \
  -b default
In this case -b default specifies you want to backup data from the default
bucket in a cluster. You could also provide any other given bucket in the
cluster that you want to backup. To backup all the data stored in multiple
buckets from a single node which access the buckets:
> cbbackup http://HOST:8091 /backups/ \
  -u Administrator -p password \
  --single-node
This is an example of how to backup data from a single bucket on a single node follows:
> cbbackup http://HOST:8091 /backups \
  -u Administrator -p password \
  --single-node \
  -b bucket_name
This example shows you how you can specify keys that are backed up using the -
k option. For example, to backup all keys from a bucket with the prefix
‘object’:
> cbbackup http://HOST:8091 /backups/backup-20120501 \
  -u Administrator -p password \
  -b bucket_name \
  -k '^object.*'
For more information on using cbbackup scenarios when you may want to use it
and best practices for backup and restore of data with Couchbase Server, see
Backing Up Using cbbackup.
Backing Up Design Documents Only
You can backup only design documents from a cluster
or bucket with the option, design_doc_only=1. You can later restore the design
documents only with cbrestore, see cbrestore
Tool :
> ./cbbackup http://10.5.2.30:8091 ~/backup -x design_doc_only=1 -b bucket_name

transfer design doc only. bucket msgs will be skipped.
done
Where you provide the hostname and port for a node in the cluster. This will
make a backup copy of all design documents from bucket_name and store this as
design.json in the directory ~/backup/bucket_name. If you do not provide a
named bucket it will backup design documents for all buckets in the cluster. In
this example we did a backup of two design documents on a node and our file will
appear as follows:
[
   {
      "controllers":{
         "compact":"/pools/default/buckets/default/ddocs/_design%2Fddoc1/controller/compactView",
         "setUpdateMinChanges":"/pools/default/buckets/default/ddocs/_design%2Fddoc1/controller/setUpdateMinChanges"
      },
      "doc":{
         "json":{
            "views":{
               "view1":{
                  "map":"function(doc){emit(doc.key,doc.key_num);}"
               },
               "view2":{
                  "map":"function(doc,meta){emit(meta.id,doc.key);}"
               }
            }
         },
         "meta":{
            "rev":"1-6f9bfe0a",
            "id":"_design/ddoc1"
         }
      }
   },
   {
      "controllers":{
         "compact":"/pools/default/buckets/default/ddocs/_design%2Fddoc2/controller/compactView",
         "setUpdateMinChanges":"/pools/default/buckets/default/ddocs/_design%2Fddoc2/controller/setUpdateMinChanges"
      },
      "doc":{
         "json":{
            "views":{
               "dothis":{
                  "map":"function (doc, meta) {\n  emit(meta.id, null);\n}"
               }
            }
         },
         "meta":{
            "rev":"1-4b533871",
            "id":"_design/ddoc2"
         }
      }
   },
   {
      "controllers":{
         "compact":"/pools/default/buckets/default/ddocs/_design%2Fdev_ddoc2/controller/compactView",
         "setUpdateMinChanges":"/pools/default/buckets/default/ddocs/_design%2Fdev_ddoc2/controller/setUpdateMinChanges"
      },
      "doc":{
         "json":{
            "views":{
               "dothat":{
                  "map":"function (doc, meta) {\n  emit(meta.id, null);\n}"
               }
            }
         },
         "meta":{
            "rev":"1-a8b6f59b",
            "id":"_design/dev_ddoc2"
         }
      }
   }
]
Using cbbackup from Couchbase Server 2.0 with 1.8.x
You can use cbbackup 2.x to backup data from a Couchbase 1.8.x cluster,
including 1.8. To do so you use the same command options you use when you backup
a 2.0 cluster except you provide it the hostname and port for the 1.8.x cluster.
You do not need to even install Couchbase Server 2.0 in order to use cbbackup
2.x to backup Couchbase Server 1.8.x. You can get a copy of the tool from the
Couchbase command-line tools GitHub
repository. After you get the tool,
go to the directory where you cloned the tool and perform the command. For
instance:
./cbbackup http://1.8_host_name:port ~/backup -u Administrator -p password
This creates a backup of all buckets in the 1.8 cluster at ~/backups on the
physical machine where you run cbbackup. So if you want to make the backup on
the machine containing the 1.8.x data bucket, you should copy the tool on that
machine. As in the case where you perform backup with Couchbase 2.0, you can use
cbbackup 2.0 options to backup all buckets in a cluster, backup a named
bucket, backup the default bucket, or backup the data buckets associated with a
single node.
Be aware that you can also use the cbrestore 2.0 tool to restore backup data
onto a 1.8.x cluster. See cbrestore Tool.
cbrestore tool
The cbrestore tool restores data from a file to an entire cluster or to a
single bucket in the cluster. Items that had been written to file on disk will
be restored to RAM.
Note
cbbackup, cbrestore and cbtransfer do not communicate with external IP
addresses for server nodes outside of a cluster. They can only communicate with
nodes from a node list obtained within a cluster. You should perform backup,
restore, or transfer to data from a node within a Couchbase cluster. This also
means that if you install Couchbase Server with the default IP address, you
cannot use an external hostname to access it. For general information about
hostnames for the server, see Using Hostnames with Couchbase Server.
The tool is in the following locations, depending on your platform:
| Linux | /opt/couchbase/bin/cbrestore
|
|---|---|
| Windows | C:\Program Files\Couchbase\Server\bin\cbrestore
|
| Mac OS X | /Applications/Couchbase Server.app/Contents/Resources/couchbase-core/bin/cbrestore
|
The format of the cbrestore command is:
cbrestore [options] [host:ip] [source] [destination]
Where:
-
[options]Command options for
cbrestoreare the same options forcbtransfer, see cbtransfer Tool. -
[host:ip]Hostname and port for a node in cluster.
-
[source]Source bucket name for the backup data. This is in the directory created by
cbbackupwhen you performed the backup. -
[destination]The destination bucket for the restored information. This is a bucket in an existing cluster. If you restore the data to a single node in a cluster, provide the hostname and port for the node you want to restore to. If you restore an entire data bucket, provide the URL of one of the nodes within the cluster.
All command options for cbrestore are the same options available for
cbtransfer. For a list of standard and special-use options, see cbtransfer
Tool.
Using cbrestore for Design Documents Only
You can restore design documents to a server node
with the option, design_doc_only=1. You can restore from a backup file you
create with cbbackup, see cbbackup Tool :
> ./cbrestore ~/backup http://10.3.1.10:8091 -x design_doc_only=1 -b a_bucket -B my_bucket

transfer design doc only. bucket msgs will be skipped.
done
This will restore design documents from the backup file ~/backup/a_bucket to
the destination bucket my_bucket in a cluster. If you backed up more than one
source bucket, you will need to perform this command more than once. For
instance, imagine you did a backup for a cluster with two data buckets and have
the backup files ~/backup/bucket_one/design.json and
~/backup/bucket_two/design.json :
> ./cbrestore ~/backup http://10.3.1.10:8091 -x design_doc_only=1 -b bucket_one -B my_bucket

> ./cbrestore ~/backup http://10.3.1.10:8091 -x design_doc_only=1 -b bucket_two -B my_bucket
This will restore design documents in both backup files to a bucket in your
cluster named my_bucket After you restore the design documents you can see
them in Couchbase Web Console under the Views tab. For more information about
the Views Editor, see Using the Views Editor.
Using cbrestore from Couchbase Server 2.0 with 1.8.x
You can use cbrestore 2.0 to backup data from a Couchbase 1.8.x cluster,
including 1.8. To do so you use the same command options you use when you backup
a 2.0 cluster except you provide it the hostname and port for the 1.8.x cluster.
You do not need to even install Couchbase Server 2.0 in order to use cbrestore
2.0 to backup Couchbase Server 1.8.x. You can get a copy of the tool from the
Couchbase command-line tools GitHub
repository. After you get the tool,
go to the directory where you cloned the tool and perform the command. For
instance:
./cbrestore ~/backup http://10.3.3.11:8091 -u Administrator -p password -B saslbucket_destination -b saslbucket_source
This restores all data in the bucket-saslbucket_source directory under
~/backups on the physical machine where you run cbbackup. It will restore
this data into a bucket named saslbucket_destination in the cluster with the
node host:port of 10.3.3.11:8091.
Be aware that if you are trying to restore data to a different cluster, that you
should make sure that cluster should have the same number of vBuckets as the
cluster that you backed up. If you attempt to restore data from a cluster to a
cluster with a different number of vBuckets, it will fail when you use the
default port of 8091. The default number of vBuckets for Couchbase 2.0 is
1024; in earlier versions of Couchbase, you may have a different number of
vBuckets. If you do want to restore data to a cluster with a different number of
vBuckets, you should perform this command with port 11211, which will
accommodate the difference in vBuckets:
cbrestore /backups/backup-42 memcached://HOST:11211 \
    --bucket-source=sessions --bucket-destination=sessions2
If you want more information about using cbbackup 2.0 tool to backup data onto
a 1.8.x cluster. See cbbackup Tool.
For general information on using cbbackup, see Restoring using cbrestore
tool.
cbtransfer tool
You use this tool to transfer data and design documents between two clusters or
from a file to a cluster. With this tool you can also create a copy of data from
a node that no longer running. This tool is the underlying, generic data
transfer tool that cbbackup and cbrestore are built upon. It is a
lightweight extract-transform-load (ETL) tool that can move data from a source
to a destination. The source and destination parameters are similar to URLs or
file paths.
Note
cbbackup, cbrestore and cbtransfer do not communicate with external IP
addresses for server nodes outside of a cluster. They can only communicate with
nodes from a node list obtained within a cluster. You should perform backup,
restore, or transfer to data from a node within a Couchbase cluster. This also
means that if you install Couchbase Server with the default IP address, you
cannot use an external hostname to access it. For general information about
hostnames for the server, see Using Hostnames with Couchbase Server.
The tool is at the following locations:
| Operating system | Location |
|---|---|
| Linux | /opt/couchbase/bin/
|
| Windows | C:\Program Files\Couchbase\Server\bin\
|
| Mac OS X | /Applications/Couchbase Server.app/Contents/Resources/couchbase-core/bin/
|
The following is the syntax and examples for this command:
> ./cbtransfer [options] source destination


Examples:
  cbtransfer http://SOURCE:8091 /backups/backup-42
  cbtransfer /backups/backup-42 http://DEST:8091
  cbtransfer /backups/backup-42 couchbase://DEST:8091
  cbtransfer http://SOURCE:8091 http://DEST:8091
  cbtransfer 1.8_COUCHBASE_BUCKET_MASTER_DB_SQLITE_FILE http://DEST:8091
  cbtransfer file.csv http://DEST:8091
The following are the standard command options which you can also view with
cbtransfer -h :
| Parameter | Description |
|---|---|
| -h, –help | Command help |
| -b BUCKET_SOURCE | Single named bucket from source cluster to transfer |
| -B BUCKET_DESTINATION, –bucket-destination=BUCKET_DESTINATION | Single named bucket on destination cluster which receives transfer. This allows you to transfer to a bucket with a different name as your source bucket. If you do not provide defaults to the same name as the bucket-source |
| -i ID, –id=ID | Transfer only items that match a vbucketID |
| -k KEY, –key=KEY | Transfer only items with keys that match a regexp |
| -n, –dry-run | No actual transfer; just validate parameters, files, connectivity and configurations |
| -u USERNAME, –username=USERNAME | REST username for source cluster or server node |
| -p PASSWORD, –password=PASSWORD | REST password for cluster or server node |
| -t THREADS, –threads=THREADS | Number of concurrent workers threads performing the transfer. Defaults to 4. |
| -v, –verbose | Verbose logging; provide more verbosity |
| -x EXTRA, –extra=EXTRA | Provide extra, uncommon config parameters |
| –single-node | Transfer from a single server node in a source cluster. This single server node is a source node URL |
| –source-vbucket-state=SOURCE_VBUCKET_STATE | Only transfer from source vbuckets in this state, such as ‘active’ (default) or ‘replica’. Must be used with Couchbase cluster as source. |
| –destination-vbucket-state=DESTINATION_VBUCKET_STATE | Only transfer to destination vbuckets in this state, such as ‘active’ (default) or ‘replica’. Must be used with Couchbase cluster as destination. |
| –destination-operation=DESTINATION_OPERATION | Perform this operation on transfer. “set” will override an existing document, ‘add’ will not override, ‘get’ will load all keys transferred from a source cluster into the caching layer at the destination. By default, the cbtransfer tool will use “set” and override any existing documents. |
/path/to/filename |
Export a.csv file from the server or import a.csv file to the server. |
The following are extra, specialized command options you use in this form
cbtransfer -x [EXTRA OPTIONS] :
| Parameter | Description |
|---|---|
| batch_max_bytes=400000 | Transfer this # of bytes per batch. |
| batch_max_size=1000 | Transfer this # of documents per batch |
| cbb_max_mb=100000 | Split backup file on destination cluster if it exceeds MB |
| max_retry=10 | Max number of sequential retries if transfer fails |
| nmv_retry=1 | 0 or 1, where 1 retries transfer after a NOT_MY_VBUCKET message. Default of 1. |
| recv_min_bytes=4096 | Amount of bytes for every TCP/IP batch transferred |
| report=5 | Number batches transferred before updating progress bar in console |
| report_full=2000 | Number batches transferred before emitting progress information in console |
| try_xwm=1 | As of 2.1, transfer documents with metadata. 1 is default. 0 should only be used if you transfer from 1.8.x to 1.8.x. |
| data_only=0 | For value 1, only transfer data from a backup file or cluster. |
| design_doc_only=0 | For value 1, transfer design documents only from a backup file or cluster. Defaults to 0. |
The most important way you can use this tool is to transfer data from a Couchbase node that is no longer running to a cluster that is running:
./cbtransfer \
       couchstore-files://COUCHSTORE_BUCKET_DIR \
       couchbase://HOST:PORT \
       --bucket-destination=DESTINATION_BUCKET

./cbtransfer \
       couchstore-files:///opt/couchbase/var/lib/couchbase/data/default \
       couchbase://10.5.3.121:8091 \
       --bucket-destination=foo
Upon success, the tool will output as follows:
[####################] 100.0% (10000/10000 msgs)
bucket: bucket_name, msgs transferred...
      : total | last | per sec
batch : 1088 | 1088 | 554.8
byte : 5783385 | 5783385 | 3502156.4
msg : 10000 | 10000 | 5230.9
done
This shows we successfully transferred 10000 total documents in batch size of 1088 documents each. This next examples shows how you can send all the data from a node to standard output:
> ./cbtransfer http://10.5.2.37:8091/ stdout:
Will produce a output as follows:
set pymc40 0 0 10
0000000000
set pymc16 0 0 10
0000000000
set pymc9 0 0 10
0000000000
set pymc53 0 0 10
0000000000
set pymc34 0 0 10
0000000000
Note Couchbase Server will store all data from a bucket, node or cluster, but
not the associated design documents. To do so, you should explicitly use
cbbackup to store the information and cbrestore to read it back into memory.
Exporting and Importing CSV Files
You can import and export well-formed.csv files with
cbtransfer. This will import data into Couchbase Server as documents and will
export documents from the server into comma-separated values. This does not
include any design documents associated with a bucket in the cluster.
For example imagine you have records as follows in the default bucket in a cluster:
re-fdeea652a89ec3e9,
0,
0,
4271152681275955,
"{""key"":""re-fdeea652a89ec3e9"",
 ""key_num"":4112,
 ""name"":""fdee c3e"",
 ""email"":""fdee@ea.com"",
 ""city"":""a65"",
 ""country"":""2a"",
 ""realm"":""89"",
 ""coins"":650.06,
 ""category"":1,
 ""achievements"":[77, 149, 239, 37, 76],""body"":""xc4ca4238a0b923820d
 .......
""}"
......
Where re-fdeea652a89ec3e9 is the document ID, 0 are flags, 0 is the expiration
and the CAS value is 4271152681275955. The actual value in this example is the
hash starting with "{""key""....... To export these items to a.csv file
perform this command:
./cbtransfer http://[hostname]:[port] csv:./data.csv -b default -u Administrator -p password
Will transfer all items from the default bucket, -b default available at the
node http://localhost:8091 and put the items into the /data.csv file. If you
provide another named bucket for the -b option, it will export items from that
named bucket. You will need to provide credentials for the cluster when you
export items from a bucket in the cluster. You will see output similar to that
in other cbtransfer scenarios:
[####################] 100.0% (10000/10000 msgs)
bucket: default, msgs transferred...
       : total | last | per sec
 batch : 1053 | 1053 | 550.8
 byte : 4783385 | 4783385 | 2502156.4
 msg : 10000 | 10000 | 5230.9
2013-05-08 23:26:45,107: mt warning: cannot save bucket design on a CSV destination
done
This shows we transferred 1053 batches of data at 550.8 batches per second. The tool outputs “cannot save bucket design….” to indicate that no design documents were exported. To import information from a.csv file to a named bucket in a cluster:
./cbtransfer /data.csv http://[hostname]:[port] -B bucket_name -u Administrator -p password
If your.csv is not correctly formatted you will see the following error during import:
w0 error: fails to read from csv file, .....
Transferring Design Documents Only
You can transfer design documents from one cluster to
another one with the option, design_doc_only=1 :
> ./cbtransfer http://10.5.2.30:8091 http://10.3.1.10:8091 -x design_doc_only=1 -b bucket_one -B bucket_two
transfer design doc only. bucket msgs will be skipped.
done
This will transfer all design documents associated with bucket_one to
bucket_two on the cluster with node http://10.3.1.10:8091. In Couchbase Web
Console you can see this updated design documents when you click on the View tab
and select bucket_two in the drop-down.
cbhealthchecker tool
The cbhealthchecker tool generates a health report named Cluster Health Check
Report for a Couchbase cluster. The report provides data that helps
administrators, developers, and testers determine whether a cluster is healthy,
has issues that must be addressed soon to prevent future problems, or has issues
that must be addressed immediately.
The tool retrieves data from the Couchbase Server monitoring system, aggregates
it over a time scale, analyzes the statistics against thresholds, and generates
a report. Unlike other command line tools such as cbstats and cbtransfer
that use the TAP protocol to obtain
data from the monitoring system, cbhealthchecker obtains data by using the
REST API and the memcached protocol. For more information about the statistics
provided by Couchbase Server, see Statistics and
Monitoring.
You can generate reports on the following time scales: minute, hour, day, week,
month, and year. The tool outputs an HTML file, a text file, and a JSON file.
Each file contains the same information — the only difference between them is
the format of the information. All cbhealthchecker output is stored in a
reports folder. The tool does not delete any files from the folder. You can
delete files manually if the reports folder becomes too large. The path to the
output files is displayed when the run finishes.
cbhealthchecker is automatically installed with Couchbase Server. You can find the tool in the following locations, depending upon your
platform:
| Operating System | Location |
|---|---|
| Linux | /opt/couchbase/bin/
|
| Windows | C:\Program Files\Couchbase\Server\bin\
|
| Mac OS X | /Applications/Couchbase Server.app/Contents/Resources/couchbase-core/bin/
|
The format of the cbhealthchecker command is:
cbhealthchecker CLUSTER USERNAME PASSWORD OPTIONS
| Option | Syntax | Description |
|---|---|---|
| CLUSTER | -c HOST[:PORT] --cluster=HOST[:PORT] |
Hostname and port of a node in the cluster. The default port is 8091. |
| USERNAME | -u USERNAME --user=USERNAME |
Admin username of the cluster. |
| PASSWORD | -p PASSWORD --password=PASSWORD |
Admin password of the cluster. |
| OPTIONS | -b BUCKETNAME --bucket=BUCKETNAME |
Specific bucket on which to report. The default is all buckets. |
-i FILENAME --input=FILENAME |
Generate an analysis report from an input JSON file. | |
-o FILENAME --output=FILENAME |
File name for the HTML report. The default output file name is the report time stamp, for example: 2013-07-26_13-26-23.html. |
|
-h --help |
Show the help message and exit. | |
-s SCALE --scale=SCALE |
Time span (scale) for the statistics: minute, hour, day, week, month or year. The default time span is day. | |
-j --jsononly |
Collect data and output only a JSON file. When you use this option, the analysis report is not generated. |
Sample Commands
The following command runs a report on all buckets in the cluster for the past day:
./cbhealthchecker -c 10.3.1.10:8091 -u Administrator -p password

bucket: default
  node: 10.3.1.10 11210
  node: 10.3.1.11 11210
................................

The run finished successfully.
Please find html output at '/opt/couchbase/bin/reports/2013-07-23_16-29-02.html'
and text output at '/opt/couchbase/bin/reports/2013-07-23_16-29-02.txt'.
The following command runs a report on all buckets in the cluster for the past month:
./cbhealthchecker -c 10.3.1.10:8091 -u Administrator -p password -s month

The run finished successfully.
Please find html output at '/opt/couchbase/bin/reports/2013-07-26_13-26-23.html'
and text output at '/opt/couchbase/bin/reports/2013-07-26_13-26-23.txt'.
The following command runs a report on only the beer-sample bucket for the
past year and outputs the HTML report to a file named beer-health-report.html.
./cbhealthchecker -c 10.3.1.10:8091 -u Administrator -p password -o beer-health-report.html \
      -b beer-sample -s year

The run finished successfully.
Please find html output at '/opt/couchbase/bin/reports/beer-health-report.html'
and text output at '/opt/couchbase/bin/reports/2013-07-26_15-57-11.txt'.
The following command generates only the statistics and outputs them in a JSON file:
./cbhealthchecker -c 10.3.1.10:8091 -u Administrator -p password -j

The run finished successfully.
Please find collected stats at '/opt/couchbase/bin/reports/2013-07-26_13-30-36.json'.
HTML Report
You can view the HTML report in any web browser. If you copy the report to another location, be sure to copy all the files in the reports folder to ensure that the report is displayed correctly by the browser. When you have multiple HTML reports in the folder, you can use the tabs at the top of the page to display a particular report. (If the tabs do not function in your browser, try using Firefox.)
Throughout the report, normal health statuses are highlighted in green, warnings are highlighted in yellow, and conditions that require immediate action are highlighted in red. When viewing the report, you can hover your mouse over each statistic to display a message that describes how the statistic is calculated.
The report begins with a header that lists the statistics scale, the date and time the report was run, and an assessment of the overall health of the cluster. The following figure shows the report header:
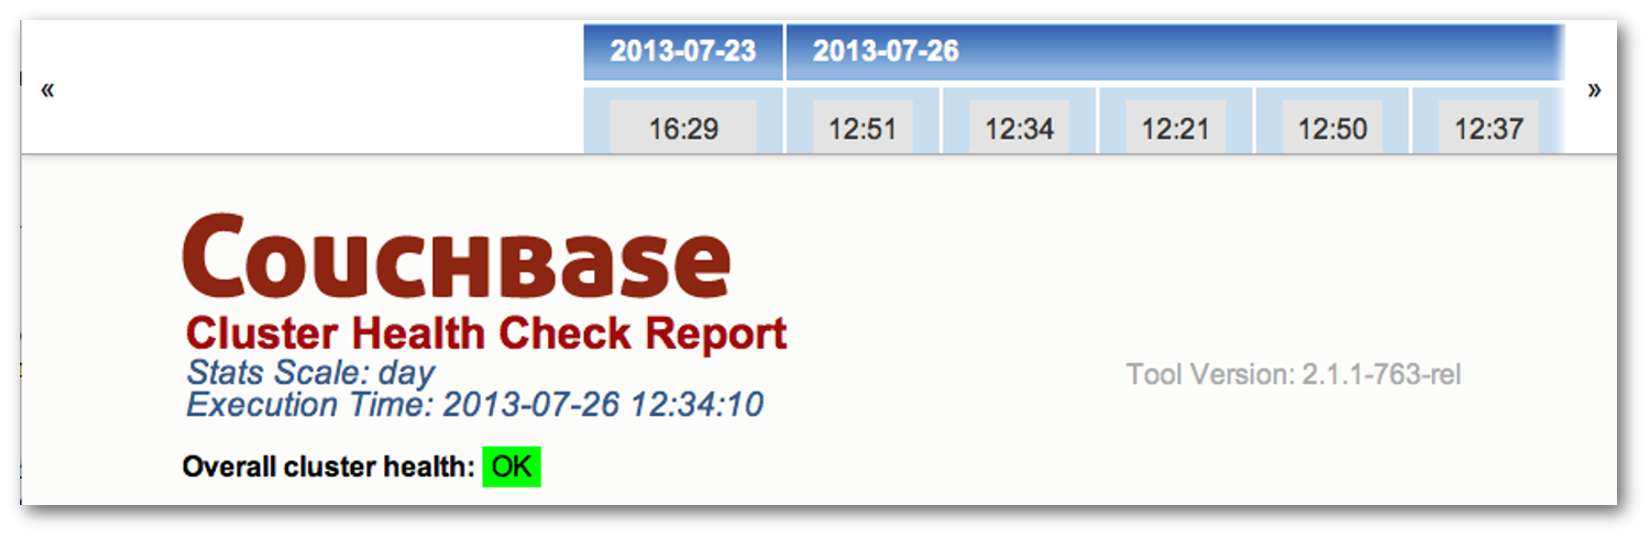
-
The body of the report is divided into several sections:Couchbase — Alerts
The alerts section contains a list of urgent issues that require immediate attention. For each issue, the report lists the symptoms detected, the impact of the issue, and the recommended corrective action to take. This section appears in the report only when urgent issues are detected. The following figure shows a portion of the alerts section of a report:
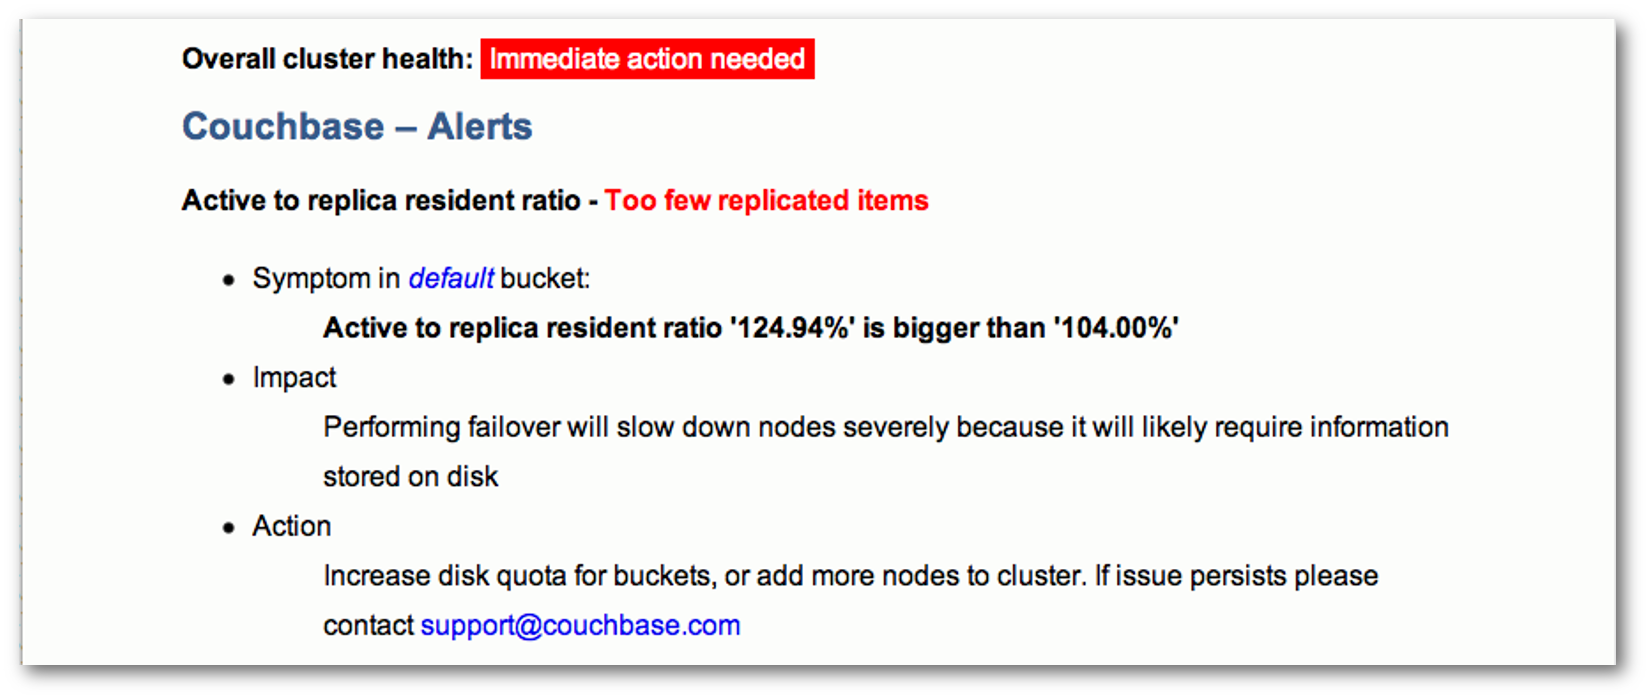
-
Couchbase Cluster Overview
The cluster overview section contains cluster-wide metrics and metrics for each bucket and node in the cluster. This section appears in all reports. The following figure shows a portion of the cluster overview section of a report:
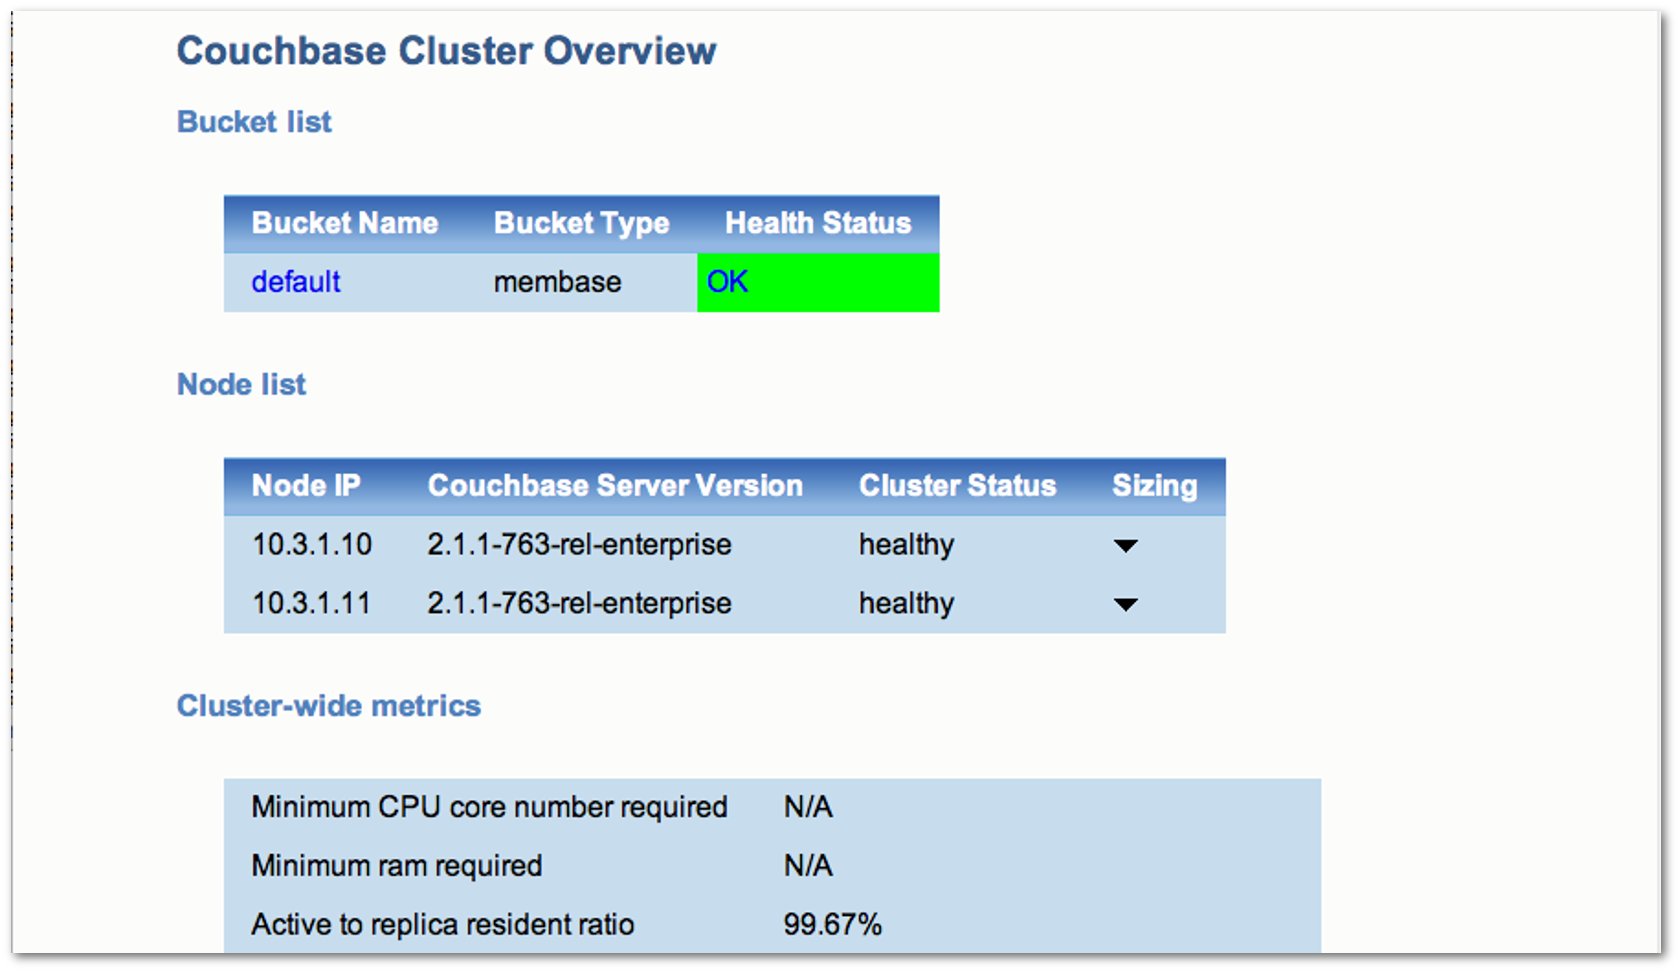
-
Couchbase — Warning Indicators
The warning indicators section contains a list of issues that require attention. For each issue, the report lists the symptoms detected, the impact of the issue, and the recommended corrective action to take. This section appears in the report only when warning indicators are detected. The following figure shows a portion of the warning indicators section of a report:
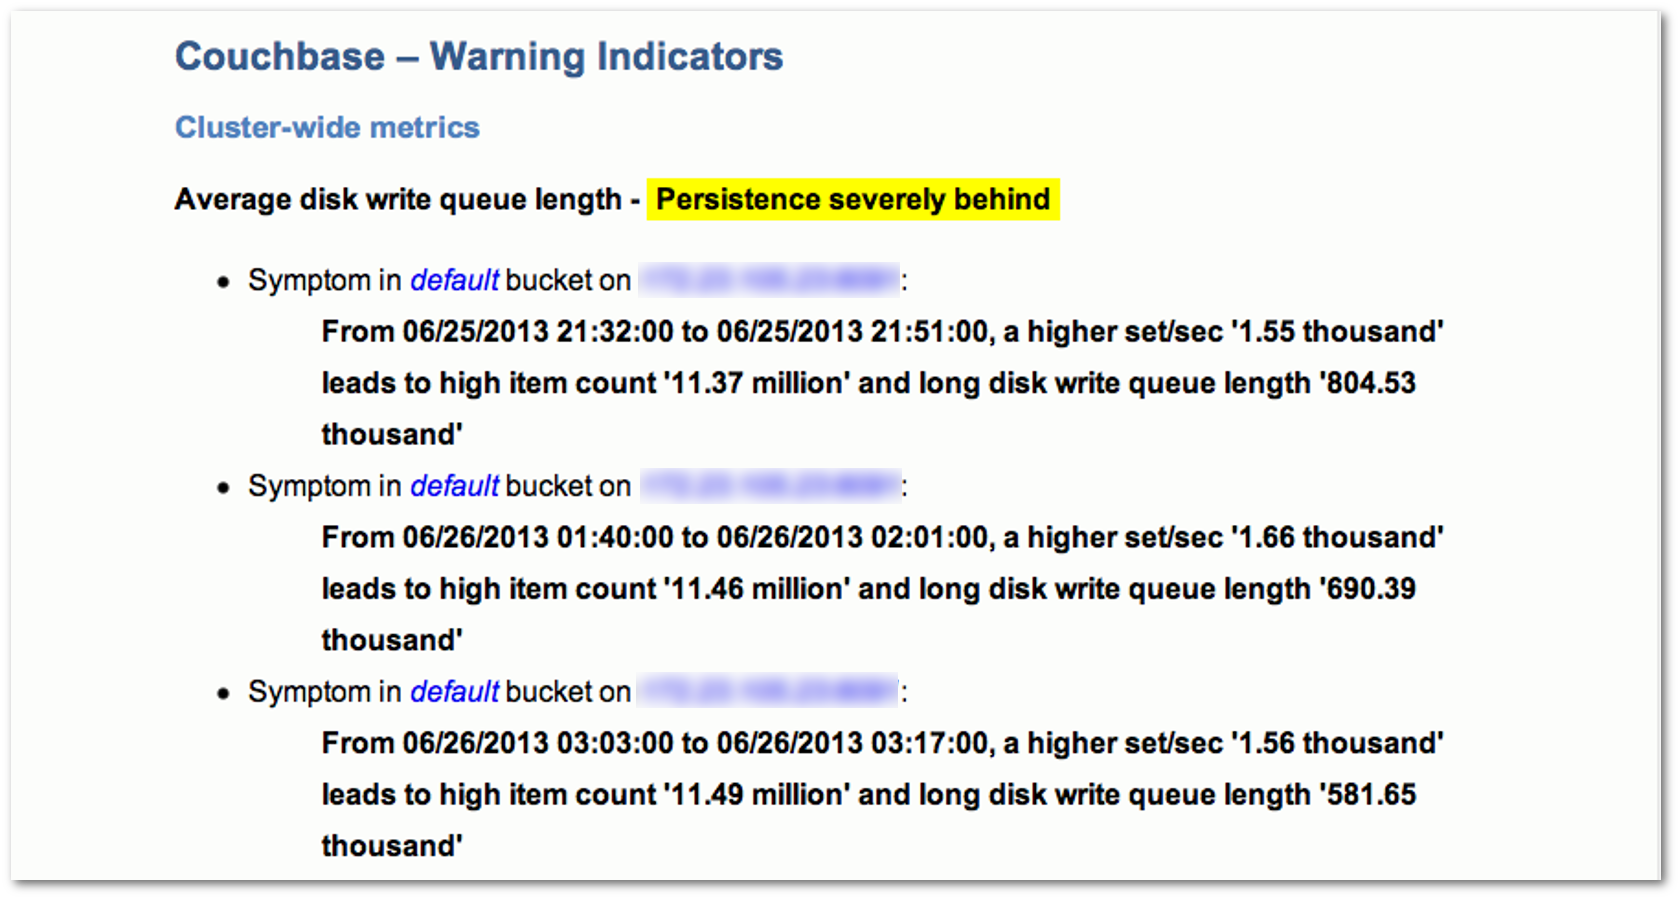
cbreset_password tool
You use this tool to reset an administrative or read-only password. You can find this tool in the following locations, depending upon your platform:
| Operating System | Location |
|---|---|
| Linux | /opt/couchbase/bin/tools/
|
| Windows | C:\Program Files\Couchbase\Server\bin\tools\
|
| Mac OS X | /Applications/Couchbase Server.app/Contents/Resources/couchbase-core/bin/tools/
|
To reset the administrative password:
./cbreset_password hostname:port
This will result in output as follows:
Please enter the new administrative password (or <Enter> for system generated password):
Enter a password of six characters or more or you can have the system generate one for you. After you enter a password or accept a generated one, the system will prompt you for confirmation:
Running this command will reset administrative password.
Do you really want to do it? (yes/no)yes
Upon success you will see this output:
Resetting administrative password...
Password for user Administrator was successfully replaced. New password is Uxye76FJ
There are a few possible errors from this command:
{error,<<"The password must be at least six characters.">>}

{error,<<"Failed to reset administrative password. Node is not initialized.">>}
The first one indicates you have not provided a password of adequate length. The second one indicates that Couchbase Server is not yet configured and running.
cbdocloader tool
You can use this tool to load a group of JSON documents in a given directory, or in a single.zip file. This is the underlying tool used during your initial Couchbase Server install which will optionally install two sample databases provided by Couchbase. You can find this tool in the following locations, depending upon your platform:
| Operating System | Location |
|---|---|
| Linux | /opt/couchbase/bin/tools/
|
| Windows | C:\Program Files\Couchbase\Server\bin\tools\
|
| Mac OS X | /Applications/Couchbase Server.app/Contents/Resources/couchbase-core/bin/tools/
|
When you load documents as well as any associated design documents for views, you should use a directory structure similar to the following:
/design_docs    // which contains all the design docs for views.
/docs           // which contains all the raw json data files. This can contain other sub directories too.
All JSON files that you want to upload contain well-formatted JSON. Any file
names should exclude spaces. If you want to upload JSON documents and design
documents into Couchbase Server, be aware that the design documents will be
uploaded after all JSON documents. The following are command options for
cbdocloader :
-n HOST[:PORT], --node=HOST[:PORT] Default port is 8091

-u USERNAME, --user=USERNAME REST username of the cluster. It can be specified in environment variable REST_USERNAME.

-p PASSWORD, --password=PASSWORD REST password of the cluster. It can be specified in environment variable REST_PASSWORD.

-b BUCKETNAME, --bucket=BUCKETNAME Specific bucket name. Default is default bucket. Bucket will be created if it does not exist.

-s QUOTA, RAM quota for the bucket. Unit is MB. Default is 100MB.

-h --help Show this help message and exit
The following is an example of uploading JSON from a.zip file:
./cbdocloader -n localhost:8091 -u Administrator -p password -b mybucket ../samples/gamesim.zip
Be aware that there are typically three types of errors that can occur: 1) the files are not well-formatted, 2) credentials are incorrect, or 3) the RAM quota for a new bucket to contain the JSON is too large given the current quota for Couchbase Server.
cbworkloadgen Tool
Tool that generates random data and perform read/writes for Couchbase Server. This is useful for testing your Couchbase node.
| Operating System | Location |
|---|---|
| Linux | /opt/couchbase/bin/tools/
|
| Windows | C:\Program Files\Couchbase\Server\bin\tools\
|
| Mac OS X | /Applications/Couchbase Server.app/Contents/Resources/couchbase-core/bin/tools/
|
The following is the standard command format:
cbworkloadgen Usage:
cbworkloadgen -n host:port -u [username] -p [password]

Options are as follows:

-r [number] // % of workload will be writes, remainder will be reads
--ratio-sets=[number] // 95% of workload will be writes, 5% will be reads
-i [number]    // number of inserted items
-l // loop forever until interrupted by user
-t // set number of concurrent threads
-v // verbose mode
For example, to generate workload on a given Couchbase node and open port on that node:
> ./cbworkloadgen -n 10.17.30.161:8091 -u Administrator -p password
Will produce a result similar to the following if successful:
[####################] 100.0% (10527/10526 msgs)
bucket: default, msgs transferred...
       :                total |       last |    per sec
 batch :                   11 |         11 |        2.2
 byte  :               105270 |     105270 |    21497.9
 msg   :                10527 |      10527 |     2149.8
done
When you check the data bucket you will see 10000 new items of with random keys and values such as the following item:
pymc0 "MDAwMDAwMDAwMA=="
cbanalyze-core tool
Helper script to parse and analyze core dump from a Couchbase node. Depending upon your platform, this tool is at the following locations:
| Operating System | Location |
|---|---|
| Linux | /opt/couchbase/bin/tools/
|
| Windows | Not Available on this platform. |
| Mac OS X | /Applications/Couchbase Server.app/Contents/Resources/couchbase-core/bin/tools/
|