Introduction
A newer version of this software is available
You are viewing the documentation for an older version of this software. To find the documentation for the current version, visit the Couchbase documentation home page.
This guide provides information for developers who want to use the Couchbase Ruby SDK to build applications that use Couchbase Server.
Getting Started
This chapter will teach you the basics of Couchbase and how to interact with it through the Ruby Client SDK.
If you haven’t already, download the latest Couchbase Server 2.0 release and
install it. While following the download instructions and setup wizard, make
sure install the beer-sample default bucket. It contains sample data of beers
and breweries, which we’ll be using in our examples here. If you’ve already
installed Couchbase Server 2.0 and didn’t install the beer-sample bucket (or
if you deleted it), just open the Web-UI and navigate to “Settings/Sample
Buckets”. Activate the beer-sample checkbox and click “Create”. In the right
hand corner you’ll see a notification box that will disappear once the bucket is
ready to be used.
Here’s a quick outline of what you’ll learn in this chapter:
Install the library with its dependencies.
Write a simple program to demonstrate connecting to Couchbase and saving some documents.
From here on, we’ll assume that you have a Couchbase Server 2.0 release running
and the beer-sample bucket configured. If you need any help on setting up
everything, there is plenty of documentation available:
Using the Couchbase Web Console, for information on using the Couchbase Administrative Console,
Couchbase CLI, for the command line interface,
Couchbase REST API, for creating and managing Couchbase resources.
Installing the Couchbase Client Libraries
Before you start you should have a working Ruby environment up and running. We recommend Ruby 1.9.2 or 1.8.7 http://ruby-lang.org.
You can verify that Ruby is installed by typing the following command:
shell> ruby -v
ruby 1.9.3p286 (2012-10-12 revision 37165) [x86_64-linux]
Another dependency needed for the client is libcouchbase. Please consult C Client Library page about ways to get it on your system. Here we will assume you are using the Ubuntu/Debian GNU/Linux family and have the apt tool.
Note that the libcouchbase dependency is not needed if you are on Microsoft Windows, as all dependencies are bundled in the source.
Once you have installed libcouchbase, you are then ready to install the most recent client using rubygems.
shell> gem install couchbase
Fetching: couchbase-1.2.0.gem (100%)
Building native extensions.  This could take a while... Successfully installed
couchbase-1.2.0 1 gem installed
Lets load and verify the library version.
shell> ruby -rrubygems -rcouchbase -e 'puts Couchbase::VERSION' 1.2.0
The TCP/IP port allocation on Windows by default includes a restricted number of ports available for client communication. For more information on this issue, including information on how to adjust the configuration and increase the available ports, see MSDN: Avoiding TCP/IP Port Exhaustion.
Hello Couchbase
To follow the tradition of programming tutorials, we’ll start with “Hello Couchbase”. In the first example, we’ll connect to the Cluster, retrieve a document, print it out and modify it. This first example contains the full source code, but in later example we’ll omit the preamble and assume we’re already connected to the cluster.
require 'rubygems'
require 'couchbase'

client = Couchbase.connect(:bucket => "beer-sample",
:host => "localhost")

beer = client.get("aass_brewery-juleol")
puts "#{beer['name']}, ABV: #{beer['abv']}"

beer['comment'] = "Random beer from Norway"
client.replace("aass_brewery-juleol", beer)

client.disconnect
While this code should be very easy to grasp, there is a lot going on worth a little more discussion:
-
Connecting: the
Couchbase.connectbasically creates an instance ofCouchbase::Bucketclass internally passing all arguments to its contructor. You can see complete list of options on the API documentation site. In our example the most interesting option is:bucket. Because our data bucket isn’t “default” we must specify it during connection. The bucket is the container for all your documents. Inside a bucket, a key — the identifier for a document — must be unique.In production environments, it is recommended to use a password on a bucket (this can be configured during bucket creation), but when you are just starting out using the default bucket without a password is fine. Note that the
beer-samplebucket also doesn’t have a password, so just change the bucket name and you’re set. Another option is:hostwhich tells the client library the address of the cluster. While passing in only one host is fine, it is strongly recommended to add two or three (of course, if your cluster has more than one node) and use:node_listoption instead. It is important to understand that this list does not have to contain all nodes in the cluster — you just need to provide a few so that during the initial bootstrap phase the Client is able to connect to the server. Any two or three nodes will be fine, but maintain this list. After this has happened, the Client automatically fetches the cluster configuration and keeps it up to date, even when the cluster topology changes. This means that you don’t need to change your application config at all when you resize your cluster. Set and get: these two operations are the most fundamental ones. You can use set to create or completely replace a document inside your bucket and get to read it back afterwards. There are lots of arguments and variations, but if you just use them as shown in the previous example will get you pretty far. The sample is using the
Couchbase::Bucket#replaceoperation. It behaves exactly like#setbut will raise an error if the document isn’t in the bucket. Note that by default all operations are using JSON to store your documents, so make sure it is possible to represent your values in this format. If not, you might use:marshalformat. Find more info about the formats in the API documentation.Disconnecting: at the end of the program (or when you shutdown your server instance), you should use the
Couchbase::Bucket#disconnectmethod. But you should know that the instance will be disconnected properly if it is destroyed by garbage collector.
That’s it. We’re ready to run our first Couchbase program.
shell> ruby hello.rb Juleøl, ABV: 5.9
Working with Documents
A document in Couchbase Server consists of a value and meta information, like a unique key, a CAS value, flags etc. These are all stored in a bucket. A document can be anything, but it is recommended to use the JSON format. JSON is very convenient for storing structured data with little overhead, and is also used inside the View engine. This means that if you want to get most out of Couchbase Server 2.0, use JSON.
The couchbase client will use any of accessible JSON libraries supported by
multi_json gem. This mean if your
values are serializable with MultiJson.dump, you can pass them to mutator
methods and be sure you will get them later in the same form.
The following chapter introduces the basic operations that you can use as the fundamental building blocks of your application.
Here’s a quick outline of what you’ll learn in this chapter:
Write a program to demonstrate using Create, Read, Update, Delete (CRUD) operations on documents.
Explore some of the API methods that will take you further than what you’ve seen previously.
Creating and Updating Documents
Couchbase Server provides a set of commands to store documents. The commands are very similar to each other and differ only in their meaning on the server-side. These are:
| Command | Description |
|---|---|
set |
Stores a document in Couchbase Server (identified by its unique key) and overrides the previous document (if there was one). |
add |
Adds a document in Couchbase Server (identified by its unique key) and fails if there is already a document with the same key stored. |
replace |
Replaces a document in Couchbase Server (identified by its unique key) and fails if there is no document with the given key already in place. |
There are also additional commands mutation commands, which do make sense when
you are working in :plain mode, because they are implemented on the server and
not JSON-aware. But still they might be useful in your application:
| Command | Description |
|---|---|
prepend |
Prepend given string to the value. The concatenation is done on the server side. |
append |
Append given string to the value. The concatenation is also done on the server side. |
increment |
Increment, atomically, the value. The value is a string representation of an unsigned integer. The new value is returned by the operation. By default it will increment by one. See API reference for other options. |
decrement |
Decrement, atomically, the value. The value is a string representation of an unsigned integer. The new value is returned by the operation. By default it will decrement by one. See API reference for other options. |
The SDK provides several options for these operations, but to start out here are the simplest forms:
key = "aass_brewery-juleol"
doc = {"name" => "Juleøl", "abv" => 5.9}

client.add(key, doc);
client.set(key, doc);
client.replace(key, doc);
Reading Documents
With Couchbase Server 2.0, you have two ways of fetching your documents: either by the unique key through the get method, or through Views. Since Views are more complex, let’s just look at a simple get first:
doc = client.get("aass_brewery-juleol")

keys = ["foo", "bar"]
docs = client.get(keys, :quiet => true)
In this case you will receve the Hash document you stored earlier. If there no
such key in the bucket, the exception Couchbase::Error:NotFound will be
raised. But you can suppress all NotFound errors by using option :quiet =>
true and the method will return nil instead. The Couchbase::Bucket#get
method can also accept list of keys returning list of documents.
With Couchbase Server 2.0, the very powerful ability to query your documents across this distributed system through secondary indexes (Views) has been added to your toolbelt. This guide gets you started on how to use them through the Ruby SDK, if you want to learn more please refer to the chapter in the Couchbase Server 2.0 documentation.
Once you created your View in the UI, you can query it from the SDK in two steps. First, you grab the design document definition from the cluster, second query view with options you need and use results. In its simplest form, it looks like this:
# Step 1: Get the design document definition
ddoc = client.design_docs["beer"]
ddoc.views      #=> ["brewery_beers", "by_location"]

# Step 2: Query the view and use results
ddoc.brewery_beers.each do |row|
puts row.key
puts row.value
puts row.id
puts row.doc
end
Note that the view request won’t be executed until you will try to access the
results. This means that you can pass view object ( ddoc.brewery_beers here)
without executing it.
Views can be queried with a large amount of options to change what the results
of the query will contain. All supported options are available as items in
options Hash accepted either by the view method or by #each iterator on the
view. Here are some of them:
| Option | Description |
|---|---|
| include_docs (Boolean) | Used to define if the complete documents should be fetched with the result ( false by default). Note this will actually fetch the document itself from the cache, so if it has been changed or deleted you may not receive a document that matches the view, or any at all. |
| reduce (Boolean) | Used to enable/disable the reduce function (if there is one defined on the server). true by default. |
| limit (Fixnum) | Limit the number of results that should be returned. |
| descending (Boolean) | Revert the sorting order of the result set. ( false by default) |
| stale (Boolean, Symbol) | Can be used to define the tradeoff between performance and freshness of the data. ( :update_after by default) |
Now that we have our View information in place, we can issue the query, which
actually triggers the scatter-gather data loading process on the Cluster. We can
use it to iterate over the results and print out some details (here is a more
complete example which also includes the full documents and only fetches the
first five results). The resulting information is encapsulated inside the
ViewRow object.
view = client.design_docs["beer"].brewery_beers

# Include all docs and limit to 5
view.each(:include_docs => true, :limit => 5) do |row|
puts row.id
# The full document (as a Hash) is available through row.doc
end
In the logs, you can see the corresponding document keys automatically sorted (ascending):
21st_amendment_brewery_cafe 21st_amendment_brewery_cafe-21a_ipa
21st_amendment_brewery_cafe-563_stout
21st_amendment_brewery_cafe-amendment_pale_ale
21st_amendment_brewery_cafe-bitter_american`
Deleting Documents
If you want to get rid of a document, you can use the delete operation:
client.delete("aass_brewery-juleol");
Advanced Topics
This chapter introduces some techniques topics that you can use to further extend your Couchbase vocabulary.
CAS and Locking
If you need to coordinate shared access on documents, Couchbase helps you with two approaches. Depending on the application you may need to use both of them, but in general it is better (if feasible) to lean towards CAS because it provides the better performance characteristics.
Optimistic Locking
Each document has a unique identifier associated with it (the CAS value), which changes when the document itself is mutated. You can fetch the CAS value for a given key and pass it to any mutator operation to protect it. The update will only succeed, when the CAS value is still the same. This is why it’s called optimistic locking. Someone else can still read and try to update the document, but it will fail once the CAS value has changed. Here is a example on how to do it with the Ruby SDK:
key = "eagle_brewing-golden"
# Reads the document with the CAS value.
beer, flags, cas = client.get(key, :extended => true)

# Updates the document and tries to store it back.
beer["name"] = "Some other Name"
client.set(key, beer, :cas => cas, :flags => flags)
Note that this also means that all your application need to follow the same code
path (cooperative locking). If you use #set somewhere else in the code on the
same document, it will work even if the CAS itself is out of date (that’s
because the normal #set method doesn’t care about those values at all). Of
course, the CAS itself changes then and the mutation operation would fail
afterwards.
There is also shortcut operation for doing optimistic locking Bucket#cas.
Internally it does the same thing but abstract you from storing and passing meta
information. Here is the previous example rewritten to use this operation:
key = "eagle_brewing-golden"
client.cas(key) do |beer|
beer["name"] = "Some other Name"
# return new value from block
beer
end
Note that you should return new value from the block. If you will skip it, it
will use "Some other Name" as new value.
Pessimistic Locking
If you want to lock a document completely (or an object graph), you can use the
Bucket#get operation with :lock option. The option accepts either boolean
(where truth does make sense really) or Fixnum meaning the time period where the
lock is valid. The server will release lock after the that period (or maximum
value, which configured on the server). Other threads can still run get
queries queries against the document, but mutation operations without a CAS will
fail.
You can determine actual default and maximum values calling Bucket#stats
without arguments and inspecting keys "ep_getl_default_timeout" and
"ep_getl_max_timeout" correspondingly.
key = "eagle_brewing-golden";

# Get with Lock
beer, flags, cas = client.get(key, :lock => true, :extended => true);

# Update the document
beer["name"] = "Some other Name"

# Try to set without the lock
client.set(key, beer, :flags => flags)
#=> will raise Couchbase::Error::KeyExists

# Try to set with the CAS aquired, will be OK
client.set(key, beer, :flags => flags, :cas => cas)
Once you update the document, the lock will be released. There is also the
Bucket#unlock method available through which you can unlock the document.
Persistence and Replication
By default, the mutation operations return when Couchbase Server has accepted the command and stored it in memory (disk persistence and replication is handled asynchronously by the cluster). That’s one of the reason why it’s so fast. For most use-cases, that’s the behavior that you need. Sometimes though, you want to trade in performance for data-safety and wait until the document has been saved to disk and/or replicated to other hosts.
The Ruby SDK provides :observe option for all mutation operations. You can
claim various persistence conditions using this option. Basically its argument
is a Hash with three possible keys, describing the condition when the mutator
will yield the result:
:replicated(Fixnum) describe how many nodes should receive replicated copy of the document.:persisted(Fixnum) describe how many nodes should persist the document to the disk. The nodes include master node, where the key resides and all replica nodes.:timeout(Fixnum) the timeout period in microseconds. After passing, the operation condition will be considered timed out and appropriate exception will be thrown. Default value could be addressed usingBucket#default_observe_timeout.
Here is an example on how to make sure that the document has been persisted on its master node, but also replicated to at least one of its replicas.
key = "important"
value = "document"
client.set(key, value, :observe => {:persisted => 1, :replicated => 1})
You can also separate persistence requirement from actual operations, and in this case, you can wait for several keys:
keys = []
(1..5).each do |nn|
key = "important-#{nn}"
keys << key
client.set(key, "document-#{nn}")
end
client.observe_and_wait(keys, :persisted => 1, :replicated => 1)
Couchbase and Rails Tutorial
The goal of this chapter is to show you how to write more advanced applications using Couchbase and Rails framework.
We assume here that you finished the “Getting Started” section already, if not, we recommend to take a look, because it describes how to install and verify Ruby SDK.
TL;DR
For the purposes of this tutorial, we prepared an example application for you to follow along with. The application uses a bucket with one of the sample datasets which come with Couchbase Server itself: beer-sample. If you haven’t already done so, download the latest Couchbase Server 2.0 and install it. While you follow the download instructions and setup wizard, make sure you install the beer-sample default bucket. It contains a sample data set of beers and breweries, which we’ll use in our examples here. If you’ve already installed Couchbase Server 2.0 and didn’t install the beer-sample bucket (or if you deleted it), just open the Web-UI and navigate to “Settings/Sample Buckets”. Select the beer-sample checkbox and click “Create”. In the right hand corner you’ll see a notification box that will disappear once the bucket is ready to be used.
After that you can clone the complete repository from couchbaselabs on github:
shell> git clone git://github.com/couchbaselabs/couchbase-beer.rb.git Cloning
into 'couchbase-beer.rb'... remote: Counting objects: 409, done. remote:
Compressing objects: 100% (254/254), done. remote: Total 409 (delta 183), reused
340 (delta 114) Receiving objects: 100% (409/409), 235.17 KiB | 130 KiB/s, done.
Resolving deltas: 100% (183/183), done.
Navigate to the directory and install all application dependencies:
shell> cd couchbase-beer.rb/
shell> bundle install
...snip... Your bundle is complete! Use `bundle show [gemname]` to see where a bundled gem is installed.
That’s it. Assuming that Couchbase Server with beer-sample bucket is up and running on localhost, you can just start the Ruby web server:
shell> rails server => Booting Thin => Rails 3.2.8 application starting in
development on http://0.0.0.0:3000 => Call with -d to detach => Ctrl-C to
shutdown server >> Thin web server (v1.5.0 codename Knife) >> Maximum
connections set to 1024 >> Listening on 0.0.0.0:3000, CTRL+C to stop
Then navigate to http://localhost:3000/. You should see something like that:
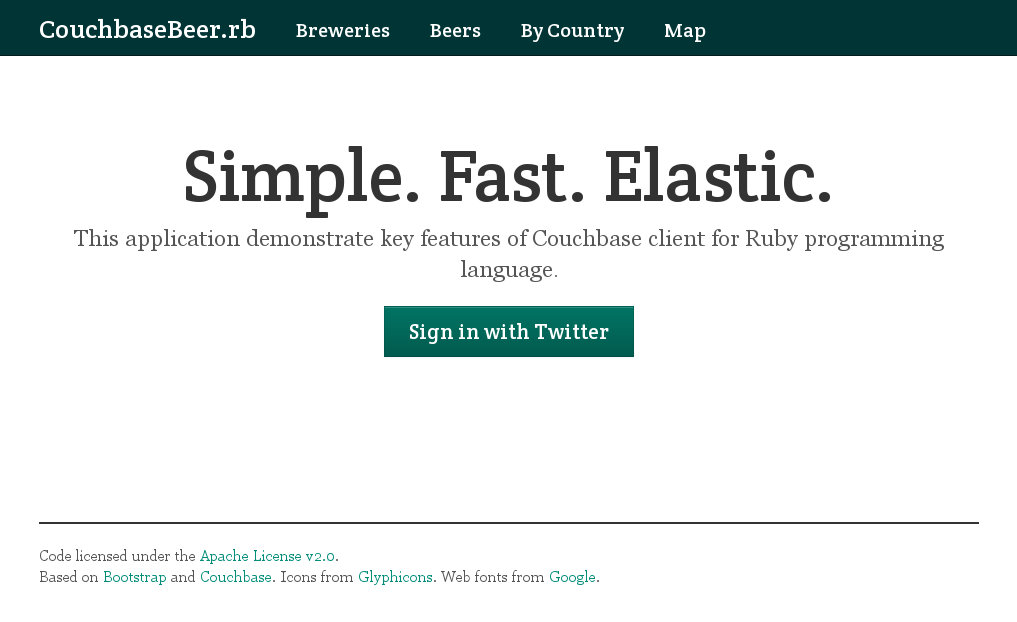
Create the Application
If you want to learn how to create this application from scratch just continue reading. As with any Rails application we will use generators a lot. Since we don’t need ActiveRecord we’ll let rails new know about this:
shell> rails new couchbase-beer.rb -O --old-style-hash
Now navigate to the project root and open up the Gemfile in your favorite editor. First, we need to add the Couchbase client libraries there:
gem 'couchbase'
gem 'couchbase-model'
Omitting the version will get the latest stable versions of those gems. We will use the couchbase-model gem to define our models in a declarative way much like all Rails developers describe their models with ActiveRecord. Apart from that we will use yajl-ruby, a high-performance JSON parser/generator, rdiscount to render descriptions as Markdown, and omniauth-twitter for authentication.
gem 'yajl-ruby'
gem 'rdiscount'
gem 'omniauth-twitter'
The complete Gemfile will looks like this:
Gemfile
source 'https://rubygems.org'

gem 'rails', '3.2.8'

gem "eventmachine", "~> 1.0.0"
gem 'thin', "~> 1.5.0"
gem 'jquery-rails'
gem 'yajl-ruby'
gem 'couchbase'
gem 'couchbase-model'
gem 'rdiscount'
gem 'omniauth'
gem 'omniauth-twitter'

gem 'capistrano'

group :development, :test do
  gem 'debugger'
end

group :assets do
  gem 'sass-rails', '~> 3.2.3'
  gem 'uglifier', '>= 1.0.3'
end
The next step will be to configure Couchbase connection, this step should be familiar to the Rails developer, because couchbase-model brings YAML-styled configuration. So if you know how config/database.yml works, you can make some assumptions about how config/couchbase.yml works. To generate a config, use the couchbase:config generator:
shell> rails generate couchbase:config create config/couchbase.yml
Since our bucket name differs from the project name, you should update the bucket property in the config. Also if your Couchbase Server is not running on the local machine, you should also change the hostname in the config. After you’ve made your modifications, your config should look like this:
config/couchbase.yml
common: &common hostname: localhost port: 8091 username: password: pool:
default  development: <<: *common bucket: beer-sample  production: <<: *common
bucket: beer-sample
That’s it for configuration, let’s move forward and create some models.
Define Models
To create a model, all you need is to define the class and inherit from Couchbase::Model. Here we dissect the Brewery model in the application.
app/models/brewery.rb
class Brewery < Couchbase::Model
  attribute :name, :description
  attribute :country, :state, :city, :address
  attribute :phone
  attribute :geo
  attribute :updated

  view :all, :limit => 31
  view :all_with_beers
  view :by_country, :include_docs => false, :group => true
  view :points, :spatial => true

  def full_address
    [country, state, city, address].reject(&:blank?).join(', ')
  end

  def location
    [country, state].reject(&:blank?).join(', ')
  end
end
The first part of the model contains attribute definitions. The attribute macro defines a pair of accessors and helps to maintain map of attributes-values. You can also specify default a value for each attribute:
class Post < Couchbase::Model
  attribute :title, :body
  attribute :timestamp, :default => lambda{ Time.now }
end

Post.new(:title => "Hello, World!")
#=> #<Post timestamp: 2012-12-07 16:03:56 +0300, title: "Hello, World!">
The next block is about defining views. One way to play with views is Couchbase Server Admin Console, but it may not be the best to keep parts of the code in different places. After all Views are implemented in JavaScript and contain the business logic couchbase-model. Each time the server starts (in development mode for each request), the application will check the file system changes of the map/reduce JavaScript files and update the design document if needed. There is also the Rails generator for views. It will put view stubs for you in proper places. Here for example, is the model layout for this particular application:
app/models/ ├── beer │   ├── all │   │   └── map.js │   └── by_category │
├── map.js │       └── reduce.js ├── beer.rb ├── brewery │   ├── all │   │   └──
map.js │   ├── all_with_beers │   │   └── map.js │   ├── by_country │   │   ├──
map.js │   │   └── reduce.js │   └── points │       └── spatial.js ├──
brewery.rb ├── favorites.rb └── user.rb
For each model which has views, you should create a directory with the same name and put in the appropriate JavaScript files. Each should implement the corresponding parts of the view. For example _design/brewery/_view/by_country does require both map and reduce parts. To generate a new view you should pass model name and view name you need to get:
shell> rails generate couchbase:view beer test create
app/models/beer/test/map.js create  app/models/beer/test/reduce.js
Those automatically generated files are full of comments, so they are worth reading as a quick start about how to write View indexes. For more information about using views for indexing and querying from Couchbase Server, here are some useful resources:
For technical details on views, how they operate, and how to write effective map/reduce queries, see Couchbase Server 2.0: Views and Couchbase Sever 2.0: Writing Views.
Sample Patterns: to see examples and patterns you can use for views, see Couchbase Views, Sample Patterns.
Timestamp Pattern: many developers frequently ask about extracting information based on date or time. To find out more, see Couchbase Views, Sample Patterns.
Implement Controllers
Now we examine the controllers from the project. This is where data is selected
to display to user. For example BreweriesController :
class BreweriesController < ApplicationController
  def index
    filter = params.extract!(:start_key, :end_key).reject{|_, v| v.blank?}
    @breweries = Brewery.all(filter).to_a
    if @breweries.size > 30
      @last_key = @breweries.pop.try(:key)
    end
    respond_to do |format|
      format.html
      format.json do
        render :json => {:last_key => @last_key, :items => @breweries}
      end
    end
  end

  def show
    @brewery, *@beers = Brewery.all_with_beers(:start_key => [params[:id]],
                                               :end_key => ["#{params[:id]}\uefff"]).to_a
  end
end
It has two actions:
“index” which pulls the list of breweries. It might look complex, but it isn’t. In first line we are preparing query parameters for views. In particular, we are interested in the
start_keyandend_keyparameters, but we need them only if they aren’t blank (i.e. not nil and not empty string). The second step is to execute the view and get results immediately. Your application might want to fetch the entries from view on demand in a lazy manner, then you no need to call the#to_amethod and iterate over them or call methods like#next. In this particular example we are fetching 31 records and are trying to pop last one to use it later for “infinite” scrolling. The end of the method is responsible for rendering the data in two formats, by default it will use HTML, but if the application is responding to an AJAX request with theAccept: application/jsonheader, it will instead render the JSON representation of our models.-
“show” uses another view from the
Brewerymodel, which collates breweries with beer for easier access. Here is a map function which does that job:function(doc, meta) { switch(doc.type) { case "brewery": emit([meta.id]); break; case "beer": if (doc.brewery_id && doc.name) { emit([doc.brewery_id, doc.name]); } break; } }
As you can see we are using a compound key with
brewery ID in the first position and the document name in the second position.
Because we are selecting only beers without null names, they will be sorted
after the breweries. By doing so, when we filter result by the first key only,
the @brewery variable will receive first element of the sequence, and @beers
will get the rest of the collection because of the splat ( * ) operator.
Bonus: Spatial Queries, Sessions and Cache
One of the experimental features of the Couchbase Server is spatial views. These kind of views allow you to build indexes on geo attributes of your data. This sample application demonstrates spatial views. Click on the “Map” link in the menu and your browser will fetch your current location; it will position the center of the map to your location, or to Mountain View otherwise. After that it will execute a spatial query using map bounds and the Couchbase Server will give you all the breweries which are nearby. The following is part of the implementation. The core of this feature is brewery/points/spatial.js :
function(doc, meta) { if (doc.geo && doc.geo.lng && doc.geo.lat && doc.name) {
emit({type: "Point", coordinates: [doc.geo.lng, doc.geo.lat]}, {name: doc.name,
geo: doc.geo}); } }
The function will emit a Point object and the name with coordinates as the payload. The action in the controller is quite trivial, it transmits the result to the application in JSON representation, and Google maps is renders markers for each object.
Except nice extensions, provided by couchbase-model library, couchbase gem itself has few more nice features which could be useful in the web application. For example, you can easily substitute your session or cache store in Rails (or even in rack) with Couchbase Server.
To use Couchbase as cache store in Rails, just put following line in your config/application.rb file:
config.cache_store = :couchbase_store
You can also pass additional connection options:
cache_options = {
  :bucket => 'protected',
  :username => 'protected',
  :password => 'secret',
  :expires_in => 30.seconds
}
config.cache_store = :couchbase_store, cache_options
To use Couchbase as the session store you should update your
config/initializers/session_store.rb file:
require 'action_dispatch/middleware/session/couchbase_store'
AppName::Application.config.session_store :couchbase_store
Or remove this file and add following line to your config/application.rb :
require 'action_dispatch/middleware/session/couchbase_store'
config.session_store :couchbase_store
You can also pass additional options:
require 'action_dispatch/middleware/session/couchbase_store'
session_options = {
  :expire_after => 5.minutes,
  :couchbase => {:bucket => "sessions", :default_format => :json}
}
config.session_store :couchbase_store, session_options
In the example above we specify the format as JSON which allows us to share sessions in a heterogeneous environment, and also analyze them using Map/Reduce. But keep in the mind that not everything in typical Rails application can be serialized to JSON, for example ActionDispatch::Flash::FlashHash. This is why the library serializes sessions using Marshal.dump by default.
Common Patterns
Creating Timed Operations
One approach you can try if you get temporary out of memory errors from the server is to explicitly pace the timing of requests you make. You can do this in any SDK by creating a timer and only performing a Couchbase request after a specific timed interval. This will provide a slight delay between server requests and will reduce the risk of an out of memory error. For instance in Ruby:
c.set("foo", 100)
n = 1

c.run do
  c.create_periodic_timer(500000) do |tm|
    c.incr("foo") do
      if n == 5
        tm.cancel
      else
        n += 1
      end
    end
  end
end
In this example we create a sample record foo with the initial fixnum value of
100. Then we create a increment count set to one, to indicate the first time we
will create a Couchbase request. In the event loop, we create a timing loop that
runs every.5 seconds until we have repeat the loop 5 times and our increment is
equal to 5. In the timer loop, we increment foo each time we loop.
Using EventMachine
The Ruby SDK provides integration with EventMachine so you can perform asynchronous operations with the server. This is very important for web applications these days because a project can gather attention and grow a user base in days or even hours. You can quickly run into problems, such as the C10K problem when the number of users grow quickly. When you provide asynchronous operations, you can maintain application performance for your users while growing your user base..
Asynchronous network services can handle a lot of active connection simultaneously, and there are a lot of libraries and frameworks which make it more easier. The Ruby client use libcouchbase which is a library written in C and implements the reactor pattern.
By default libcouchbase comes with bindings to two popular event libraries: libevent and libev. There is special layer in libcouchbase which allows substitution of IO easily. The Ruby client substitutes IO in two cases, meaning it comes with two additional IO engines. The first engine in the Ruby client is Ruby thread-friendly, because it tries to release Ruby GVL as long as possible when it does IO. This is the default behavior for the Ruby SDK. The second Ruby-specific engine is one using routines from EventMachine. To understand more about the couchbase gem and EventMachine read this blog post.
The EventMachine library is Ruby implementation of the reactor
pattern. It can solve C10K
problems for applications written in Ruby, and in this section we will describe
how to write efficient application using the asynchronous server
goliath and the framework
grape. You can find all the code for
this example in the examples/chat-goliath-grape directory of the source
distribution.
First we show you how to configure a couchbase connection. We will use
EventMachine::Synchrony::ConnectionPool so the client can handle multiple
threads:
config['couchbase'] = EventMachine::Synchrony::ConnectionPool.new(:size => 5) do
  Couchbase::Bucket.new(:engine => :eventmachine)
end
This allocates a pool of five connection instances and stores the connections
into a config object; this object will be available as a method on an env
object during a request.
We use grape to declare our API endpoints and goliath to run it
asynchronously on EventMachine. This code connects these libraries and wraps the
whole grape application into a goliath handler:
class App < Goliath::API
  def response(env)
    Chat.call(env)
  rescue => e
    [
      500,
      {'Content-Type' => 'application/json'},
      MultiJson.dump(:error => e, :stacktrace => e.backtrace)
    ]
  end
end
Here the Chat class contains the definition of our API. Since the service
communicates JSON we catch all errors, reformat them into JSON and stream the
errors back to the client:
class Chat < Grape::API

  format :json

  resource 'messages' do
    get do
      view = env.couchbase.design_docs["messages"].all
      msgs = view.map do |r|
        {
          "id" => r.id,
          "key" => r.key,
          "value" => r.value,
          "cas" => r.meta["cas"]
        }
      end
      {"ok" => true, "messages" => msgs}
    end

    post do
      payload = {
        "timestamp" => DateTime.now.iso8601,
        "message" => params["message"]
      }
      id = env.couchbase.incr("msgid", :initial => 1)
      id = "msg:#{id}"
      cas = env.couchbase.set(id, payload)
      {"ok" => true, "id" => id, "cas" => cas}
    end
  end

end
Our Chat class defines a single resource messages which responds to GET
and POST HTTP methods. We first describe a post do... end action block
first. Here we extract the message string from input parameters and build a
payload of new messages with a timestamp.
As the next step we use a incr operation to get the next message ID. In
Couchbase this operation is atomic, so it is safe to do it in the case of
multiple application instances. After that, we store a new message document with
a set operation and report upon success to the client. The hash we return will
be automatically converted to JSON, because of the format :json declaration on
the top of the class.
GET /messages handler requires no parameters and returns all the message
documents stored in the cluster. In the first line of the handler we create a
Couchbase::View object which is bound to /_design/messages design document.
For more information about design documents and Views, see Couchbase Manual,
Views and
Indexes.
view = env.couchbase.design_docs["messages"].all
Here you can pass View parameters when you create the object. For example, if
you want to load documents along with view results, just pass :include_docs =>
true :
view = env.couchbase.design_docs["messages"].all(:include_docs => true
The Couchbase::View class includes the
Enumerable module, which
supports convenience methods available, such as #map, which you saw
previously. Note that the view object itself doesn’t fetch data until you query
it.
As the last note, we should probably show the server-side map function, which the server uses to index:
function(doc, meta) {
  if (doc.timestamp) {
    emit(meta.id, doc)
  }
}
This function can be either defined using the Couchbase Web Console, or you can create it in your program (see Bucket#save_design_doc method). For more information about using the Web Console, see Couchbase Manual, Using the Views Editor.
The next examples show how you can query a view. We will use curl tool, which probably available on your distribution by default. This example was tested with recent stable version of the Ruby interpreter 2.0.0.
Start the goliath server up:
$ ruby app.rb -sv
Query the server for a single message:
$ curl -X POST -Fmessage="Hello world" http://localhost:8091/messages
{"ok":true,"id":"msg:1","cas":11880713153673363456}
Query for all messages with this command:
$ curl -X GET http://localhost:8091/messages
{"ok":true,"messages":[{"id":"msg:1","key":"msg:1","value":{"timestamp":"2013-04-11T12:43:42+03:00","message":"Hello world"},"cas":11880713153673363456}]}
Data Transcoders
More often these days we build heterogeneous application systems. They are
heterogeneous in a sense of programming languages, frameworks and even database
storage. And more often this is the case when we want to gracefully transition
an older system to newer one, and this occurs more often in this constantly
changing world. This section will describe a technique which provides custom
data formatting into an application. This feature is in the almost every
Couchbase client, and we call it Transcoders. This feature is available in the
Ruby client since version 1.3.0.
So the transcoder API is simple; it is the class or instance, which responds to
the two methods, dump and load. The semantic is very straight forward: dump
returns a byte stream (String) representation of an object along with new flags.
The signature is:
def dump(obj, flags, options = {})
  # do conversion
  [blob, new_flags]
end
The options hash will contain some context from the library which helps
identify when the conversion occurs. Currently takes only one parameter,
:forced which means that the transcoder is explicitly passed to the operation.
Compare the two different examples of using an implicit or explicit transcoder:
# default transcoder is Couchbase::Transcoder::Document
conn = Couchbase.connect
# implicit, used default transcoder, in this case :forced => false
conn.set("foo", "bar")
# explicit, used MyCustom transcoder, and :forced => true
conn.set("foo", "bar", :transcoder => MyCustom)
The load method is even simpler. It converts the stream back into the object:
def load(blob, flags, options = {})
  # check flags and decode value
  obj
end
This method can also accept :forced as an option. The Ruby library comes with
three predefined transcoders: Document, Marshal and Plain, which are in file
lib/couchbase/transcoder.rb. You can use these transcoders with an earlier
version of the Ruby formatting API, therefore the patch won’t break applications
built on earlier versions of the library:
conn.default_format = :document
conn.get("foo", :format => :marshal) # {:force => true}
Below is a transcoder which will compress and decompress all values using Gzip. Its object initializer accepts any other transcoder and can format the results:
require 'zlib'
require 'stringio'

class GzipTranscoder
  FMT_GZIP = 0x04

  def initialize(base = nil)
    @base = base || Couchbase::Transcoder::Plain
  end

  def dump(obj, flags, options = {})
    obj, flags = @base.dump(obj, flags, options)
    io = StringIO.new
    gz = Zlib::GzipWriter.new(io)
    gz.write(obj)
    gz.close
    [io.string, flags|FMT_GZIP]
  end

  def load(blob, flags, options = {})
    # decompress value only if gzip flag set
    if (flags & FMT_GZIP) == FMT_GZIP
      io = StringIO.new(blob)
      gz = Zlib::GzipReader.new(io)
      blob = gz.read
      gz.close
    end
    @base.load(blob, flags, options)
  end
end
This shows you how you can use this transcoder after you create a connection:
conn = Couchbase.connect
conn.transcoder = GzipTranscoder.new
conn.get("foo")
Using Couchbase::ConnectionPool
When your application using threads for better concurrency or parallelism, it is
become important to carefully use all data structures. For example you cannot
share Couchbase::Bucket instance between threads. But the library contains
special class Couchbase::ConnectionPool which designed to leverage
connection_pool gem and protect
Couchbase::Bucket. Note that the Couchbase::ConnectionPool class available
only for ruby 1.9+. Here is small example, which demonstrates how to use it:
require 'rubygems'
require 'couchbase'

CONFIG = {
  :node_list => ["example.net:8091"],
  :key_prefix => "pool_",
  :pool_size => 3
}

# returns the thread-safe pool object, which proxies all methods to
# the Couchbase::Bucket instance
def connection(bucket)
  @servers ||= {}
  @servers[bucket] ||= begin
                         size = CONFIG[:pool_size]
                         params = CONFIG.merge(:bucket => bucket)
                         Couchbase::ConnectionPool.new(size, params)
                       end
end

connection("default").set('foo', 'bar')

threads = []
5.times do
  threads << Thread.new do
    connection("default").get('foo')
  end
end

threads.map do |t|
  puts [t.object_id, t.value].join("\t")
end
If you will run it in your terminal, it should printout a table of thread IDs and the values, received from the Couchbase Server like this:
shell> ruby base.rb
70236984451160    bar
70236984451080    bar
70236984451000    bar
70236984450920    bar
70236984389840    bar
Release Notes
The following sections provide release notes for individual release versions of Couchbase Client Library Ruby. To browse or submit new issues, see Couchbase Client Library Ruby Issues Tracker.
1.3.9 (26 August 2014)
Fixes in 1.3.9
- Updates for compatibility with libcouchbase 2.4.0.
- Deprecations cleaned up.
1.3.8 (11 June 2014)
Fixes in 1.3.8
- Update runtime (connection_pool) and build (libcouchbase) dependencies to the latest versions.
Known issues in 1.3.8
- RCBC-176. When the Couchbase client is used in an em-synchrony context, connection errors might not be propagated to the client. This leads to a runtime assertion in EventMachine.
1.3.7 (18 April 2014)
-
[major] Allow the selection of bootstrap providers. Since libcouchbase 2.3.0 there is a new bootstrapping transport available: Cluster Configuration Carrier Publication (CCCP). It is a more efficient way to keep the cluster configuration up-to-date using Carrier Publication instead of HTTP connection.
nodes = ["example.com", "example.org"]
Couchbase.connect(node_list: nodes, bootstrap_transports: [:cccp, :http])
Read more about it here: <http://www.couchbase.com/wiki/display/couchbase/Cluster+Configuration+Carrier+Publication> -
[major] RCBC-168 An experimental DNS SRV helper for connection constructor. The DNS SRV records need to be configured on a reachable DNS server. An example configuration could look like the following (note that the service ids might change):
cbmcd.tcp.example.com. 0 IN SRV 20 0 11210 node2.example.com. cbmcd.tcp.example.com. 0 IN SRV 10 0 11210 node1.example.com. cbmcd.tcp.example.com. 0 IN SRV 30 0 11210 node3.example.com.cbhttp.tcp.example.com. 0 IN SRV 20 0 8091 node2.example.com. cbhttp.tcp.example.com. 0 IN SRV 10 0 8091 node1.example.com. cbhttp.tcp.example.com. 0 IN SRV 30 0 8091 node3.example.com.
Now if “example.com” is passed in as the argument, the three nodes configured will be parsed and put in the returned URI list. Note that the priority is respected (in this example, node1 will be the first one in the list, followed by node2 and node3). As of now, weighting is not supported. This is how it could be used to bootstrap the connection:
transport = :http
  nodes = Couchbase::DNS.locate(‘example.com’, transport)
  if nodes.empty?
      nodes = ["example.com:8091"]
  end
  Couchbase.connect(node_list: nodes, bootstrap_transports: [transport])
NOTE: This is experimental and subject to change at any time. Watch the release notes for changes in future releases.
[major] RCBC-166 Fix a crash with
eventmachine. Ineventmachineevent handlers are separated and run separately and in the following order: [READ, WRITE]. So it was possible to cancel WRITE event handler from the READ handler, which could cause a crash when the reactor run it in the next turn.[minor] Fixed a typo that doesn’t allow you to use bundler in the project directory.
Release notes for Couchbase client library Ruby 1.3.6 (17 February 2014)
Fixes in 1.3.6
- Fix linkage issue that blocks library installation on Microsoft Windows.
Release notes for Couchbase client library Ruby 1.3.5 (5 February 2014)
Fixes in 1.3.5
-
Honor the :environment constructor argument.
Allow inheritance from
Couchbase::Bucket. It wasn’t possible to create a view with a subclass of theCouchbase::Bucketclass.-
Ensure that an exception raised early does not prevent the finalizer from being called in the underlying client being constructed. Here’s an example of a situation where this could occur:
  class Couchbase::Bucket
    def initialize(*args)
      raise "something wrong"
      super
    end
  end
Release notes for Couchbase client library Ruby 1.3.4 (8 January 2014)
New Features and Behavior Changes in 1.3.4
Build 64-bit versions of the extensions for Windows platform. Also support ruby 2.0 and 2.1.
Updated hacking section in README.
-
Return CAS in extended mode for incr/decr
Issues: RCBC-151
-
Update list of options on
Cluster.create_bucket. Added the following new options::replica_index,:flush_enabled,:parallel_db_and_view_compaction.Issues: RCBC-150
Allow retries on Couchbase::Bucket#cas collisions. Now it takes a
:retryFixnum option that specifies the maximum number of times the method should retry the entire get/update/set operation when aCouchbase::Error::KeyExistserror is encountered due to a concurrent update from another writer between its#getand#setcalls.MD5 and truncate ActiveSupport::Cache keys that are longer than 250 characters.
Fixes in 1.3.4
- Fix gemspec warnings regarding versions of the dependencies. Now it honors semantic versioning and doesn’t use strict versions.
Release notes for Couchbase client library Ruby 1.3.3 GA (12 September 2013)
New Features and Behavior Changes in 1.3.3
Allow application to use several connections with thread-local singleton. Issues: RCBC-134
Add selection options for new IO engines: select and iocp. Issues: RCBC-137
-
Allow determining the version of libcouchbase:
Couchbase.libcouchbase_version
Fixes in 1.3.3
Fixed invalid memory access which was detected by using ‘GC.stress = true’ in tests. Issues: RCBC-135
Build shared object for ruby 2.0 on windows. Also fixes build script when using latest rake and rake-compiler. Issues: RCBC-136:
Initialize event indexes correctly. The plug-in didn’t trace event callbacks, which might lead to invalid memory access during rebalance, where libcouchbase creates or removes a lot of events because of a fast-changing topology. Issues: RCBC-141:
-
When setting the username field, check for password presence. Fixes segmentation fault in this code:
Couchbase.connect(:username => "default", :bucket => "default") -
Fix deprecation warning on ruby 2.x. On newer versions it should use
rb_thread_call_without_gvl().ext/couchbase_ext/multithread_plugin.c: In function ‘loop_run_poll’: ext/couchbase_ext/multithread_plugin.c:772:5: warning: ‘rb_thread_blocking_region’ is deprecated (declared at .../2.0.0-p247-dbg/include/ruby-2.0.0/ruby/intern.h:839) [-Wdeprecated-declarations] rb_thread_blocking_region(loop_blocking_poll, args, RUBY_UBF_PROCESS, NULL); Do not try to compile with plug-ins for Windows platform.
Force handle to be NULL on
lcb_create()failure.lcb_create()can leave garbage in the pointer even if the call itself failed. This behavior could lead to illegal memory access on GC.Remove usage of
RARRAY_PTRin favor ofrb_ary_entry. This improves performance significantly on Rubinius and also improves compatibility with future CRuby 2.1, which introduces generational garbage collection. This results in these arrays not having to be rescanned in Rubinius and not marked as shady in RBGCENC in CRuby 2.1. For more discussion, see https://bugs.ruby-lang.org/issues/8399.
Release Notes for Couchbase Client Library Ruby 1.3.2 GA (10 July 2013)
New Features and Behavior Changes in 1.3.2
-
Allow application to select the strategy of reading from replica nodes. This version requires libcouchbase >= 2.0.7. Now three strategies are available:
-
:first- synonym totrue, previous behavior now the default. It means that the library will sequentially iterate over all replicas in the configuration supplied by the cluster and will return as soon as it finds a successful response, or report an error.c.get("foo", :replica => true) c.get("foo", :replica => :first) #=> "bar" c.get("foo", :replica => :first, :extended => true) #=> ["bar", 0, 11218368683493556224] -
:all- query all replicas in parallel. In this case the method will return the array of the values on the all replica nodes without a particular order. Also if the key isn’t on the node, it will be skipped in the result array.c.get("foo", :replica => :all) #=> ["bar", "bar", "bar"] c.get("foo", :replica => :all, :extended => true) #=> [["bar", 0, 11218368683493556224], # ["bar", 0, 11218368683493556224], # ["bar", 0, 11218368683493556224]] -
Fixnum- you can also select specific replica node by its index in the cluster configuration. It should be in interval0...c.num_replicas0…c.num_replicas #=> 0…3 c.get("foo", :replica => 1) #=> "bar" c.get("foo", :replica => 42) #=> ArgumentError: replica index should be in interval 0…3
Note that applications should not assume the order of the replicas indicates more recent data is at a lower index number. It is up to the application to determine which version of a document/item it may wish to use in the case of retrieving data from a replica.
Issues : RCBC-133
-
Release Notes for Couchbase Client Library Ruby 1.3.1 GA (06 June 2013)
Fixes in 1.3.1
Fix compatibility with multi_json 1.7.5. It removed the VERSION constant unexpectedly. github.com/intridea/multi_json/commit/f803f397d1a3ef839a80a669a09318c64b252e5f
-
Couchbase::Cluster instance shouldn’t require persistent connections. There was an issue which lead to a Couchbase::Error::Connect exception and blocked the creation/removing of buckets.
Issues : RCBC-131
Release Notes for Couchbase Client Library Ruby 1.3.0 GA (07 May 2013)
New Features and Behavior Changes in 1.3.0
Introduce Transcoders. This mechanism is more flexible, and similar to how other clients encode values.
-
Implement Couchbase::ConnectionPool to allow applications (and ActiveSupport::Cache::CouchbaseStore) use it in multi-threaded environment
Issues : RCBC-46
Fixes in 1.3.0
-
Deprecate numeric argument to ‘default_format’. Instead of this style:
Couchbase.connect(:default_format => Couchbase::Bucket::FMT_MARSHAL)Symbol notation or explicit transcoder entity should be used
Couchbase.connect(:default_format => :marshal)
  Couchbase.connect(:transcoder => Couchbase::Transcoder::Marshal)