How-to Guide: Data Topology Synchronization
A how-to guide on data topology synchronization with Couchbase Kubernetes Operator.
Overview
In the following guide, we’ll show you how to discover the configuration of a Couchbase cluster in the form of Kubernetes resources, and how the Kubernetes Operator manages those resources.
Prerequisites
-
If you are new to Couchbase Kubernetes Operator (CAO), refer to the Kubernetes Operator Introduction
-
Couchbase Scopes and Collections was added in Version 7.0. Refer to the Couchbase Scopes and Collections page to learn more about these.
In your Couchbase cluster load the travel-sample sample bucket.
See Load the Sample Dataset to learn how to load a sample bucket.
On this cluster we’ll enable synchronization to discover the bucket and its scopes and collections in the form of Kubernetes resources.
For the purposes of this guide, we’ll be referring to an example cluster called cb-example.
Substitute the name of the cluster with your own if necessary.
|
Enabling Synchronization
In order to enable the synchronization, firstly we have to disable bucket management in the cluster. This is to ensure that existing configuration is not deleted once backing resources are removed.
$ kubectl patch couchbasecluster cb-example --type=merge -p '{"spec":{"buckets":{"managed":false}}}'The above command disables bucket management for a Couchbase cluster named cb-example.
Next, remove any resources that may conflict with those the Operator will generate.
$ for i in couchbasebuckets \
    couchbaseephemeralbuckets \
    couchbasememcachedbuckets \
    couchbasescopes \
    couchbasescopegroups \
    couchbasecollections \
    couchbasecollectiongroups
  do
    kubectl delete $i --all
  done
This command deletes all resources in the namespace that will be affected by a synchronization operation.
You can replace --all with a label, or field, selector if you wish to be more selective, especially in the case where multiple Couchbase clusters are running in the same namespace.
|
Data topology resources can be shared between clusters. If they are shared, then deletion may affect another — unrelated — cluster and result in data loss. For this reason we recommend only ever deploying one Couchbase cluster per namespace. |
Synchronizing
Once you have manually updated the data topology to how you want it, we can begin synchronizing it so it can be managed.
|
Because multiple Couchbase clusters can run in the same namespace, there is a danger that any resource created by synchronization may be erroneously picked up by another cluster. For this reason, the Operator enforces the use of a label selector to generate and select buckets for inclusion on the cluster to be synchronized. It is your responsibility to ensure any other clusters in this namespace have a unique bucket label selector that will not be affected by this synchronization operation. |
Synchronization is triggered by first setting a label selector, then triggering the operation:
$ kubectl patch couchbasecluster cb-example --type merge -p '{"spec":{"buckets":{"selector":{"matchLabels":{"foo":"bar"}}}}}'

$ kubectl patch couchbasecluster cb-example --type merge -p '{"spec":{"buckets":{"synchronize":true}}}'
After the above commands, the Operator will begin the synchronization process and it may take some time depending on the number of resources to synchronize.
The synchronization operation proceeds as follows:
-
Couchbase server is polled for all buckets, scopes and collections.
-
Kubernetes resources are generated for those Couchbase resources.
-
Buckets are labeled as defined by the provided label selector, therefore they should be considered by this cluster only.
-
-
Kubernetes resources are created and persisted.
-
The Operator reports the status in the cluster conditions.
|
Once synchronization has been triggered, you should not make any more manual adjustments to the data topology. Doing so may result in a conflict between what is expected and what has already been generated and committed. If you do encounter a conflict, then restart the process from the Enabling Synchronization stage to remove the conflicting resource. |
To check for completion status, you can wait until the condition is reported:
$ kubectl wait --for=condition=Synchronized couchbasecluster/cb-exampleOnce the synchronization is complete you’ll see the below output:
couchbasecluster.couchbase.com/cb-example condition metAdditionally, you can check whether or not the synchronization succeeded.
$ kubectl describe couchbasecluster/cb-example | grep Synchronized -B 5Last Transition Time: 2022-04-06T09:09:29Z
Last Update Time: 2022-04-06T09:09:29Z
Message: Data topology synchronized and ready to be managed
Reason: SynchronizationComplete
Status: True
Type: SynchronizedFrom the above command output, we can see the synchronization is completed.
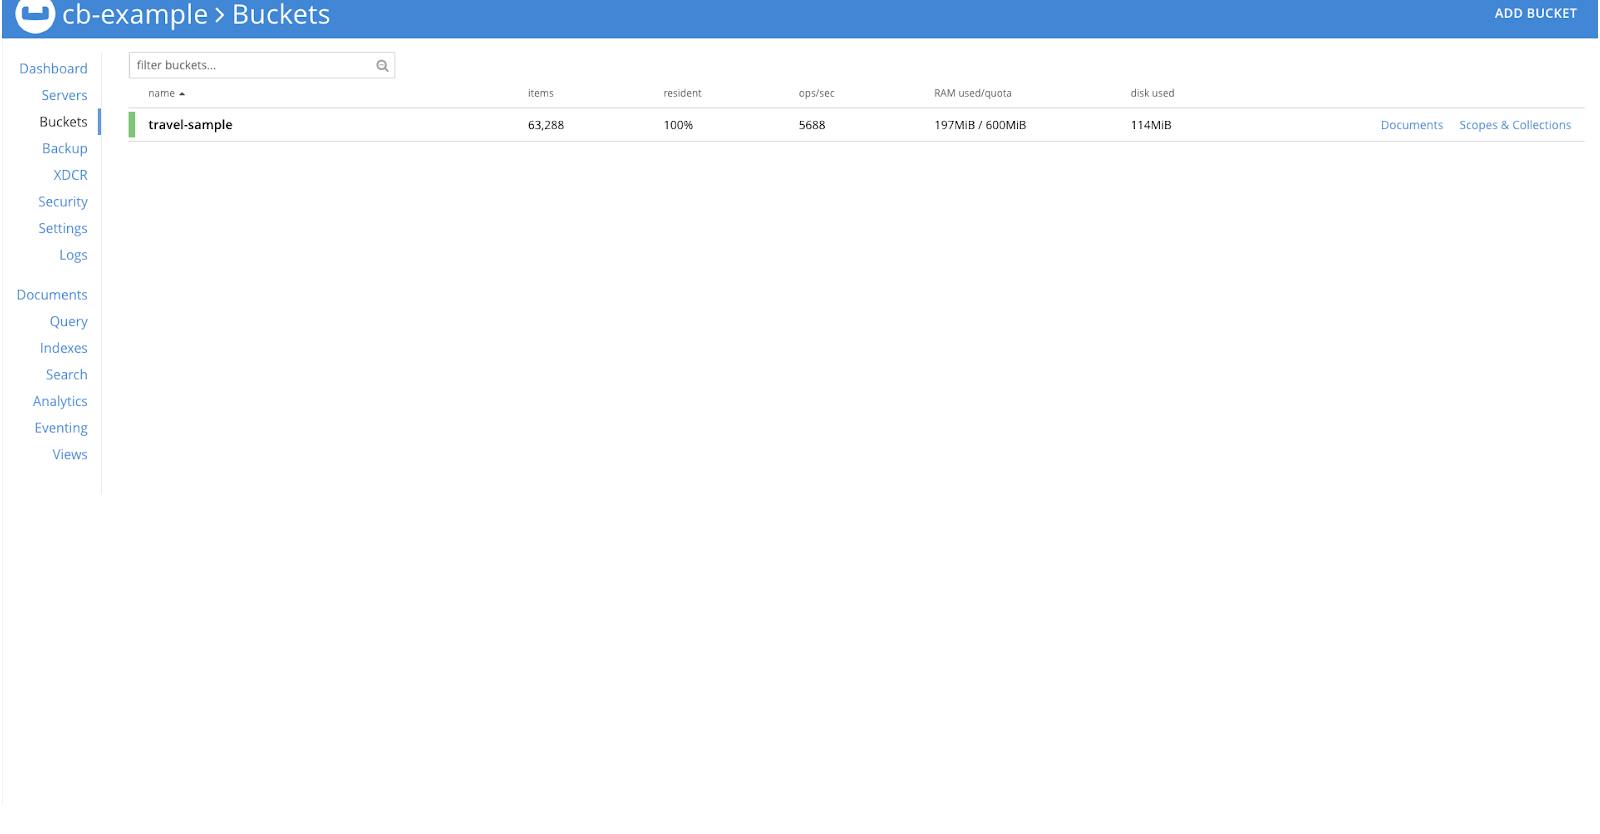
To verify this, we can check the couchbasebuckets, couchbasescopes, and couchbasecollections resources in the Kubernetes cluster.
-
couchbasebuckets
-
couchbasescopes
-
couchbasecollections
$ kubectl get couchbasebucketsNAME MEMORY QUOTA REPLICAS IO PRIORITY EVICTION POLICY CONFLICT RESOLUTION AGE
bucket-b9982f53695b5568909c430adb35b7081ce806f03e4595271617f98e02e9860f 100Mi 1 low valueOnly seqno 4m25s$ kubectl get couchbasescopesNAME AGE
scope-14d7e8da532ac0e2e94dc3b1c5c5713d80bb1a70c788a87e98d9961cb66392e4 4m41s
scope-ea83ae2e97f046de6b93dcd34a31153270e26df02fa23d0af243cfb785915c10 4m40s
scope-af0511e62c22693e891b27e5fe4ef2178fa2fb0db7d68e59ffa9e23755f71d2b 4m40s
scope-0b38b57a5a7429d4d0ffa17f7ac1bbdd54a7ce39168f2c18e0efd7c8316726c2 4m39s
scope-9e6e24ebefcf44c769d1e9862086c9db82d8e3f6bb7606a0b9ee09aa2f22a994 4m38s
scope-4cd319d8db460a3dcc47a3e08895f85de8cb6640cc7588a18a4989481f148b72 4m35s
scope-8e94e137deff4184a58d69abf11ef3a4b05371c5a70003d2dd860fdafdda8b7f 4m32s$ kubectl get couchbasecollectionsNAME AGE
collection-47c60b8730d89473b4d4deb7e28b453dd2a01d1c25b1a12cf5bd9ac01879522f 4m57s
collection-4a8b7011364f2e8a013ed1beffe6b98584e1065ebb3379fe9b099d504497f6a7 4m57s
collection-8d634ed46c0c575530973b5be2f68563f362ecb9200ee4c214bea5fed6a2cb53 4m57s
collection-91d3bb3a539bdc2ecd5e9c88aaab8b2bb9fff96625d34317324931ad34ba7901 4m57s
collection-3ad7a6293c86d17d761050d91d312b5c5cc482f93663cdae1346e6564775663d 4m57s
collection-f19a4b407c643bbf87f6433da5cd796dde6b85347c2e18d03e8a6a7e9f1a79d4 4m57s
collection-46c7a949b5952cb7870af3d7a37838b2acc964cfd6b4084ce7f330be4053d47e 4m57s
collection-ce901d0c8a7155c42a49e713d33a6ee0768ea8b891d2acb4dec05d281cd9b39b 4m57s
collection-18b795d22e0556aef3fd1b8633edcaeaa3dfb869069f42bd44528b25260be1a4 4m56s
collection-bc1d8048305b0849e842b01aa6fecec7cdd44bcf33691767598bfd3d5990dbfb 4m56s
collection-b9bc191b8eda07c1f97e937fd8c03bf6de47ae3fc3f6b205c8ef48a99014157c 4m55s
collection-e94d67f1c969076371e6ae175db9e6777d09d9a2a3950e48bc2d5ed3df5484d2 4m54s
collection-8337cf47f187f88dbe3799e7572a915bc097a6df23634537c36c34f69f1900cf 4m53s
collection-0c21c5e37c1d282eff2d1a08032698bb8bd4e5be02b00442c4717c979463f3c9 4m52s
collection-4bbb3cbbc1fbe031b218a383a12c1cf0abefb3cfbbf43ad7679cc503035cf1d5 4m51s|
Unlike save and restore, synchronization does not optimize the data topology Kubernetes resources. In a worst case scenario, where 1000’s of scopes and collections are in use, then you can expect synchronization to take several minutes due to the throttling of requests to the Kubernetes API to ensure fair use. |
Managing Synchronized Resources
You must ensure synchronization has completed successfully before switching to managed mode. Failure to do so may result in backing resources not being created, and data loss.
Now that we have confirmed synchronization has completed successfully, we can switch the cluster’s bucket management on:
$ kubectl patch couchbasecluster cb-example --type=merge -p '{"spec":{"buckets":{"synchronize":false,"managed":true}}}'From this point onward, any managed resources that are deleted or modified manually will be recovered, and any additional resources that are added will be deleted, as per the usual operation of the Operator.
Scenarios
Oops Scenario
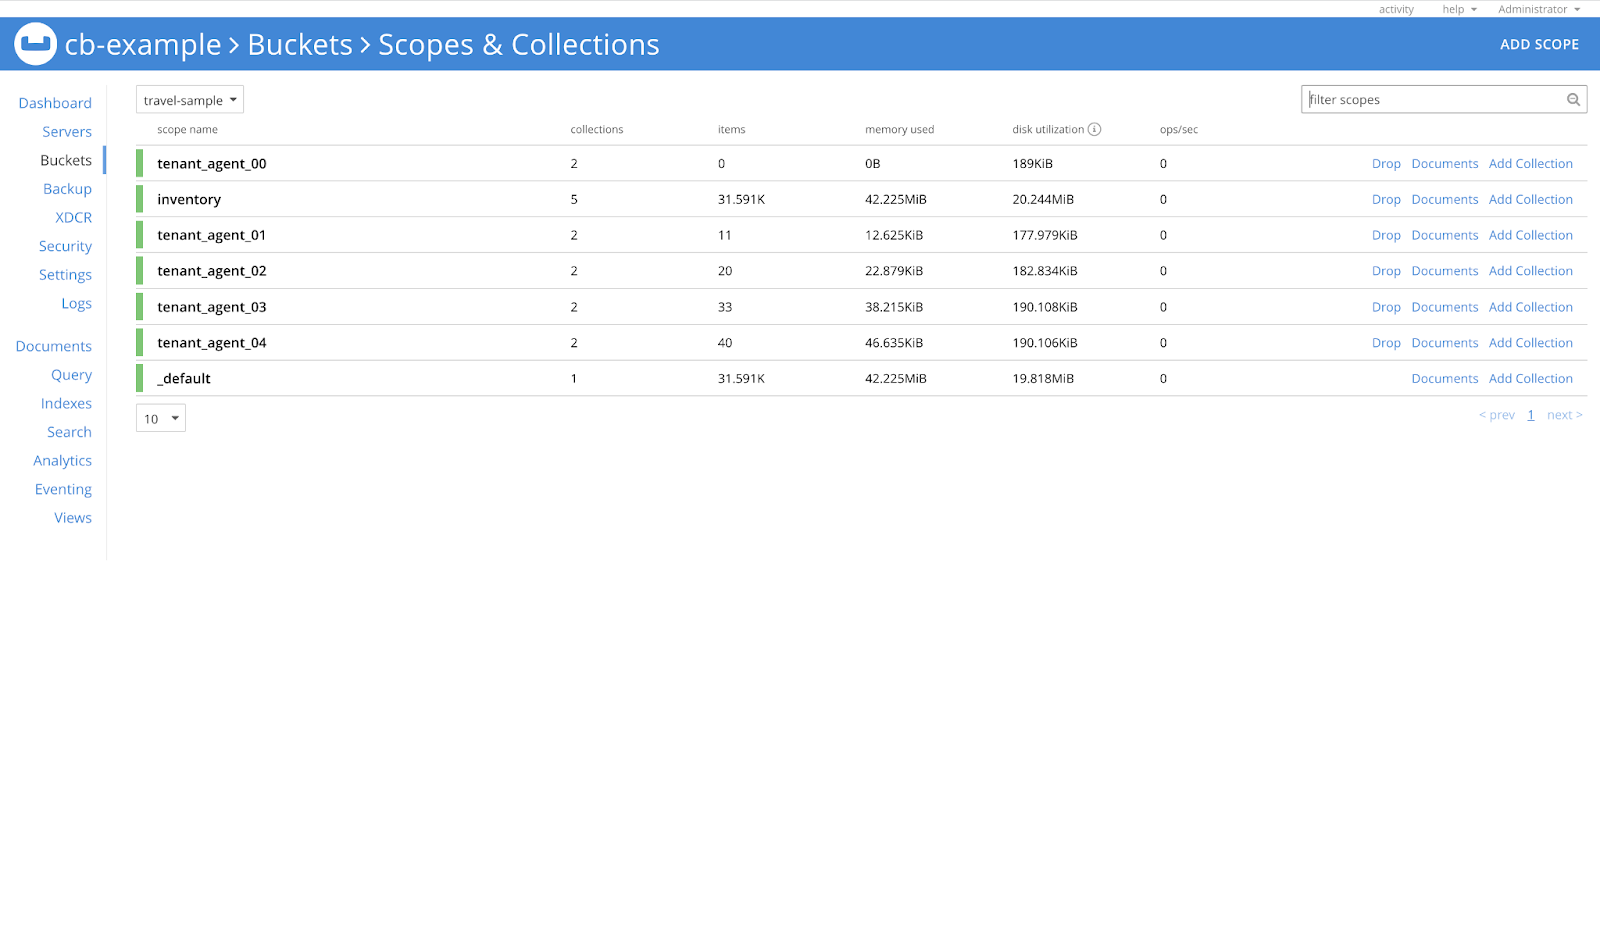
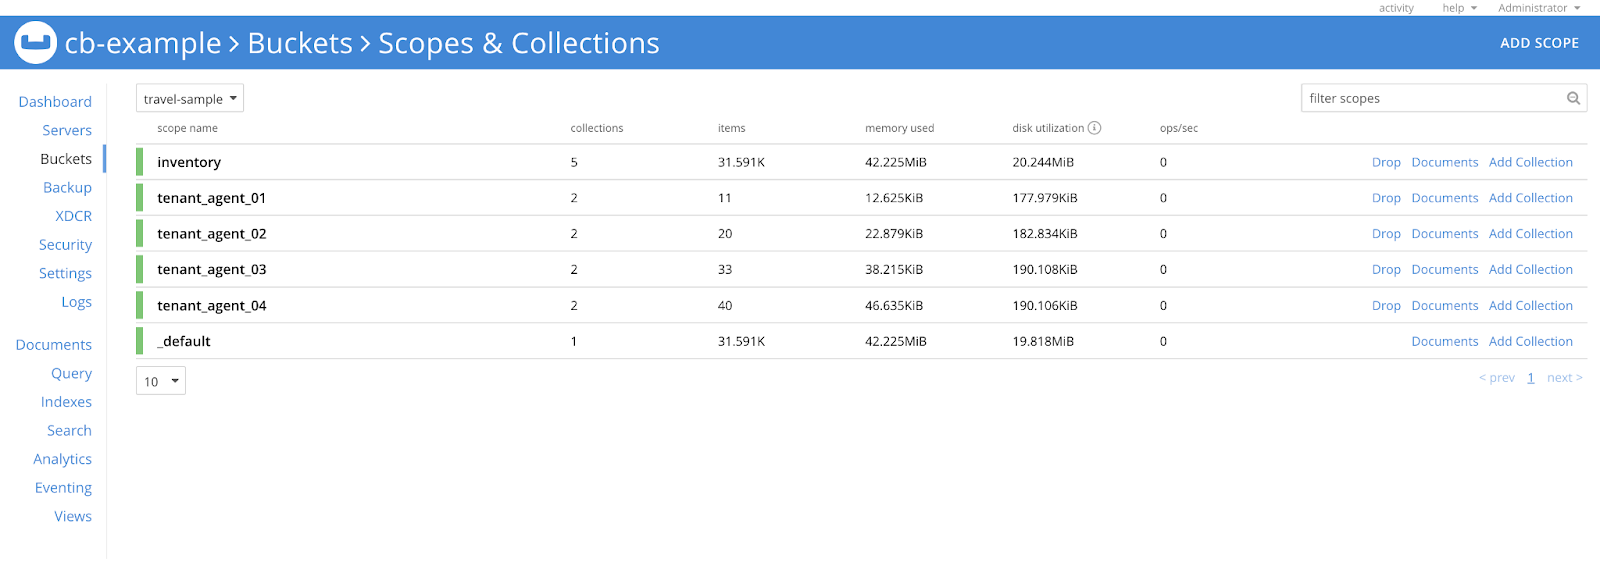
Let’s check the scopes of the travel-sample bucket first.
In the image below, we can see that there are a total of 7 scopes in this bucket.
Let’s assume a scenario where we deleted one of the scopes (tenant_agent_00) by mistake.
If the resource was synchronized, the operator should be able to recover it.
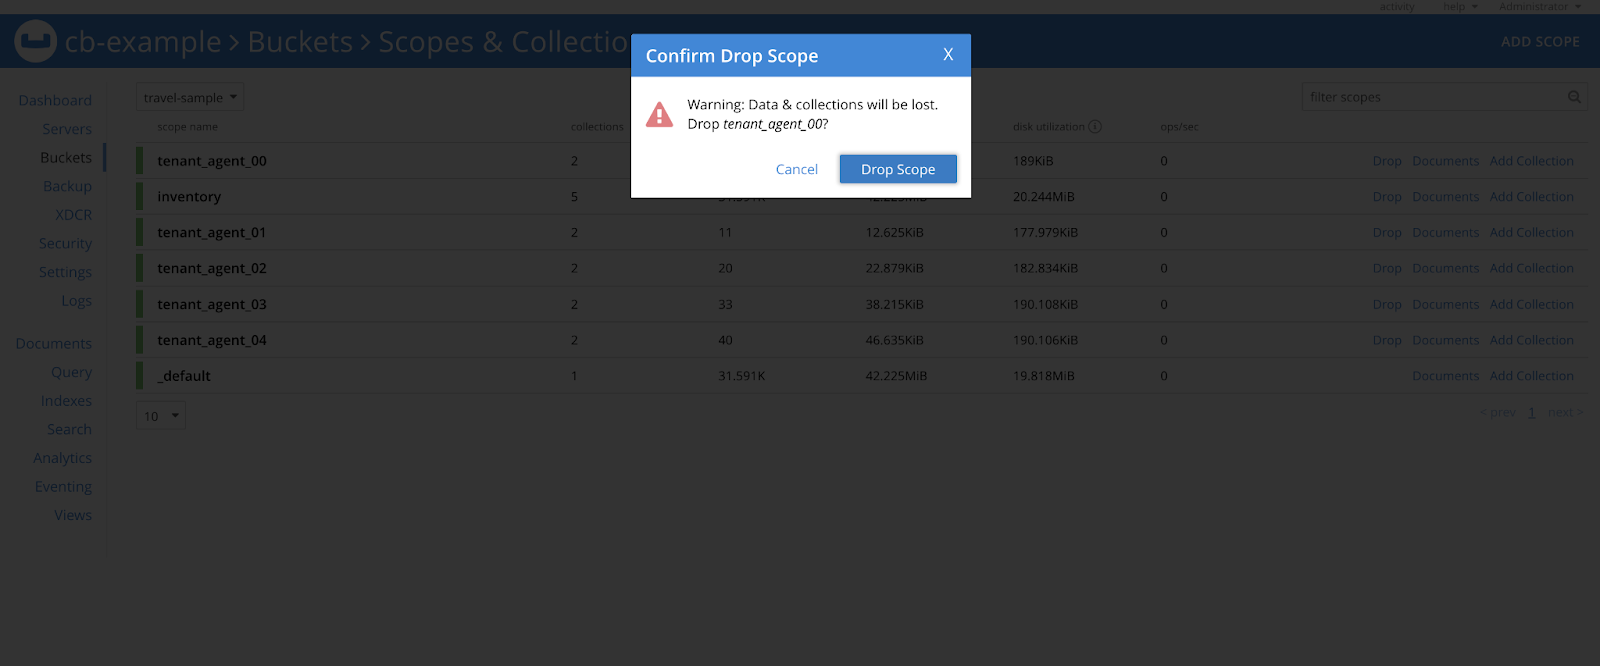
In the above image we are deleting the tenant_agent_00 scope and after some time, the Operator should recover it.
In order to see if the resources are recovered or not, we can look at the events of the CouchbaseCluster resource.
$ kubectl describe couchbaseclusters cb-exampleEvents:
Type Reason Age From Message
---- ------ ---- ---- -------
Normal NewMemberAdded 52m New member cb-example-0000 added to cluster
Normal NewMemberAdded 52m New member cb-example-0001 added to cluster
Normal NewMemberAdded 52m New member cb-example-0002 added to cluster
Normal RebalanceStarted 52m A rebalance has been started to balance data across the cluster
Normal RebalanceCompleted 52m A rebalance has completed
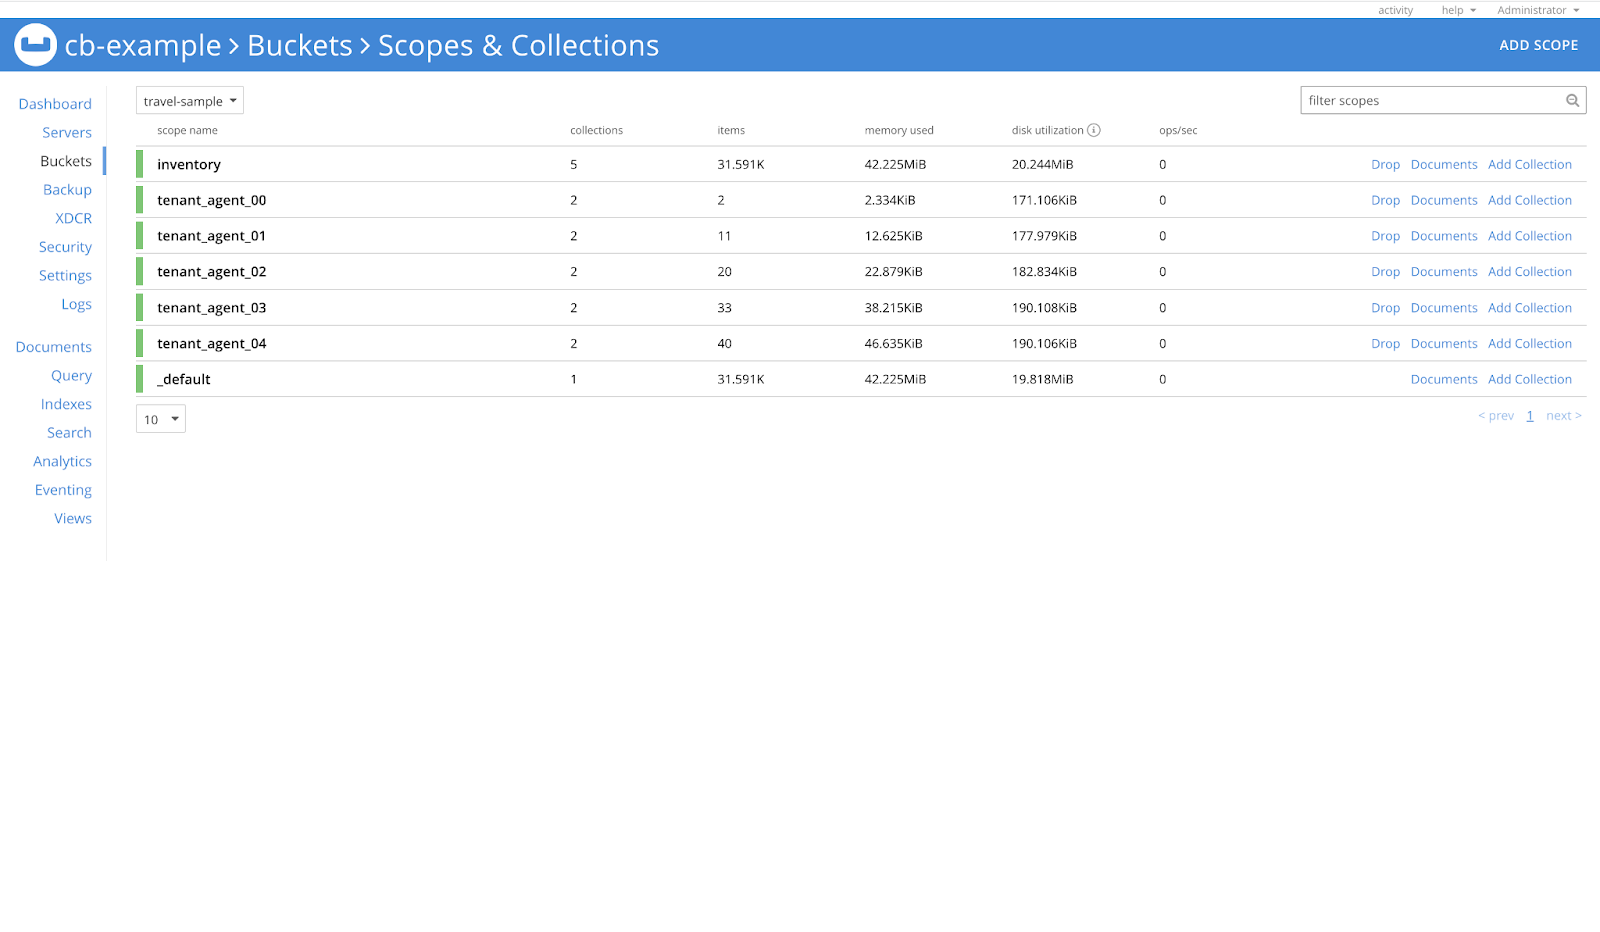
Normal EventScopesAndCollectionsUpdated 38m Scopes and collections updated for bucket travel-sampleHere, we have just copied the output of events from the above command. The last event says scopes and collections are updated for the bucket.
This means the operator has recovered the resource and we can verify the same on Couchbase UI.