Manage Your Couchbase Capella Account
- Capella Operational
Couchbase Capella accounts are independent of organizations.
Access Your Account Management Settings
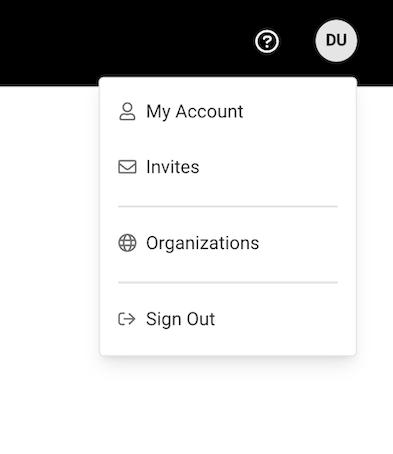
To manage your Couchbase Capella account settings, click your initials in the upper-right corner of the Capella UI. In the dropdown menu that appears, click My Account to open your account management page.

Manage General Settings
In the account management menu, the General option offers settings to update your profile information, password, region and timezone, and enable notifications. Make sure you save any changes.
| Users who sign in with SSO cannot change their name, email, password, or activate Multi-Factor Authentication (MFA) settings. |

| You can also reset your password by selecting Forgot Password from the log-in screen, which will send you a recovery email. No matter how many times you click Forgot Password, you will only receive one password reset email per minute. |
To activate MFA, see Manage MFA.
Link Your Capella Account to a Google or GitHub Account
You can sign in to your existing Capella account using a Google account or GitHub account that has the same email as your Capella account.
To link an existing Capella account to a Google or GitHub Account, go to the Couchbase Capella Sign-in page.
-
GitHub Account
-
Google Account
-
In GitHub, make sure that your primary email address is the same as the email address that your Capella account uses.
-
In GitHub, make sure that your primary email address is verified.
-
In GitHub, make sure your primary email address is public.
To set a public GitHub email address:
-
Sign in to GitHub, and on your profile menu, click Settings.
Your Public profile page should display.
-
In the navigation pane, click Emails.
-
Clear Keep my email addresses private.
-
Return to the Public Profile page and select your primary email address from the Public email list.
-
Click Update profile to save the changes.
-
-
-
Click GitHub.
-
Follow the GitHub prompts to sign in to your GitHub account.
-
Click Link GitHub Account
-
Enter your Capella account password, and if you have Multi-Factor Authentication (MFA) turned on, a MFA time-based one-time password (TOTP).
-
Click Verify and Link.
-
In Google, make sure your primary email address is the same as the email address that your Capella account uses.
-
If your Google account uses a non-Google email, make sure that your account is verified.
-
Click Google.
-
Follow the Google prompts to sign in to your Google account.
-
Click Link Google Account
-
Enter your Capella account password, and if you have Multi-Factor Authentication (MFA) turned on, a MFA time-based one-time password (TOTP).
-
Click Verify and Link.
Unlink Your Capella Account from a Google or GitHub Account
To unlink your Couchbase Capella account from a Google or GitHub account:
-
On your profile page, click Unlink from Google or Unlink from GitHub.
-
Enter a new password for your Capella account and confirm it.
If Multi-Factor Authentication (MFA) is on for your Capella account, Capella keeps this, and you’ll need your MFA time-based one-time password (TOTP) to sign in to your account after unlinking from a Google or GitHub account. -
Click Unlink from Google or Unlink from Google.
The next time you sign in, you must use your email address and the new password that you set.
Update Notifications
Click General on the account management menu to change your notification settings.
Check the Receive Email Notifications check box if you want to receive notifications concerning activity within your account. Clear if you don’t want to receive notifications.
Click Save to apply your changes.
Manage Invitations
Click Invitations on the Account Management menu to view and accept your new invitations to organizations and projects.
Manage Organizations
In the account management menu, click Organizations to view and access your organizations.
Click on the name of an organization to open its Organization page, where you can make changes relative to your user permissions.
View Activity Log
In the account management menu, click Activity Log to access your user activity logs.
The Activity Log is where you can view the activity in the organizations and the projects you’re involved. This tool displays a summary of all events in a chosen timespan.
The Activity Log provides you with insight into user actions and cluster activity. It can also give details and actionable recommendations to help resolve cluster issues before they impact downstream applications.