Goal: Demonstrate a recurring Eventing Timer.
Implementation: Create a JavaScript function that contains an OnUpdate handler and a Timer callback function. The handler listens for mutations or data-changes within a specified, source collection. When any document within this collection is created or modified, the Eventing Function creates a callback in the future to execute a user-defined routine. In this example, we rely on a control document which if the created or altered controls whether a Recurring Timer will be created or canceled.
-
Test 1: The control document is created or mutated in such a way that a Timer is created and fires approximately 30 seconds in the future, at which point a document representing user work is written to the source collection with the scheduled time of execution. The original control document, in the source collection, is not changed. The Timer is re-armed and will execute again until canceled.
-
Test 2: The control document mutated in such a way that any existing Timer with the reference of the control documents id (meta.id) is canceled. This has no effect if the Timer created has already fired.
Preparations:
For this example, two (2) buckets 'bulk' and 'rr100' are required where the latter is intended to be 100% resident. Create the buckets with a minimum size of 100MB. For information on buckets, see Create a Bucket. Within the buckets we need three (2) keyspaces 'bulk.data.source' and 'rr100.eventing.metadata' (we loosely follow this organization).
If you run a version of Couchbase prior to 7.0 you can just create the buckets 'source' and 'metadata' and run this example. Furthermore if your cluster was subsequently upgraded from say 6.6.2 to 7.0 your data would be moved to 'source._default._default' and 'metadata._default._default' and your Eventing Function would be seamlessly upgraded to use the new keyspaces and continue to run correctly.
For complete details on how to set up your keyspaces refer to creating buckets and creating scopes and collections.
| The Eventing Storage keyspace, in this case 'rr100.eventing.metadata', is for the sole use of the Eventing system, do not add, modify, or delete documents from it. In addition do not drop or flush or delete the containing bucket (or delete this collection) while you have any deployed Eventing functions. In a single tenancy deployment this collection can be shared with other Eventing functions. |
Setup:
-
Access the Couchbase Web Console > Buckets page.
-
You should see the following once you have created your buckets:

-
-
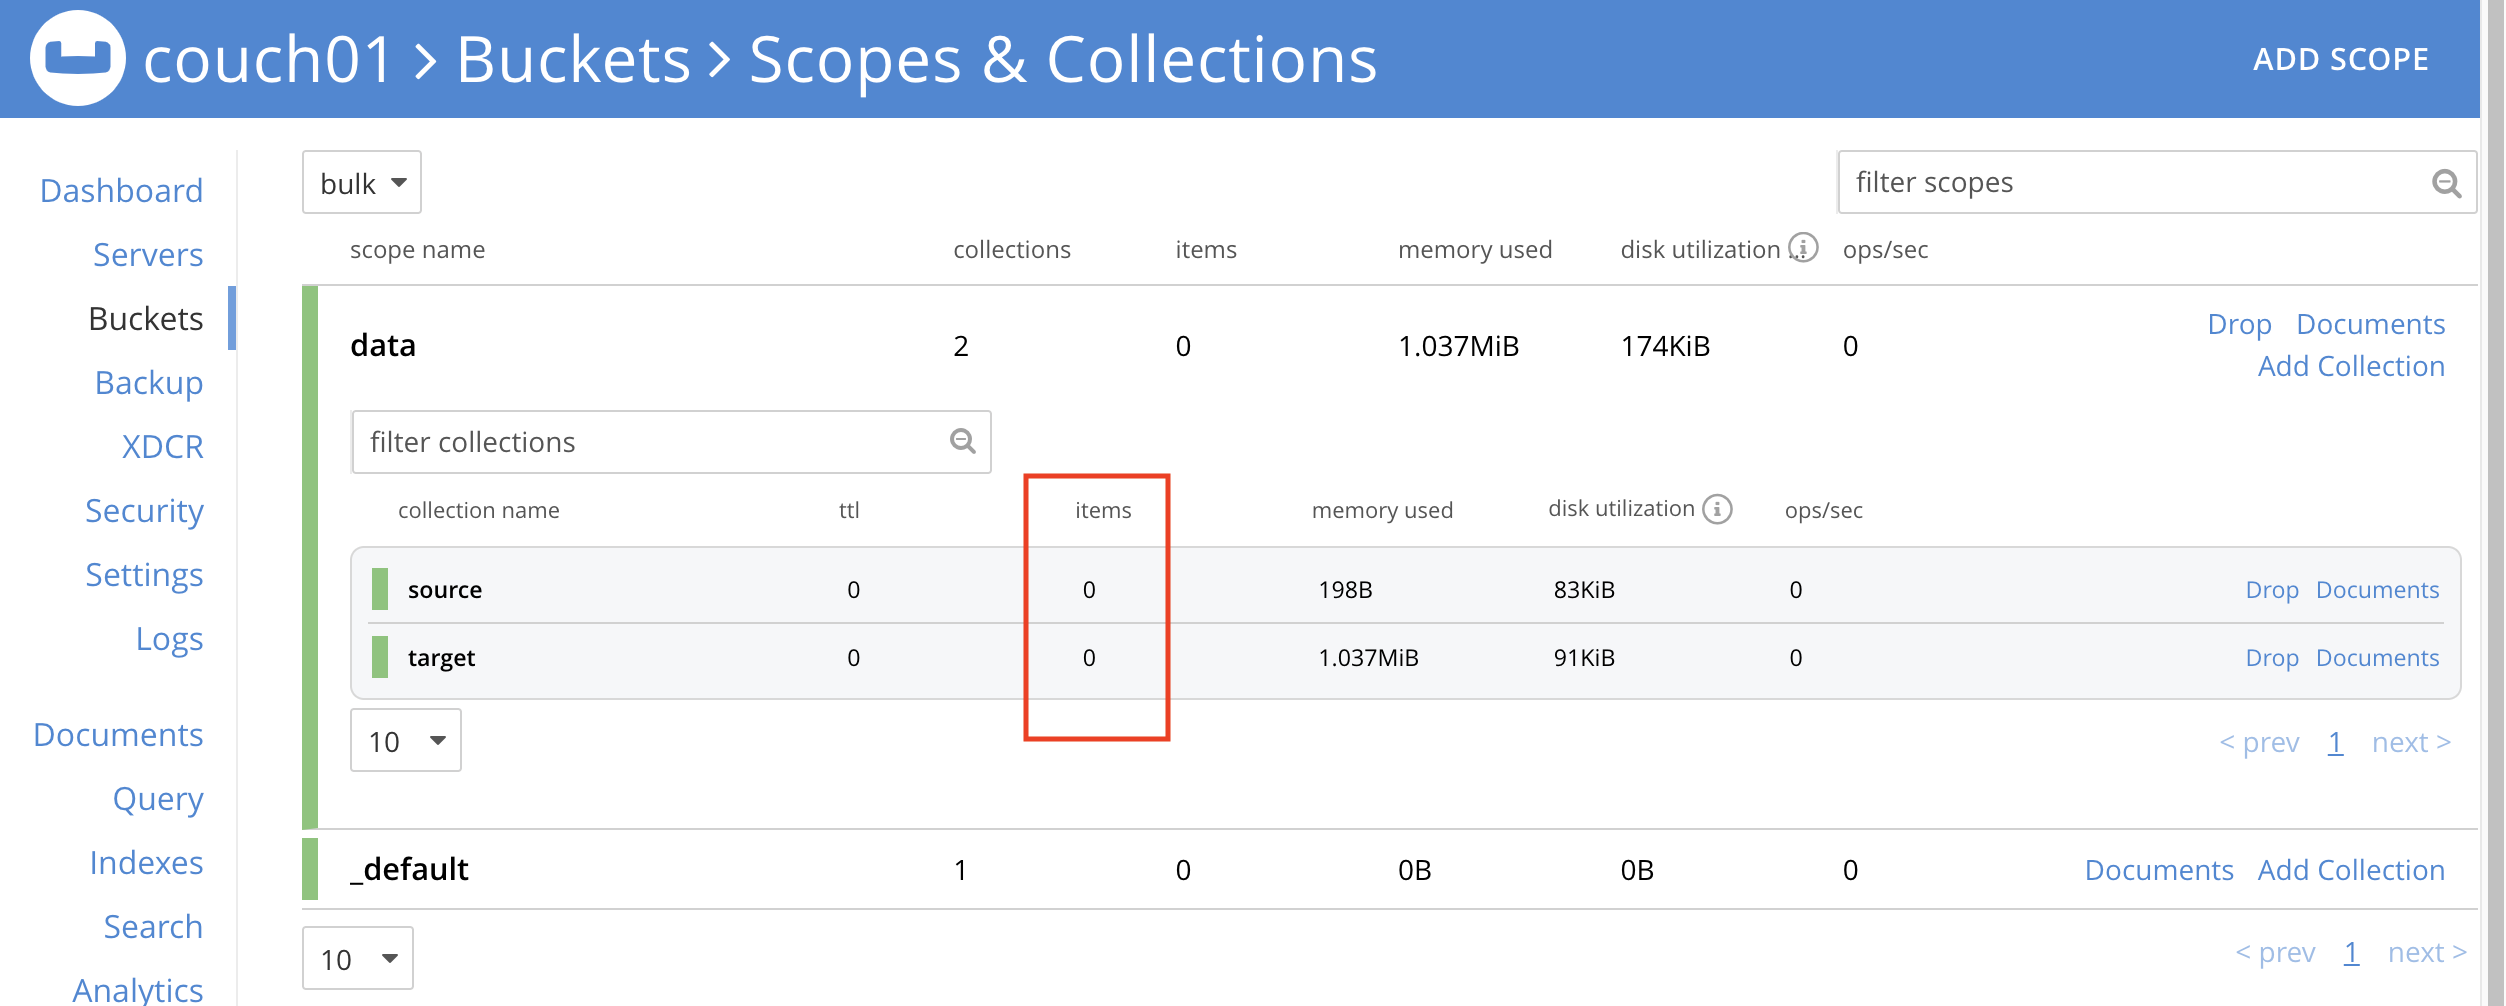
[Optional Step] Verify we have our empty collections:
-
Click the Scopes & Collections link of the bulk bucket (on the right).
-
Click the data scope name to expand the section (on the left).
-
You should see no user records.
-
-
Click the Documents link of the source collection (on the right).
-
Again you should see no user records.

-
Click Add Document in the upper right banner
-
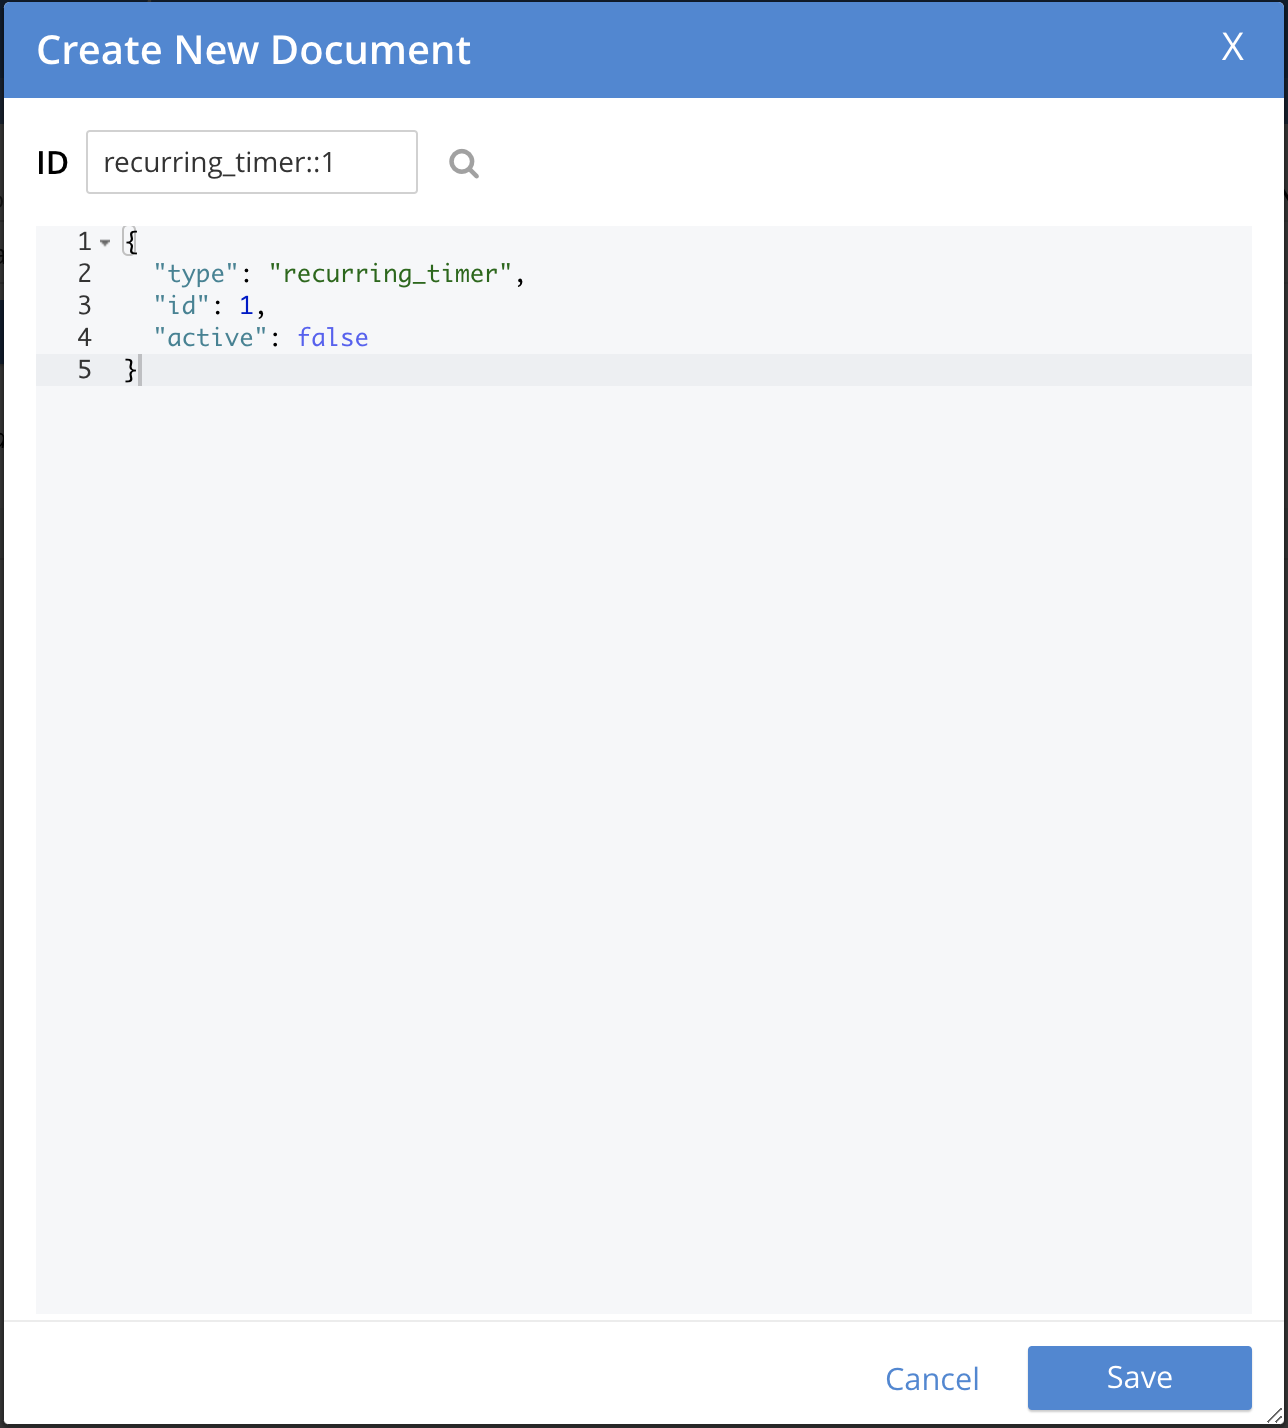
For the ID in the Create New Document dialog specify recurring_timer::1
ID [ recurring_timer::1 ]
-
For the document body in the Create New Document dialog, the following text is displayed:
{ "click": "to edit", "with JSON": "there are no reserved field names" } -
replace the above text with the following JSON document via a cut-n-paste
{
  "type": "recurring_timer",
  "id": 1,
  "active": false
}
-
Click Save.
-
-
From the Couchbase Web Console > Eventing page, click ADD FUNCTION, to add a new Function. The ADD FUNCTION dialog appears.
-
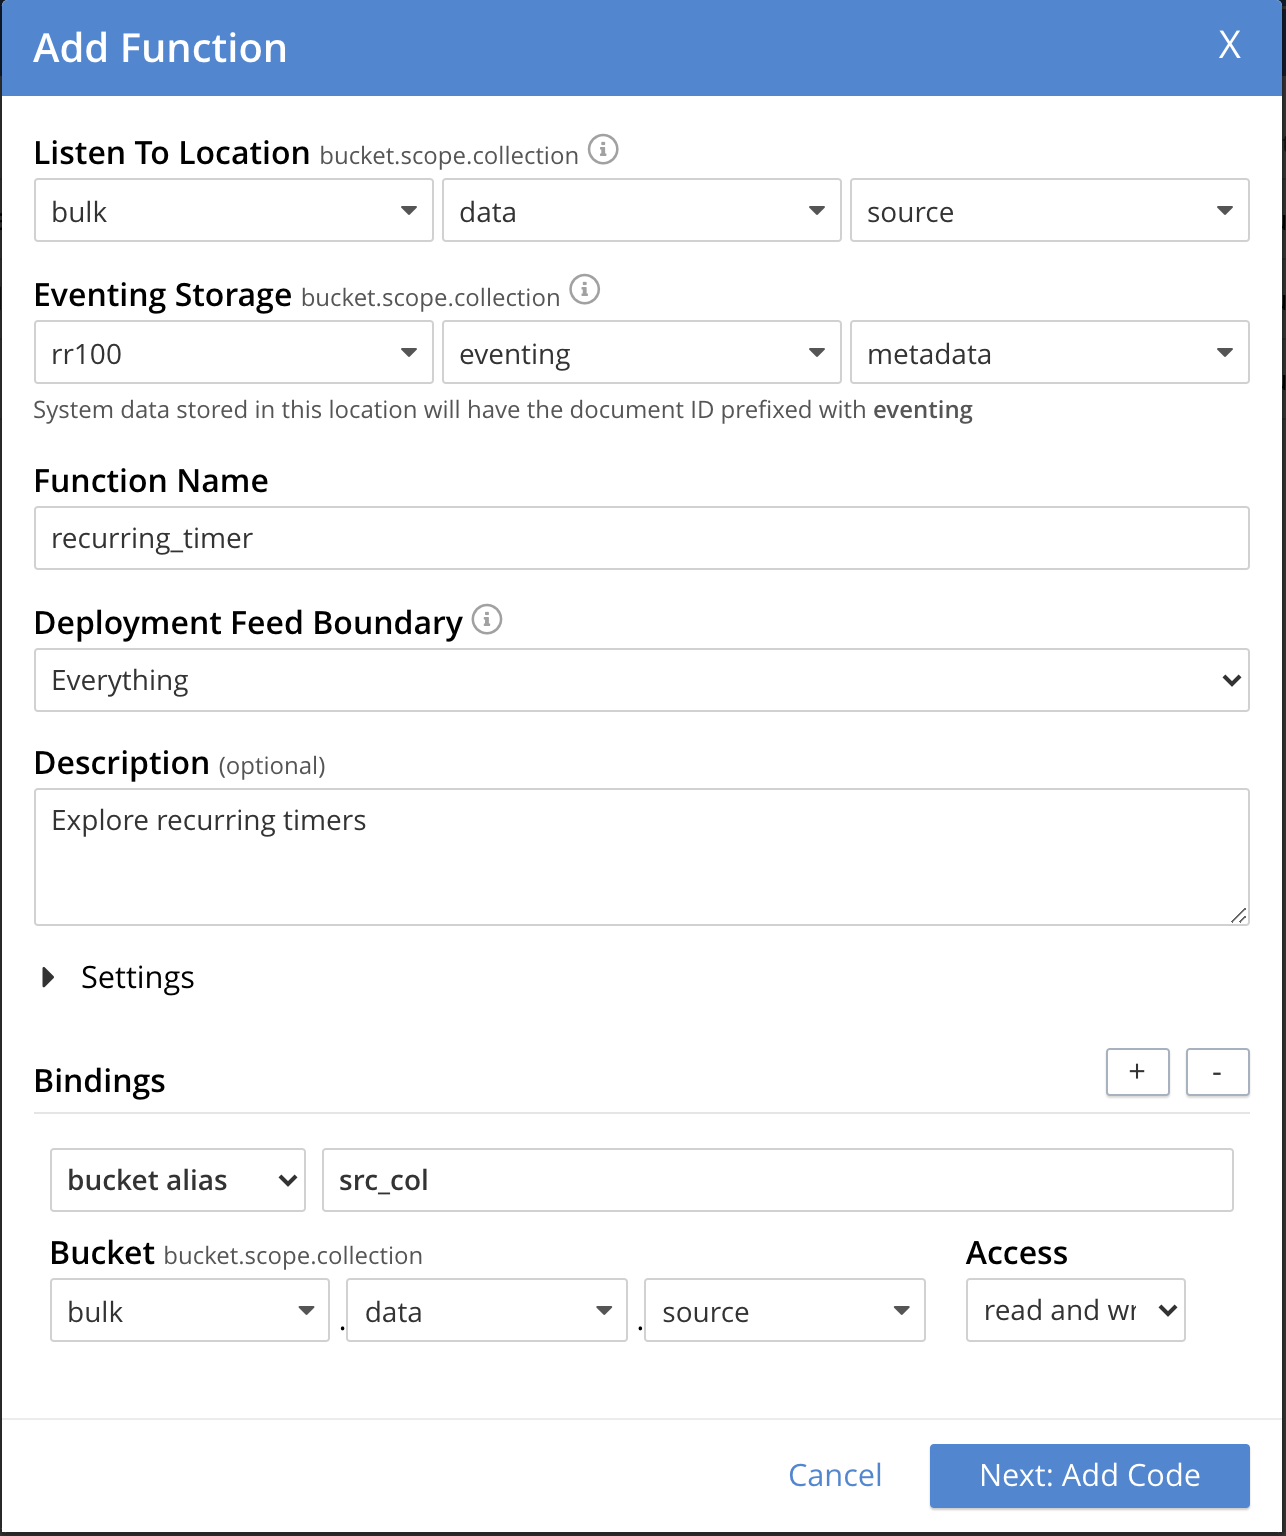
In the ADD FUNCTION dialog, for individual Function elements provide the below information:
-
For the Listen To Location drop-down, select bulk, data, source as the keyspace.
-
For the Eventing Storage drop-down, select rr100, eventing, metadata as the keyspace.
-
Enter recurring_timer as the name of the Function you are creating in the Function Name text-box.
-
Leave the "Deployment Feed Boundary" as Everything.
-
[Optional Step] Enter text Explore recurring timers, in the Description text-box.
-
For the Settings option, use the default values.
-
For the Bindings option, add just one binding.
-
For the first binding, select "bucket alias", specify src_col as the "alias name" of the collection, select bulk, data, source as the associated keyspace, and select "read and write" for the access mode.
-
-
After configuring your settings the ADD FUNCTION dialog should look like this:
-
-
After providing all the required information in the ADD FUNCTION dialog, click Next: Add Code. The recurring_timer dialog appears.
-
The recurring_timer dialog initially contains a placeholder code block. You will substitute your actual recurring_timer code in this block.

-
Copy the following Function, and paste it in the placeholder code block of recurring_timer dialog.
function CreateRecurringTimer(context) {
    log('From CreateRecurringTimer: creating timer', context.mode, context.id);
    // Create a timestamp 30 seconds from now
    var thirtySecFromNow = new Date(); // Get current time & add 30 sec. to it.
    thirtySecFromNow.setSeconds(thirtySecFromNow.getSeconds() + 30);
    // Create a document to use as out for our context
    createTimer(RecurringTimerCallback, thirtySecFromNow, context.id, context);
}

function RecurringTimerCallback(context) {
    log('From RecurringTimerCallback: timer fired', context);
    // rearm the timer ASAP, to ensure timer keeps running in the event
    // of later  errors or script timeouts in later "recurring work".
    CreateRecurringTimer({ "id": context.id, "mode": "via_callback" });
    // do any sort of recurring work here, just update a date_stamp in a doc
    src_col["cur_" + context.id] = { "last_update": new Date() };
}

function OnUpdate(doc, meta) {
    // You would typically filter to mutations of interest
    if (doc.type !== 'recurring_timer') return;
    if (doc.active === false) {
        if (cancelTimer(RecurringTimerCallback, meta.id)) {
            log('From OnUpdate: canceled active Timer, doc.active',
                doc.active, meta.id);
        } else {
            log('From OnUpdate: no active Timer to cancel, doc.active',
                doc.active, meta.id);
        }
    } else {
        log('From OnUpdate: create/overwrite doc.active', doc.active, meta.id);
        CreateRecurringTimer({  "id": meta.id, "mode": "via_onupdate" });
    }
}
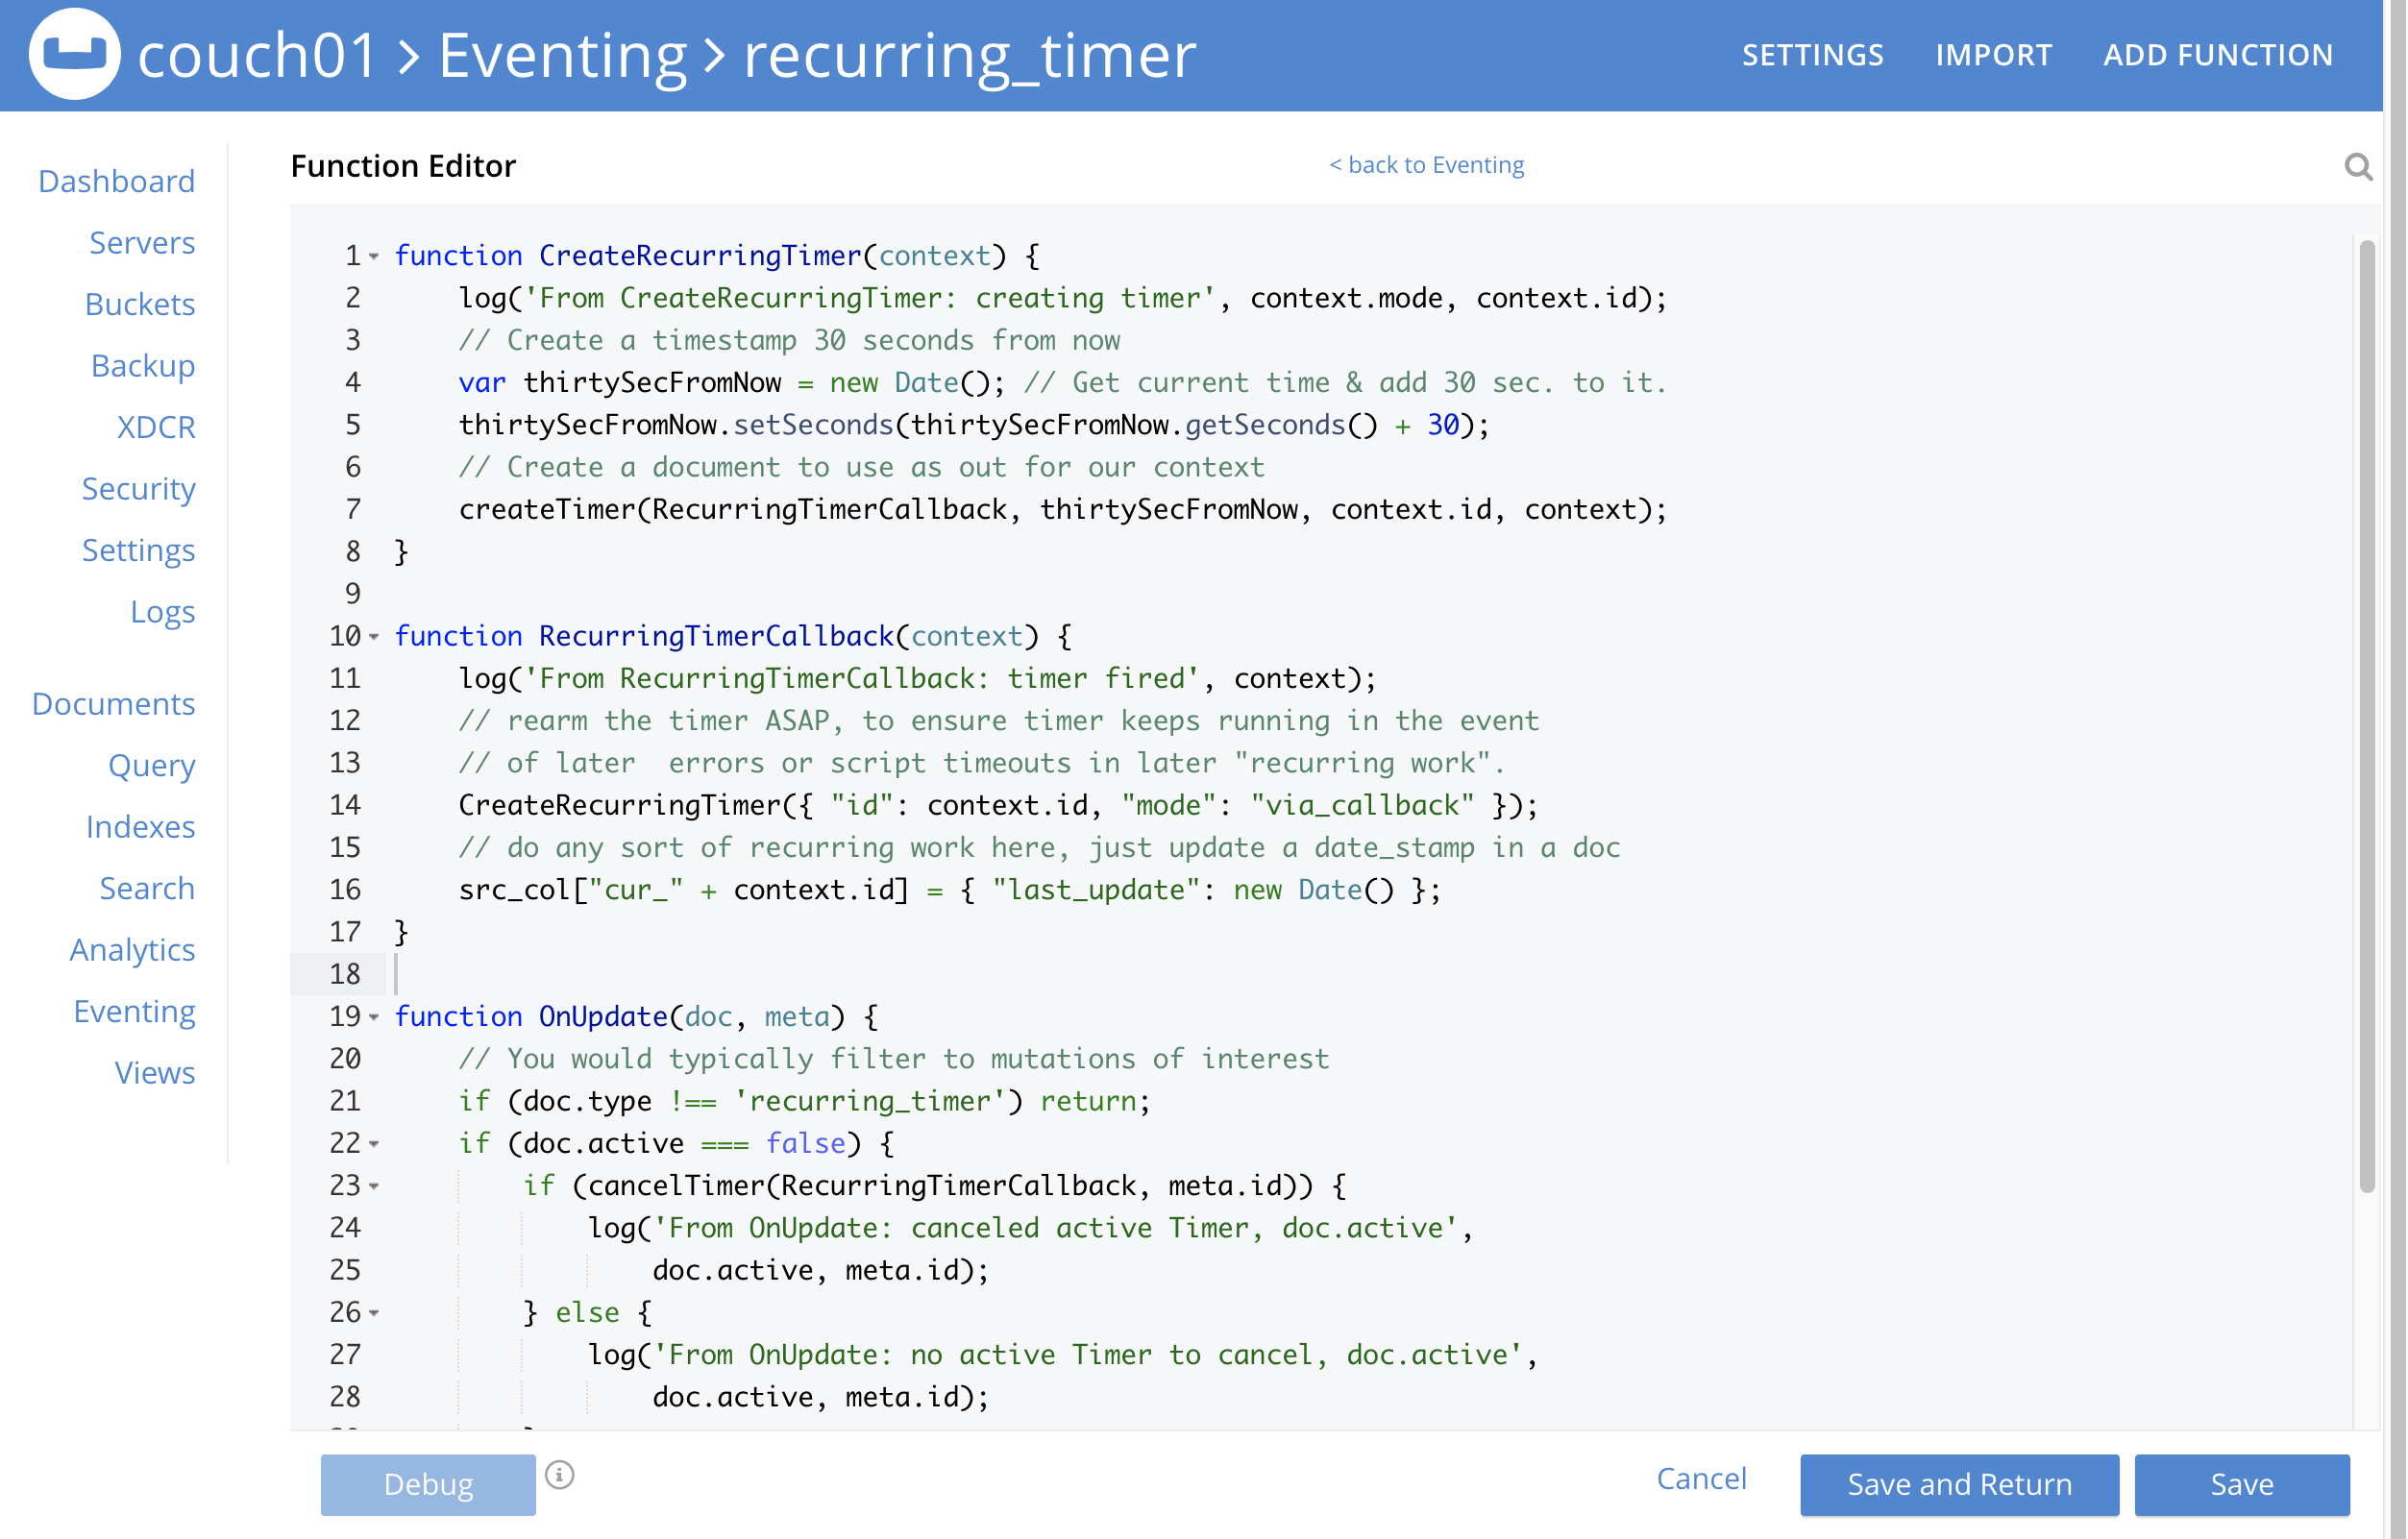
After pasting, the screen appears as displayed below:
-
Click Save and Return.
-
-
The OnUpdate routine specifies that when a change occurs to data within the "source" collection, actions will be processed according to the field within the document. First we ignore all documents that do not have a doc.type of "recurring_timer" — this is the control document. Next we use the field "active" to determine which action we take.
-
If "active" is true we will create a series of Timers that will fire approximately 30 seconds in the future.
-
If "active" is false we will cancel the existing Timer if any.
-
In the event a Timer created by this Function fires, the callback RecurringTimerCallback executes, and will write a new document with a similar key (but with "cur_" prepended) into the "source" collection.
-
-
From the Eventing screen, click the recurring_timer function to select it, then click Deploy.

-
In the Confirm Deploy Function Click Deploy Function.
-
-
The Eventing function is deployed and starts running within a few seconds. From this point, the defined Function is executed on all existing documents, and more importantly it will also run on subsequent mutations.
Test 1: Create a Recurring Timer and allow the Timer to Fire and Rearm
-
Access the Couchbase Web Console > Documents page then select the keyspace
bulk.data.source-
Edit the control document recurring_timer::1 — it should look like this:
{
  "type": "recurring_timer",
  "id": 1,
  "active": false
}
Change "active" to true, then click Save. This will create a mutation and the Function will generate the first of a series of recurring Timers. The control document is now:
{
  "type": "recurring_timer",
  "id": 1,
  "active": true
}
-
-
Access the Couchbase Web Console > Eventing page and if necessary select the Function recurring_timer, then click the "Log" link for Deployed Function to view the activity.
-
Here we see from the Application log that we created a timer. Note the log is in reverse order and the bottom (or first) message was a NOOP because doc.active was false when we first deployed and we tried to cancel any timer if it was running.
2021-07-18T10:50:37.879-07:00 [INFO] "From OnUpdate: create/overwrite doc.active" true "recurring_timer::1"
2021-07-18T10:50:37.879-07:00 [INFO] "From CreateRecurringTimer: creating timer" "via_onupdate" "recurring_timer::1"
2021-07-18T10:50:06.147-07:00 [INFO] "From OnUpdate: no active Timer to cancel, doc.active" false "recurring_timer::1"

-
-
Close the Function Log dialog, then wait about 2 minutes and click the "Log" link for Deployed Function recurring_timer to view the activity again.
-
Here we see the timer fired and executed the callback RecurringTimerCallback near our scheduled time and re-arming as expected.
2021-07-18T10:54:04.705-07:00 [INFO] "From RecurringTimerCallback: timer fired" {"id":"recurring_timer::1","mode":"via_callback"}
2021-07-18T10:54:04.705-07:00 [INFO] "From CreateRecurringTimer: creating timer" "via_callback" "recurring_timer::1"
2021-07-18T10:53:22.712-07:00 [INFO] "From RecurringTimerCallback: timer fired" {"id":"recurring_timer::1","mode":"via_callback"}
2021-07-18T10:53:22.712-07:00 [INFO] "From CreateRecurringTimer: creating timer" "via_callback" "recurring_timer::1"
2021-07-18T10:52:40.708-07:00 [INFO] "From RecurringTimerCallback: timer fired" {"id":"recurring_timer::1","mode":"via_callback"}
2021-07-18T10:52:40.708-07:00 [INFO] "From CreateRecurringTimer: creating timer" "via_callback" "recurring_timer::1"
2021-07-18T10:51:58.703-07:00 [INFO] "From RecurringTimerCallback: timer fired" {"id":"recurring_timer::1","mode":"via_callback"}
2021-07-18T10:51:58.703-07:00 [INFO] "From CreateRecurringTimer: creating timer" "via_callback" "recurring_timer::1"
2021-07-18T10:51:16.713-07:00 [INFO] "From RecurringTimerCallback: timer fired" {"id":"recurring_timer::1","mode":"via_onupdate"}
2021-07-18T10:51:16.713-07:00 [INFO] "From CreateRecurringTimer: creating timer" "via_callback" "recurring_timer::1"
2021-07-18T10:50:37.879-07:00 [INFO] "From OnUpdate: create/overwrite doc.active" true "recurring_timer::1"
2021-07-18T10:50:37.879-07:00 [INFO] "From CreateRecurringTimer: creating timer" "via_onupdate" "recurring_timer::1"
2021-07-18T10:50:06.147-07:00 [INFO] "From OnUpdate: no active Timer to cancel, doc.active" false "recurring_timer::1"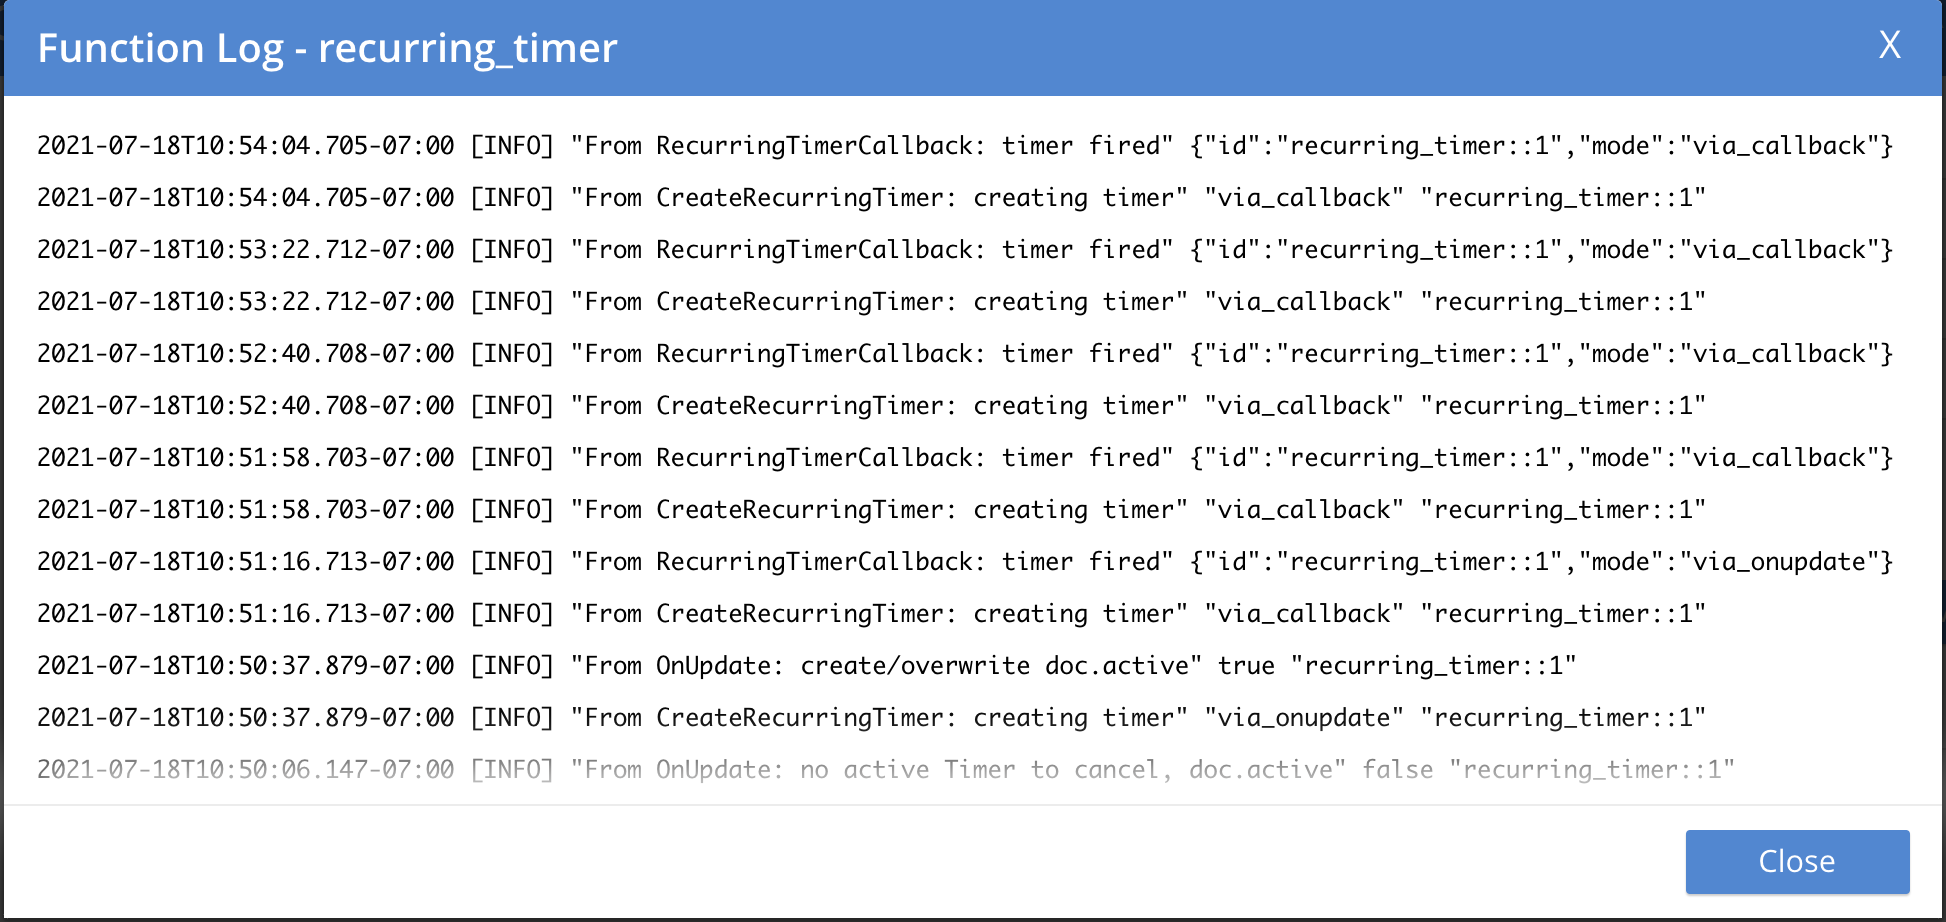
-
-
Close the Function Log dialog again. Then, to check the results of the callback, access the Couchbase Web Console > Documents page then select the keyspace
bulk.data.source-
Edit the new output status document cur_recurring_timer::1 (note the last_update field is in UTC) and you will see the data written by the Timer’s callback:
{ "last_update": "2021-07-18T17:56:10.707Z" } -
Click Cancel to close the editor.
-
-
Wait about 30 seconds and repeat the above. The emulated "work" of this Eventing function is merely writing a time stamp to the cur_recurring_timer::1 document about every 30 seconds.
Test 2: Cancel the Recurring Timer
-
Access the Couchbase Web Console > Documents page then select the keyspace
bulk.data.source-
Edit the control document recurring_timer::1 — it should look like this:
{
  "type": "recurring_timer",
  "id": 1,
  "active": true
}
Change "a_number" to 2 to create a mutation, then click Save. The control document is now:
{
  "type": "recurring_timer",
  "id": 1,
  "active": false
}
-
-
Access the Couchbase Web Console > Eventing page and if necessary select the Function recurring_timer, then click the "Log" link for the Deployed Function to view the activity.
-
Here we see from the Application log that we canceled the sequence — the recurring timer has stopped.
2021-07-18T10:57:59.480-07:00 [INFO] "From OnUpdate: canceled active Timer, doc.active" false "recurring_timer::1"
-
Cleanup:
Go to the Eventing portion of the UI and undeploy the Function cancel_overwrite_timer, this will remove the 1280 documents (2048 prior to 7.0.0) for the function from the 'rr100.eventing.metadata' collection (in the Bucket view of the UI). Remember you may only delete the 'rr100.eventing.metadata' keyspace if there are no deployed Eventing Functions.
Now flush the 'bulk' bucket if you plan to run other examples (you may need to Edit the bucket 'bulk' and enable the flush capability).