Alerts
Email alerts can be dispatched automatically.
Configuring Alerts
Alerts can be dispatched automatically by Couchbase Server, in order to highlight specific issues and problems. When an issue arises, one or both of the following can occur, based on user-configuration:
-
The alert is sent as an email by Couchbase Server to a configured SMTP server. From there, the email is forwarded to a configured list of email recipients. All cluster-nodes must have network access to the configured SMTP server, for the system to be fully effective.
-
The alert appears as a pop-up, within the Couchbase Web Console of its recipient.
Only Full Administrators and Cluster Administrators can configure email alerts. Configuration can be performed with Couchbase Web Console, the Couchbase CLI, or the REST API.
Configure Email Alerts with the UI
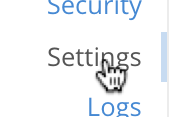
Access the Email Alerts settings screen. First, left-click on the Settings tab, in the navigation bar at the left-hand side of Couchbase Web Console:

This brings up the main Settings screen. Now, access the Alerts panel, by means of the Alerts tab, located on the horizontal navigation bar, at the top:

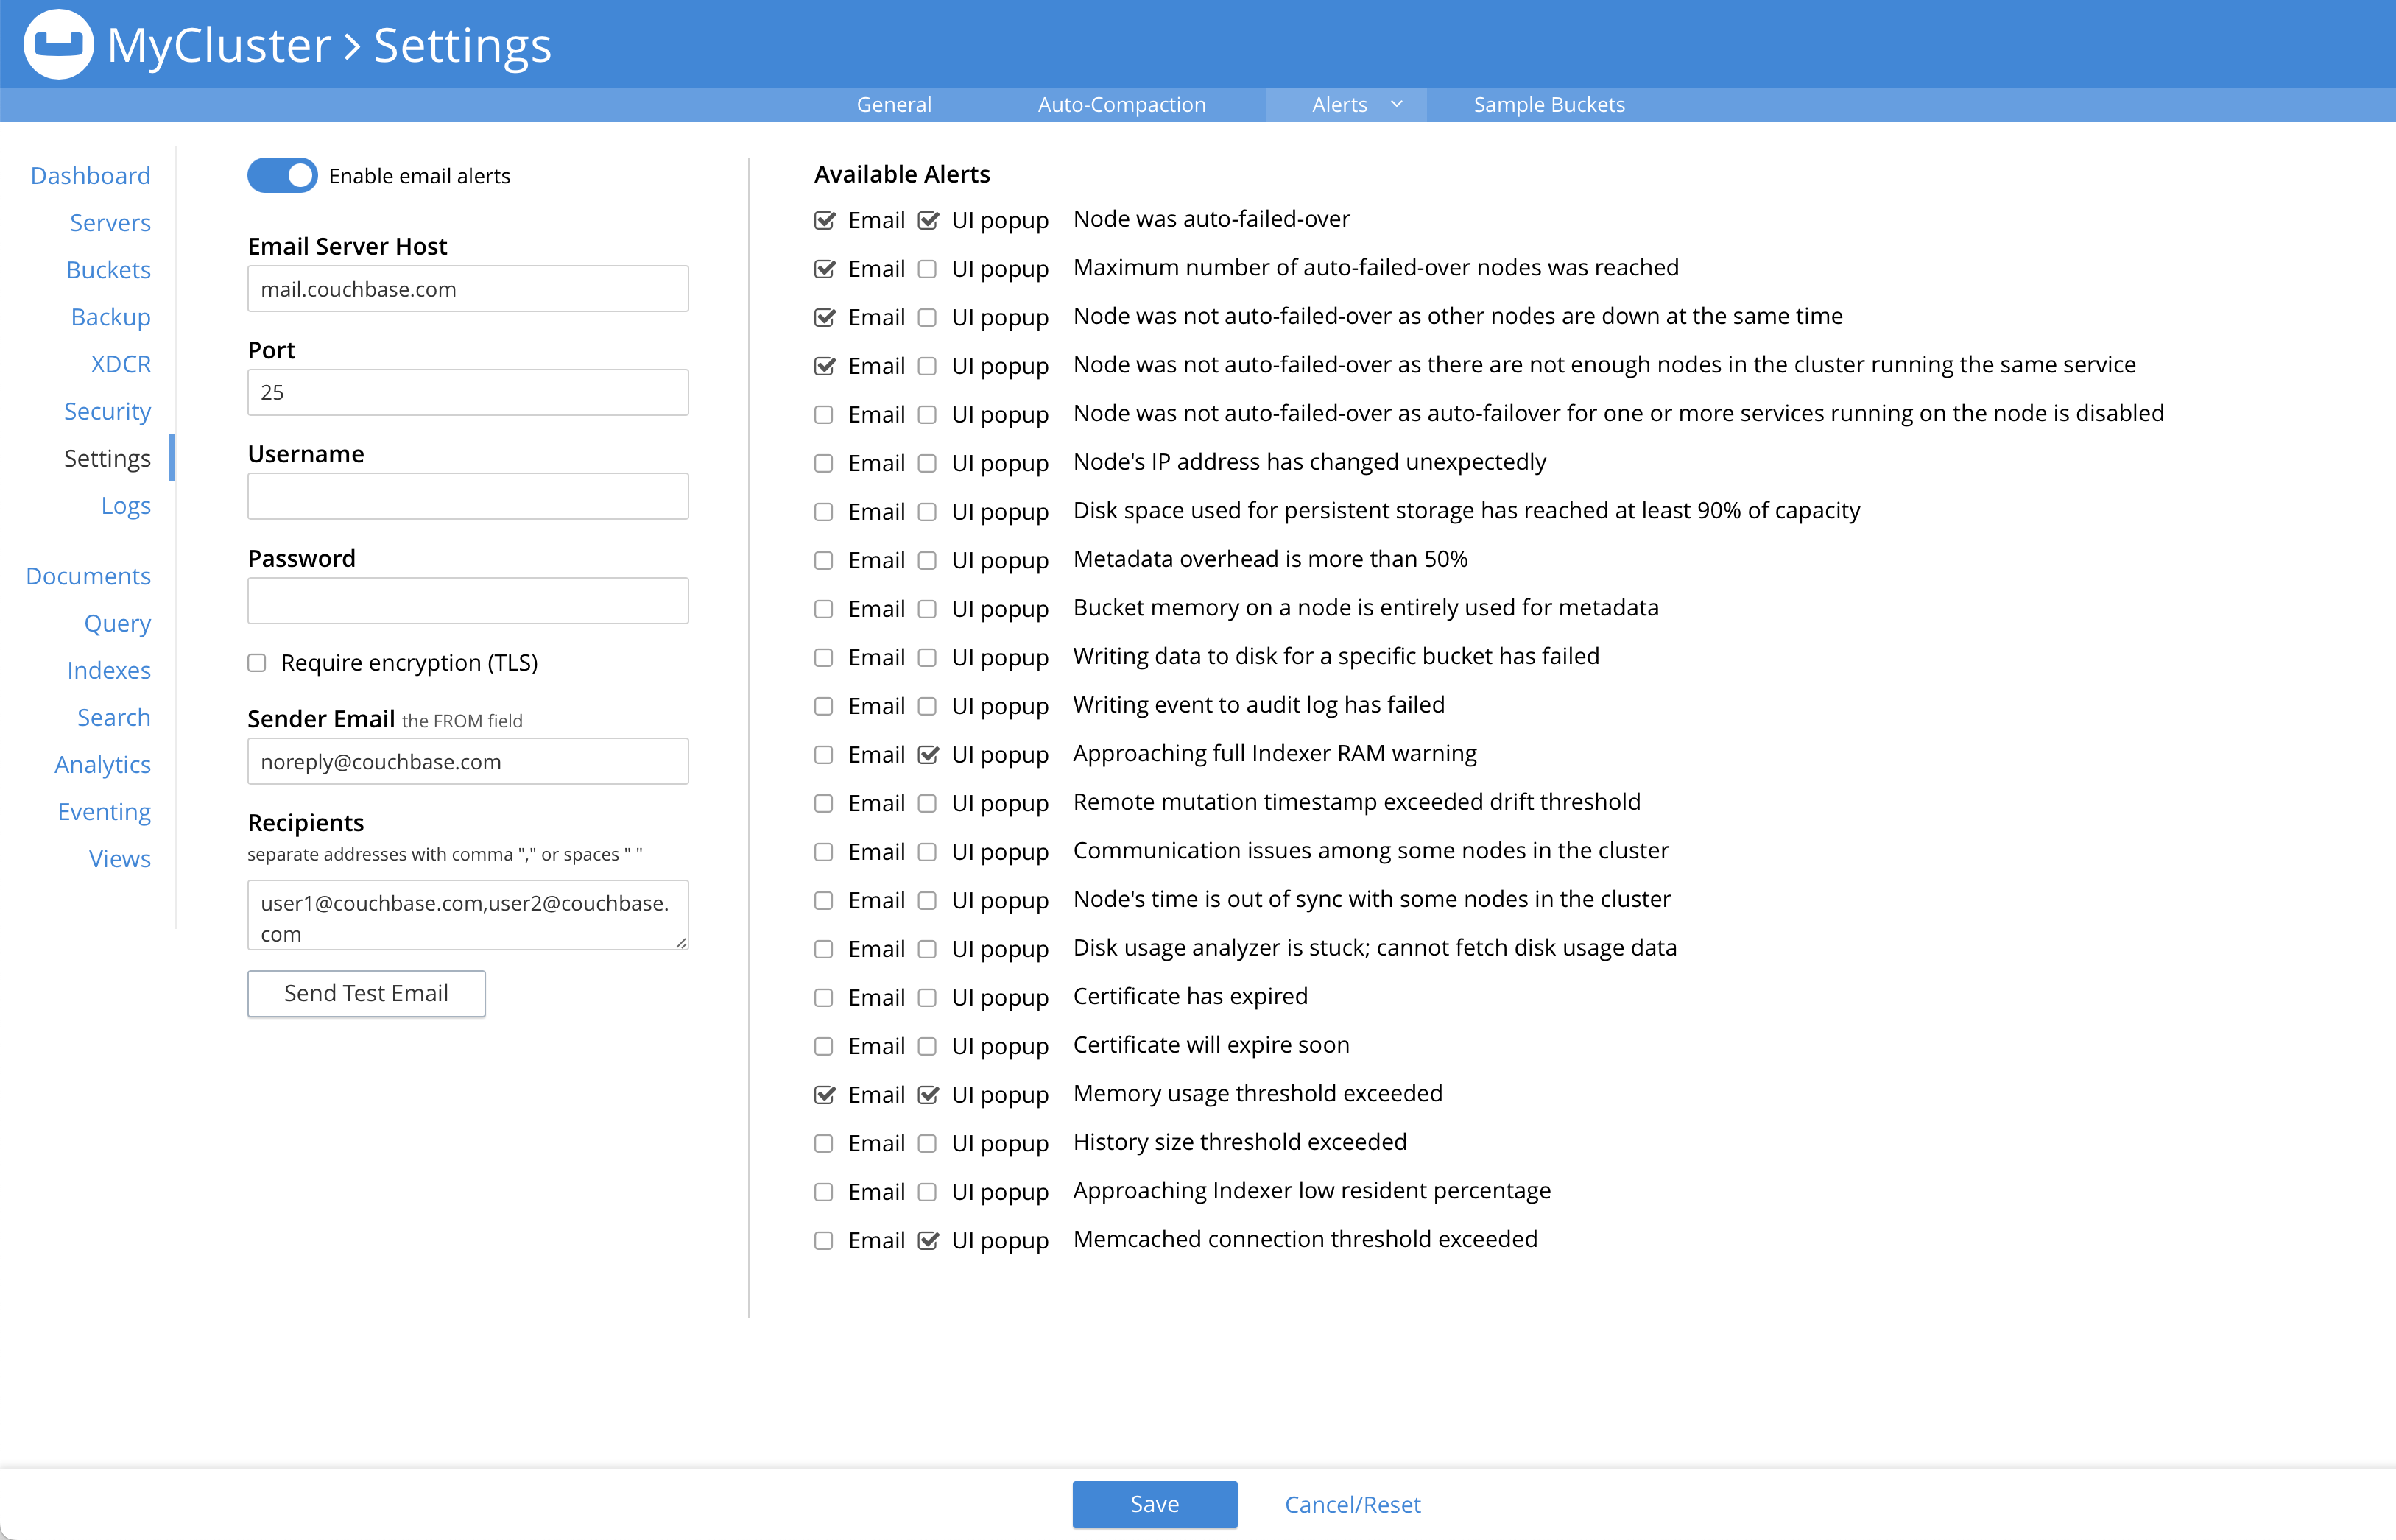
The Email Alerts panel now appears, as follows:

Initially, its content is greyed out, and the user-interface components are inaccessible. To make the components accessible, use the Enable email alerts toggle, near the top of the panel:

Switch the toggle to the right:

The Email Alerts panel is now fully displayed, and the user-interface components are accessible. To establish an appropriate email-alerts configuration, first, enter appropriate data into the displayed fields at the left, using the data provided in the Email Settings table, immediately below. Then, proceed to Saving and Testing the Alert Configuration, further below.
Email Settings
| Option | Description |
|---|---|
Email Server Host |
The hostname of the SMTP server that will be used to send the email. |
Port |
The TCP/IP port to be used to communicate with the SMTP server. The default is the standard SMTP port 25. |
Username |
For email servers that require a username and password to send email, the username is used for authentication. |
Password |
For email servers that require a username and password to send email, the password is used for authentication. |
Require encryption (TLS) |
Enable Transport Layer Security (TLS) when sending the email through the designated server. |
Sender Email |
The email address identified as a source from which the email is sent. This email address should be one that is valid as a sender address for the SMTP server that you specify. |
Recipients |
A list of the recipients of each alert message. To specify more than one recipient, separate each address by a space, comma (,), or semicolon (;). |
Send Test Email |
Click Send Test Email to send a test email to confirm the settings and configuration of the email server and recipients. |
Saving and Testing the Alert Configuration
When you have entered appropriate data into the fields, proceed as follows:
-
Save the configuration by left-clicking on the Save button at the bottom of the screen:

Note that when you left-click on btn[Save], the password that you typed into the Password field becomes invisible, and the field therefore appears blank. This is a security measure imposed by Couchbase Server: the password remains valid, and will be used in authenticating with the email server.
Alternatively, left-click on Cancel/Reset, to remove the configuration.
-
Optionally, left-click on the Send Test Email button to send a test email.
Available Alerts
The Available Alerts panel, at the right, provides a list of all available alerts, and allows you to select, by means of interactive checkboxes, the subset of alert messages that you wish to be sent. You can also select, by checking checkboxes, whether you wish the alert to be sent as Email, or displayed as a UI Popup, or both.
The listed alerts are as follows.
| Alert | Description | Code |
|---|---|---|
Node was auto-failed-over |
The sending node has been failed over automatically. |
|
Maximum number of auto-failed-over nodes was reached |
The auto-failover system stops auto-failover when the maximum number of spare nodes available has been reached. |
|
Node wasn’t auto-failed-over as other nodes are down at the same time |
Auto-failover does not take place if there is already a node down. |
|
Node was not auto-failed-over as there are not enough nodes in the cluster running the same service |
You cannot support auto-failover with less than three nodes. |
|
Node was not auto-failed-over as auto-failover for one or more services running on the node is disabled |
Auto-failover does not take place on a node as one or more services running on the node is disabled. |
|
Node’s IP address has changed unexpectedly |
The IP address of the node has changed, which may indicate a network interface, operating system, or other network or system failure. |
|
Disk space used for persistent storage has reached at least 90% of capacity |
The disk device configured for storage of persistent data is nearing full capacity. |
|
Metadata overhead is more than 50% |
The amount of data required to store the metadata information for your dataset is now greater than 50% of the available RAM. |
|
Bucket memory on a node is entirely used for metadata |
All the available RAM on a node is being used to store the metadata for the objects stored. This means that there is no memory available for caching values. With no memory left for storing metadata, further requests to store data will also fail. |
|
Writing data to disk for a specific bucket has failed |
The disk or device used for persisting data has failed to store persistent data for a bucket. |
|
Writing event to audit log has failed |
The audit log event writing has failed. |
|
Approaching full Indexer RAM warning |
The indexer RAM limit threshold is approaching warning. |
|
Remote mutation timestamp exceeded drift threshold |
The remote mutation timestamp exceeded drift threshold warning. |
|
Communication issues among some nodes in the cluster |
There are some communication issues in some nodes within the cluster. |
|
Node’s time is out of sync with some nodes in the cluster. |
The clock of this cluster-node needs to be synchronized with the clocks of other cluster-nodes. |
|
Disk usage analyzer is stuck; cannot fetch disk usage data |
The disk usage worker is stuck and unresponsive. |
|
Memory usage threshold exceeded |
System memory use as a percentage of total available memory has exceeded a threshold. Note that a warning-level alert is issued when system memory, as a percentage of total available memory, exceeds the warning threshold (90% by default). A critical-level alert is issued when system memory exceeds the critical threshold (95% by default). |
|
History size threshold exceeded |
The mutation history for a specified bucket is greater than an administrator-specified percentage of the administrator-specified change-history size, for a number of vbuckets. The size of the change history may need to be increased. For information, on establishing change-history size, see Creating and Editing Buckets. |
|
Low Indexer Residence Percentage |
Warns that the Index Service is, on a given node, occupying a percentage of available memory that is below an established threshold, the default for which is |
|
Memcached connection threshold exceeded. |
Trigger an alert if the number of |
|
1The memcached_connections alert is only available on nodes running Couchbase Server 7.2.4 and above. The alert is disabled for nodes running versions below 7.2.4.
Configure Email Alerts with the CLI
To configure email alerts with the Couchbase CLI, use the setting-alert command, as follows:
couchbase-cli setting-alert -c 10.143.192.101 --username Administrator \
--password password --enable-email-alert 1 --email-user admin \
--email-password password --email-host mail.couchbase.com --email-port 25 \
--email-recipients user1@couchbase.com,user2@couchbase.com \
--email-sender noreply@couchbase.com --enable-email-encrypt 0 \
--alert-auto-failover-node --alert-auto-failover-max-reached \
--alert-auto-failover-node-down --alert-auto-failover-cluster-small \
--alert-memory-threshold
In this example, cluster 10.143.192.101 is accessed, with administor username and password specified.
The enable-email-alert flag is specified as 1, enabling email alerts.
Additional flags specify the username and password required by the mail server, as well as email host, port, recipients, and sender.
The enable-mail-encrypt flag specifies encryption as off.
Additional flags are used to indicate which alerts should be sent. Note that every possible alert has a flag: if a flag is not specified, the corresponding alert will not be sent.
See Email Settings and Available Alerts, above, for descriptions of settings and alerts. See setting-alert for further information on using the CLI, including a full list of command-line parameters.
Configure Email Alerts with REST
To configure email alerts with the Couchbase REST API, use the /settings/alerts method, as follows:
curl -v -X POST http://localhost:8091/settings/alerts \
-u Administrator:password  \
-d 'emailPass=password' \
-d 'alerts=auto_failover_node,auto_failover_maximum_reached,auto_failover_other_nodes_down,auto_failover_cluster_too_small,memory_threshold,memcached_connections' \
-d 'pop_up_alerts=auto_failover_node,memory_threshold,indexer_ram_max_usage,memcached_connections' \
-d 'sender=noreply@couchbase.com' \
-d 'recipients=user1@couchbase.com,user2@couchbase.com' \
-d 'emailHost=mail.couchbase.com' \
-d 'emailPort=25' \
-d 'emailEncrypt=false' \
-d 'enabled=true'
This example demonstrates flags that specify mail-server password, sender, recipients, host, and port.
Emails settings are enabled with the enabled flag; and encryption is specified as off, by means of the emailEncrypt flag.
A list of the alerts that can be sent is provided as the value of the alerts flag.
A list of the pop-up alerts that can be sent is provided as the value of the pop_up_alerts flag.
See the Code column of the Available Alerts table, above, for additional event-codes.
See Email Settings, above, for a description of available email settings.
For more information on configuring alerts by means of the REST API, see Setting Alerts.